Match creation UI - Create joinable sessions with dedicated servers - (Unity module)
What's on the menu
A Unity user interface (UI) prefab for creating a match session has been prepared for you. In this tutorial, you will learn how to implement creating match sessions by coding it into the provided prefab. The prefab is available in the Resources section and consists of the following files:
-
MatchSessionHandler.cs: This script is designed to handle UI functionality related to selecting a match type for creating a match session. It features a Button UI element and logic to process the selected server type.
- CS file:
Assets/Resources/Modules/MatchSession/Scripts/MatchSessionHandler.cs
- CS file:
-
MatchSessionHandler.prefab: A GameObject prefab that is created based on the Canvas Panel UI GameObject.
- Prefab file:
Assets/Resources/Modules/MatchSession/Prefabs/MatchSessionHandler.prefab
- Prefab file:
-
MatchSessionServerTypeSelection.cs: This script is designed to handle UI functionality related to selecting a server type for creating a match session. It features a Button UI element and logic to process the selected server type.
- CS file:
Assets/Resources/Modules/MatchSession/Scripts/MatchSessionServerTypeSelection.cs
- CS file:
-
MatchSessionServerTypeSelection.prefab: A GameObject prefab that is created based on the Canvas Panel UI GameObject.
- Prefab file:
Assets/Resources/Modules/MatchSession/Prefabs/MatchSessionServerTypeSelection.prefab
- Prefab file:
-
CreateMatchSessionDSHandler_Starter.cs: A C# script that contains most of the match session implementation. This class connects the UI and the AccelByte Gaming Services (AGS) Game SDK service wrapper class to call its API.
- CS file:
Assets/Resources/Modules/MatchSessionDS/Scripts/UI/CreateMatchSessionDSHandler_Starter.cs
- CS file:
-
CreateMatchSessionDSHandler_Starter.prefab: A GameObject prefab that acts as container for
CreateMatchSessionDSHandler_Starter.cs.- Prefab file:
Assets/Resources/Modules/MatchSessionDS/Prefabs/CreateMatchSessionDSHandler_Starter.prefab
- Prefab file:
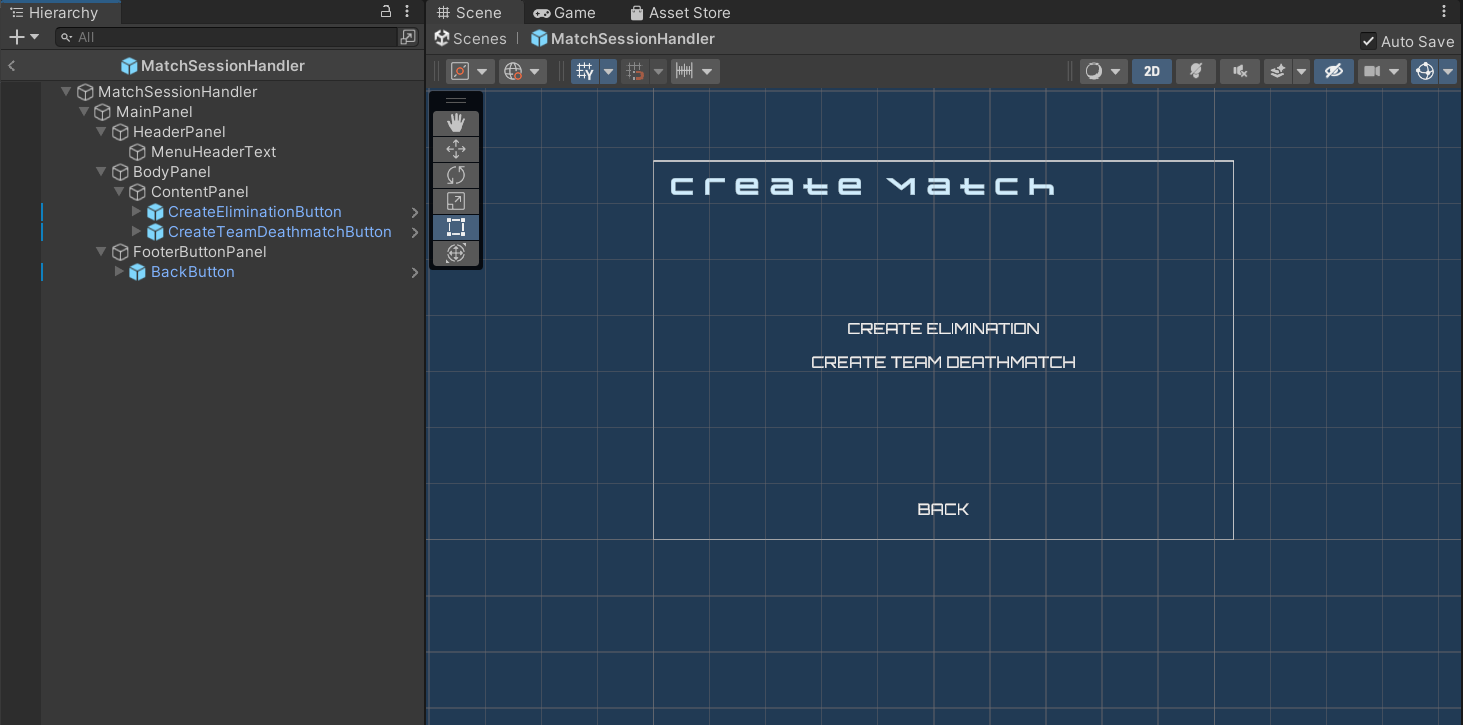
Create match session canvas
The MatchSessionHandler.prefab is used as a menu for game mode options and the MatchSessionServerTypeSelection.prefab is used for network type options. Both menus will display UI elements with these options, holding values for the game mode and network type, which are later passed to CreateMatchSessionDSHandler_Starter.cs as the UI handler.
Select game mode state
The MatchSessionHandler.prefab includes states that allow the player to select one of the offered game modes: Elimination or Team Deathmatch.
Select network type state
The MatchSessionServerTypeSelection.prefab includes states that allow the player to select one of the network types the session will use. In this module, you will implement the dedicated server network type.

Ready the UI
The prefab you will use to implement creating match sessions is CreateMatchSessionDSHandler_Starter.prefab, which has a CreateMatchSessionDSHandler_Starter.cs C# script. You need to implement the UI functionality before calling the AGS Game SDK API to create match sessions. Follow these steps to do this:
-
Open the
CreateMatchSessionDSHandler_Starter.cs. You will implement creating a match session with the Elimination game mode using the dedicated server. Modify theCreateMatchSessionDSHandler_Starter.cs.ClickDedicatedServerButtonmethod as shown below.public void ClickDedicatedServerButton()
{
BytewarsLogger.Log("Creating a match with a dedicated server is not implemented");
} -
In Unity, go to
Assets/Resources/Modules/MatchSessionDS/MatchSessionWithDSAssetConfig.asset. There, you will find an asset config called MatchSessionWithDSAssetConfig.asset. Open it and enable Is Starter Active. This will activate the starter UI, allowing you to navigate through it when you play the game. -
Play the game in the Editor. If your implementation was successful, you will be able to navigate to the server selection panel from the Create Match>Create Elimination and see the following log when you click DEDICATED SERVER:
[CreateMatchSessionDSHandler_Starter.cs] [ClickDedicatedServerButton] [Log] [linenumber] - Creating a match with a dedicated server is not implemented
Resources
-
The files used in this tutorial section are available in the ByteWars GitHub repository.