Play test - End-to-end testing - (Unity module)
Play test
In this tutorial section, you learn how to connect Byte Wars game client with dedicated servers (DS) hosted on your AMS fleet, using the sample matchmaking backend service.
-
Make sure the sample matchmaking backend service is running locally on your computer. Refer to the previous tutorial section for more information.
-
Also, make sure your AMS fleet is active and have dedicated servers up and running. Refer to the previous tutorial module for more information.
-
Now, you need to build Byte Wars as desktop game client. Open the Byte Wars project in Unity Editor, then go to File > Build Settings. On the new window, select Windows, Mac, Linux for the Platform, and chose Windows as the Target Platform. Then, click on the Build button to build your game client as executable.
-
Next, locate the game client build and then open Windows PowerShell on the game client build folder. On the Windows PowerShell, enter the command below to run your game client. The
-CustomMatchmakingUrl=ws://127.0.0.1:8080launch parameter tells the game client to use the sample matchmaking backend service that you run locally to perform matchmaking../ByteWars.exe -CustomMatchmakingUrl=ws://127.0.0.1:8080infoThe
ws://127.0.0.1:8080is the address of your local sample matchmaking backend service. If the backend service is hosted on different IP address or port, you can simply replace the launch parameter value:-CustomMatchmakingUrl=ws://<your_service_ip>:<your_service_port>. -
Since the sample matchmaking backend service only matchmake a minimum of two players, you need to run one more instance of the game client. Simply follow the previous steps to run another instance.
-
Once you have two game client instances running, start matchmaking by navigating to Custom Matchmaking and clicking on the Start Matchmaking button on both game clients. Then, these two game clients try to connect to the sample matchmaking backend service via WebSocket.
-
When the clients are connected to the local sample matchmaking backend service, the service matchmakes the game clients and then claims a dedicated server from your AMS fleet. You can also see the log on the sample matchmaking backend service, like the example below.
New connection
New connection
Match found! Requesting server...
{'ip': '12.345.67.890', 'ports': {'default': 12345}, 'region': 'ap-southeast-1', 'serverId': 'ds_0194871b-2df7-7369-ae2f-bc48bc4ab9bb'} None
12.345.67.890:12345
Server found! Connecting players... -
You can also check the claimed dedicated server on your AMS fleet. Go to your Admin Portal game namespace dashboard and navigate to Multiplayer Server Configuration > Fleet Manager then select your AMS fleet from the list. On the fleet details page, locate the Dedicated Server List section. There, you can see a dedicated server with Claimed status.
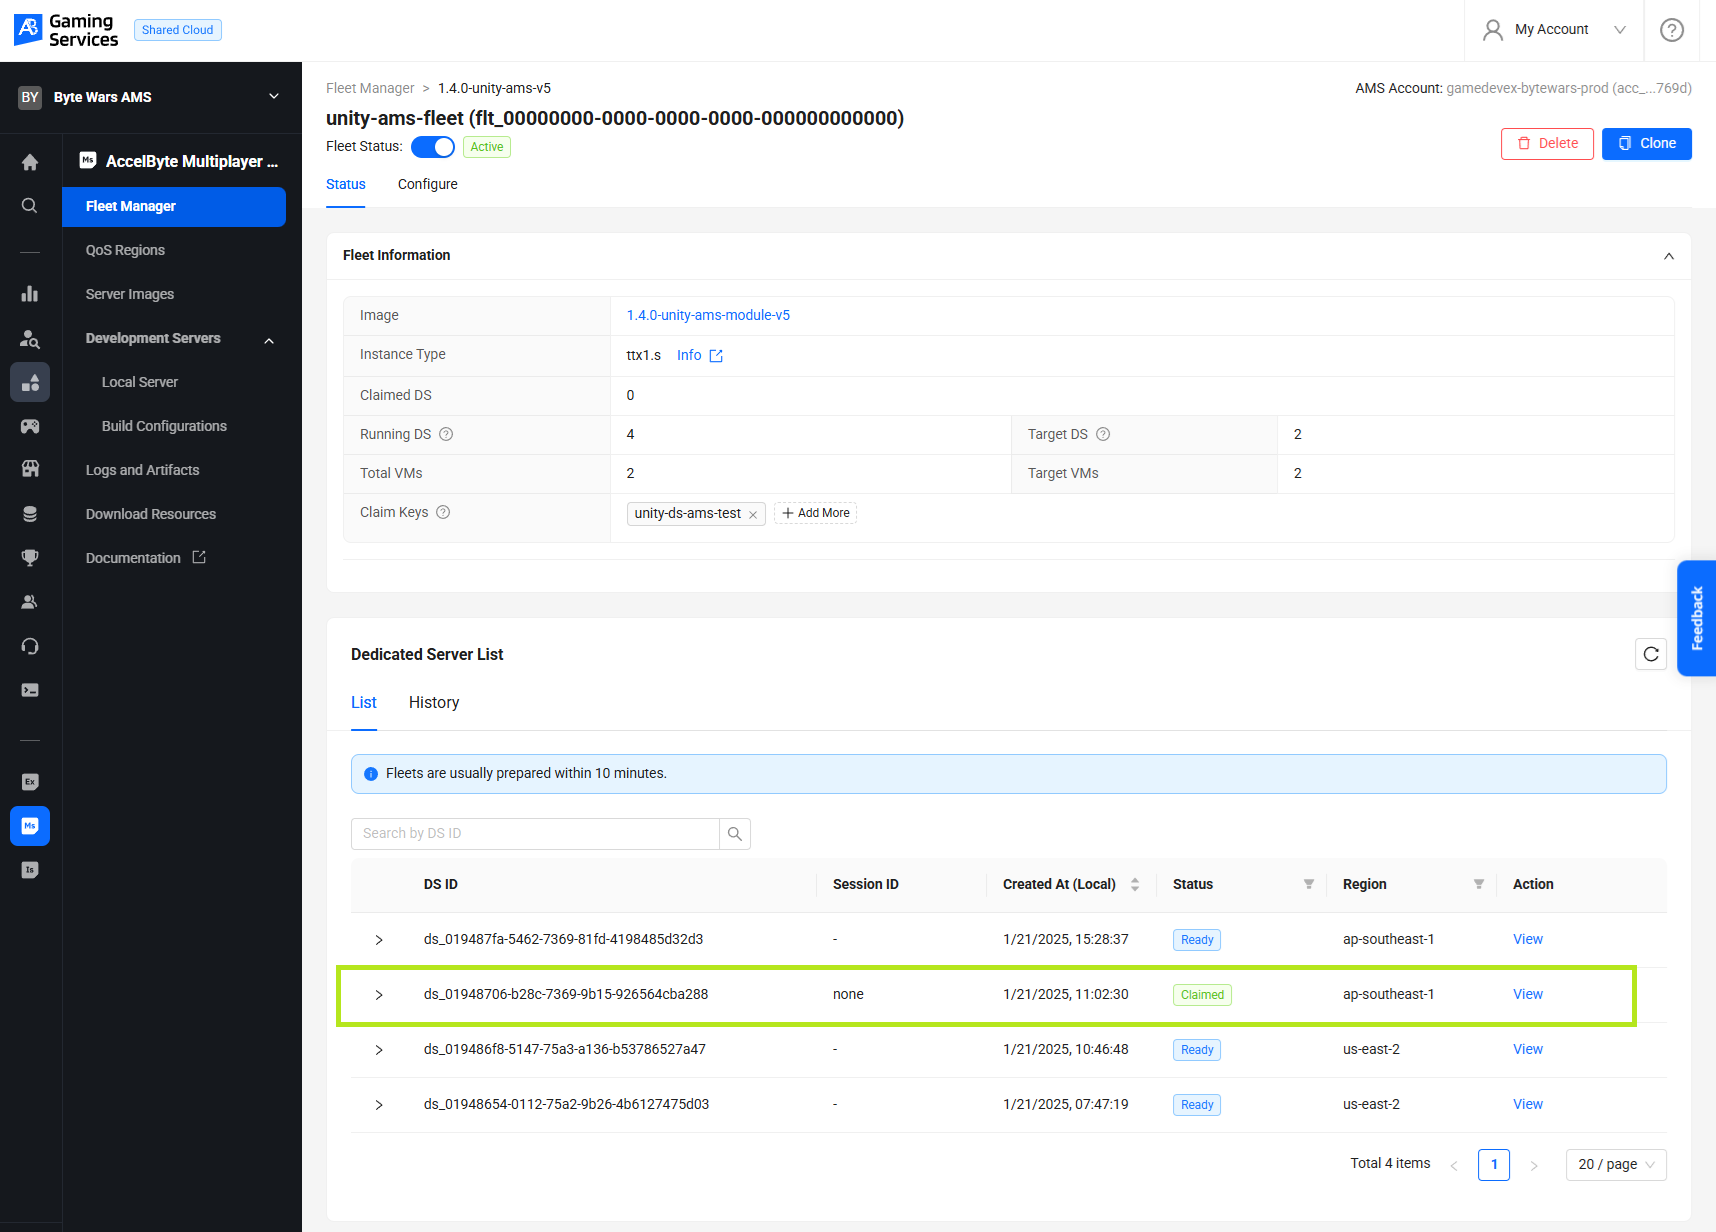
-
After the dedicated server is claimed, the sample matchmaking backend service sends the server information to the game clients. Upon receiving this info, the game clients connect to the dedicated server using the server IP address and port.
-
Now, the game clients can play the game served by the dedicated server. The full end-to-end play test simulation looks like the image below.