Set up AMS configuration - Dedicated servers with AccelByte Multiplayer Servers (AMS) - (Unity module)
The AGS CLI is the unified command-line tool for AGS, and it now includes Extend and AMS tooling. The instructions on this page remain valid today. See the AGS CLI documentation to learn about the unified tool.
About
IAM clients are used to give permissions to certain resources in AccelByte Gaming Services (AGS). In order for your game's dedicated server to be able to communicate with AccelByte Multiplayer Servers (AMS), you will need to set up the correct IAM client permissions, and also config the installed AGS Game SDK in your project to enable the AMS features for your game.
Create a server IAM client
The server identity and access management (IAM) client is an IAM client that gives permissions for your game server. Sufficient permissions are needed for your game server so it can communicate with AMS.
-
Log in to the Admin Portal and go to your game namespace dashboard.
-
Go to Foundations > Identity & Access > IAM Clients and click Create New.
-
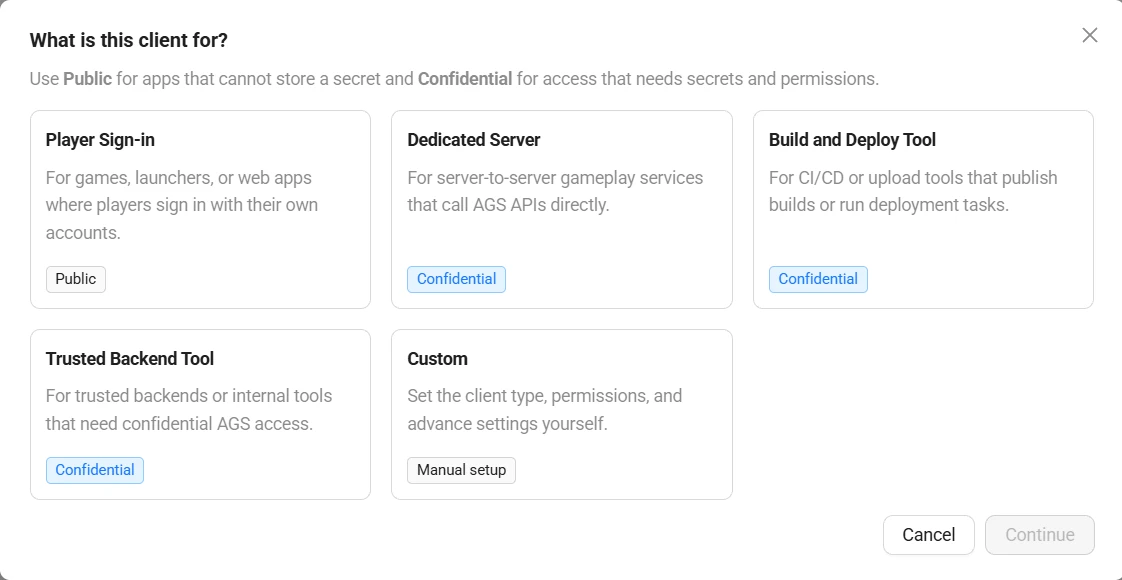
In the What is this client for? window, select Dedicated Server and click Continue. The New IAM Client page appears.
-
In the Basic Info and Client Settings sections, use the configuration below to create a new server IAM client.
- Client Name: the name of the IAM client. Set it to ByteWars-GameServer.
- Secret: the secret or password for the IAM client. You can use your own secret or click Generate to generate a random one.
- Redirect URI: the URI used to redirect once the IAM client authorization is successful. Select Localhost, which sets it to
http://127.0.0.1.
-
In the Permissions section, make sure the client has these permissions. These permissions allow your server to manage game session, update statistics, read player information, and manage AMS settings.
Resource Permission AMS > Dedicated Server Create, Read, Update, Delete IAM > Users Read Session > Game Session Create, Read Statistics > User’s Statistics Value Create, Read, Update -
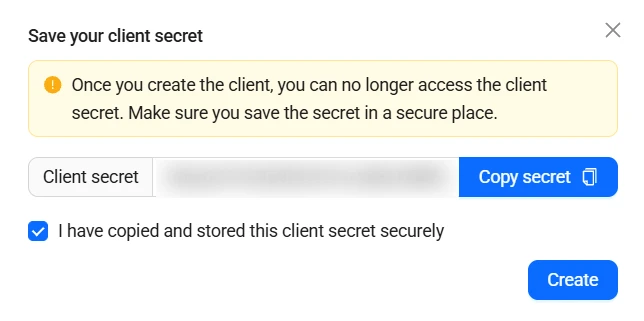
Click Continue. The Save your client secret window appears. Click Copy secret and save the secret somewhere secure. Then, tick I have copied and stored this client secret securely and click Create to create your IAM client.
warningThe Secret will not be shown again after you create the IAM client. Be sure to copy and save it before you click Create.
Create an AMS CLI IAM client
The AMS command line interface (CLI) IAM client is an IAM client that gives permission for you to upload your server to AMS.
-
Log in to the Admin Portal and go to your game namespace dashboard.
-
Go to Foundations > Identity & Access > IAM Clients and click Create New.
-
In the What is this client for? window, select Build and Deploy Tool and click Continue. The New IAM Client page appears.
-
In the Basic Info and Client Settings sections, use the configuration below to create a new AMS CLI IAM client.
- Client Name: the name of the IAM client. Set it to ByteWars-AMSCLI.
- Secret: the secret or password for the IAM client. You can use your own secret or click Generate to generate a random one.
- Redirect URI: the URI used to redirect once the IAM client authorization is successful. Select Localhost, which sets it to
http://127.0.0.1.
-
In the Permissions section, make sure the client has this permission. This permission allow you to upload your server image to AMS using AMS CLI.
Resource Permission AMS > Dedicated Server Toolkit Create, Read, Update -
Click Continue. The Save your client secret window appears. Click Copy secret and save the secret somewhere secure. Then, tick I have copied and stored this client secret securely and click Create to create your IAM client.
warningThe Secret will not be shown again after you create the IAM client. Be sure to copy and save it before you click Create.
Configure the Server SDK
Once your server IAM client is configured in the Admin Portal, you'll need to configure the Server SDK in your game project.
-
Open Byte Wars in Unity.
-
In the
Resourcesfolder, create a new JSON file namedAccelByteServerSDKConfig.json. Copy the code below and paste it into the file. Then, replace the values with your credentials.- AGS Public Cloud
- AGS Private Cloud
{
    "Default": {
        "Namespace": "<game_namespace_id>",
        "PublisherNamespace": "",
        "BaseUrl": "https://<game_namespace_id>.prod.gamingservices.accelbyte.io",
        "RedirectUri": "http://127.0.0.1"
    }
}info- Namespace is the namespace ID of your game namespace.
- BaseUrl is the base URL made out of your game namespace ID combined with your Admin Portal environment.
{
    "Default": {
        "Namespace": "<game_namespace_id>",
        "PublisherNamespace": "accelbyte",
        "BaseUrl": "https://<studio_name>.accelbyte.io",
        "RedirectUri": "http://127.0.0.1"
    }
}info- Namespace is the namespace ID of your game namespace.
- PublisherNamespace is the publisher ID of your publisher namespace. The default value is
accelbyte. - BaseUrl is the URL of your Admin Portal environment.
tip-
To find your game namespace ID, go to your Admin Portal and navigate to the Namespace page where your game namespaces are listed. Then, locate your game namespace under the GAMES section and click on the gear icon. On the new page, locate the Namespace ID property and there you can find your game namespace ID value.
-
Similarly, to find your publisher namespace ID, go to your Admin Portal and navigate to the Namespace page where your game namespaces are listed. Then, locate your publisher namespace under the PUBLISHER section and click on the gear icon. On the new page, locate the Namespace ID property and there you can find your publisher namespace ID value.
-
Create another JSON file in the
Resourcesfolder namedAccelByteServerSDKOAuthConfig.json. Then, copy the code below and paste it into the file, replacing the values with your credentials.{
"Default": {
"ClientId": "<server_iam_client_id>",
"ClientSecret": "<server_iam_client_secret>"
}
}info- ClientId is randomly generated and used to uniquely identify your server IAM client.
- ClientSecret is the secret (password) for your server IAM client.
-
Save the files and your server SDK configuration is complete.
Enable AMS in the AGS Game SDK
In this section, you will enable AMS in the installed AGS Game SDK in your project so your game server will be able to use AMS features and be authorized to communicate with AMS. You can use one of the following methods:
In the future, AMS will be enabled by default in the AGS Game SDK.
- From Config File
- From Unity Editor
-
Open the
AccelByteServerSDKConfig.jsonfile in any text editor. -
To enable AMS in the AGS Game SDK, add and enable the
EnableAmsServerQosconfiguration as shown below into theAccelByteServerSDKConfig.jsonfile.{
"Default": {
...
"EnableAmsServerQos": true
}
} -
Save the file to enable the configuration.
-
Open Byte Wars in the Unity Editor.
-
From the toolbar, go to AccelByte > Edit Server Settings.
-
On the AccelByte Server Config window, expand Service URL Configs and enable Use AMS QoS Server URL to activate AMS in the AGS Game SDK.
-
Once done, click the Save button to save the configuration.
Enable Starter Mode
To follow the rest of the module, you need to enable a Starter Mode. To do this, open your project in Unity. From the Project window, open Assets\Resources\Modules\MultiplayerDSEssentials\MultiplayerDSEssentialsAssetConfig.asset and enable the Is Starter Active setting in the Inspector. This setting will enable the starter files you will use to follow the tutorials.