メインコンテンツまでスキップ

ログインメニューを追加する - デバイス ID でログインする - (Unity モジュール)

Last updated on October 23, 2024

What's on the menu

In this tutorial, you will learn on how to prepare a simple login menu prefab so it can be used to send login requests to AccelByte Gaming Services (AGS).

The login menu has been provided for you, and you will add additional code to it so it can connect to the AGS Game SDK. The files are available in the Resources section and consist of the following files:

  • LoginHandler_Starter: A C# script where most of the implementation will be.
    • CS file: /Assets/Resources/Modules/AuthEssentials/Scripts/UI/LoginHandler_Starter.cs
  • LoginMenuCanvas_Starter: A Unity prefab that is created from the Canvas UI GameObject.
    • Prefab file: /Assets/Resources/Modules/AuthEssentials/Prefabs/LoginMenuCanvas_Starter.prefab

This login menu has three states:

  • Login state: the default view that shows all available login methods.
  • Loading state: the login request was sent to AGS and is waiting for the response.
  • Failed state: the login response failed and the display view will show the option to retry or quit.

If the login response succeeds, the game will direct the user to the main menu.

The state changes are possible using an enum state with a getter setter included in the Login to change between the view panels.

Each view panels inside LoginMenuCanvas_Starter prefab should be declared in LoginHandler_Starter class to get the user interface (UI) references. The code to get UI references is shown below.

[SerializeField] private GameObject loginStatePanel;
[SerializeField] private GameObject loginLoadingPanel;
[SerializeField] private GameObject loginFailedPanel;

To change the state, you use an enum to define the login view state.

public enum LoginView
{
LoginState,
LoginLoading,
LoginFailed
}

You use the LoginView enum to define the enum state's getter setter variable that will hold the login view state based on the LoginView.

private LoginView CurrentView
{
get => CurrentView;
set
{
loginStatePanel.SetActive(value == LoginView.LoginState);
loginLoadingPanel.SetActive(value == LoginView.LoginLoading);
loginFailedPanel.SetActive(value == LoginView.LoginFailed);
}
}

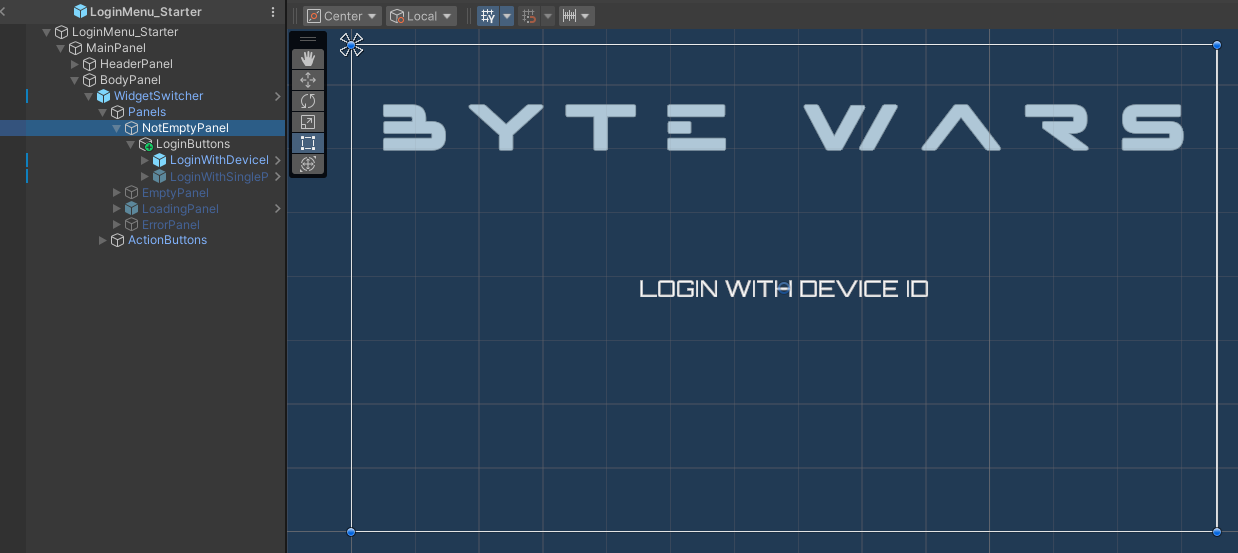
Login State Panel

The Login State Panel is the default view that displays a button to log in called LoginWithDeviceIdButton. It uses Button - TextMeshPro as the UI button type.

The button LoginWithDeviceIdButton reference can be set in the UI in LoginHandler_Starter through the code below.

[SerializeField] private Button loginWithDeviceIdButton;

Login State Panel Preview Unity Byte Wars device ID

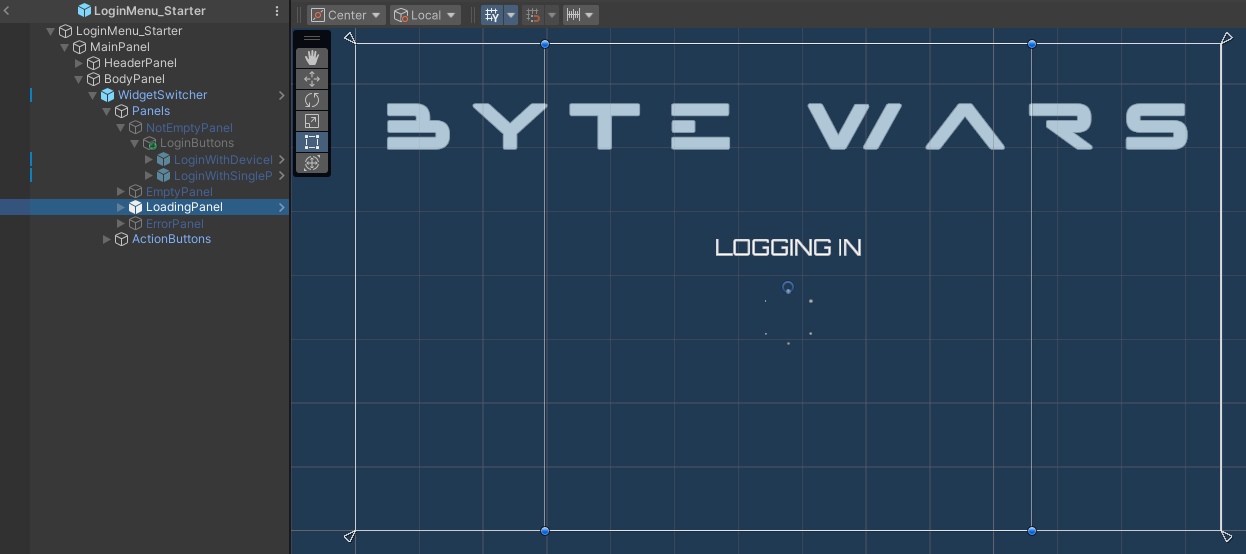
Login Loading Panel

The Login Loading Panel displays text and an image animation when the login request is in progress.

Login Loading Panel Preview Unity Byte Wars device ID

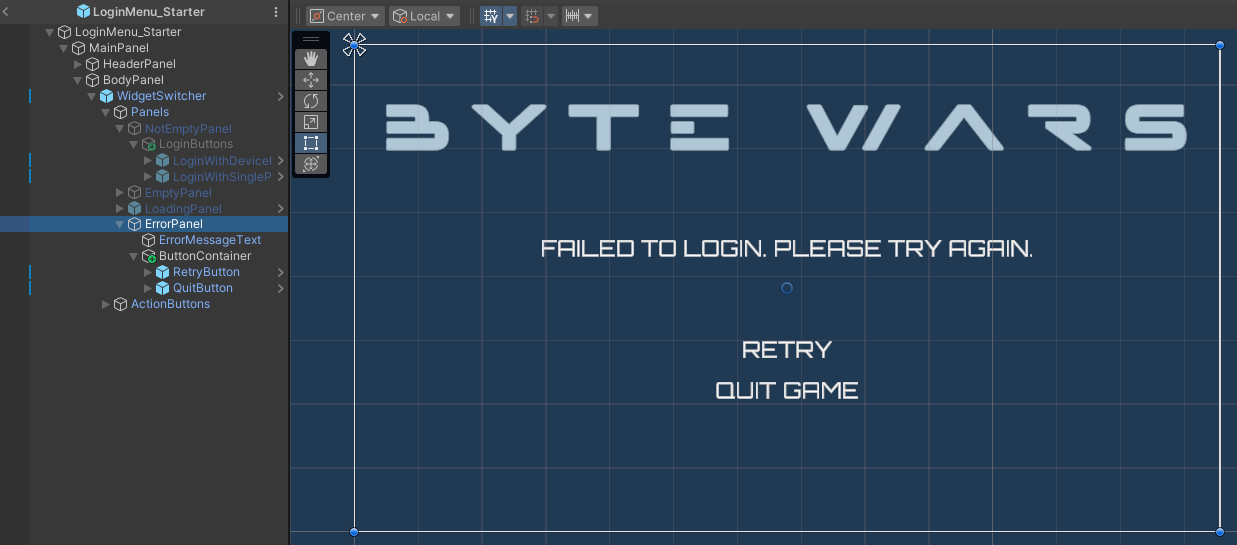
Login Failed Panel

The Login Failed Panel displays an error message when the login fails and display the RetryLoginButton and QuitGameButton buttons. There is also Text UI to display error messages coming from the AGS Game SDK. The error messages are shown by the FailedMessageText UI element, which is TextMeshPro.

Those UI elements (RetryLoginButton, QuitGameButton, and FailedMessageText) are declared in the LoginHandler_Starter class as shown below.

[SerializeField] private Button retryLoginButton;
[SerializeField] private Button quitGameButton;
[SerializeField] private TMP_Text failedMessageText;

The quitGameButton will be bound to a function named OnQuitGameButtonClicked, which contains code below:

private void OnQuitGameButtonClicked()
{
Application.Quit();
}

Login Failed Panel Preview Unity Byte Wars device ID

Ready the UI

In this section, you are going to prepare the UI for the AGS Game SDK Login integration.

  1. Open Byte Wars in Unity.

  2. Open LoginHandler_Starter.cs. This file will hold all LoginMenuCanvas UI references.

  3. Update the Start() function with the code below.

    private void Start()
    {
    loginWithDeviceIdButton.onClick.AddListener(OnLoginWithDeviceIdButtonClicked);
    retryLoginButton.onClick.AddListener(OnRetryLoginButtonClicked);
    quitGameButton.onClick.AddListener(OnQuitGameButtonClicked);
    }
  4. Create a new function called Login() that will be called later to log in with the AGS Game SDK. Inside the function, prepare the implementation to change the current view to the LoginLoading state that indicates the login request is in progress.

    private void Login()
    {
    CurrentView = LoginView.LoginLoading;
    }
  5. Now, create the OnEnable() function below to bind all buttons to their corresponding onClick events and set the current view to the default LoginView.

    private void OnEnable()
    {
    CurrentView = LoginView.LoginState;
    }
  6. Create the callback event of loginWithDeviceIdButton and retryLoginButton. The loginWithDeviceIdButton will be bound to the OnLoginWithDeviceIdButtonClicked function and retryLoginButton will be bound to OnRetryLoginButtonClicked.

    private void OnLoginWithDeviceIdButtonClicked()
    {
    Login();
    }
    private void OnRetryLoginButtonClicked()
    {
    Login();
    }
  7. From the Project window, open Assets\Resources\Modules\AuthEssentials\AuthEssentialsAssetConfig.asset and enable the Is Starter Active setting in the Inspector.

Resources