Manage third-party store integrations
Overview
This article walks you through how to create store integrations for third-party platforms (i.e., PSN, XBox, Steam, Epic, Twitch, Google Play, or Apple) to enable AccelByte Gaming Services (AGS) synchronization of player purchases from those platforms. You can do this in the AGS Admin Portal or with the AGS CLI.
Prerequisites
Before adding a new third-party store configuration, you must have:
- Configured third-party authentication for your selected platform.
- Familiarity with In-App Purchase integration in the AGS Admin Portal.
- To follow the AGS CLI steps, you must have installed the AGS CLI and signed in with an account that has access to these features. See Install and sign in. The examples use a Bash shell.
Add a third-party store configuration
- Admin Portal
- AGS CLI
-
Go to your namespace.
-
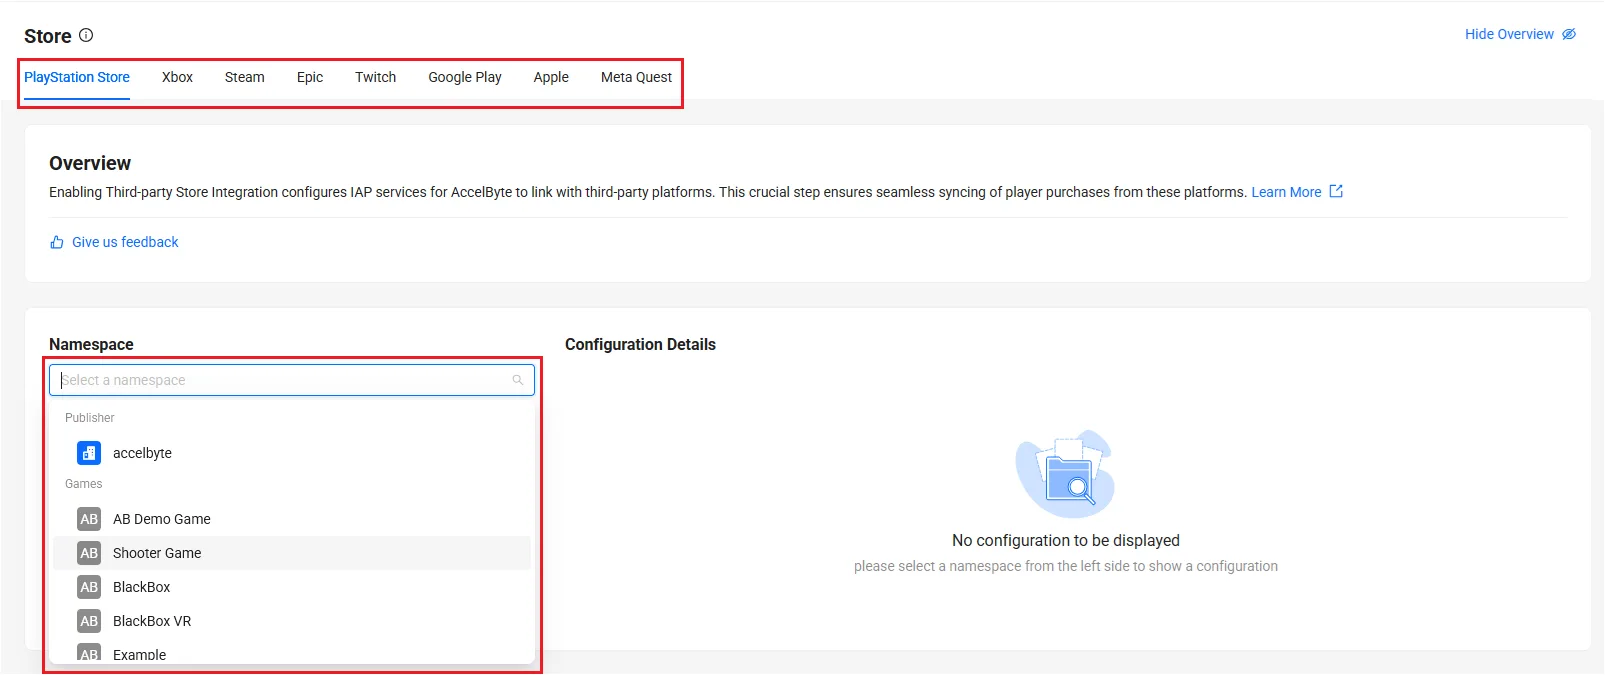
On the sidebar, select Foundations > 3rd Party Integrations > Store.
 note
noteAny configuration you make in the publisher namespace will be used as the default configuration for any unconfigured game namespaces.
-
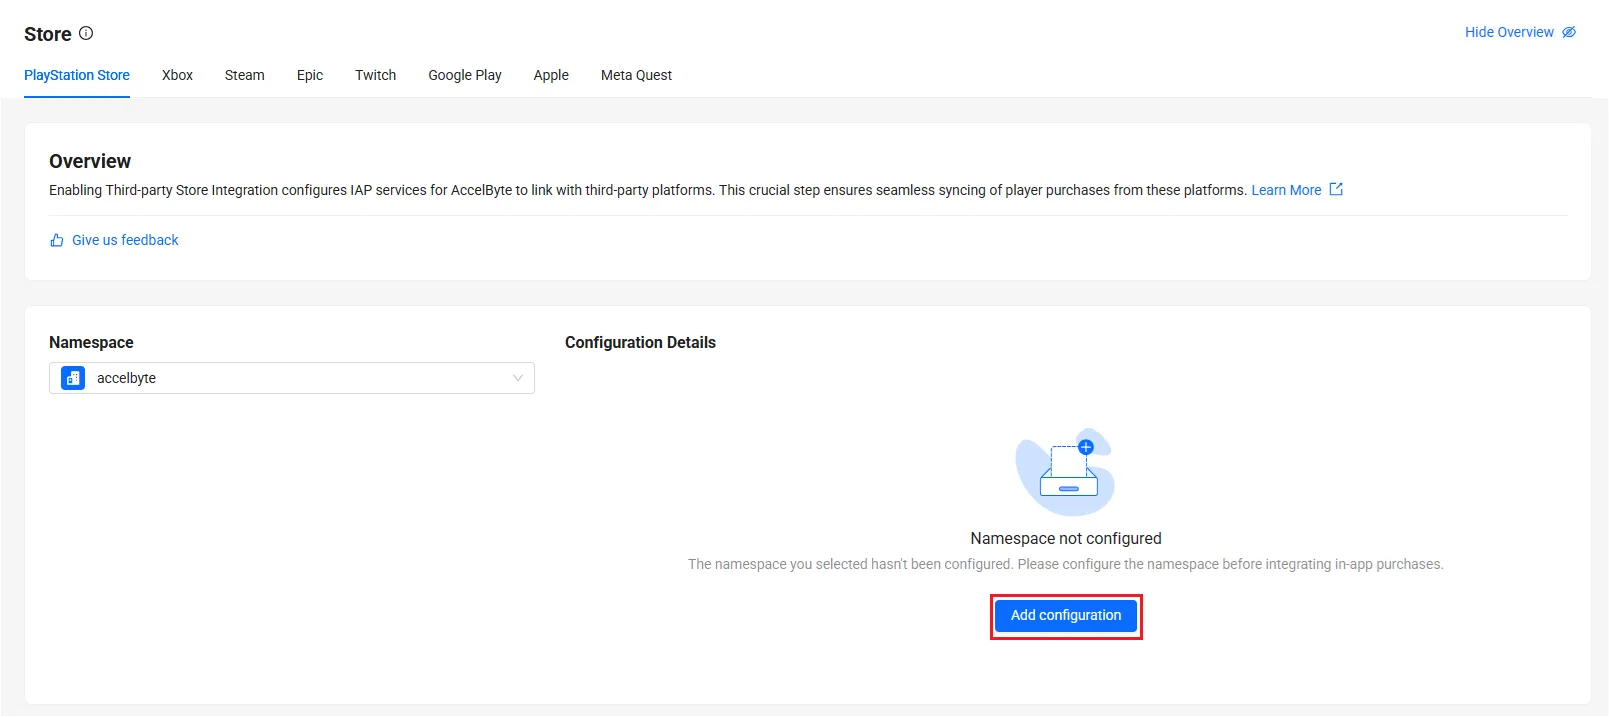
From the available platform tabs, select the platform you want to configure, and then click on the Add Configuration button. The Add Configuration form appears.
 note
noteEach namespace can only have one configuration per platform.
-
Follow the configuration steps for the platform you're configuring:
-
Check whether your namespace already has a configuration for the platform. Each platform has its own command group:
iap-steam,iap-epicgames,iap-twitch,iap-google,iap-apple, oriap-oculus(Meta Quest). This example checks Steam. Replace<YourNamespace>with your namespace:ags platform iap-steam get-config --namespace <YourNamespace>noteEach namespace can only have one configuration per platform. The
update-configcommand creates the configuration if there is none and replaces it if there is one. Any configuration you make in the publisher namespace will be used as the default configuration for any unconfigured game namespaces. -
Follow the configuration steps for the platform you're configuring:
PlayStation and Xbox require information from your AccelByte Account Manager.
PlayStation
Contact your AccelByte Account Manager to access this information.
Xbox
Contact your AccelByte Account Manager to access this information.
Steam
Make sure you've created an item with the same SKU in both the Steam Store and in your namespace in the AGS Admin Portal. Once completed, make sure you have your Steam Web API Key.
- Admin Portal
- AGS CLI
Then, on the configuration form, fill in the game App ID and Steam Web API Key. You can find both of these values in the Steamworks Portal.
The Steam Web API Key is the same as the Publisher Authentication Key. For more information, refer to Steam's documentation about the Steam Web API Key.
-
Create a JSON file with the configuration. This example uses
steam-iap.json:{
"appId": "<YourSteamAppId>",
"publisherAuthenticationKey": "<YourSteamWebApiKey>",
"syncMode": "TRANSACTION",
"env": "LIVE"
}appIdandpublisherAuthenticationKey: the game App ID and the Steam Web API Key from the Steamworks Portal. The Steam Web API Key is the same as the Publisher Authentication Key.syncMode:INVENTORYorTRANSACTION. See Steam Sync Mode.env:LIVEorSANDBOX. Required whensyncModeisTRANSACTION. Remove it forINVENTORY.
-
Save the configuration:
ags platform iap-steam update-config --namespace <YourNamespace> --json @steam-iap.json -
Delete
steam-iap.json, because it contains your Steam Web API Key.
Steam Sync Mode
The Monetization service offers two options for syncing items from Steam to the player in AGS.
- Steam Inventory
- Consume items from Steam Inventory and directly grant items to players in AGS.
- A manual sync is required after the user logs in or makes a purchase.
- Items will be removed from the player's Steam Inventory once they are synced.
- Items that have been consumed are not refundable, due to Steam policy.
- Steam Transaction
- Relies on Steam getReport to synchronize Steam transactions and grant or revoke rewards.
- The AGS backend will automatically sync and grant purchased items to players in AGS. Ideally, this process takes approximately 2 minutes.
- If a purchase is made in the game, you can retrieve the order ID and call the IAP sync endpoint directly, allowing players to receive their rewards in real time.
- The items in the player's Steam inventory will not be consumed during the sync process.
- The items will stay in the player's Steam inventory, and players should be able to get a refund.
- AGS can revoke the corresponding items when a refund occurs on Steam.
- Relies on Steam getReport to synchronize Steam transactions and grant or revoke rewards.
Epic
- Admin Portal
- AGS CLI
On the configuration form, fill in the Sandbox ID of your Epic Developer's account, and then click Add to save the configuration. For more information, refer to Epic's documentation about sandboxes.
Save the configuration with the Sandbox ID of your Epic Developer's account. Replace <YourSandboxId> with your Sandbox ID. For more information, refer to Epic's documentation about sandboxes.
ags platform iap-epicgames update-config --namespace <YourNamespace> --json '{"sandboxId": "<YourSandboxId>"}'
Twitch
Make sure you've completed the following the prerequisites:
- Register your organization with Twitch Developer. For more information, refer to Twitch's documentation about managing organizations
- Create a Twitch application for Drops and configure the Drops settings. For more information, refer to Twitch's documentation about managing Drops
- Create a reward. Be sure to specify the Reward ID to match the reward with your AGS Store item. The Reward ID should follow this format:
{accelbyte-namespace}-{accelbyte-itemSKU}(e.g.,game001-weapon001). For more information, refer to Twitch's documentation about creating rewards.
- Admin Portal
- AGS CLI
Then, on the configuration form, do the following:
- Fill in the Client ID and Secret you set when you created the Twitch application for Drops.
- Fill in your Organization ID.
- Click Add to save the configuration.
-
Create a JSON file with the configuration. This example uses
twitch-iap.json:{
"clientId": "<YourTwitchClientId>",
"clientSecret": "<YourTwitchClientSecret>",
"organizationId": "<YourTwitchOrganizationId>"
}clientIdandclientSecret: the Client ID and Secret you set when you created the Twitch application for Drops.organizationId: your Organization ID.
-
Save the configuration:
ags platform iap-twitch update-config --namespace <YourNamespace> --json @twitch-iap.json -
Delete
twitch-iap.json, because it contains your client secret.
Google Play
Make sure you've created your Android app and set the Product ID to publish your app in the Google Play store. For further details about setting up these prerequisites, contact your AccelByte Account Manager. You can also refer to Google's documentation about creating in-app products.
- Admin Portal
- AGS CLI
Then, follow these steps on the configuration form:
- Fill in the Application Name you set in the Google Play Console.
- Fill in the Package Name for your app as registered in the Google Play Console.
- Fill in your Service Account ID. For more information, refer to Google's documentation about managing service accounts.
- Upload your Business Certificate in
.p12format. For more information, refer to Google's documentation about p12 service account keys. - (Optional) Fill in the notificationTokenAudience. This value represents the intended audience for Google Cloud Pub/Sub notifications. It defines which services are allowed to interact with your subscription configuration.
- (Optional) Fill in the notificationTokenEmail. This is the email address of the Google service account used to authenticate requests made by Google Cloud Pub/Sub when delivering push notifications to your endpoint. It ensures that your service only processes notifications from the authorized and expected Google service account. For more information, see Google's documentation about the notificationTokenEmail.
- Click Add to save the configuration.
-
Create a JSON file with the configuration. This example uses
google-iap.json:{
"applicationName": "<YourApplicationName>",
"packageName": "<YourPackageName>",
"serviceAccountId": "<YourServiceAccountId>",
"notificationTokenAudience": "<YourNotificationTokenAudience>",
"notificationTokenEmail": "<YourNotificationTokenEmail>"
}applicationName: the Application Name you set in the Google Play Console.packageName: the Package Name for your app as registered in the Google Play Console.serviceAccountId: your Service Account ID.notificationTokenAudienceandnotificationTokenEmail: optional. Remove the lines you don't use.
-
Save the configuration:
ags platform iap-google update-config --namespace <YourNamespace> --json @google-iap.json -
Upload your Business Certificate in
.p12format. Replace<path/to/certificate.p12>with the path to the file:ags platform iap-google upload-certificate --namespace <YourNamespace> --file <path/to/certificate.p12>
Apple
Make sure you've created an item in App Store Connect and configured the AGS notification URL in App Store Connect to ensure Apple sends the necessary notifications. For further details about setting up these prerequisites, contact your AccelByte Account Manager. You can also refer to Apple's documentation about App Store Server Notifications.
AGS supports two methods for verifying in-app purchases with Apple: Version 1 (Legacy) and Version 2 (Recommended). Follow the configuration steps for your preferred integration method:
Version 2 (Recommended)
The Version 2 method uses the App Store Server API for transaction verification and the App Store Server Notifications V2 endpoint to verify and synchronize real-time purchase and subscription data updates, specifically:
- One-time purchases: Only purchase validation is supported, which means refunds, auto-renewals, or chargebacks are not supported.
- Subscriptions: In-app purchases, auto-renewals, refunds, chargebacks, and chargeback reversals are supported.
The App Store Server Notifications V2 endpoint works with the latest StoreKit v2 (which no longer uses direct receipt validation) and uses JSON Web Tokens (JWT) for authentication. For more information, refer to Apple's documentation about the App Store Server API and the App Store Server Notifications V2 endpoint.
- Admin Portal
- AGS CLI
To use this method, select Version 2 on the configuration form and do the following:
- Fill in the Bundle ID. This is the unique identifier for your app in the Apple ecosystem (e.g.,
com.example.myapp). For more information, refer to Apple's documentation about Bundle IDs. - Fill in the Issuer ID. This is the unique identifier for your Apple Developer account, which is used to authenticate requests made to Apple's servers. You can find this in the API Keys section of your App Store Connect account. For more information, refer to Apple's documentation about Issuer IDs.
- Fill in the Key ID. This is the private key used to sign the JWT for authentication. You can find the Key ID in App Store Connect under the API Keys section when you generate the key for your app. For more information, refer to Apple's documentation about Key IDs.
- Fill in the App Apple ID. The
appAppleIdis a unique numeric identifier assigned by Apple to your app when you register it in App Store Connect. This ID is used in various server-to-server communications and API requests. For more information, refer to Apple's documentation about App Apple IDs. - Upload the Apple Private Key (.p8 file). This file is used to securely authenticate your app's communication with Apple's services. The .p8 file can be obtained from App Store Connect and is critical for signing JWT tokens. For more information, refer to Apple's documentation about Apple Private Keys.
- Click Add to save the configuration.
-
Create a JSON file with the configuration. This example uses
apple-iap.json:{
"version": "V2",
"bundleId": "<YourBundleId>",
"issuerId": "<YourIssuerId>",
"keyId": "<YourKeyId>",
"appAppleId": <YourAppAppleId>
}bundleId: the unique identifier for your app in the Apple ecosystem, such ascom.example.myapp.issuerIdandkeyId: the Issuer ID and Key ID from the API Keys section of your App Store Connect account.appAppleId: the numeric App Apple ID that Apple assigned to your app. Write it as a number, without quotes.
-
Save the configuration:
ags platform iap-apple update-config --namespace <YourNamespace> --json @apple-iap.json -
Upload the Apple Private Key (.p8 file). Replace
<path/to/AuthKey.p8>with the path to the file:ags platform iap-apple upload-certificate --namespace <YourNamespace> --file <path/to/AuthKey.p8>
Version 1 (Legacy)
The Version 1 method uses the deprecated verifyReceipt endpoint to validate purchases. For one-time purchases, it only supports purchase validations, which means refunds, auto-renewals, or chargebacks are not supported.
This verifyReceipt endpoint relies on receipt validation, which is no longer supported in new versions of Apple's StoreKit. Select this method if your system still uses StoreKit v1and relies on older integration setups.
- Admin Portal
- AGS CLI
To use this method, select Version 1 on the configuration form, and then fill in the Password with the App-Specific Shared Secret found in your item's details in App Store Connect.
-
Create a JSON file with the configuration. This example uses
apple-iap.json:{
"version": "V1",
"bundleId": "<YourBundleId>",
"password": "<YourAppSpecificSharedSecret>"
}bundleId: the unique identifier for your app in the Apple ecosystem, such ascom.example.myapp.password: the App-Specific Shared Secret found in your item's details in App Store Connect.
-
Save the configuration:
ags platform iap-apple update-config --namespace <YourNamespace> --json @apple-iap.json -
Delete
apple-iap.json, because it contains your shared secret.
- While this method allows for continued functionality, it does not offer real-time event handling or modern JWT-based authentication. Apple has deprecated this method, and its continued use is not recommended for new applications. AccelByte recommends migrating to App Store Server Notifications V2 for improved security and real-time event support. For more information, refer to Apple's documentation about the App Store Server Notifications V2 endpoint.
- If you have already upgraded to App Store Server Notifications V2, this method is no longer supported for your namespace. Ensure that you upgrade your game client to use App Store Server Notifications V2 for the purchase verification process for a successful integration.
Meta Quest
- Admin Portal
- AGS CLI
On the configuration form, fill the App ID and App Secret of your Meta Quest Application, and then click Add to save the configuration. For more details, refer to the official Meta Quest documentation on creating an App Page.
-
Create a JSON file with the App ID and App Secret of your Meta Quest Application. This example uses
oculus-iap.json. For more details, refer to the official Meta Quest documentation on creating an App Page.{
"appId": "<YourMetaQuestAppId>",
"appSecret": "<YourMetaQuestAppSecret>"
} -
Save the configuration:
ags platform iap-oculus update-config --namespace <YourNamespace> --json @oculus-iap.json -
Delete
oculus-iap.json, because it contains your app secret.