Byte Wars を複製して実行する - 初期設定 - (Unity モジュール)
注釈:本資料はAI技術を用いて翻訳されています。
Byte Wars リポジトリを複製する
Byte Wars プロジェクトフォルダは Byte Wars Unity GitHub リポジトリにあり、以下のコマンドを使用して複製できます。
git clone https://github.com/AccelByte/accelbyte-unity-bytewars-game.git
Unity で Byte Wars プロジェクトを開く
Unity で Byte Wars を開くには、以下の手順に従います。
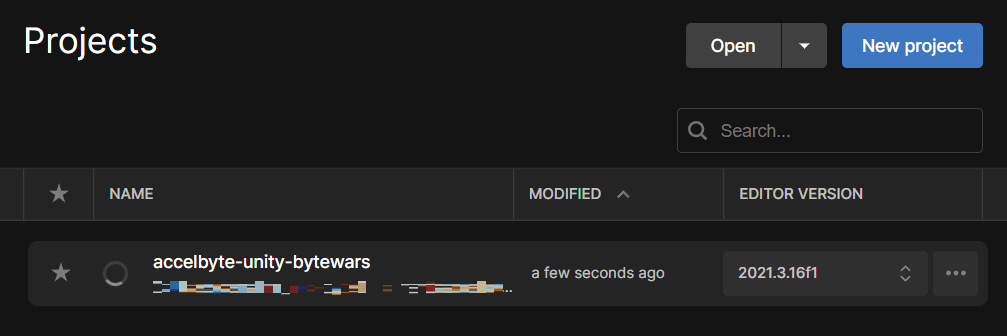
- Unity Hub から、Projects に移動し、Open をクリックします。
- ファイルエクスプローラーで、複製した Byte Wars フォルダを見つけて開きます。Byte Wars プロジェクトがプロジェクトパネルに追加されます。
- プロジェクトをクリックして Unity Editor で開きます。
プロジェクトは EDITOR VERSION 列で 2022.3.50f1 以降 が選択された状態で開く必要があります。以前のバージョンが選択されている場合は、この列のドロップダウンを使用してプロジェクトに適したバージョンを選択してください。
ファイルエクスプローラーでプロジェクトを見つけて開くと、Unity Editor で自動的に開く場合があります。
Byte Wars を実行する
Byte Wars は Unity Editor で直接実行することも、.exe 実行ファイルまたは Web ページ(WebGL)としてビルドして実行することもできます。
Unity Editor で Byte Wars を実行する
-
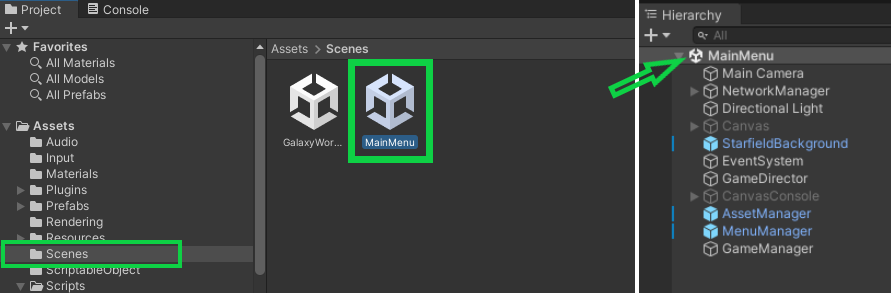
Unity で Byte Wars を開いた状態で、Assets 内の Scenes フォルダに移動し、MainMenu シーンファイルをダブルクリックして、MainMenu シーンが Hierarchy で開いていることを確認します。
-
Editor でゲームを再生します。

パッケージから Byte Wars を実行する
- Windows
- WebGL
-
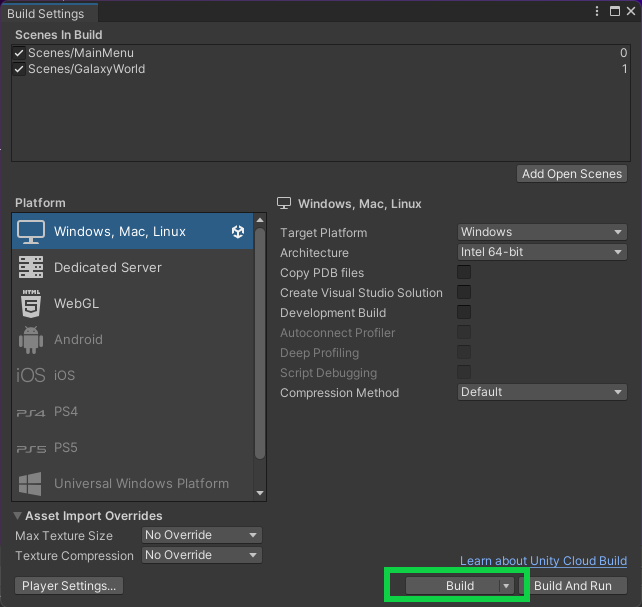
Unity で Byte Wars を開いた状態で、File > Build Settings に移動します。すべてをデフォルトのままにして、Build をクリックします。
-
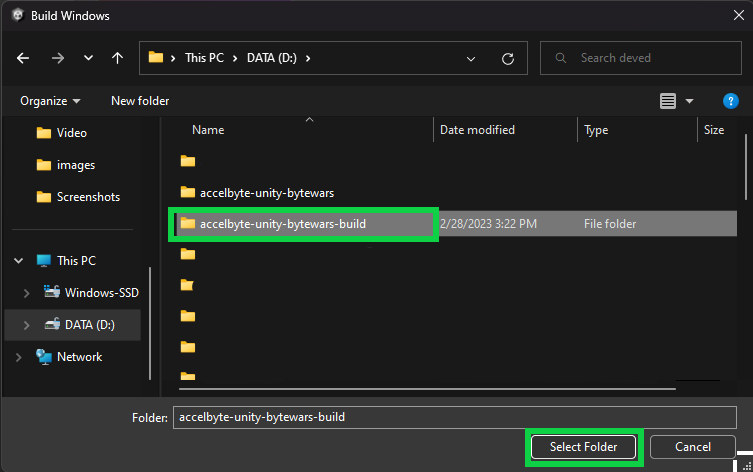
ファイルエクスプローラーで、パッケージファイルを保存するフォルダを選択し、Select Folder をクリックします。
-
ファイルのパッケージ化が完了するまで待ちます。

-
ファイルを保存したフォルダを開き、
ByteWars.exeを開いてゲームをプレイします。
以下のコマンドを使用して、ターミナルから直接 Byte Wars を実行できます。
ByteWars.exe -window-mode -screen-width 1280 -screen-height 720
Unity Editor に WebGL Build Support モジュールがインストールされている必要があります。インストールされていない場合は、Unity Hub を使用してインストールできます。必要なモジュールの追加の詳細については、Unity Hub ドキュメントを参照してください。
-
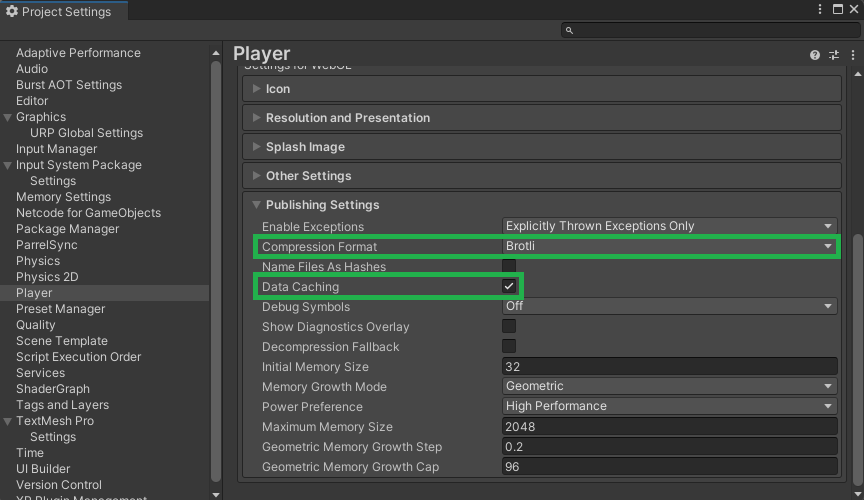
パッケージ化された WebGL ビルドを最適化するために、圧縮とデータキャッシュを有効にします。これを行うには、Unity Editor で Byte Wars を開き、File > Edit > Project Settings に移動します。
-
新しいウィンドウで、左パネルから Player を選択し、Settings for WebGL タブを選択します。次に、Publishing Settings セクションを展開し、Compression Format を Brotli に設定し、Data Caching を有効にします。
-
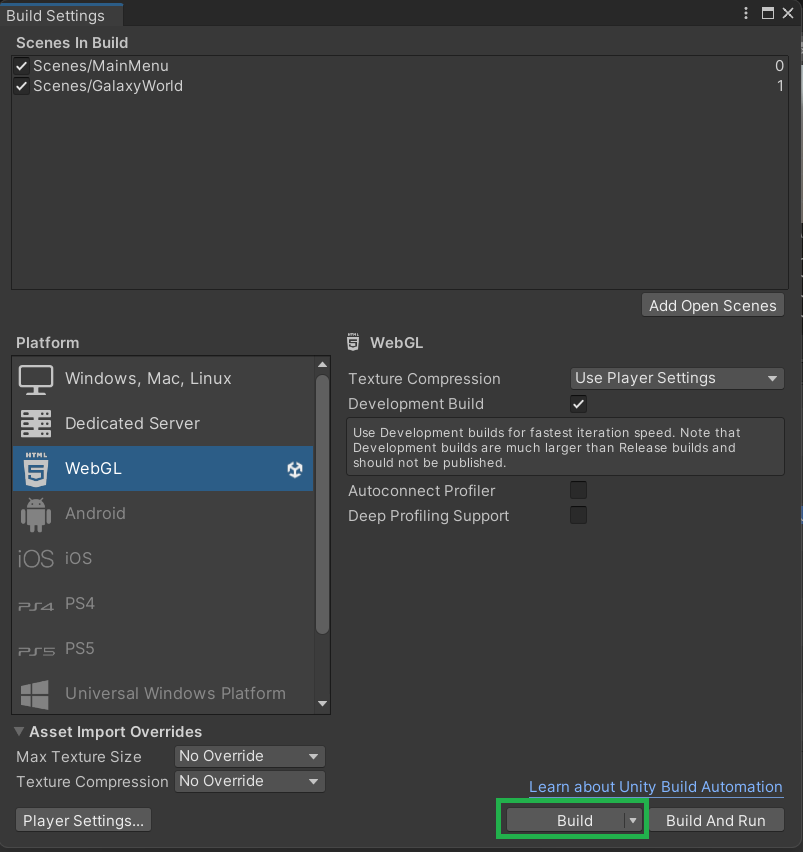
次に、Byte Wars を WebGL ビルドとしてパッケージ化します。File > Build Settings に移動します。ビルドプラットフォームとして WebGL を選択し、Build をクリックします。
-
ファイルエクスプローラーウィンドウで、パッケージファイルを保存するフォルダを選択し、Select Folder をクリックします。
-
ファイルのパッケージ化が完了するまで待ちます。
-
ファイルを保存したフォルダを開き、ローカル Web サーバーにコピーします。
-
Web ブラウザでローカル Web サーバーの IP アドレスを開いてゲームを実行します。