AGS Game SDKをインストールする - 初期設定 - (Unreal Engine モジュール)
注釈:本資料はAI技術を用いて翻訳されています。
はじめに
AccelByte Gaming Services (AGS) Game Software Development Kit (SDK) for Unreal Engine は、AGS をゲームに統合します。AGS Game SDK は、ゲームのクライアントとサーバーの両方のビルドで使用できます。
AccelByte Game SDK は 3 つの部分で構成されています。各部分には独自のリポジトリがあります:
- AGS Unreal Online Subsystem (OSS) GitHub Repository
- AGS Unreal Game SDK GitHub Repository
- AGS Network Utilities GitHub Repository
AGS Unreal Online Subsystem (OSS) は、AGS と対話するための高レベル API として機能し、ゲームとの統合をより迅速かつ簡単にします。Byte Wars に従うには、AGS Unreal OSS を使用する必要があります。
AccelByte Unreal OSS は、Unreal の Online Subsystem インターフェースを実装しています。Online Subsystems の詳細については、Unreal's Online Subsystem Documentation をご覧ください。
AGS Unreal SDK と Network Utilities は、より低レベルのサポート API です。Byte Wars では直接対話することはありませんが、それらが存在することを知っておくと便利です。Unreal SDK と Network Utilities の詳細については、こちらをご覧ください:
-
AccelByte Unreal SDK: ゲームクライアントとゲームサーバーが AGS にリクエストを送信するための API で構成されるライブラリ。
-
AccelByte Network Utilities: ピアツーピア (P2P) ネットワーキングのためにゲームクライアント間で通信するネットワーク機能で構成されるライブラリ。
プロジェクトのセットアップ
Byte Wars Unreal プロジェクトが AGS 実装の準備ができる前に、完了する必要があるいくつかのセットアッププロセスがあります。
オプション: tutorialmodules ブランチでセットアップをスキップ
初期プロジェクトのセットアップ要件を自動的に完了させたい場合は、前のチュートリアル でクローンしたローカルの Byte Wars Unreal リポジトリで tutorialmodules ブランチに切り替えて、IAM クライアントのセットアップ に直接スキップできます。
git switch -f tutorialmodules
独自のプロジェクトで AGS SDK をセットアップする方法を知りたい場合は、次のサブセクションに進んでください。
AGS Unreal OSS をクローンする
-
ターミナルで Byte Wars Unreal プロジェクトフォルダー (
.uprojectファイルを含むフォルダー) を開きます。 -
次のコマンドを使用して AGS Unreal OSS サブモジュールを追加します:
git submodule add git@github.com:AccelByte/accelbyte-unreal-oss.git Plugins/AccelByte/OnlineSubsystemAccelByte -
次のコマンドを使用して AccelByte Unreal OSS サブモジュールをチェックアウトします:
cd Plugins/AccelByte/OnlineSubsystemAccelByte

git checkout 0.12.6
AGS Unreal Game SDK をクローンする
-
Byte Wars プロジェクトフォルダーに戻り、次のコマンドを使用して AGS Unreal SDK サブモジュールを追加します:
git submodule add git@github.com:AccelByte/accelbyte-unreal-sdk-plugin.git Plugins/AccelByte/AccelByteUe4Sdk -
次のコマンドを使用して AGS Unreal Game SDK サブモジュールをチェックアウトします:
cd Plugins/AccelByte/AccelByteUe4Sdk

git checkout 25.0.0
AGS Network Utilities をクローンする
-
Byte Wars プロジェクトフォルダーに戻り、次のコマンドを使用して AGS Network Utilities サブモジュールを追加します:
git submodule add git@github.com:AccelByte/accelbyte-unreal-network-utilities.git Plugins/AccelByte/AccelByteNetworkUtilities -
次のコマンドを使用して AccelByte Network Utilities サブモジュールをチェックアウトします:
cd Plugins/AccelByte/AccelByteNetworkUtilities

git checkout 4.3.1
プラグインのセットアップを確認する
すべてのプラグインがサブモジュールとして正しくセットアップされていることを確認するには、%PROJECTPATH%/.gitmodules ファイルに以下の例のようにすべてのサブモジュールの設定が含まれていることを確認してください。
[submodule "Plugins/AccelByte/OnlineSubsystemAccelByte"]
    path = Plugins/AccelByte/OnlineSubsystemAccelByte
    url = git@github.com:AccelByte/accelbyte-unreal-oss.git

[submodule "Plugins/AccelByte/AccelByteUe4Sdk"]
    path = Plugins/AccelByte/AccelByteUe4Sdk
    url = git@github.com:AccelByte/accelbyte-unreal-sdk-plugin.git

[submodule "Plugins/AccelByte/AccelByteNetworkUtilities"]
    path = Plugins/AccelByte/AccelByteNetworkUtilities
    url = git@github.com:AccelByte/accelbyte-unreal-network-utilities.git
プラグインを使用するようにプロジェクトを設定する
プラグインが Plugins/AccelByte に正しくクローンされたので、Byte Wars プロジェクトに AGS Game SDK プラグインを使用するように指示する必要があります。
-
AccelByteWars.uprojectファイルにすべてのプラグインを追加します:"Plugins": [
...
{
"Name": "AccelByteUe4Sdk",
"Enabled": true
},
{
"Name": "OnlineSubsystemAccelByte",
"Enabled": true
},
{
"Name": "AccelByteNetworkUtilities",
"Enabled": true
}
] -
/Source/AccelByteWars.Target.csファイルにプラグインを追加します:ExtraModuleNames.AddRange(
new string[]
{
"AccelByteWars",
"AccelByteUe4Sdk",
"OnlineSubsystemAccelByte",
"AccelByteNetworkUtilities"
}
); -
/Source/AccelByteWarsEditor.Target.csファイルにプラグインを追加します:ExtraModuleNames.AddRange(
new string[]
{
"AccelByteWars",
"AccelByteUe4Sdk",
"OnlineSubsystemAccelByte",
"AccelByteNetworkUtilities"
}
); -
/Source/AccelByteWars/AccelByteWars.Build.csファイルのPublicDependencyModuleNamesにプラグインを登録しますPublicDependencyModuleNames.AddRange(
new string[]
{
...
"AccelByteUe4Sdk",
"AccelByteNetworkUtilities",
"OnlineSubsystemAccelByte",
...
}
); -
Visual Studio プロジェクトファイルを再生成してコンパイルします。
-
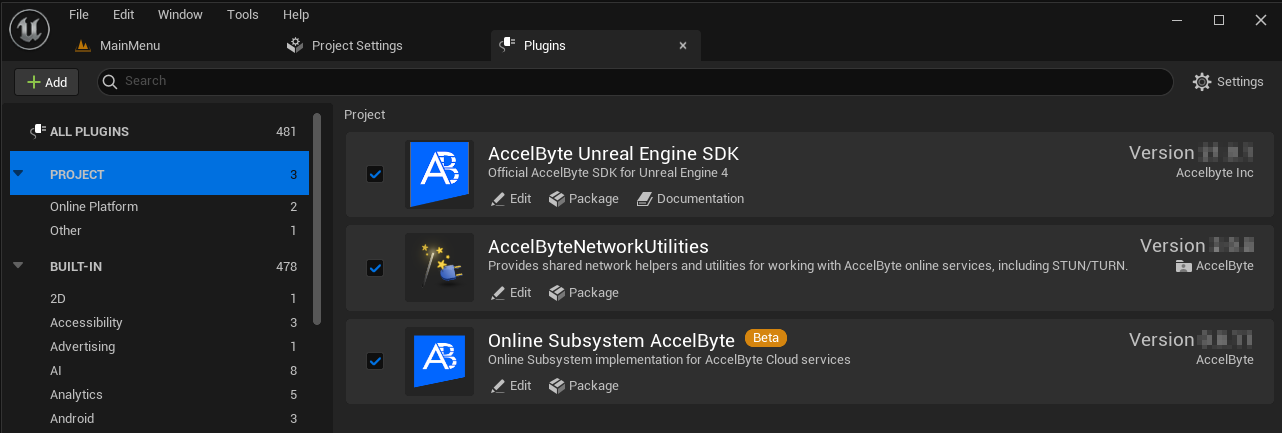
Unreal Editor を実行し、Edit > Plugins に移動して、Unreal Editor でプロジェクトに対して AGS Game SDK プラグインが有効になっていることを確認します。
パブリック IAM クライアントをセットアップする
AGS Game SDK がクライアント環境にアクセスできるようにするには、Admin Portal でパブリック IAM Client を追加する必要があります。
- AGS Shared Cloud
- AGS Private Cloud
-
Admin Portal にログインし、ゲーム名前空間ダッシュボードに移動します。
-
Game Setup > Games and Apps > IAM Clients に移動し、Create IAM Clients をクリックします。
-
新しいページで、以下の設定を使用してフィールドに入力します。
- Create Options: 新しい IAM クライアントを作成するための利用可能なオプション。テンプレートから新しい IAM クライアントを作成するには、Create from Template オプションを選択します。
- Select Template: 新しい IAM クライアントを作成するためのテンプレート。Game Client オプションを選択します。
- Client Name: IAM クライアントの名前。ByteWars-GameClient に設定します。
- Client Type: IAM クライアントの機密性。Public オプションを選択します。
-
他のすべてのフィールドは変更せずに、Create をクリックして新しい IAM クライアントを作成します。
-
Admin Portal にログインし、ゲーム名前空間ダッシュボードに移動します。
-
Game Setup > Games and Apps > IAM Clients に移動し、Create New をクリックします。
-
新しいウィンドウで、以下の設定を使用してフィールドに入力します。
- Client Type: IAM クライアントの機密性。IAM クライアントをパブリックにしたいので、Public に設定します。
- Client Name: IAM クライアントの名前。ByteWars-GameClient に設定します。
- Redirect URI: IAM クライアント認証が成功した後にリダイレクトするために使用される URI。
https://127.0.0.1に設定します。
-
他のすべてのフィールドは変更せずに、下にスクロールして Create をクリックして新しい IAM クライアントを作成します。
IAM クライアント用に AGS Game SDK を設定する
AGS Game SDK を使用する前に、作成した IAM クライアントを使用するように設定する必要があります。
-
テキストエディターで
/Config/DefaultEngine.iniを開きます。 -
DefaultEngine.ini内の[/Script/AccelByteUe4Sdk.AccelByteSettings]セクションを見つけて、Client IDをパブリック IAM クライアント情報に置き換えます。また、ゲーム名前空間と AGS 環境に基づいて他のプレースホルダー値を置き換えます。- AGS Shared Cloud
- AGS Private Cloud
[/Script/AccelByteUe4Sdk.AccelByteSettings]
ClientId=<game_iam_client_id>
ClientSecret=
Namespace=<game_namespace_id>
PublisherNamespace=
BaseUrl="https://<game_namespace_id>.prod.gamingservices.accelbyte.io"

[OnlineSubsystem]
DefaultPlatformService=AccelByte備考- ClientId はランダムに生成され、パブリック IAM クライアントを一意に識別するために使用されます。
- Namespace は、ゲーム名前空間の名前空間 ID です。
- BaseUrl は、ゲーム名前空間 ID と Admin Portal 環境を組み合わせて作成されたベース URL です。
[/Script/AccelByteUe4Sdk.AccelByteSettings]
ClientId=<game_iam_client_id>
ClientSecret=
Namespace=<game_namespace_id>
PublisherNamespace=accelbyte
BaseUrl="https://<studio_name>.accelbyte.io"

[OnlineSubsystem]
DefaultPlatformService=AccelByte備考- ClientId はランダムに生成され、パブリック IAM クライアントを一意に識別するために使用されます。
- Namespace は、ゲーム名前空間の名前空間 ID です。
- PublisherNamespace は、パブリッシャー名前空間のパブリッシャー ID です。デフォルト値は
accelbyteです。 - BaseUrl は、Admin Portal 環境の URL です。
ヒント-
ゲーム名前空間 ID を見つけるには、Admin Portal に移動し、ゲーム名前空間がリストされている Namespace ページに移動します。次に、GAMES セクションでゲーム名前空間を見つけて、gear アイコンをクリックします。新しいページで、Namespace ID プロパティを見つけると、ゲーム名前空間 ID の値を見つけることができます。
-
同様に、パブリッシャー名前空間 ID を見つけるには、Admin Portal に移動し、ゲーム名前空間がリストされている Namespace ページに移動します。次に、PUBLISHER セクションでパブリッシャー名前空間を見つけて、gear アイコンをクリックします。新しいページで、Namespace ID プロパティを見つけると、パブリッシャー名前空間 ID の値を見つけることができます。
-
DefaultEngine.iniファイルを保存し、Byte Wars プロジェクトを再ビルドします。
AGS Game SDK の設定を確認する
-
Config/DefaultEngine.iniのLogAccelByteOSSのログレベルが Log 以上に設定されていることを確認します。[Core.Log]
LogAccelByteOSS=Log -
DefaultEngine.iniファイルを保存して閉じます。 -
Unreal Engine エディターを実行し、Window > Output Log に移動して Output Log Window を表示し、ログに
AccelByte API initialized!が表示されていれば、SDK が適切に設定されています。LogAccelByteOSS: Starting OnlineSubsystemAccelByte module!
...
LogAccelByteOSS: AccelByte API initialized! -
Unreal Editor でゲームを実行して、SDK が適切に設定されているかどうかを確認することもできます。
-
SDK が適切に設定されている場合、メインメニューにリダイレクトされます:
-
SDK が適切に設定されていない場合、メインメニューの代わりにエラーメッセージが表示されます。
-
この段階では、DefaultEngine.ini をまだ適切に設定していないという LogAccelByte からのいくつかのエラーが表示される場合があります。これらのチュートリアルを続行し、専用サーバーを使用する予定がある場合は、これらのメッセージは後で解決されるため無視してください。チュートリアルの流れを妨げることはありません。それ以外の場合は、DefaultEngine.ini を開き、[/Script/AccelByteUe4Sdk.AccelByteServerSettings] に移動して、ClientId、Namespace、および BaseUrl の値を " " に設定してください。