Set up AMS configuration - Game server integration - (Unity module)
About
AccelByte Multiplayer Servers (AMS) is a dynamic dedicated game server manager that enables you to serve dedicated game servers as close to your players as possible. You can learn more about what AMS has to offer in the AMS documentation.
To start using AMS, you need to create an AMS account and link your game namespace to it. You also need an IAM Client to manage your game server on AMS, such as upload your game server build and claim your dedicated servers from your fleet.
Create AMS IAM client
To manage your dedicated servers on AMS, such as uploading new server build and claiming dedicated servers from your backend, you need an IAM client with enough permission to do those actions. In this tutorial section, you learn how to create that IAM client.
-
Log in to the Admin Portal and go to your game namespace dashboard.
-
Go to Foundations > Identity & Access > IAM Clients and click Create New.
-
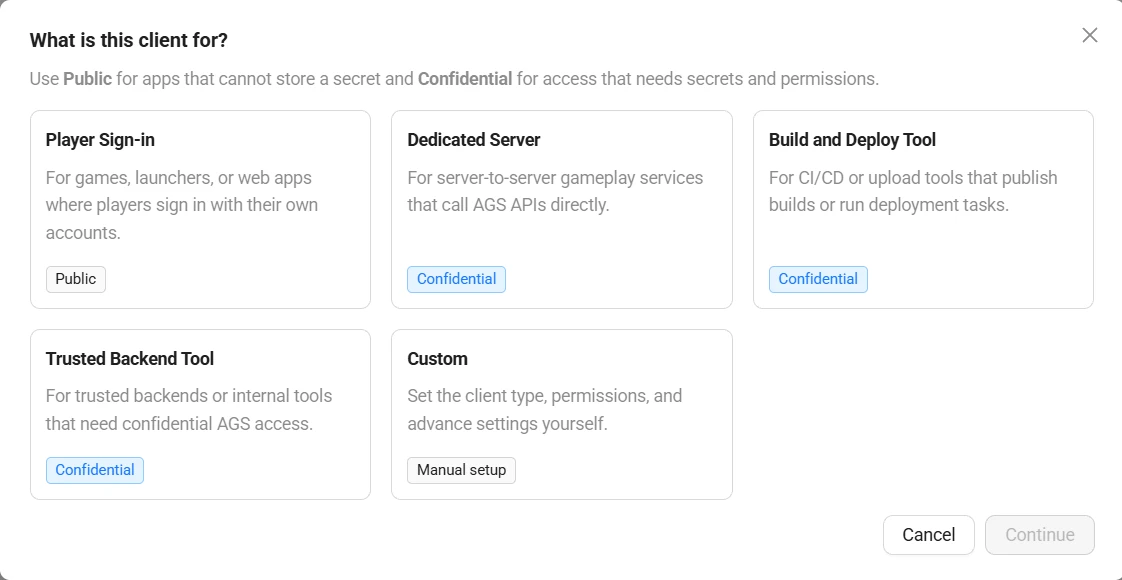
In the What is this client for? window, select Custom and click Continue. The New IAM Client page appears.
-
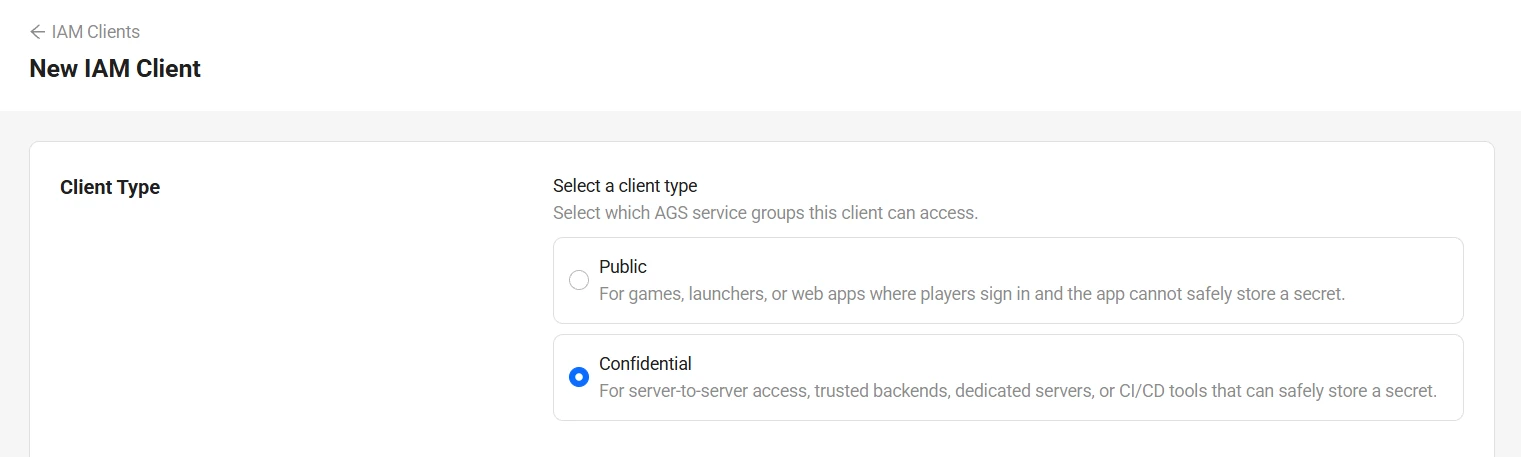
In the Client Type section, select Confidential.
-
In the Basic Info and Client Settings sections, use the configuration below to create a new server IAM client.
- Client Name: the name of the IAM client. Set it to ByteWars-AMS.
- Secret: the secret or password for the IAM client. You can use your own secret or click Generate to generate a random one.
- Redirect URI: the URI used to redirect once the IAM client authorization is successful. Select Localhost, which sets it to
http://127.0.0.1.
-
In the Permissions section, enable the permission below. This permission allow you to upload the game server build to AMS.
- AMS > Dedicated Server Toolkit: enable Read, Create, and Update permissions.
-
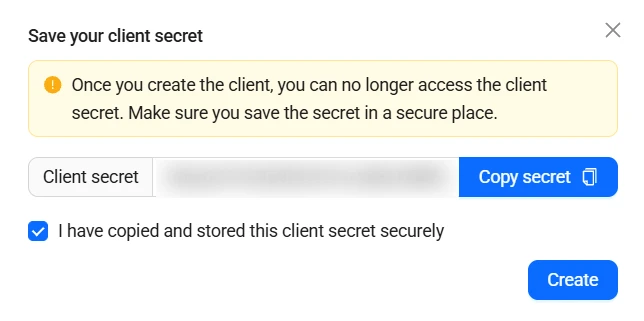
Click Continue. The Save your client secret window appears. Click Copy secret and save the secret somewhere secure. Then, tick I have copied and stored this client secret securely and click Create to create your IAM client.
warningThe Secret will not be shown again after you create the IAM client. Be sure to copy and save it before you click Create.
Configure the AccelByte Unity SDK
In order for your game server can be integrated with AMS, you need to add a few AccelByte Unity SDK configuration below.
-
Open Byte Wars in Unity Editor. In the Byte Wars project, there is an existing
Resourcesfolder. If you are using your own project, please create theResourcesfolder under theAssetsfolder. -
In the
Resourcesfolder, create a new JSON file namedAccelByteServerSDKConfig.json. Copy the code below and paste it into the file. Then, replace the values based on your AGS game namespace settings.- AGS Public Cloud
- AGS Private Cloud
{
    "Default":
    {
        "BaseUrl": "https://<game_namespace_id>.prod.gamingservices.accelbyte.io",
        "RedirectUri": "http://127.0.0.1"
    }
}info- BaseUrl is the base URL made out of your game namespace ID combined with your Admin Portal environment.
{
    "Default":
    {
        "BaseUrl": "https://<studio_name>.accelbyte.io",
        "RedirectUri": "http://127.0.0.1"
    }
}info- BaseUrl is the URL of your Admin Portal environment.
tip- To find your game namespace ID, go to your Admin Portal and navigate to the Namespace page where your game namespaces are listed. Then, locate your game namespace under the GAMES section and click on the gear icon. On the new page, locate the Namespace ID property and there you can find your game namespace ID value.
-
Save the file and your AccelByte Unity SDK configuration is complete.