Automate Your Extend App Deployments with GitHub Actions
If you’re building an Extend App with AccelByte's platform, chances are you are pushing updates regularly. Manually uploading images and triggering deployments can become tedious; not to mention error-prone.
Thankfully, GitHub Actions can automate this entire process. In this post, we'll walk through how to set up a GitHub Actions worflow to automatically upload and deploy your Extend App when you publish a release.
What You'll Build
A CI workflow powered by extend-helper-cli that:
- Uploads your container image to AccelByte when you publish a GitHub release
- Deploys your Extend App automatically
Let's get started.
Step 1: Clone an Extend App Repository
For this walkthrough, we'll use the Extend Service Extension (Go) template.
git clone https://github.com/AccelByte/extend-service-extension-go
cd extend-service-extension-go
You can, of course, use any of the official Extend App templates depending on your language and use case.
Step 2: Create the GitHub Actions Workflow
In your project, create the following file:
# .github/workflows/deploy.yaml
name: Upload and Deploy

on:
  release:
    types: [published]

jobs:
  upload:
    runs-on: ubuntu-latest
    steps:
      - name: Checkout
        uses: actions/checkout@v4

      - name: Install Extend Helper CLI
        uses: AccelByte/gha-install-extend-helper-cli@v1

      - name: Upload Image
        env:
          AB_BASE_URL: ${{ secrets.BASE_URL }}
          AB_CLIENT_ID: ${{ secrets.CLIENT_ID }}
          AB_CLIENT_SECRET: ${{ secrets.CLIENT_SECRET }}
        run: |
          extend-helper-cli image-upload \
            --namespace ${{ secrets.NAMESPACE }} \
            --app ${{ secrets.APP }} \
            --image-tag ${{ github.event.release.tag_name }} \
            --login

  deploy:
    runs-on: ubuntu-latest
    needs: upload
    steps:
      - name: Checkout
        uses: actions/checkout@v4

      - name: Install Extend Helper CLI
        uses: AccelByte/gha-install-extend-helper-cli@v1

      - name: Deploy App
        env:
          AB_BASE_URL: ${{ secrets.BASE_URL }}
          AB_CLIENT_ID: ${{ secrets.CLIENT_ID }}
          AB_CLIENT_SECRET: ${{ secrets.CLIENT_SECRET }}
        run: |
          extend-helper-cli deploy-app \
            --namespace ${{ secrets.NAMESPACE }} \
            --app ${{ secrets.APP }} \
            --image-tag ${{ github.event.release.tag_name }}
Step 3: Store your secrets
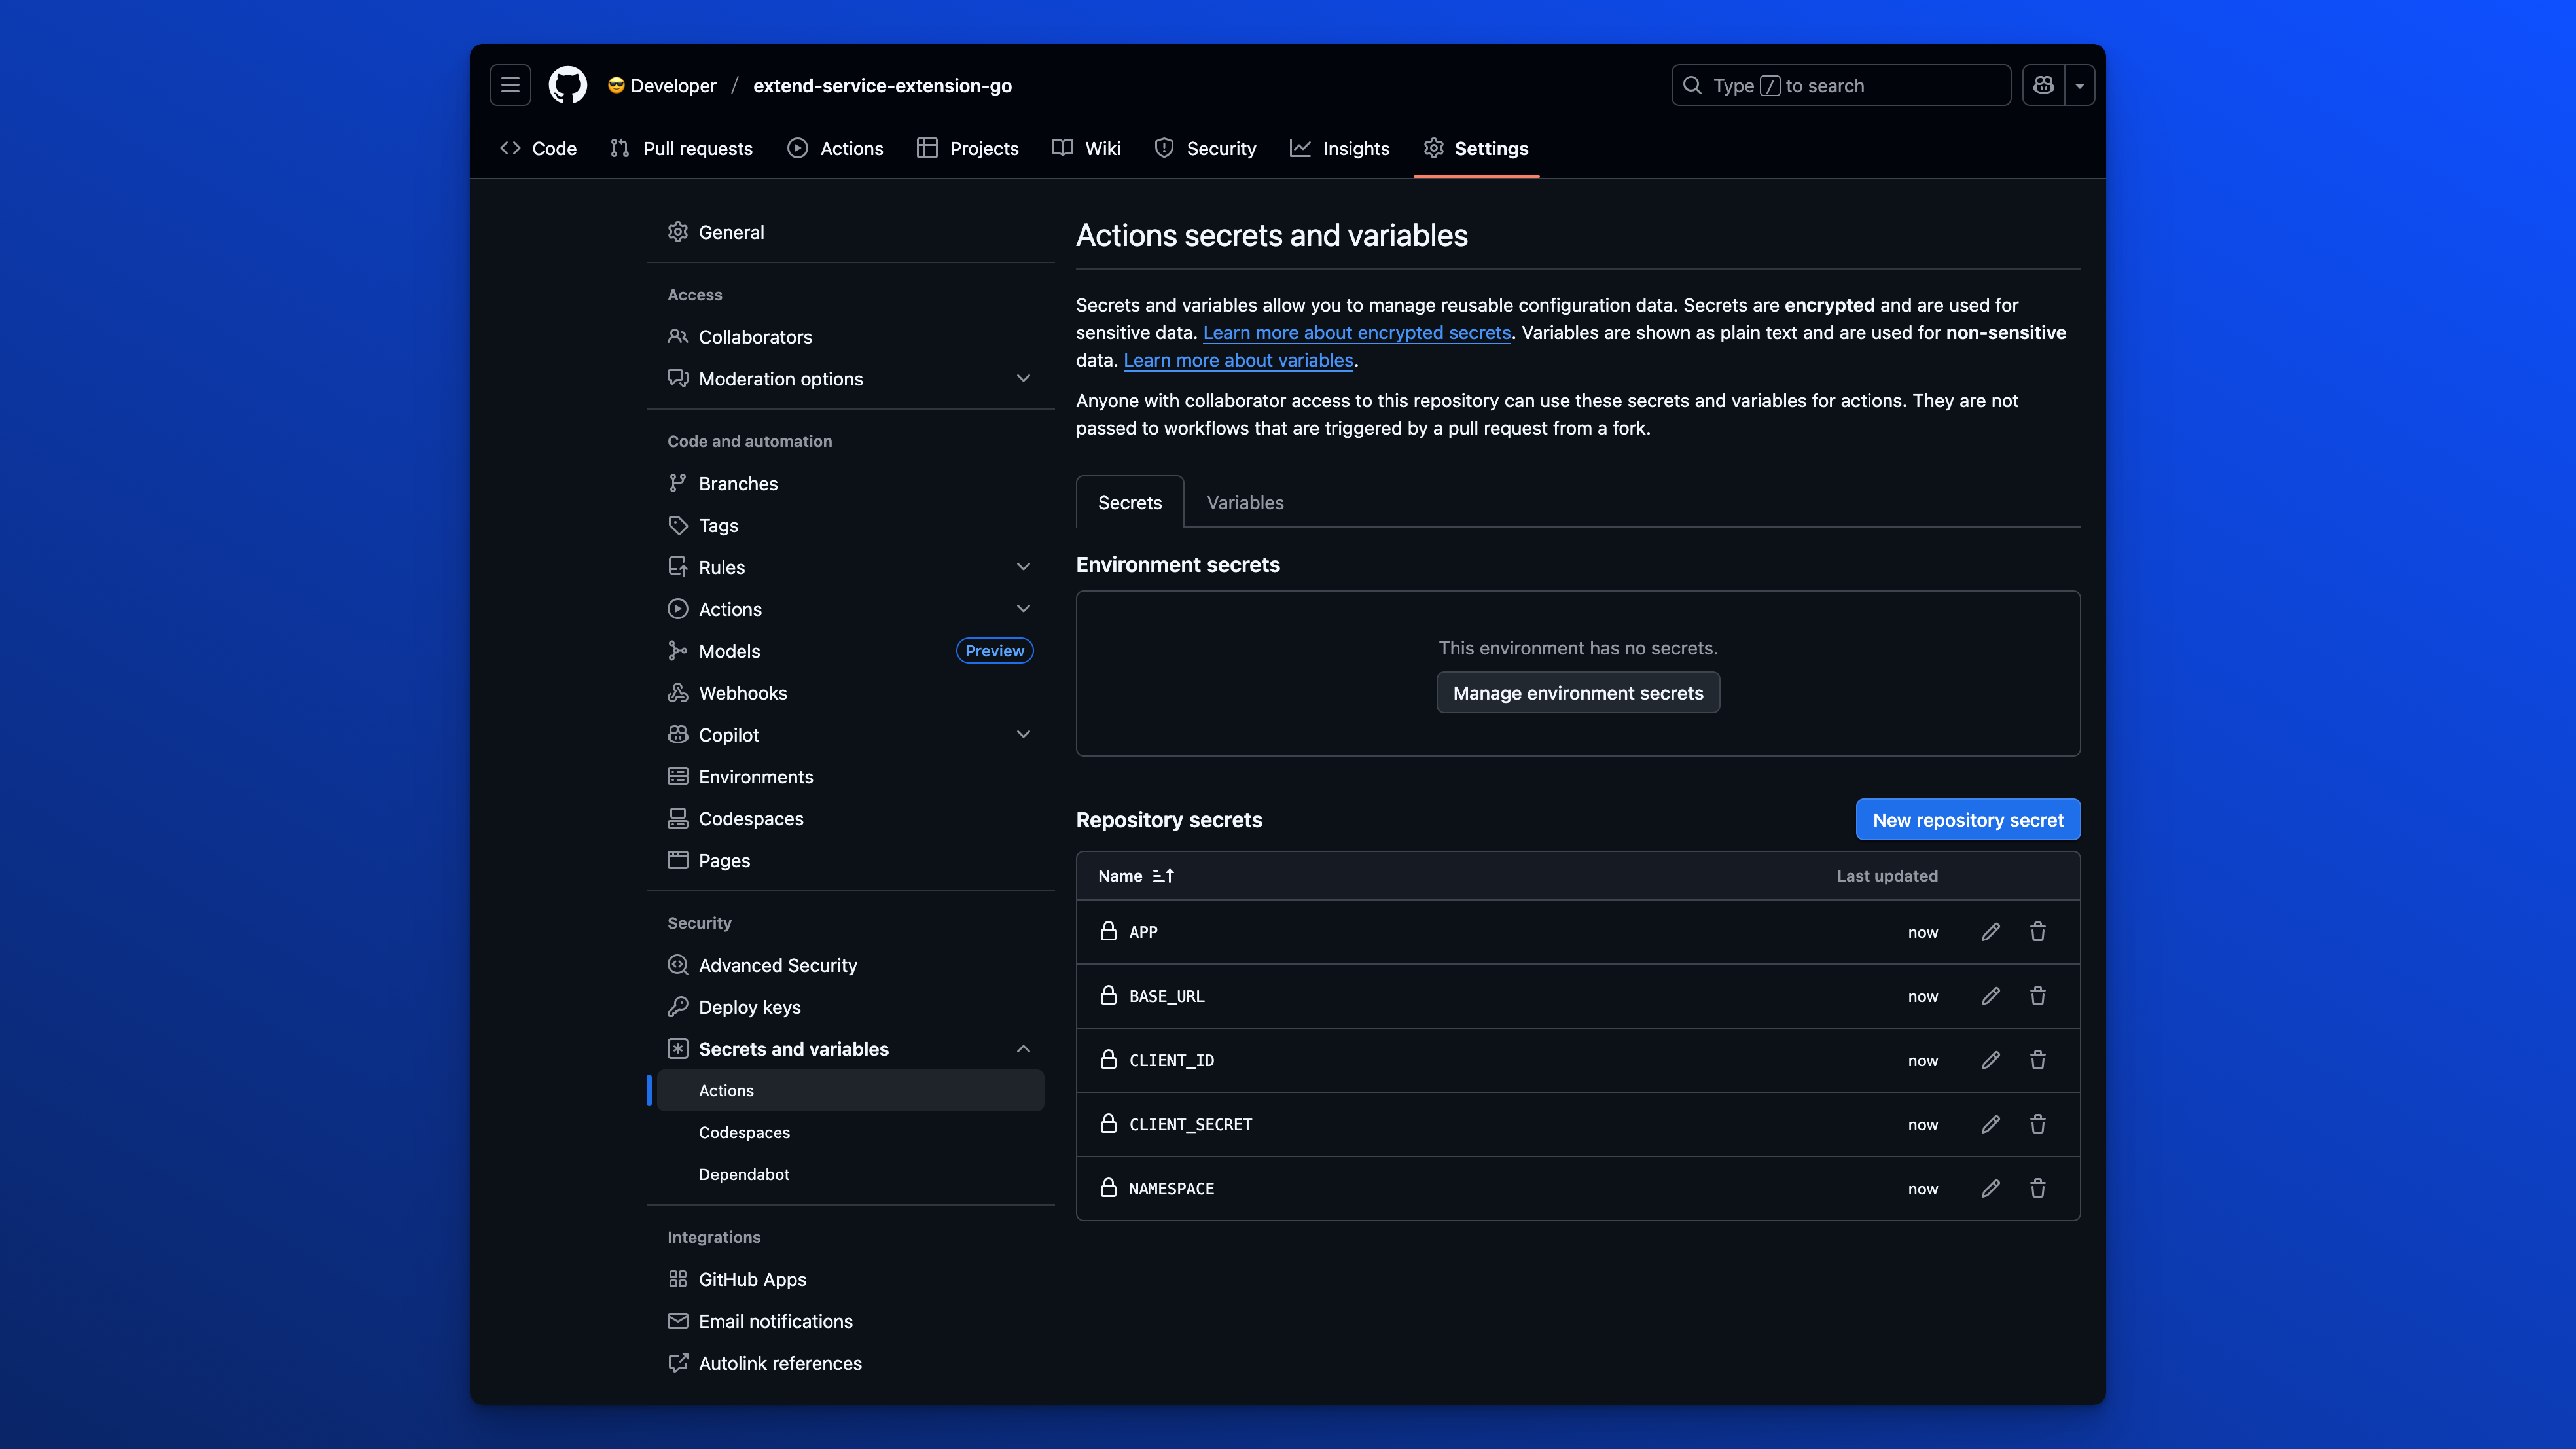
Go to your repository's Settings > Secrets and variables > Actions, and add the following:
| Secret Name | Purpose |
|---|---|
BASE_URL | Your AccelByte environment URL |
CLIENT_ID | OAuth2 Client ID |
CLIENT_SECRET | OAuth2 Client Secret |
NAMESPACE | Your app's namespace |
APP | Your app's name |
These secrets are required for authentication and targeting during upload and deployment.
Use the same CLIENT_ID and CLIENT_SECRET that you would typically provide when running extend-helper-cli manually.
See the setup guide for more details.
Step 4: Create a Release
To deploy your app:
-
Go to your repository's
Releasespage.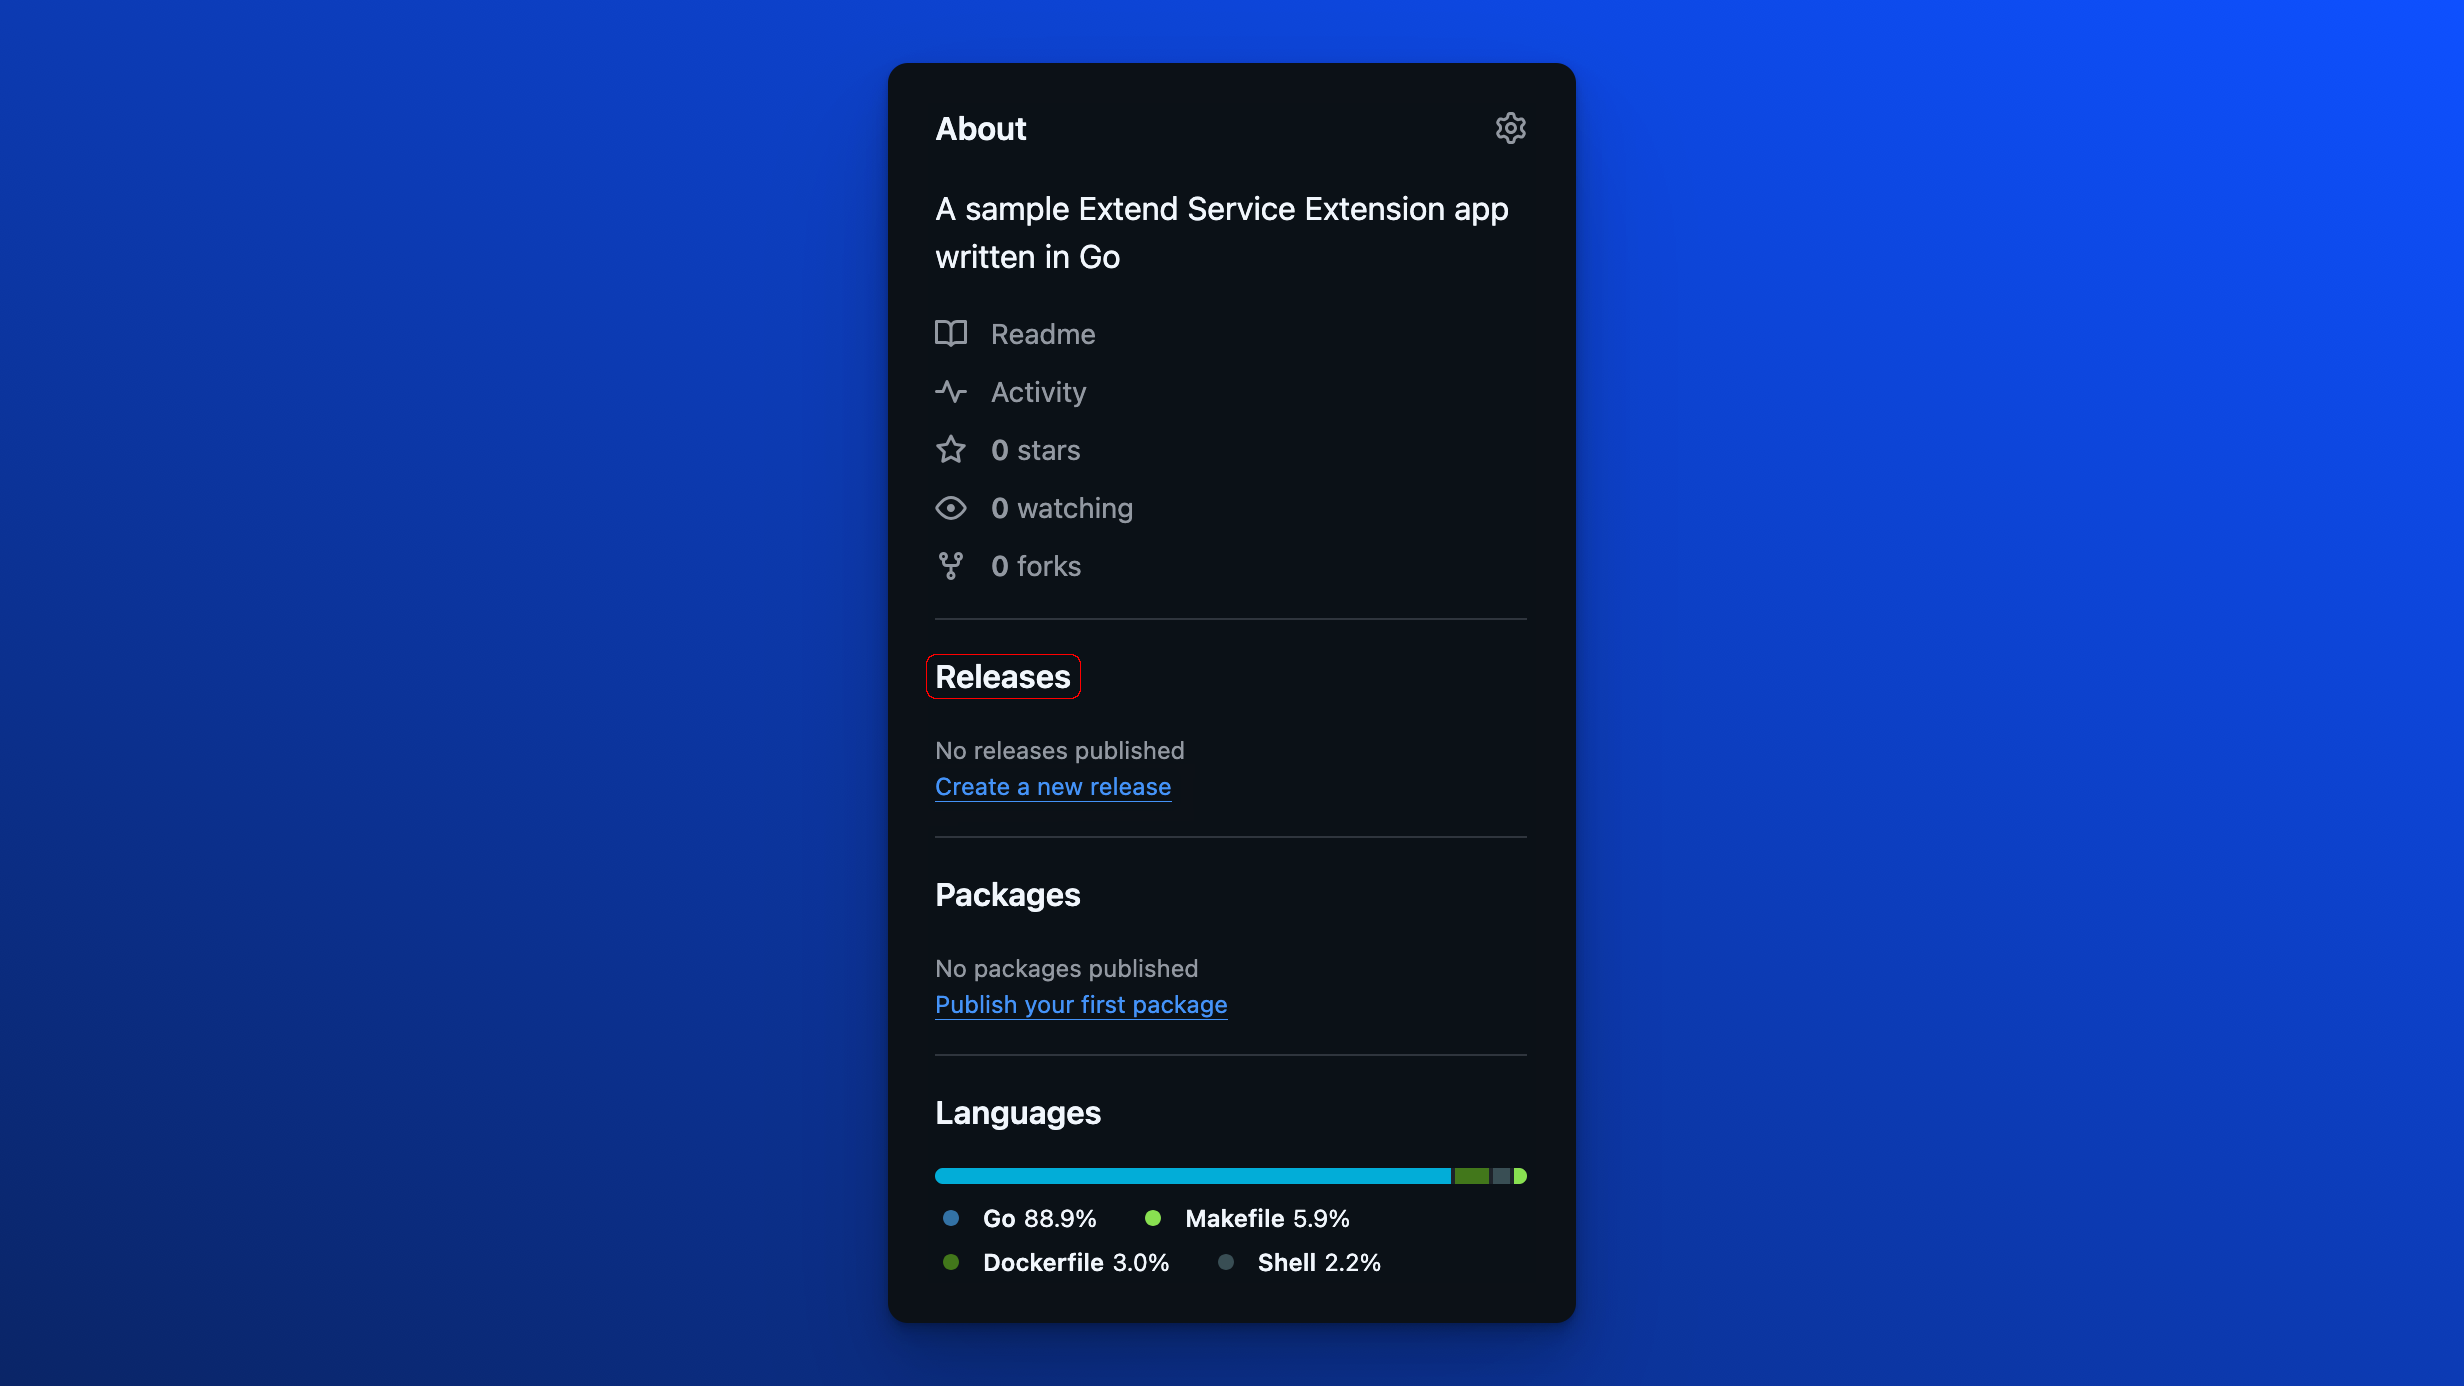
-
Click
Create a new releaseorDraft a new release. -
Choose or create a new tag (e.g.
v1.0.0) and fill in optional release notes. -
Click
Publish release.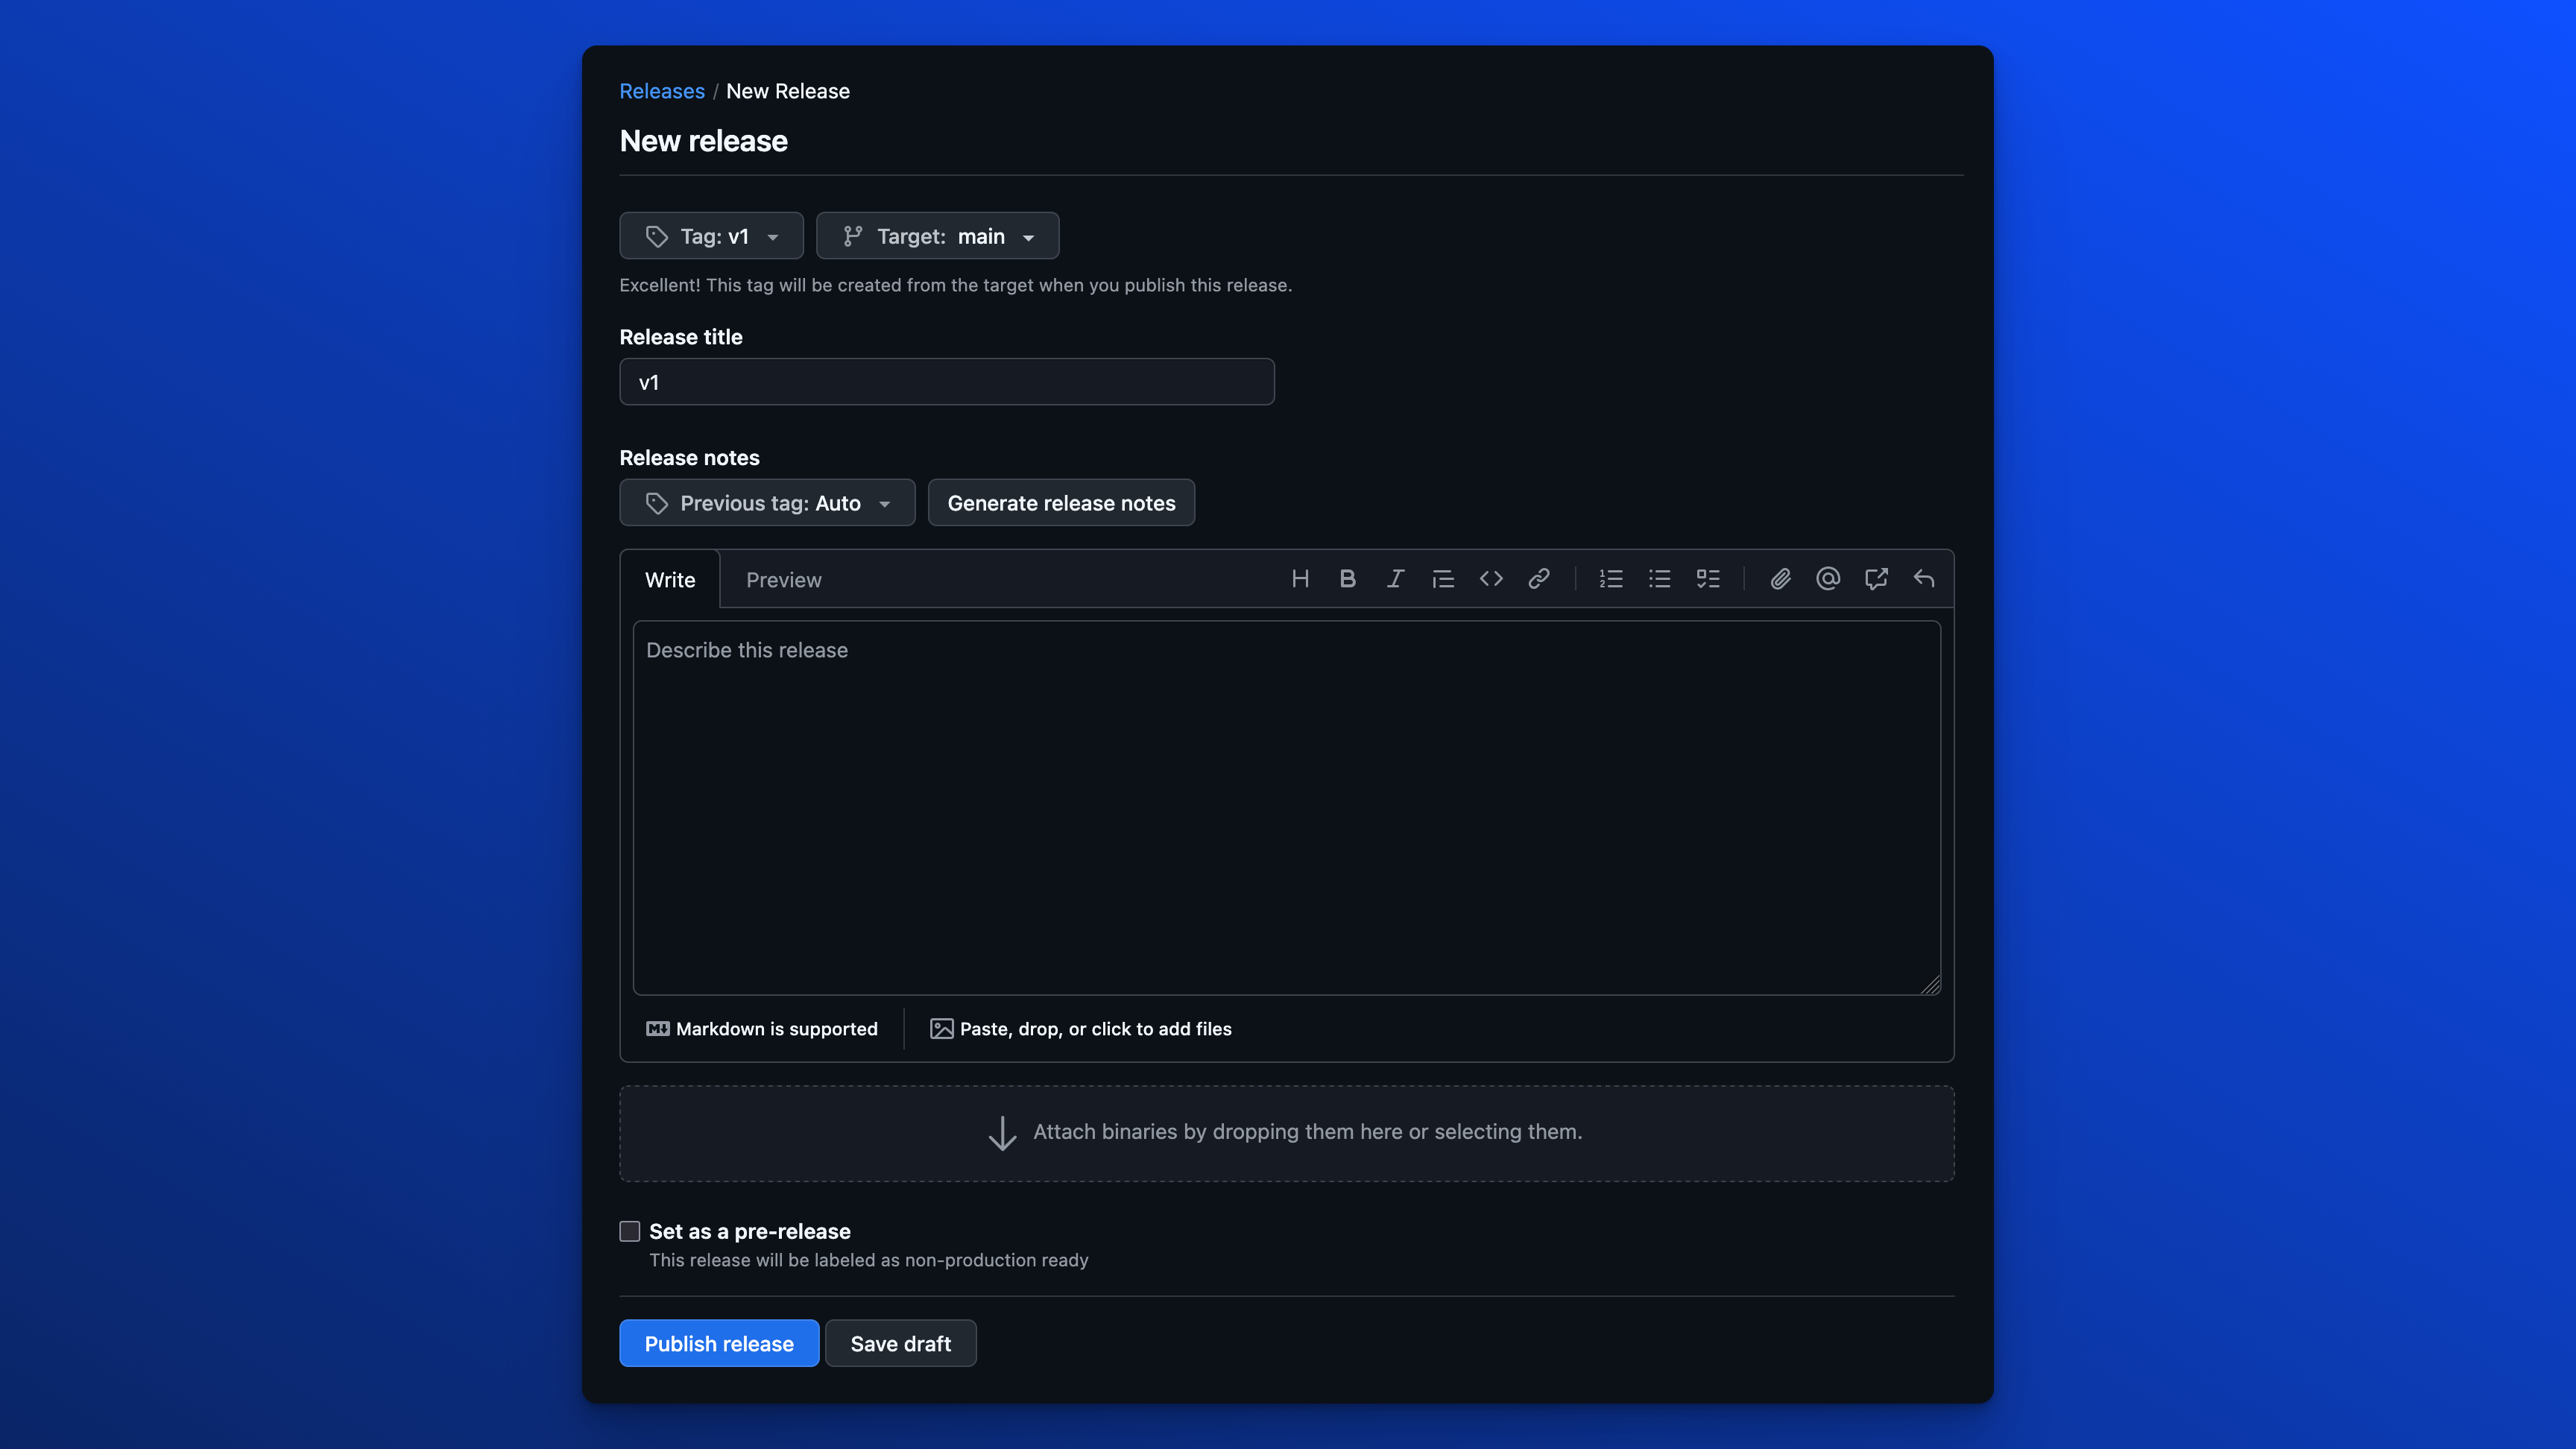
The GitHub Actions workflow will trigger automatically, uploading your container image and deploying it to your specified namespace.
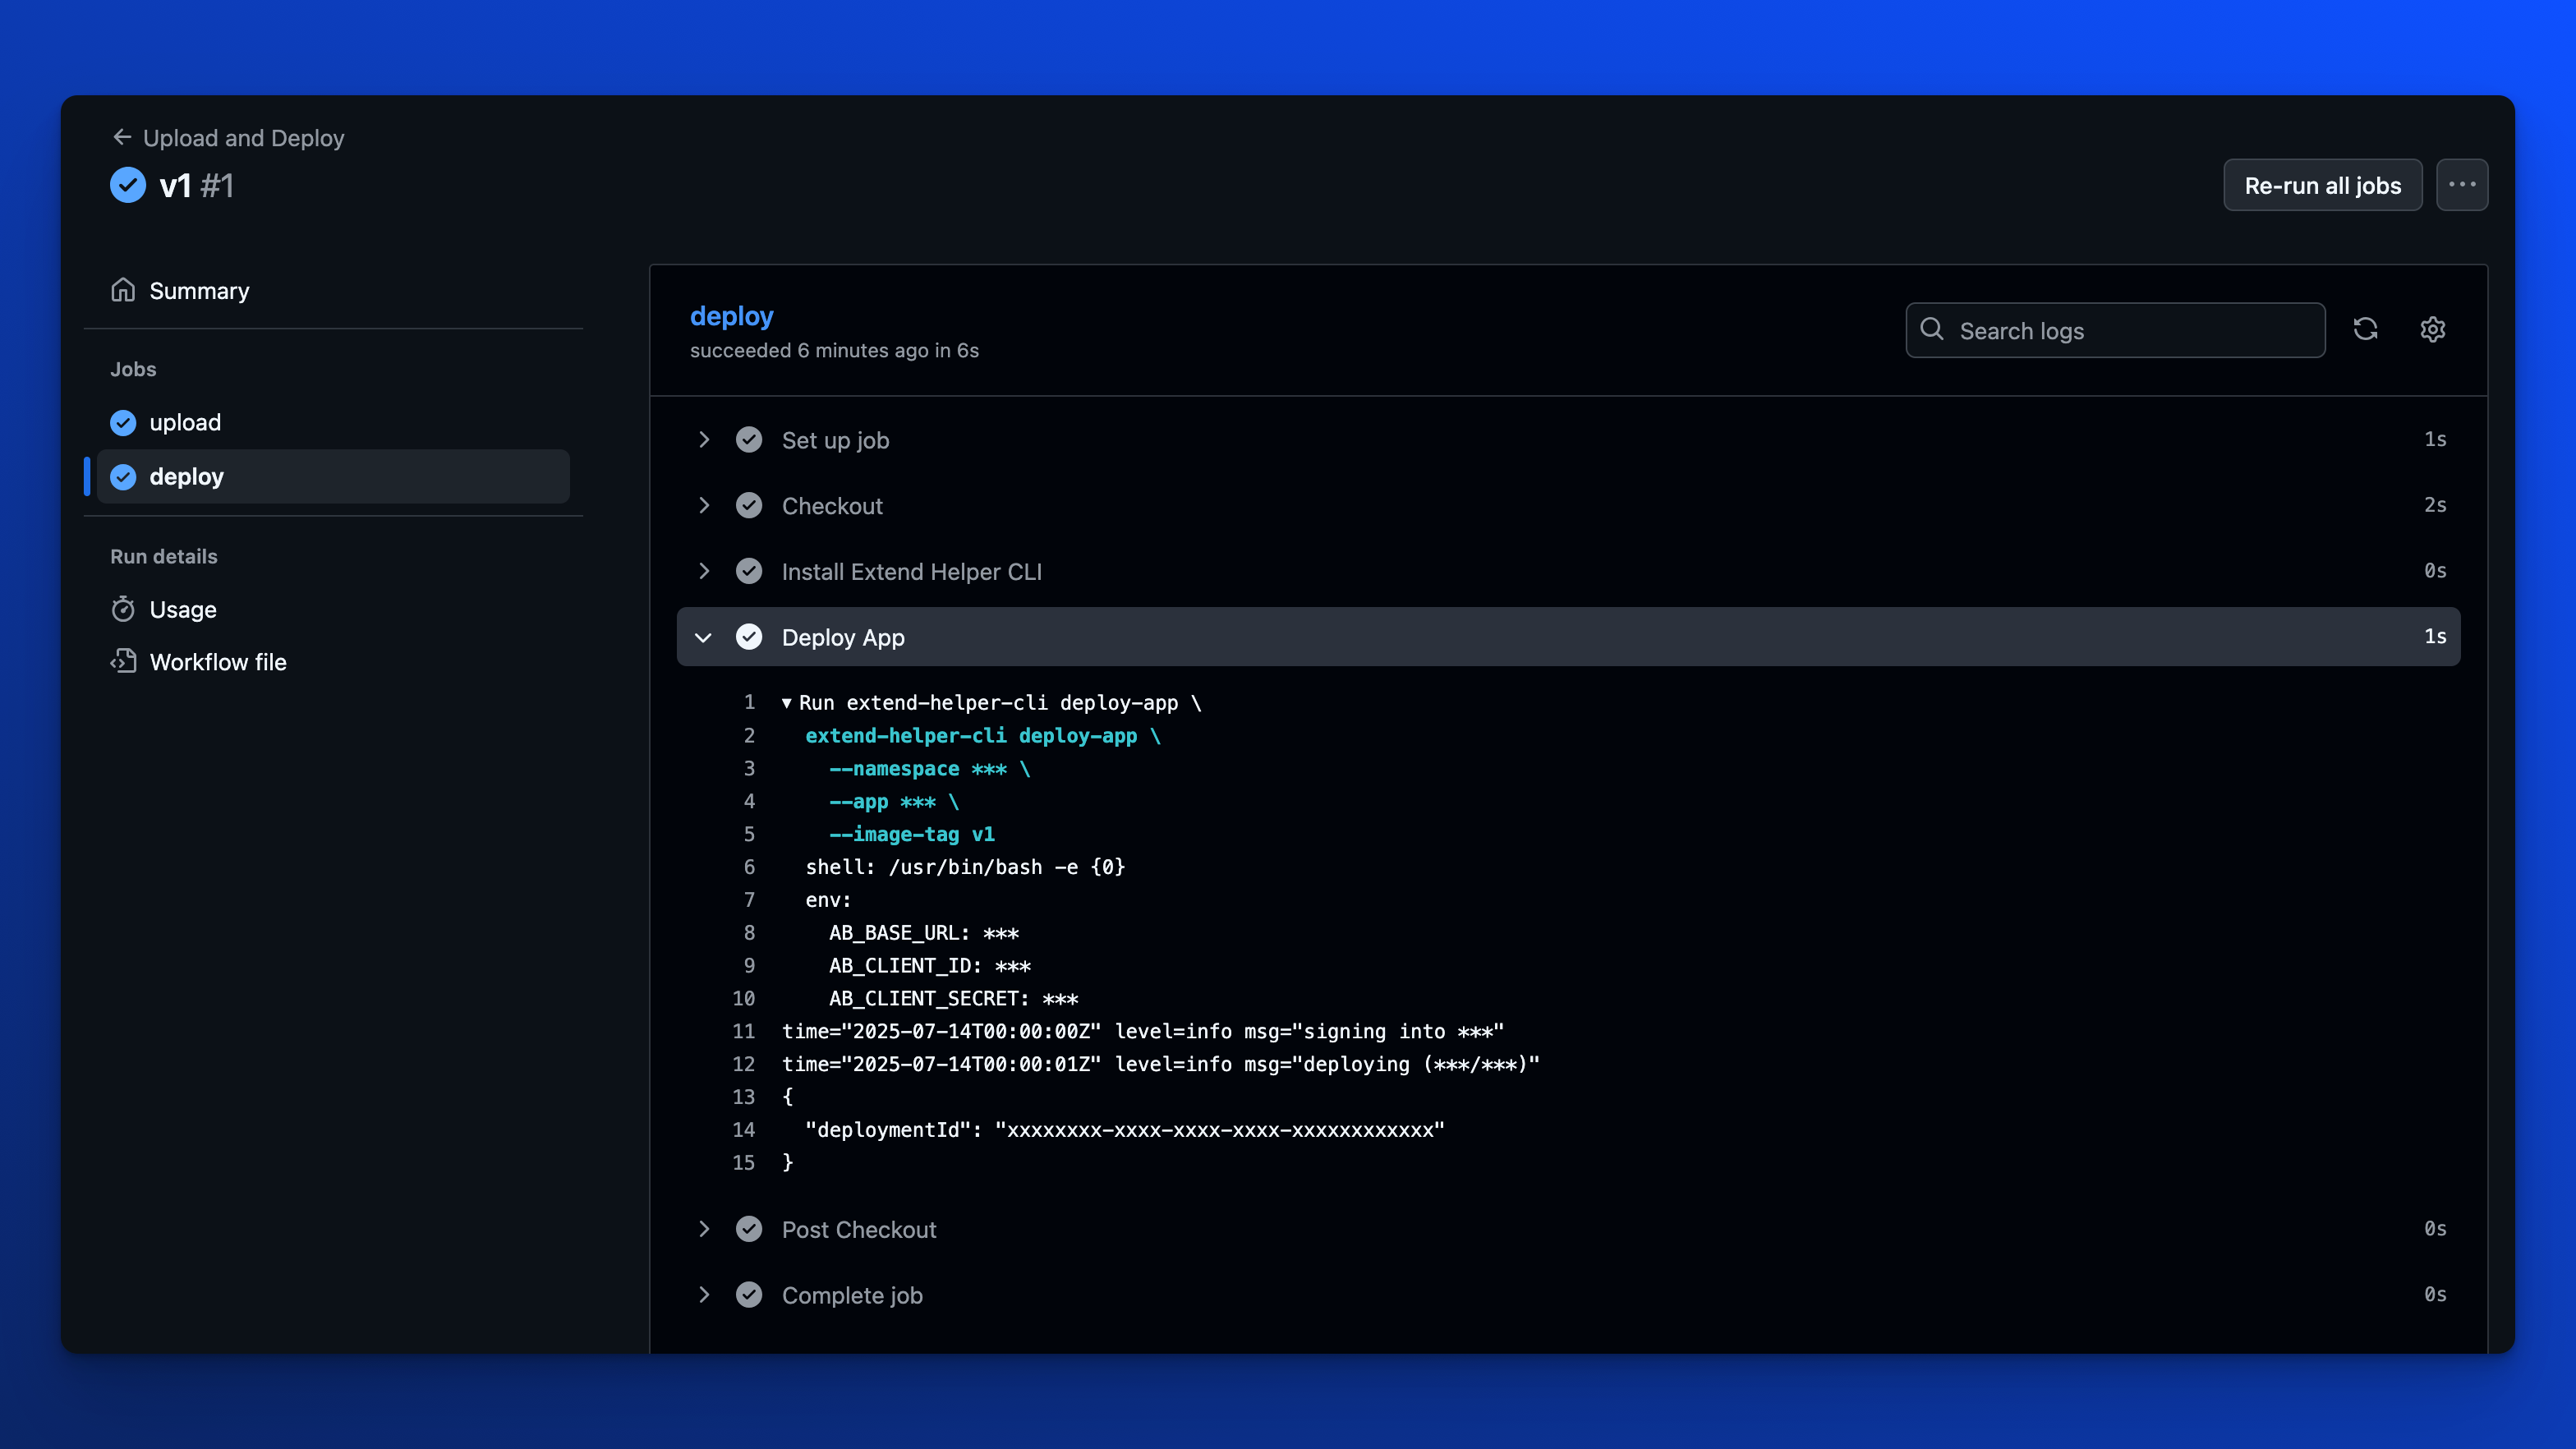
Monitor the progress under the Actions tab; logs are available for each step of the process.

TL;DR
- Clone extend-service-extension-go
- Add the
deploy.yamlGitHub Action workflow - Store your secrets
- Trigger deployment by publishing a release
With GitHub Actions in place, your deploys become fast, consistent, and hands-free.
With that, you're all set; happy coding!
If you're working on different type of Extend App; like an override or event handler. Check out the other templates available in C#, Go, Java, and Python.