Add permissions to a role
Overview
This article contains information on how to use the AccelByte Gaming Services (AGS) Admin Portal or the AGS CLI to add permissions to a role that you've previously created.
The ability to customize your own roles in Public Cloud will be available soon.
Prerequisites
-
You have created at least one role in your environment.
-
You have access to the Admin Portal and have sufficient permissions for roles management.
-
In Private Cloud, make sure you have the following permissions:
Usage Resource Action Create Role ADMIN:ROLECreate Add Role Permissions ADMIN:ROLEUpdate Invite User Admin ADMIN:NAMESPACE:{namespace}:USER:INVITECreate Admin Add User's Role ADMIN:NAMESPACE:{namespace}:ROLE:USER:*Update -
To follow the AGS CLI steps, you have installed the AGS CLI and signed in with an account that meets the requirements above. See Install and sign in. The examples use a Bash shell.
Add permissions to a role
Follow the steps below to add permissions to a role:
- Admin Portal
- AGS CLI
-
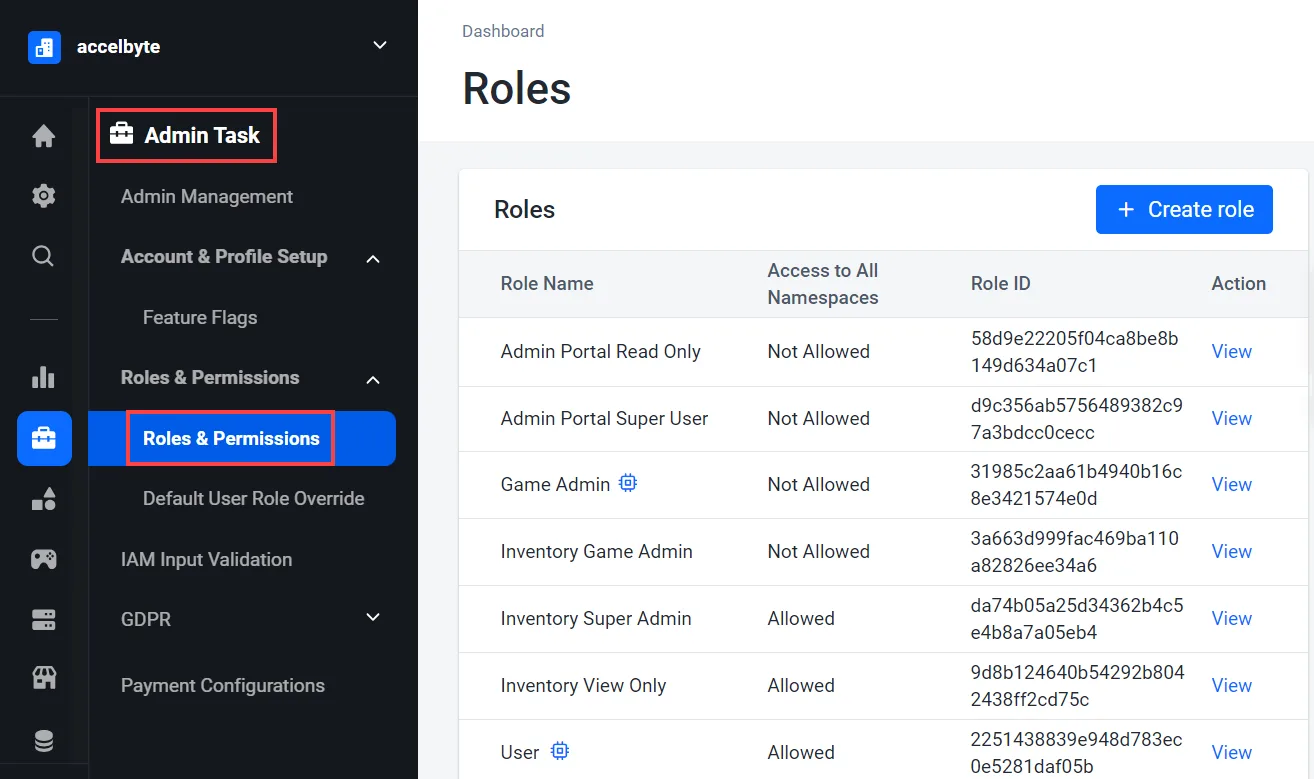
On the Admin Portal sidebar, go to Admin Task > Roles & Permissions.
-
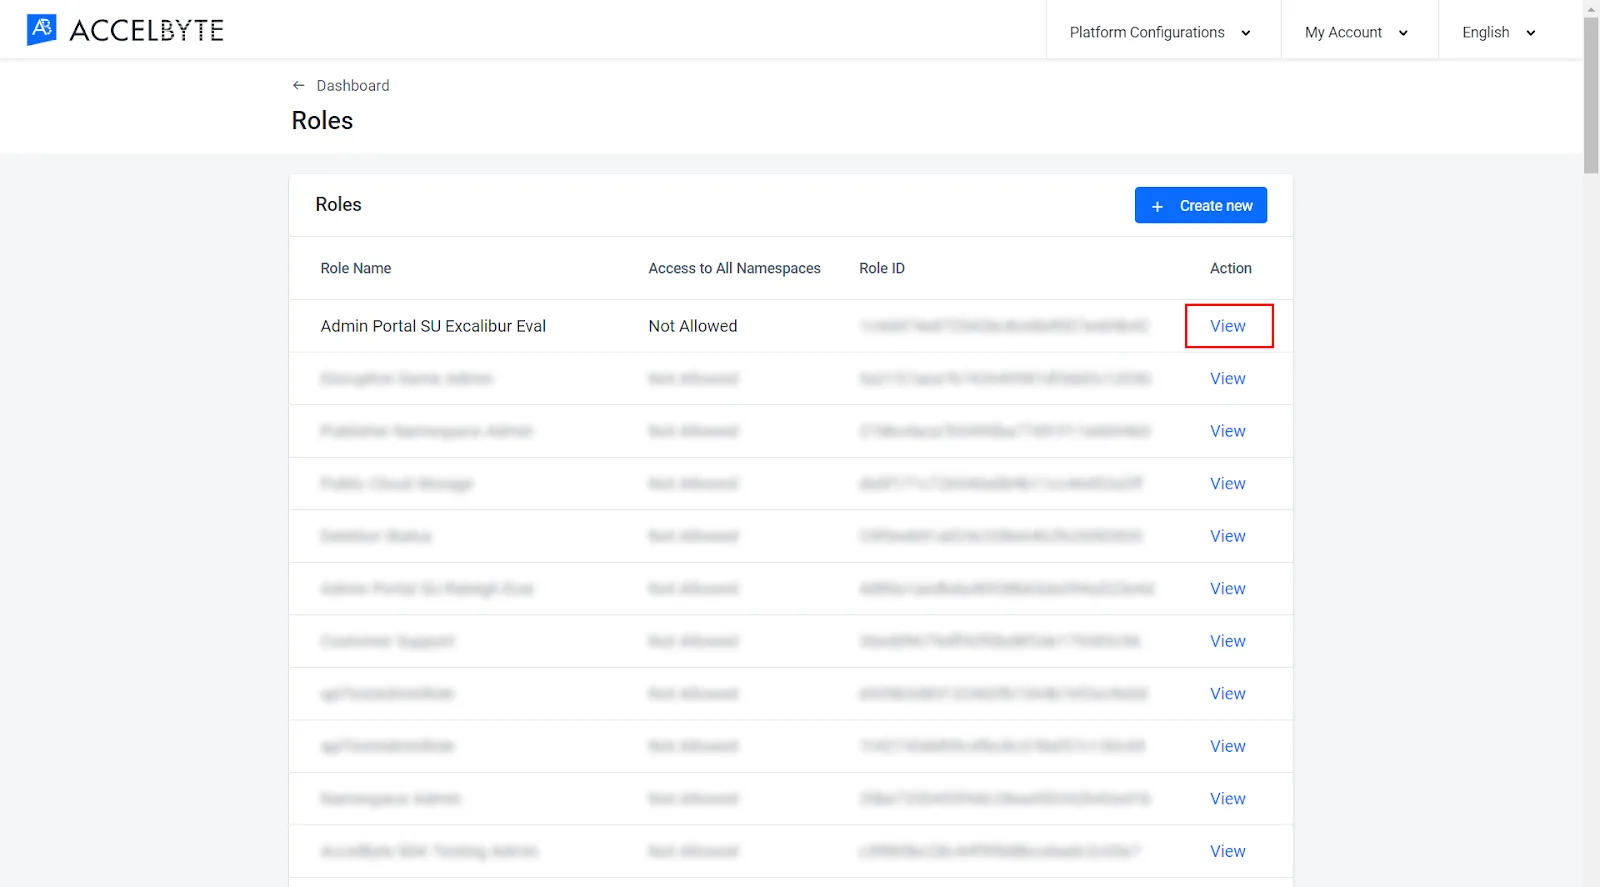
Find the role that you want to add permissions to and click View.
-
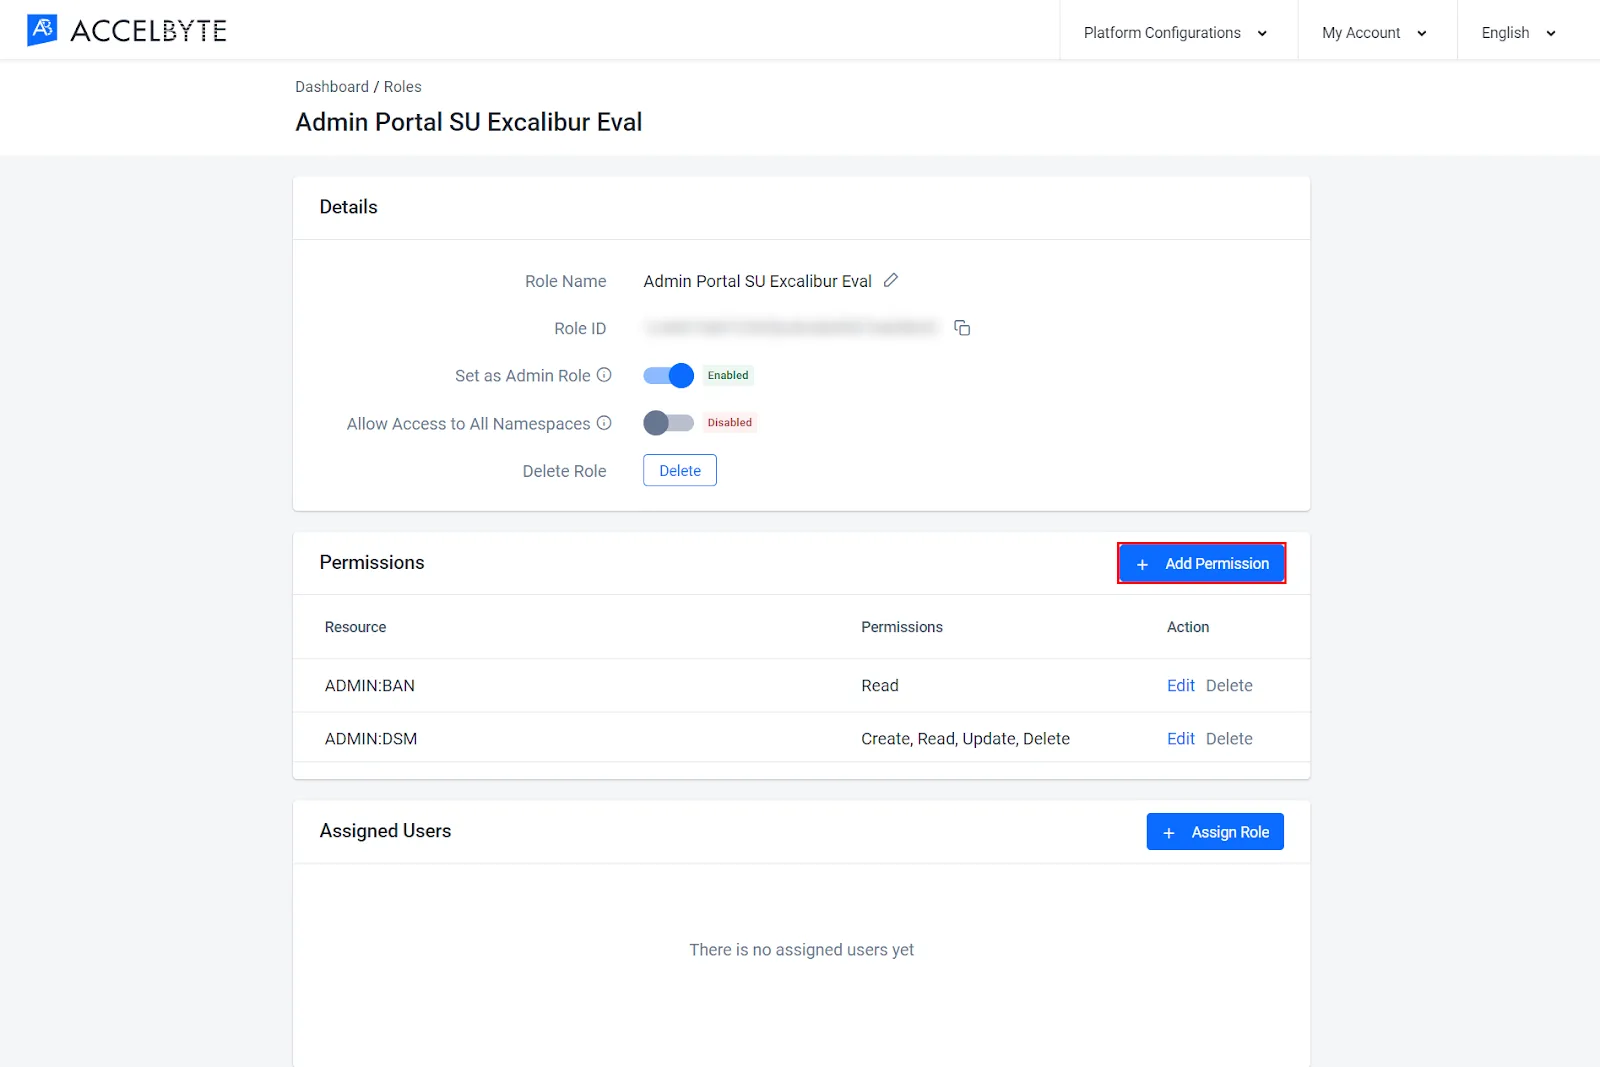
In the Permissions section of the Role page, click Add Permission.
-
On the Add Role Permission dialog, fill in its fields with the following:
- Type in a permission resource in the Resource field. A permission resource is a string containing multiple tokens that the system uses to grant access to resources.
- Select the actions the permission requires in the Action field.

-
Click Confirm. The system adds the permission to the role.
-
Find the role that you want to add permissions to. For each role, the output shows its
roleId, its name (roleName), and its current permissions (permissions).ags iam roles list --page-all --format json -
Add the permission to the role. Replace
<RoleId>with the role'sroleId,<PermissionResource>with the permission resource, and<Action>with the action value from the table below.ags iam roles add-permissions --role-id <RoleId> \
--json '{"permissions": [{"resource": "<PermissionResource>", "action": <Action>}]}'The action value is the sum of the actions that the permission allows. For example, Read and Update is
6, and all four actions is15.Admin Portal action Value Create 1Read 2Update 4Delete 8To add more than one permission at a time, add more objects to the
permissionslist, separated by commas.noteIf the role already has a permission with the same resource, the command adds the new actions to that permission and keeps its existing actions.
You've successfully added a permission to a role. You can now assign the role to a user or you can add more permissions to the role.