Assign a role to a user
Overview
This article contains information on how to use the AccelByte Gaming Services (AGS) Admin Portal or the AGS CLI to assign a role to a user. In the Admin Portal, you can do this from either the Admin Management or Roles page.
Prerequisites
- AGS Public Cloud
- AGS Private Cloud
- You have access to the Admin Portal
- You have Studio Admin or Game Admin role in your account
-
You have access to the Admin Portal and have sufficient permissions for roles management:
Usage Resource Action Create Role ADMIN:ROLECreate Add Role Permissions ADMIN:ROLEUpdate Invite User Admin ADMIN:NAMESPACE:{namespace}:USER:INVITECreate Admin Add User's Role ADMIN:NAMESPACE:{namespace}:ROLE:USER:*Update
- To follow the AGS CLI steps, you have installed the AGS CLI and signed in with an account that meets the requirements above. See Install and sign in. The examples use a Bash shell.
Assign roles to users
You can assign roles to your users from the Admin Management page and the Roles & Permissions page.
From the Admin Management page
- Admin Portal
- AGS CLI
- AGS Public Cloud
- AGS Private Cloud
-
In the Admin Portal, go to your studio namespace. Go to Admin Task > Admin Management. Find the role that you want to add permissions to and click View next to it.
-
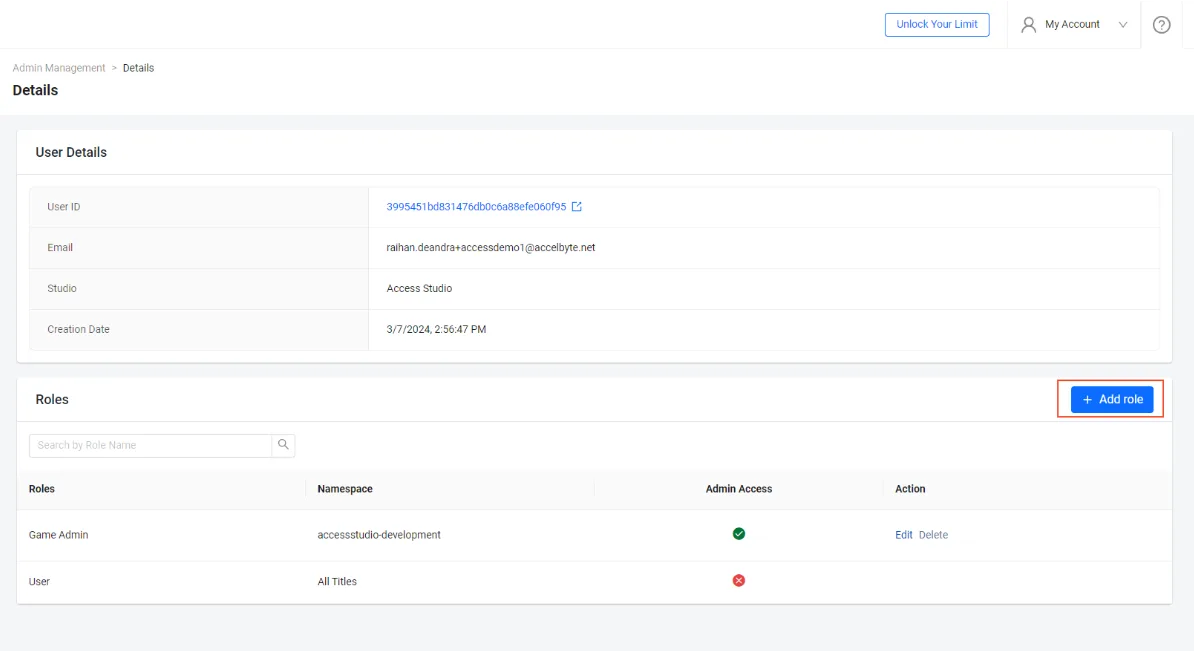
On the Details page, click Add role.
-
On the Add Role form, fill in the fields with the following information:
- In the Role field, you can select one of the following roles:
Studio Admin,Game Admin, orView only.- If the account already has one of the roles, then that role will not be shown. For example, if the account you want to change has a
Game Adminrole, then there will be two options for you:Studio AdminorView only. - If your account is granted a
Game AdminorView onlyrole, then theStudio Adminoption will not be shown.
- If the account already has one of the roles, then that role will not be shown. For example, if the account you want to change has a
- In the Namespace field, choose the game namespace(s) you want to grant to the chosen role.
- If you choose
Studio Namespace, the Game Namespace field will not be shown, as a studio namespace can access all game namespaces.
- If you choose
- In the Role field, you can select one of the following roles:
-
Click Add after you complete the form and the role on the account will be updated.
-
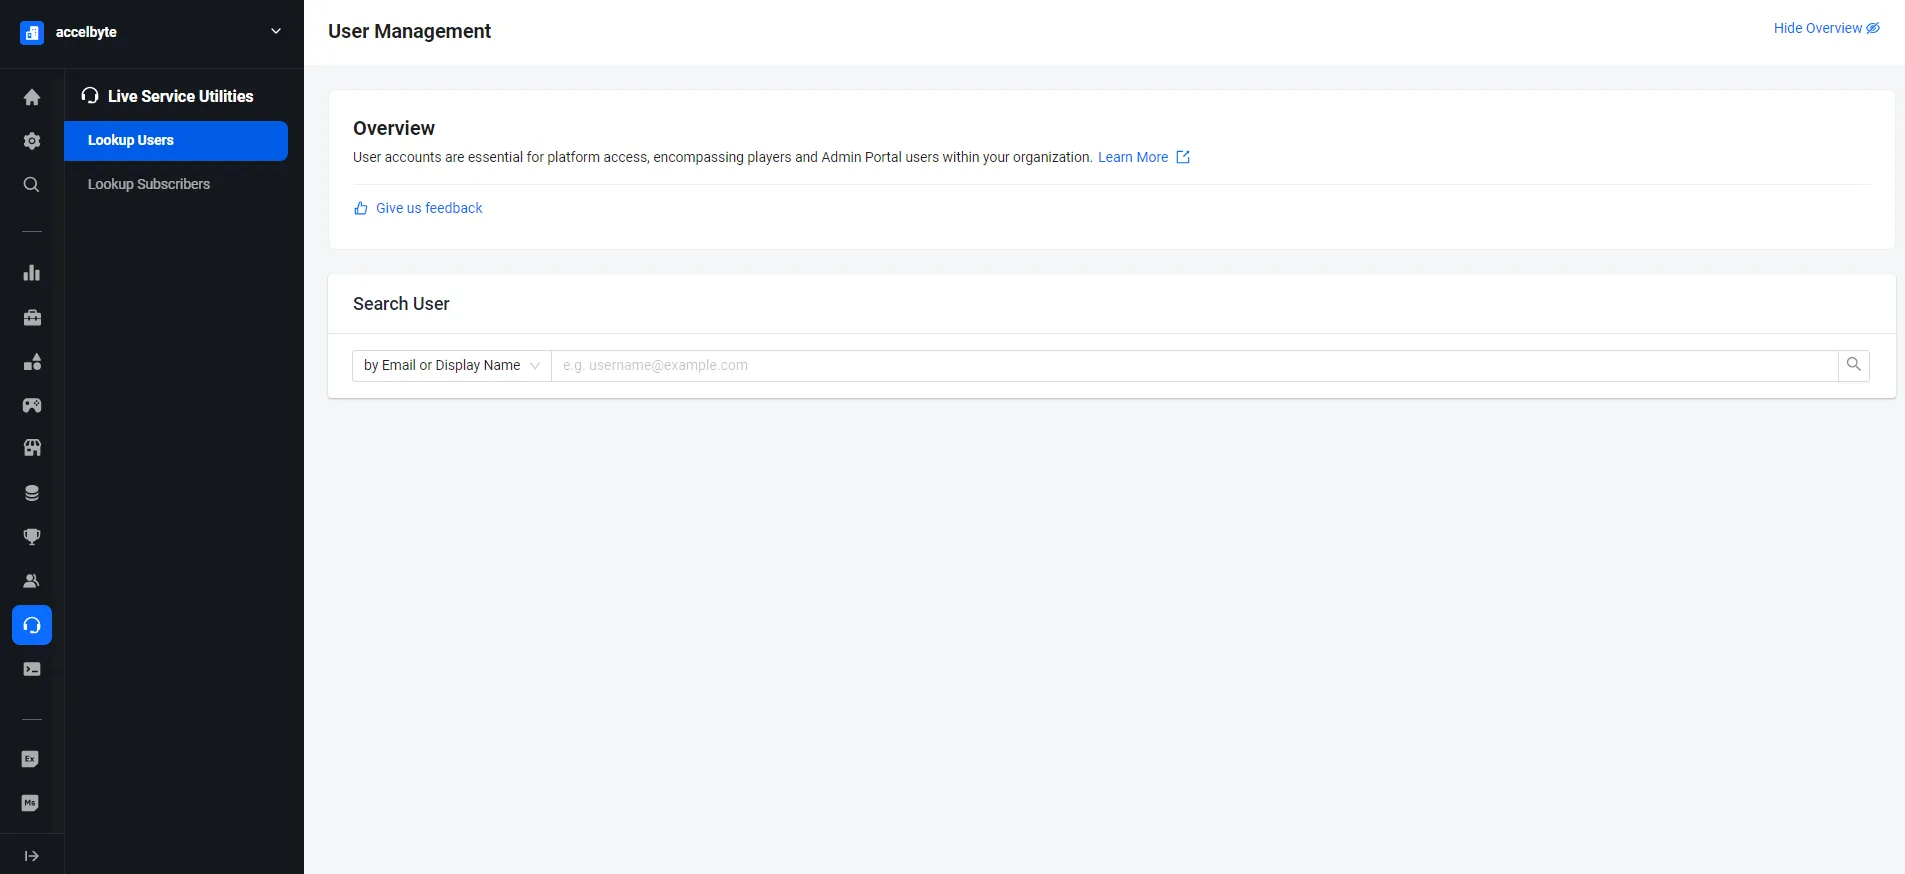
In your publisher namespace, go to Admin Task > Admin Management.
-
On the Admin Management page, search for the user account that you want to assign a role to.

-
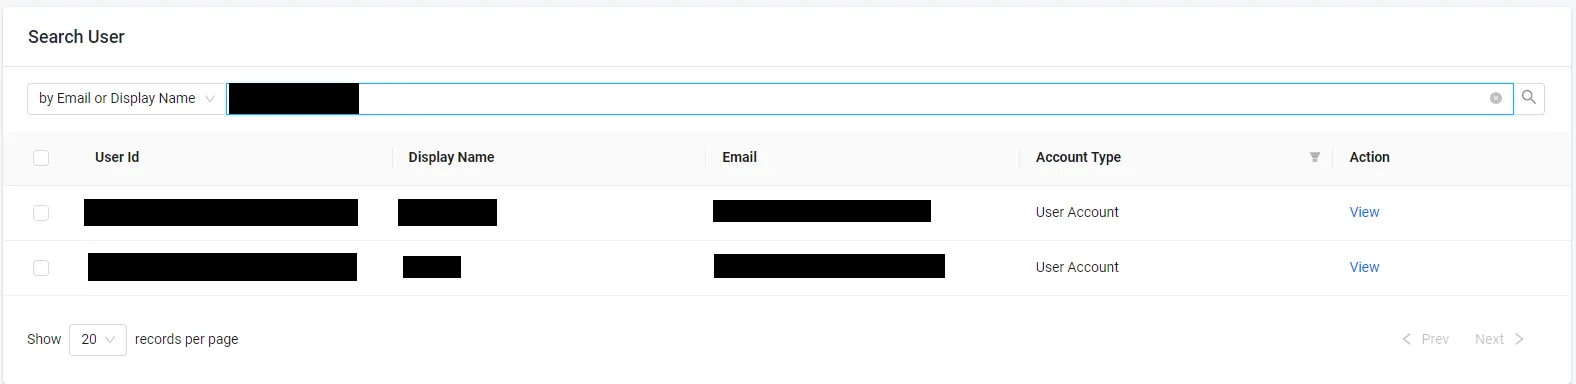
Browse the search results to find the account you're looking for and click View in the Action column of the Account Listing to open it.
-
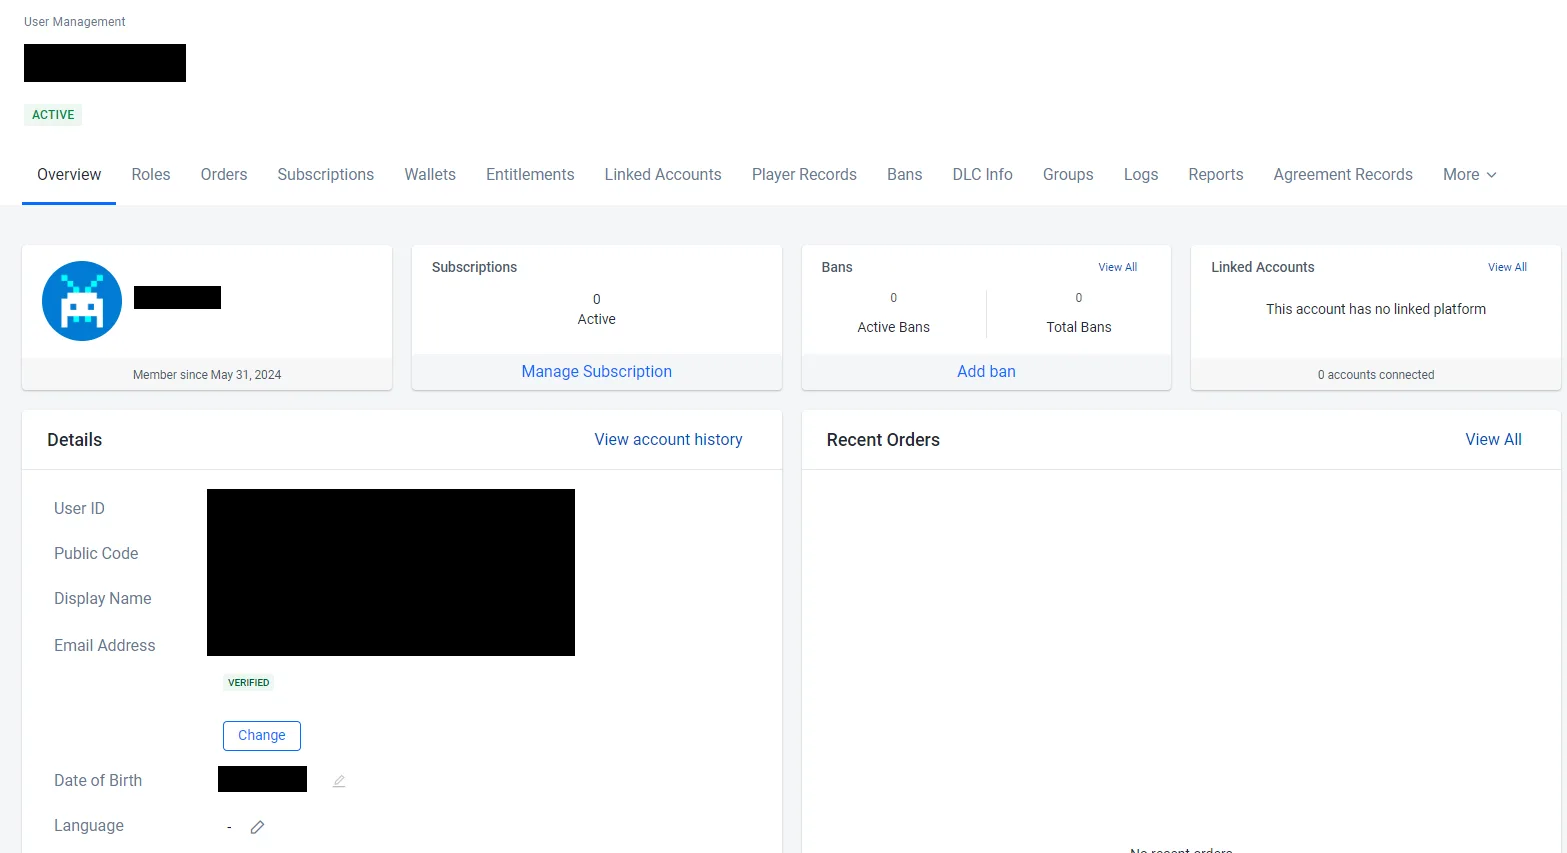
On the User Overview page, open the Roles tab at the top of the page.
-
On the Roles page, click the Add Role button.

-
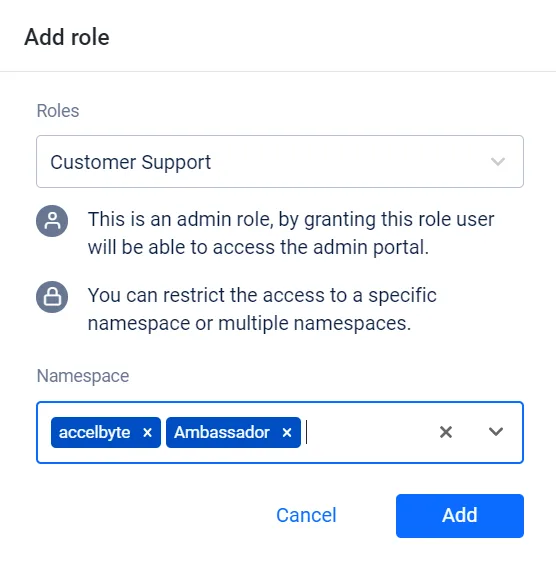
On the Add Role form, fill in the fields with the following information:The Add Role form appears. Fill in the fields with the following information:
- Select the role you want to assign to the user from the Roles dropdown menu.
- If you haven't configured the role to enable access to all namespaces, the Select Namespace field appears, where you can choose one or more namespaces. These namespaces are the only namespaces in which the user has this role. This enables you to create one role that you can use for multiple games.
-
Click Add. The system adds the role to the user.
-
Find the user that you want to assign a role to. Replace
<YourNamespace>with your studio namespace in AGS Public Cloud or your publisher namespace in AGS Private Cloud, and<UserEmail>with the user's email address. The output shows the user'suserId. If you already have the user's ID, skip this step.ags iam users get-by-email --namespace <YourNamespace> --email-address <UserEmail> --format json -
Find the ID of the role that you want to assign.
-
In AGS Public Cloud, use one of these role IDs. If you have the
Game Adminrole, assign only theGame AdminorView onlyrole, the same as in the Admin Portal.Role Role ID Studio Admin7207e5a98c744efa84770792169cfb85Game Adminf41fb7c110f5439aa6830eab1fefa3feView only4066884da46b45f689796786200184e3 -
In AGS Private Cloud, list the roles. For each role, the output shows its
roleId, its name (roleName), and whether it applies to all namespaces (isWildcard).ags iam roles list --page-all --format json
-
-
Assign the role to the user. Replace
<YourNamespace>as in step 1,<UserId>and<RoleId>with the IDs from the previous steps, and<Namespace>with the namespace where the user gets the role:-
For a role that applies to all namespaces (
isWildcardistrue), use*. -
In AGS Public Cloud, for the
Studio Adminrole, use your studio namespace. -
For any other role, use a game namespace. To add more, separate them with commas, for example
["mygame", "othergame"].ags iam users assign-role --namespace <YourNamespace> --user-id <UserId> \
--json '{"roleId": "<RoleId>", "assignedNamespaces": ["<Namespace>"]}'
If the user already has the role, the command keeps the role's current namespaces and adds the ones you list.
-
From the Roles & Permissions page
This option is only available in AGS Private Cloud tier.
- Admin Portal
- AGS CLI
-
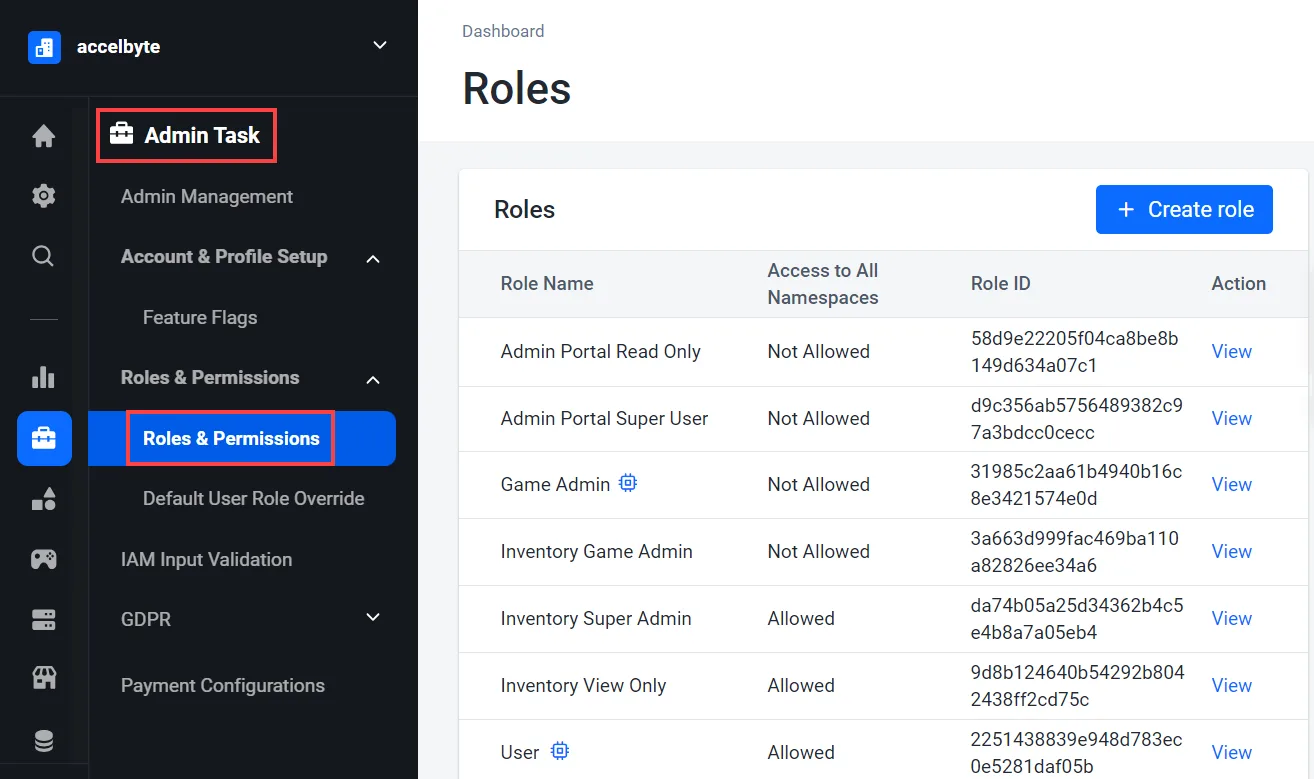
On the Admin Portal sidebar, go to Admin Task > Roles & Permissions.
-
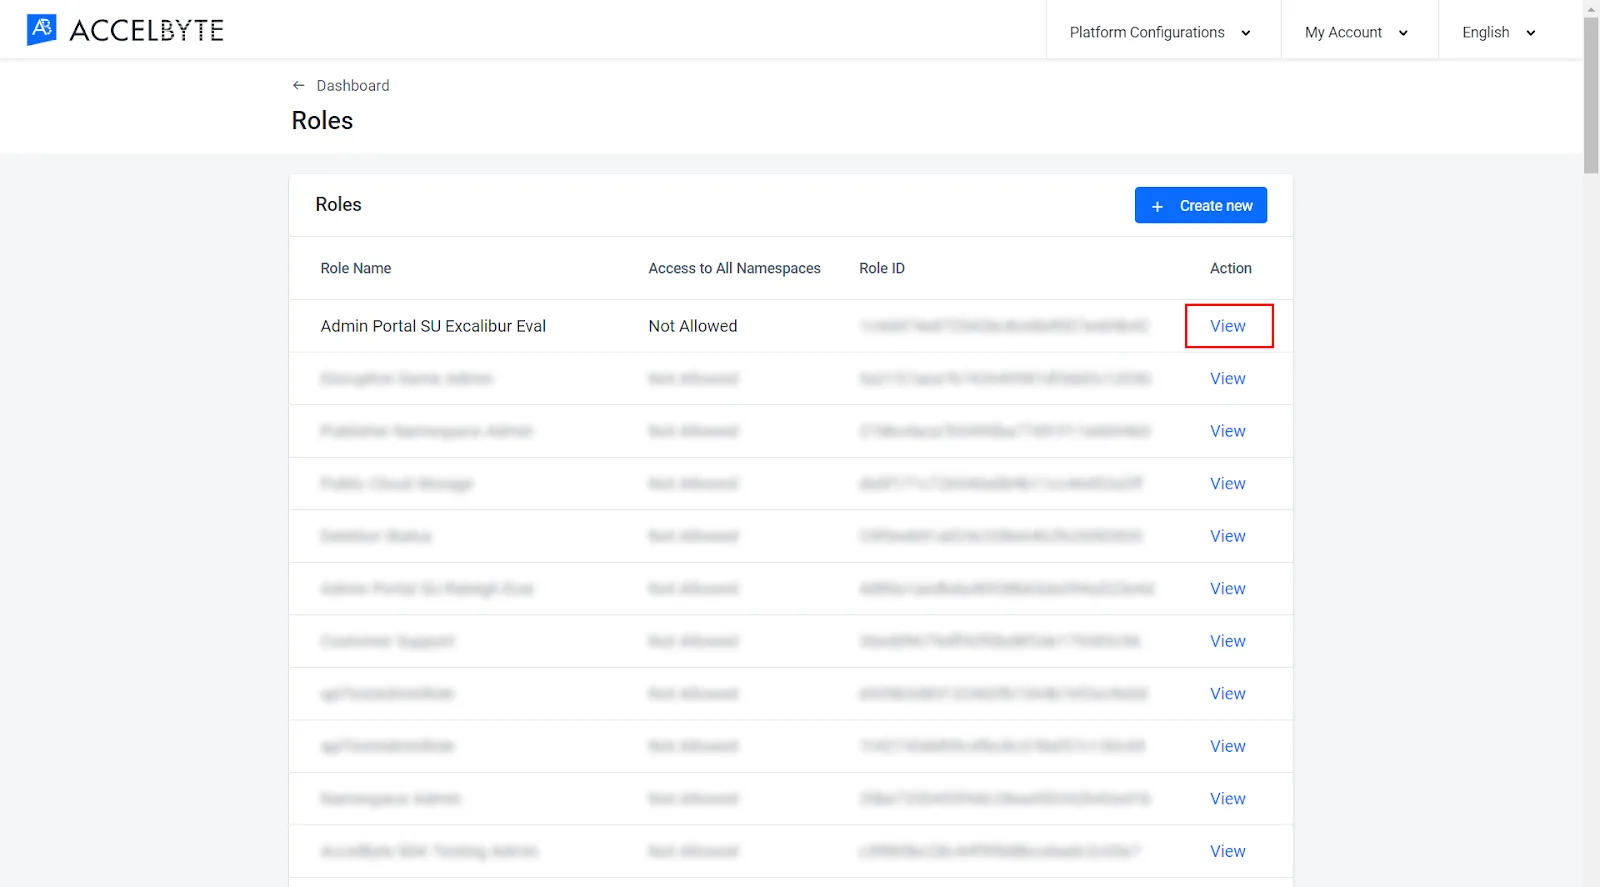
Click View next to the Role that you want to assign users to.
-
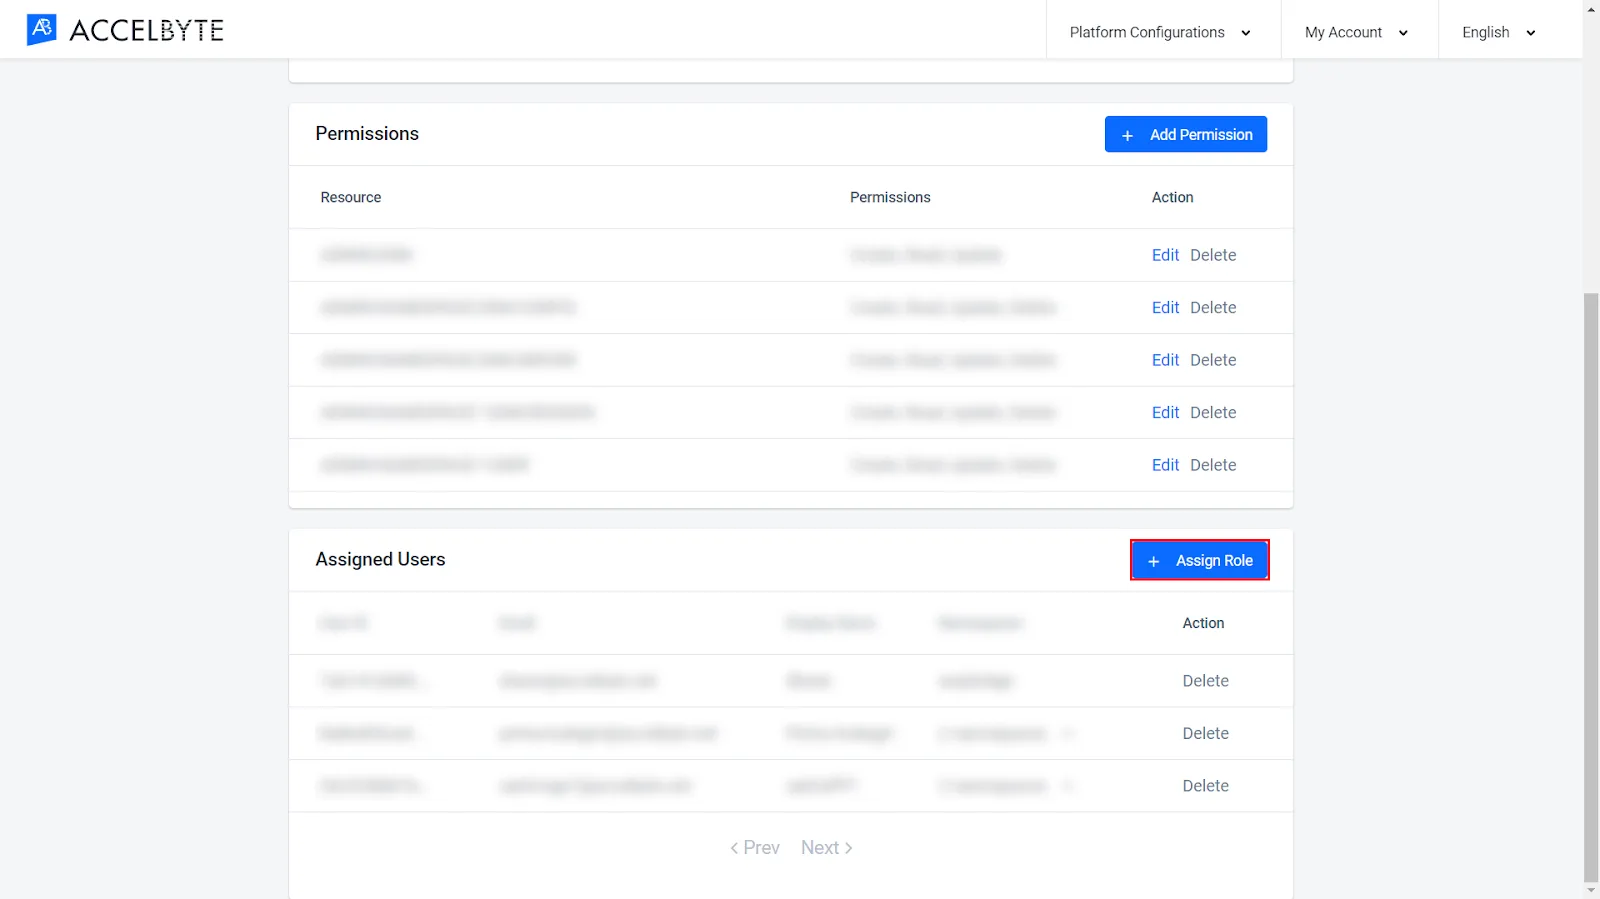
Click the Assign Role button in the Assigned Users section of the page.
-
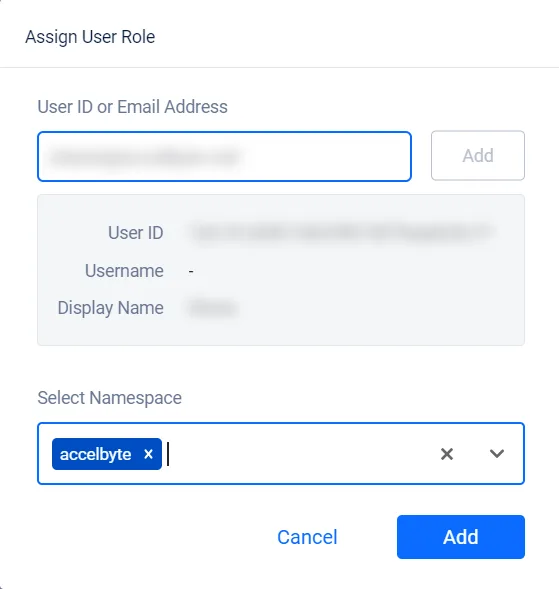
On the Assign User Role form, fill in the fields with the following information:
- In the User ID or Email Address field, type in the ID or email address of the user you want to assign the role to.
- If you haven't configured the role to enable access to all namespaces, the Select Namespace field appears, where you can choose one or more namespaces. These namespaces are the only ones in which the user has this role. This enables you to create one role that you can use for multiple games.
-
Click Add. The system assigns the user to the role.
The AGS CLI steps are the same as in From the Admin Management page, because the CLI doesn't depend on which Admin Portal page you start from.