Override default user role permissions
Overview
You can override default user role permissions in AccelByte Gaming Services (AGS) by enabling or disabling the predefined actions (i.e., View, Create, Update, or Delete) assigned to them.
Default user role permissions come with predefined actions. Actions that are not predefined cannot be added to these permissions. For example, the NAMESPACE:{namespace}:USER:{userId}:* permission includes only the View and Update actions. You can enable or disable these predefined actions, but you cannot add new actions like Create or Delete.
The override applies at the namespace level, means the changes you make are scoped to the specific namespace where they are configured and do not affect other namespaces.
This article walks you through how to override default user role permissions in the AGS Admin Portal.
In AGS Shared Cloud, you can also use this feature to grant custom permissions to your players, allowing them to invoke Custom APIs exposed by your Extend App, refer to Add custom permission section for more details.
Prerequisites
- AGS Shared Cloud
- AGS Private Cloud
- You have access to the Admin Portal
-
You have access to the Admin Portal and have sufficient permissions for roles override management:
Usage Resource Action Get Role Information ADMIN:ROLERead Get Overridden User Permissions ADMIN:NAMESPACE:{namespace}:ROLE:OVERRIDERead Override User Permissions ADMIN:NAMESPACE:{namespace}:ROLE:OVERRIDEUpdate
Activate default user role override
Activating the Default User Role Override feature applies the override changes you've made to default user role permissions in your namespace. You can activate the feature in the following scenarios:
- Activate before overriding permissions: Turn on the feature before modifying permissions. This ensures your changes take effect immediately after you save them.
- Override permissions before activating: Update the permissions you want to override, then activate the feature to apply those updates.
If you don't want to apply the overridden permissions, deactivate the feature. This makes your namespace to use the permissions in their default state. You can reactivate the feature later to reapply your changes.
To activate the Default User Role Override feature, follow these steps:
-
On the Admin Portal sidebar, go to your namespace.
-
On the sidebar, go to Identity & Access > Default User Role Override.
-
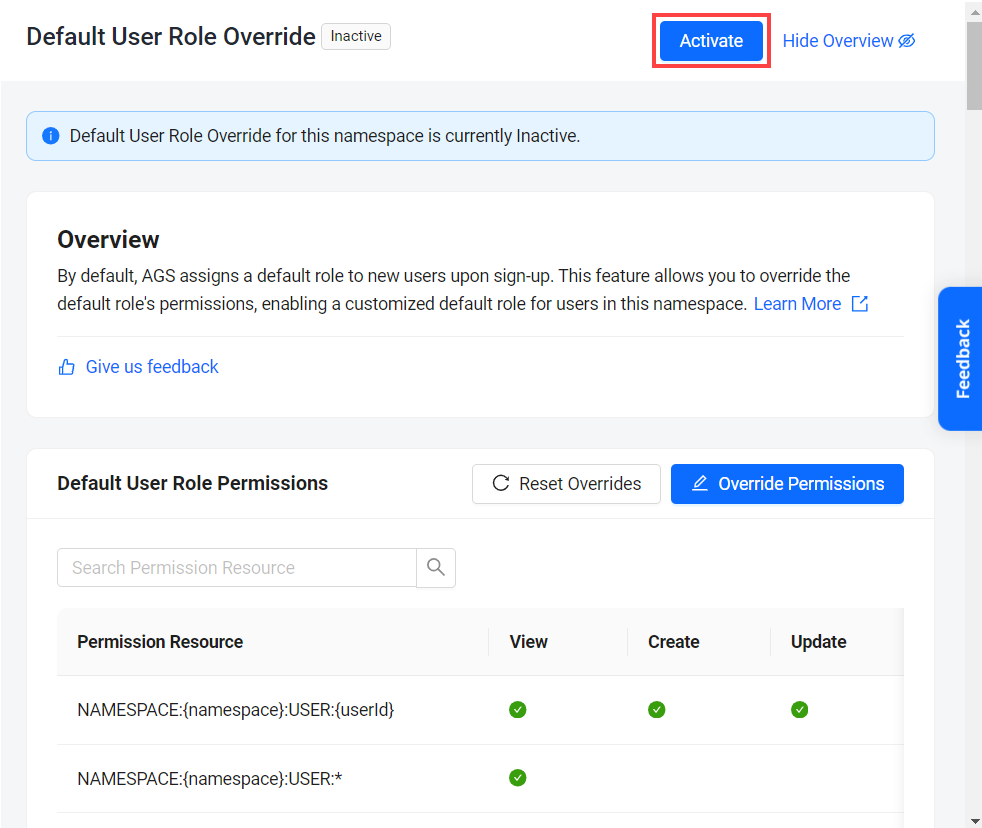
At the top of the Default User Role Override page, click on Activate and then click on Confirm on the confirmation message.
Override default user role permissions
-
On the Admin Portal sidebar, go to your namespace.
-
On the sidebar, go to Identity & Access > Default User Role Override.
-
On the Default User Role Override page, click on the Override Permissions button. The Override Permissions page appears.

-
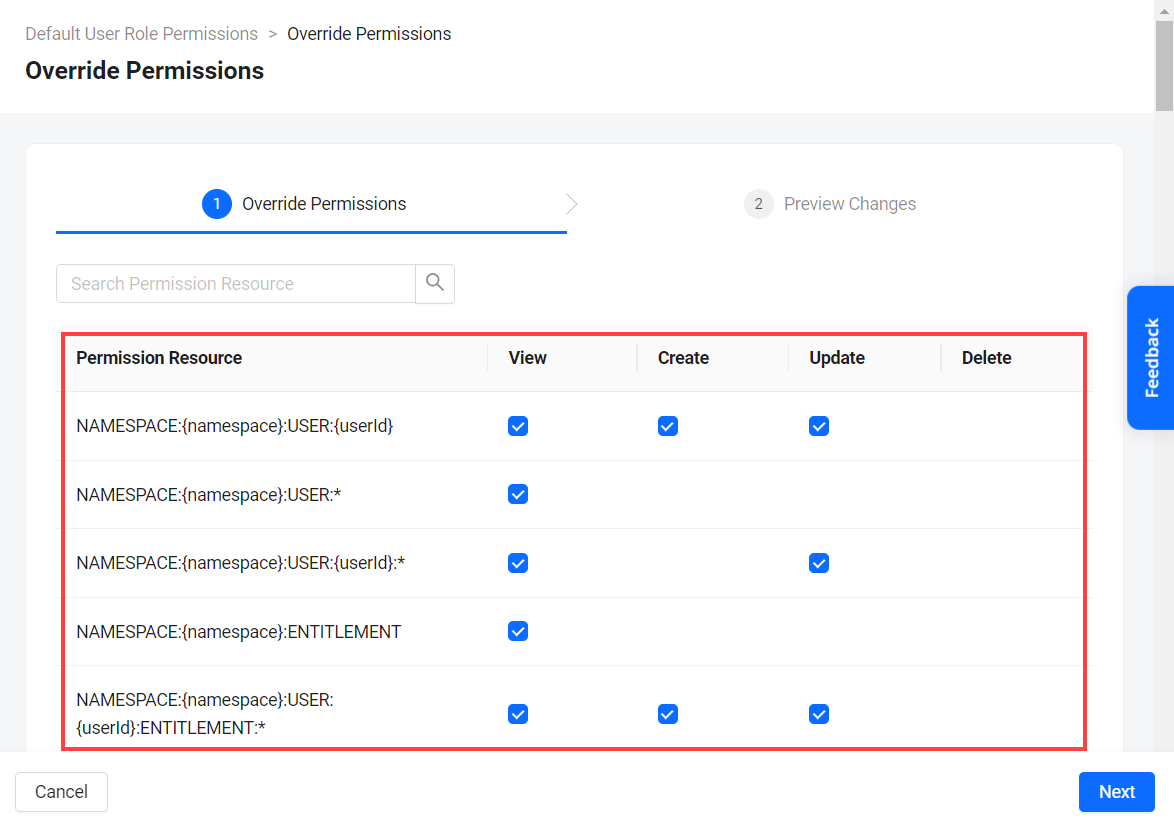
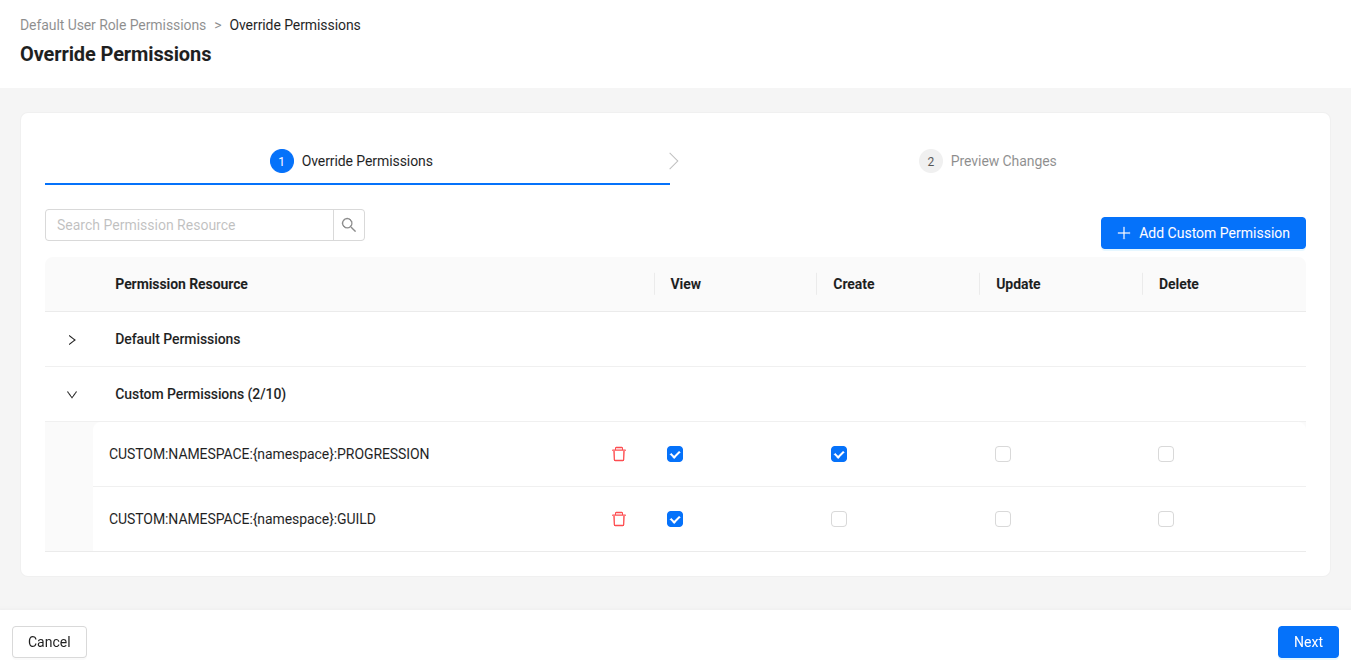
From the list of default user role permissions, locate the permissions you want to override. Then, enable or disable their designated actions by checking or unchecking the corresponding checkboxes.
-
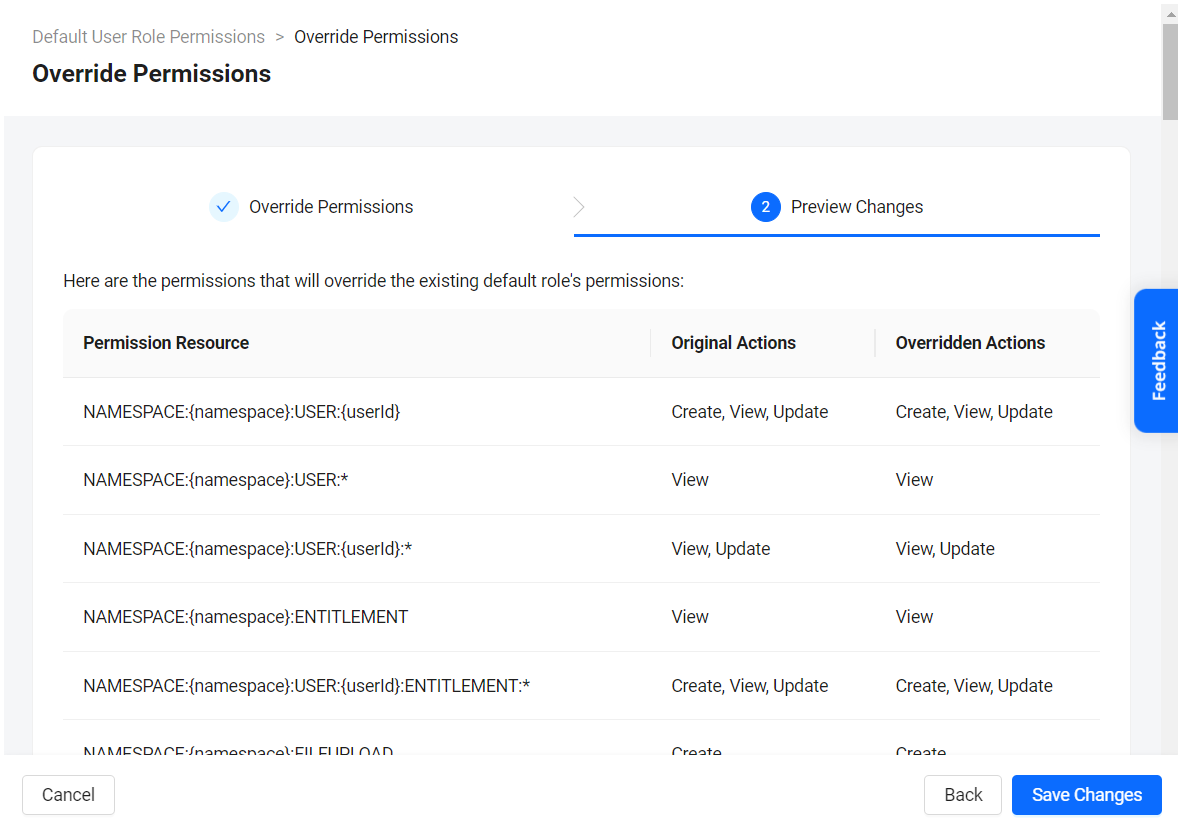
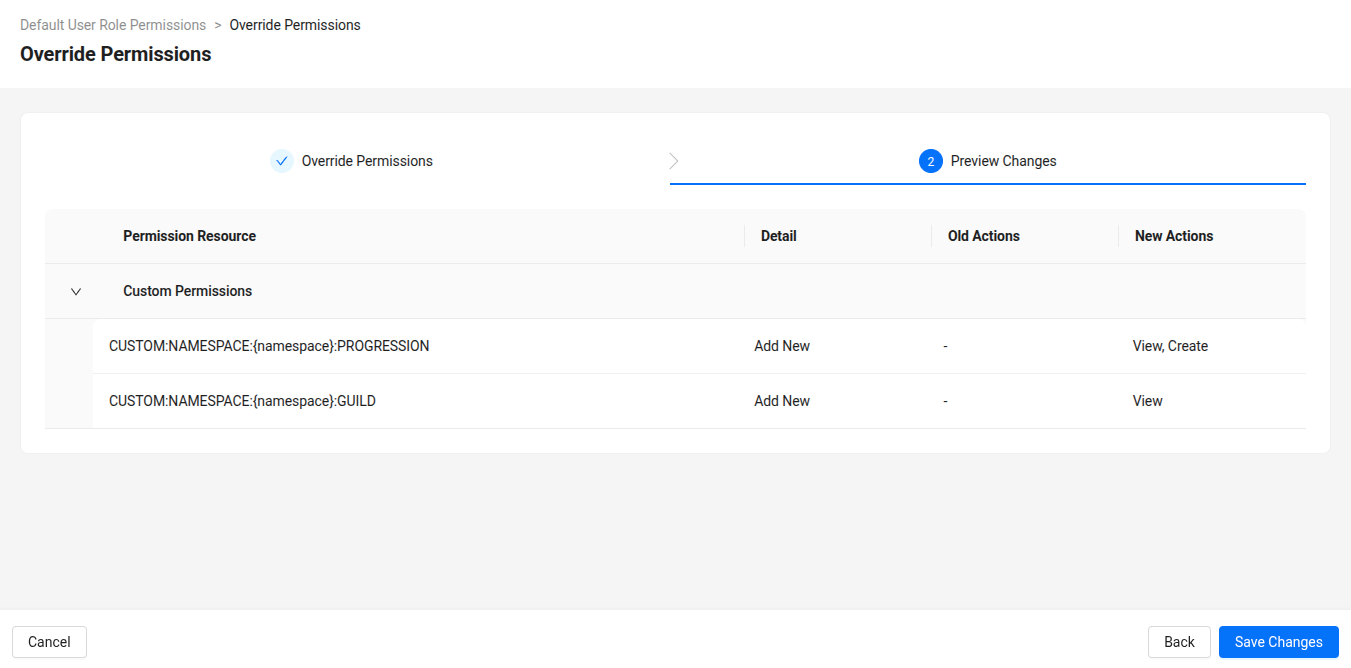
Click Next to preview the changes and then click Save Changes.
The changes will take effect based on whether or not you have activated the Default User Role Override feature. For more information, refer to Activate default user role override.
Add custom permission
This section is only applicable to AGS Shared Cloud customers.
You can use this feature to grant custom permissions to your players, allowing them to invoke Custom APIs exposed by your Extend App directly from the Game Client.
The custom permissions in AGS Shared Cloud must follow the predefined format, see Custom permissions in Shared Cloud for more details.
Limitation: You can add up to 10 custom permissions per namespace in the User Role Override feature. This hard limit is in place to prevent spam and misuse. If you require more, please contact AccelByte Support.
-
On the Default User Role Override page, click on the Override Permissions button.
-
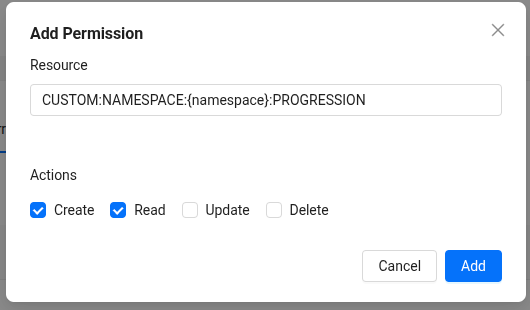
Click the Add Custom Permission button. The popup modal appears:
-
In the Resource field, the prefix should be filled based on the custom permission format (i.e.
CUSTOM:NAMESPACE:{namespace}:for public endpoints, orCUSTOM:ADMIN:NAMESPACE:{namespace}:for admin endpoints), then append the rest of your resource name after the prefix.For example:
CUSTOM:NAMESPACE:{namespace}:PROGRESSION -
Select the Actions (Create, Read, Update, Delete) you want to enable for this permission.
-
Click Add button to add the permission, you can review your custom permissions in the Custom Permissions section.
-
-
Click Next to preview the changes and then click Save Changes.
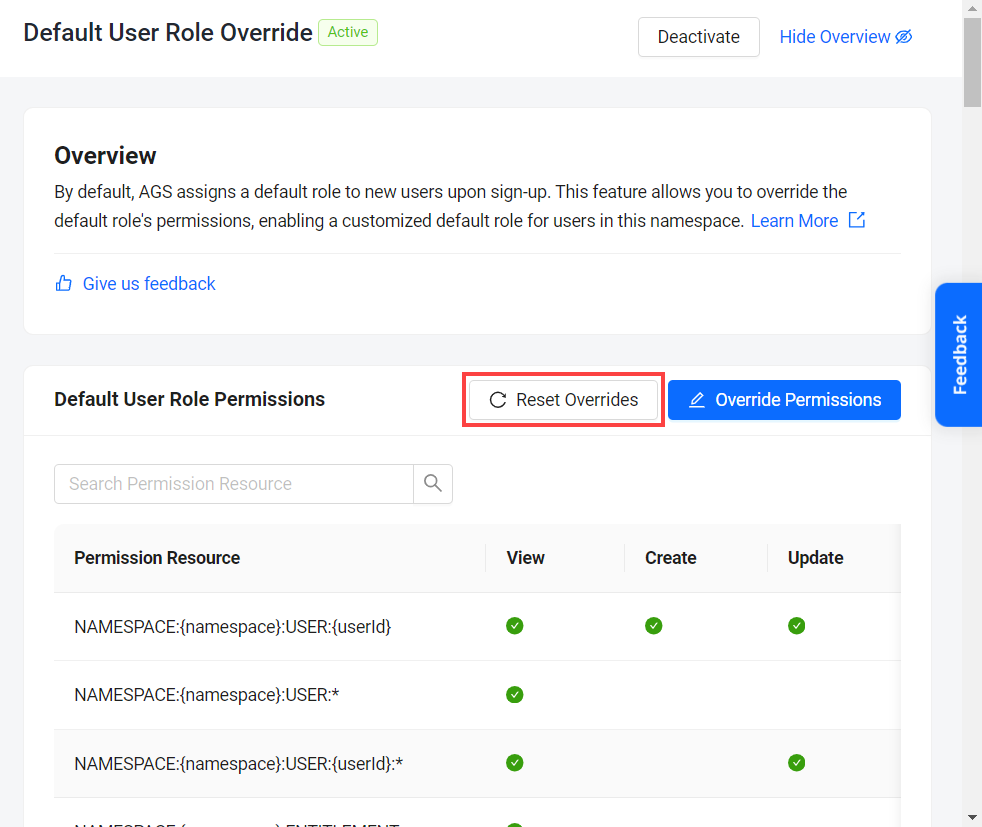
Reset overridden default user role permissions
To reset user role permissions to their default state and undo any previous overrides, follow these steps:
-
On the Default User Role Override page, click on the Reset Override button
-
Confirm the action by clicking Confirm in the confirmation message.
The changes will take effect based on whether or not you have activated the Default User Role Override feature. For more information, refer to Activate default user role override.