Create and manage custom profanity filters
Overview
You can create custom profanity filters on the AccelByte Gaming Services (AGS) Admin Portal and use an Extend App you've configured or your own custom server.
Prerequisite
You have created and configured a designated profanity filter Extend App or set up your own custom server.
Add a custom filter
In the AGS Admin Portal, go to your game namespace.
On the sidebar menu, click on Game Setup and go to Profanity Filter > Customizations.
On the Customizations page, click on the Add Custom Filter button.
On the Add Custom Filter form, type in a name for the new custom filter and add a description (optional) for the new custom filter.
In the Hosting section, do one of the following:
- Select AccelByte Hosted to use an Extend app you've configured. From the Extend app dropdown, select the Extend app you have configured as your profanity filter.
- Select Locally Hosted to use your own custom server. Then, add the address of your custom server into the Host/Port text box.
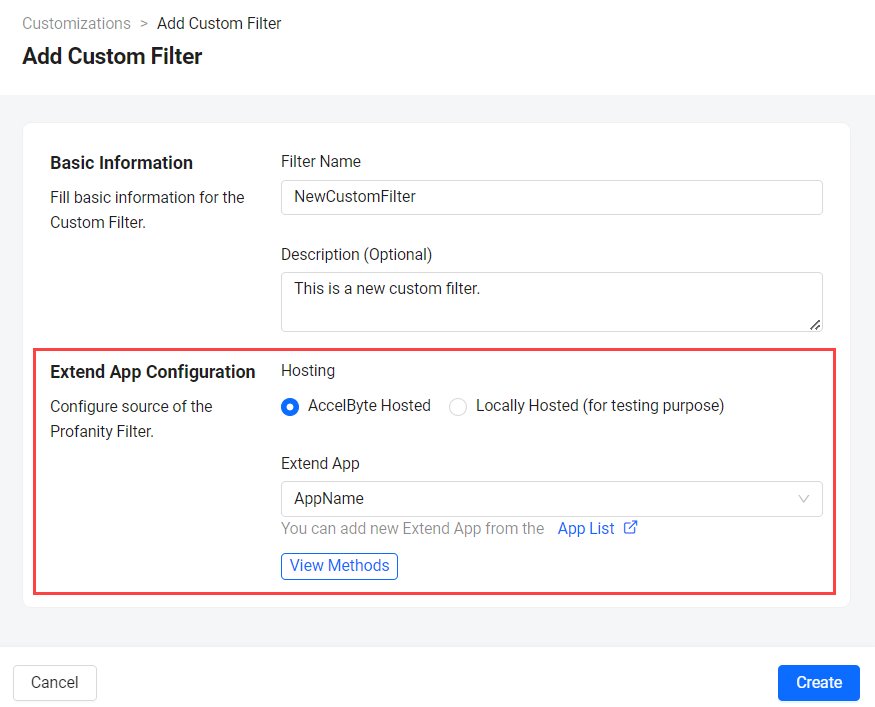 tip
tipIf you selected an Extend app, click on the View methods option below the dropdown to display the app's exposed methods and supported features.
Click Add to finish creating your new custom filter. It will be added to the Customization
View and edit a custom filter
You can edit the description and hosting method of a custom filter. To do so, follow these steps:
From the Custom Filters list on the Customizations page, find the custom filter you want to edit and remove.
On the corresponding Action column of the filter, click on View. The details page of the filter appears.
Click on Edit.
Edit the custom filter as needed.
Click Save.
Delete a custom filter
From the Custom Filters list on the Customizations page, find the custom filter you want to edit and remove.
You can delete a custom filter in two ways:
- Click on the filter's corresponding Delete option. Type DELETE on the confirmation message that appears and click on Confirm.
- Click on the filter's corresponding View option. On the top-right side of the filter's details page, click on the Delete button.
A confirmation message appears.
Type DELETE on the confirmation message and click on Confirm. The custom filter is immediately deleted from the list.
Next step
After creating custom profanity filters, you can activate the profanity filter feature in your namespace to use for validation. See Activate profanity filter for validation.