Create a Snowflake connector
Introduction
You can create and configure a Snowflake connector in the AccelByte Gaming Services (AGS) Admin Portal to ensure seamless integration between your data streaming workflows and Amazon Snowflake.
Prerequisites
- Access to the AGS Admin Portal.
- You have created roles, users with necessary privileges, and databases in Snowflake. See Configure Snowflake permission setup to learn how. This ensures that the Snowflake connector has the required permissions to access your Snowflake data.
Create a Snowflake connector
-
On the Admin Portal sidebar, go to ADD-ONS > AIS > Data Connector.
 note
noteIf you are using the Shared Cloud, access the connector page by navigating to Analytics > Data Connector on the sidebar.

-
On the Data Connector page, click the Create Connector button. The Create Connector page appears.
-
In the General Configuration section, fill in the required information:
-
Platform: select Snowflake from the dropdown.
-
Connector Name: type in a name for the connector. Note that after the connector is created, a randomized set of numbers will be added at the end of the name your provided, which will be preceded by a dash. For example, "AAAConnect" will be "AAAConnect-123456" after the connector is created.
-
Snowflake Account ID: add your Snowflake Account ID. Your account ID is the prefix before the ``http://snowflakecomputing.com` in your Snowflake account URL. For example, if your Snowflake URL is
rsa42644.us-east-1.snowflakecomputing.com, then your account ID isrsa42644.us-east-1. -
DB Username: type in your username in Snowflake to authenticate the connector with the database.
-
Database Name: type in the name of the Snowflake database.
-
Schema: type in the name of the Snowflake schema.
-
Table Model: choose how the table will be created. Choose between:
- Single: all events will be inserted into one table based on the event type.
- Example topics:
analytics_game_telemetry.dev.lightfantastic.gameStartedanalytics_game_telemetry.dev.lightfantastic.gameEnded
- Expected table (only have one table with table format, which is
schema.table_name):public.game_telemetry_dev
- Example topics:
- Mapping: events will be inserted into multiple tables based on the topics.
- Example topics:
analytics_game_telemetry.dev.lightfantastic.gameStartedanalytics_game_telemetry.dev.lightfantastic.gameEnded
- Expected table:
analytics_game_telemetry_dev_lightfantastic_gamestartedanalytics_game_telemetry_dev_lightfantastic_gameended
- Example topics:
- Single: all events will be inserted into one table based on the event type.
-
Table Name Format: choose how the table name will be created (Only works with table model mapping). Choose between:
- Topic: the topic name will be the table name.
- Example topics:
analytics_game_telemetry.dev.lightfantastic.gameStartedanalytics_game_telemetry.dev.lightfantastic.gameEnded
- Expected table:
analytics_game_telemetry_dev_lightfantastic_gameStartedanalytics_game_telemetry_dev_lightfantastic_gameEnded
- Example topics:
- Event: the event name will be the table name.
- Example topics:
analytics_game_telemetry.dev.lightfantastic.gameStartedanalytics_game_telemetry.dev.lightfantastic.gameEnded
- Expected table:
gameStartedgameEnded
- Example topics:
- Topic: the topic name will be the table name.
-
Flatten Column: choose how the column is created (Only works with table model mapping). Choose between:
-
False (recommended for better performance): all events will be inserted into one column.
-
Example event:
{
    "EventNamespace": "lightfantastic",
    "EventTimestamp": "2023-07-20T03:30:00.036483Z",
    "EventId": "d110582c54804a29ab1d95650ca4c644",
    "Payload": {
        "winning": true,
        "hero": "Captain America",
        "kill": 9,
        "network": 912.27,
        "item": [
        {
            "name": "vibranium shield",
            "defense": 10,
            "attack": 1
        },
        {
            "name": "mjolnir hammer",
            "defense": 1,
            "attack": 9
        }
        ]
    },
    "EventName": "gameEnded"
} -
Expected column:
event {"EventNamespace":"accelbyte","EventTimestamp":"2023-07-20T03:30:00.036483Z","EventId":"d110582c54804a29ab1d95650ca4c644","Payload":{"winning":true,"hero":"Captain America","kill":9,"network":912.27,"item":[{"name":"vibranium shield","defense":10,"attack":1},{"name":"mjolnir hammer","defense":1,"attack":9}]},"EventName":"gameEnded"}
-
-
True: all events will be inserted into multiple columns, based on event property.
-
Example event:
{
    "EventNamespace": "lightfantastic",
    "EventTimestamp": "2023-07-20T03:30:00.036483Z",
    "EventId": "d110582c54804a29ab1d95650ca4c644",
    "Payload": {
        "winning": true,
        "hero": "Captain America",
        "kill": 9,
        "network": 912.27,
        "item": [
        {
            "name": "vibranium shield",
            "defense": 10,
            "attack": 1
        },
        {
            "name": "mjolnir hammer",
            "defense": 1,
            "attack": 9
        }
        ]
    },
    "EventName": "gameEnded"
} -
Expected column:
eventid eventnamespace eventtimestamp eventname payload d110582c54804a29ab1d95650ca4c644 accelbyte 2023-07-20T03:30:00.036483Z gameEnded {"winning":true,"hero":"Captain America","kill":9,"network":912.27,"item":[{"name":"vibranium shield","defense":10,"attack":1},{"name":"mjolnir hammer","defense":1,"attack":9}]
-
-
-
Flush Interval: set the maximum time interval in milliseconds in which the data will be periodically written into Snowflake. The flush interval range is between one and 5 minutes.
-
Flush Size: set the maximum number of events that will be written into Snowflake. The flush size range is between 100 and 1000.
-
Flush Memory: set the maximum memory size in kilobytes that will be used to store the data before it is written into Snowflake. The flush memory range is between 100 and 1000 KB.
noteData will be sent depending on which condition is reached first between a flush interval, flush size, or flush memory.
-
-
Click Next to go to the Data Filtering section.
-
In the Data Filtering section, fill in the required information:
- Event: choose which event type will be the source:
- Game Telemetry: Custom telemetry events that are sent from game clients (Custom Telemetry).
- AccelByte Event: System-generated events from AccelByte services (Service Telemetry).
- Filter: click the Add Filter button. The Add Filter pop-up form appears. You can add specific namespaces that you want to stream from the source services. You can also select all namespaces. This ensures only relevant data is transferred. Click Add to create and save the filter.
- Event: choose which event type will be the source:
-
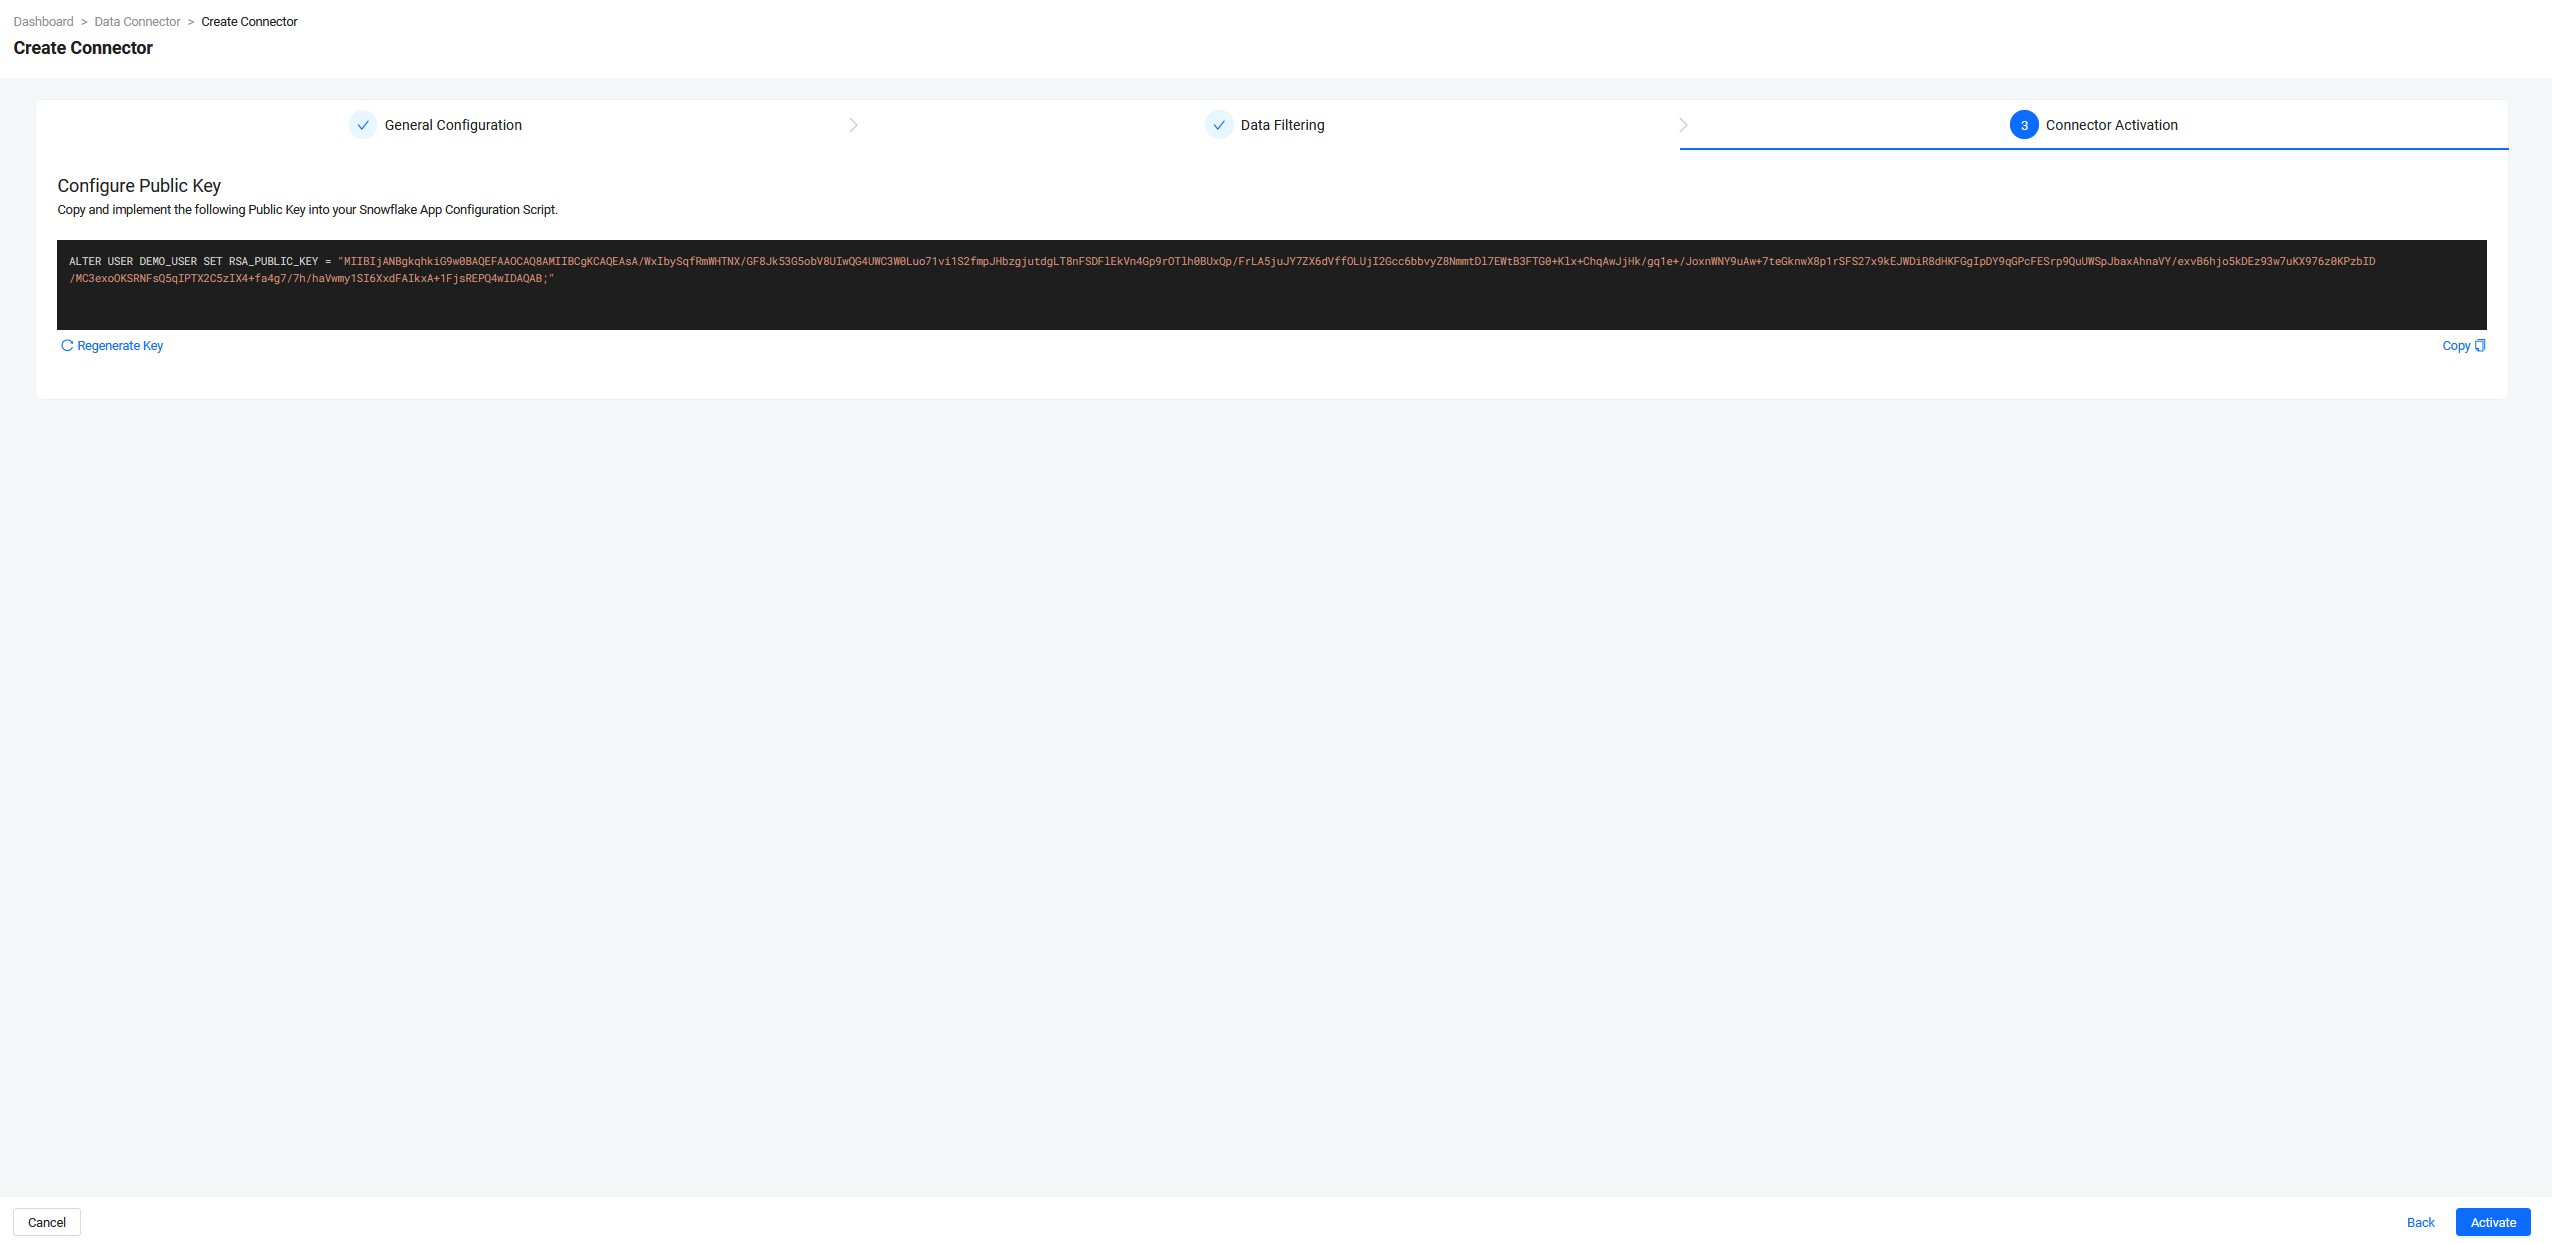
Click Next to go to the Connector Activation section. In the section, you will see a query with a public key that you can use to set the public key in Snowflake.

-
Copy the command. Then, in Snowflake, execute the command to set the RSA_PUBLIC_KEY. You also have the option to regenerate the key,
important- Ensure that you implement the policy before clicking Activate in this section. Otherwise, the connector will fail to activate.
- If you don't want to activate the connector yet, you have the option to save it as a draft. Without setting the public key in your Snowflake account, click Activate. An error message will appear, stating that the connection failed. Click on Do It Later to save the connector as a draft. You can activate it at a later time.
-
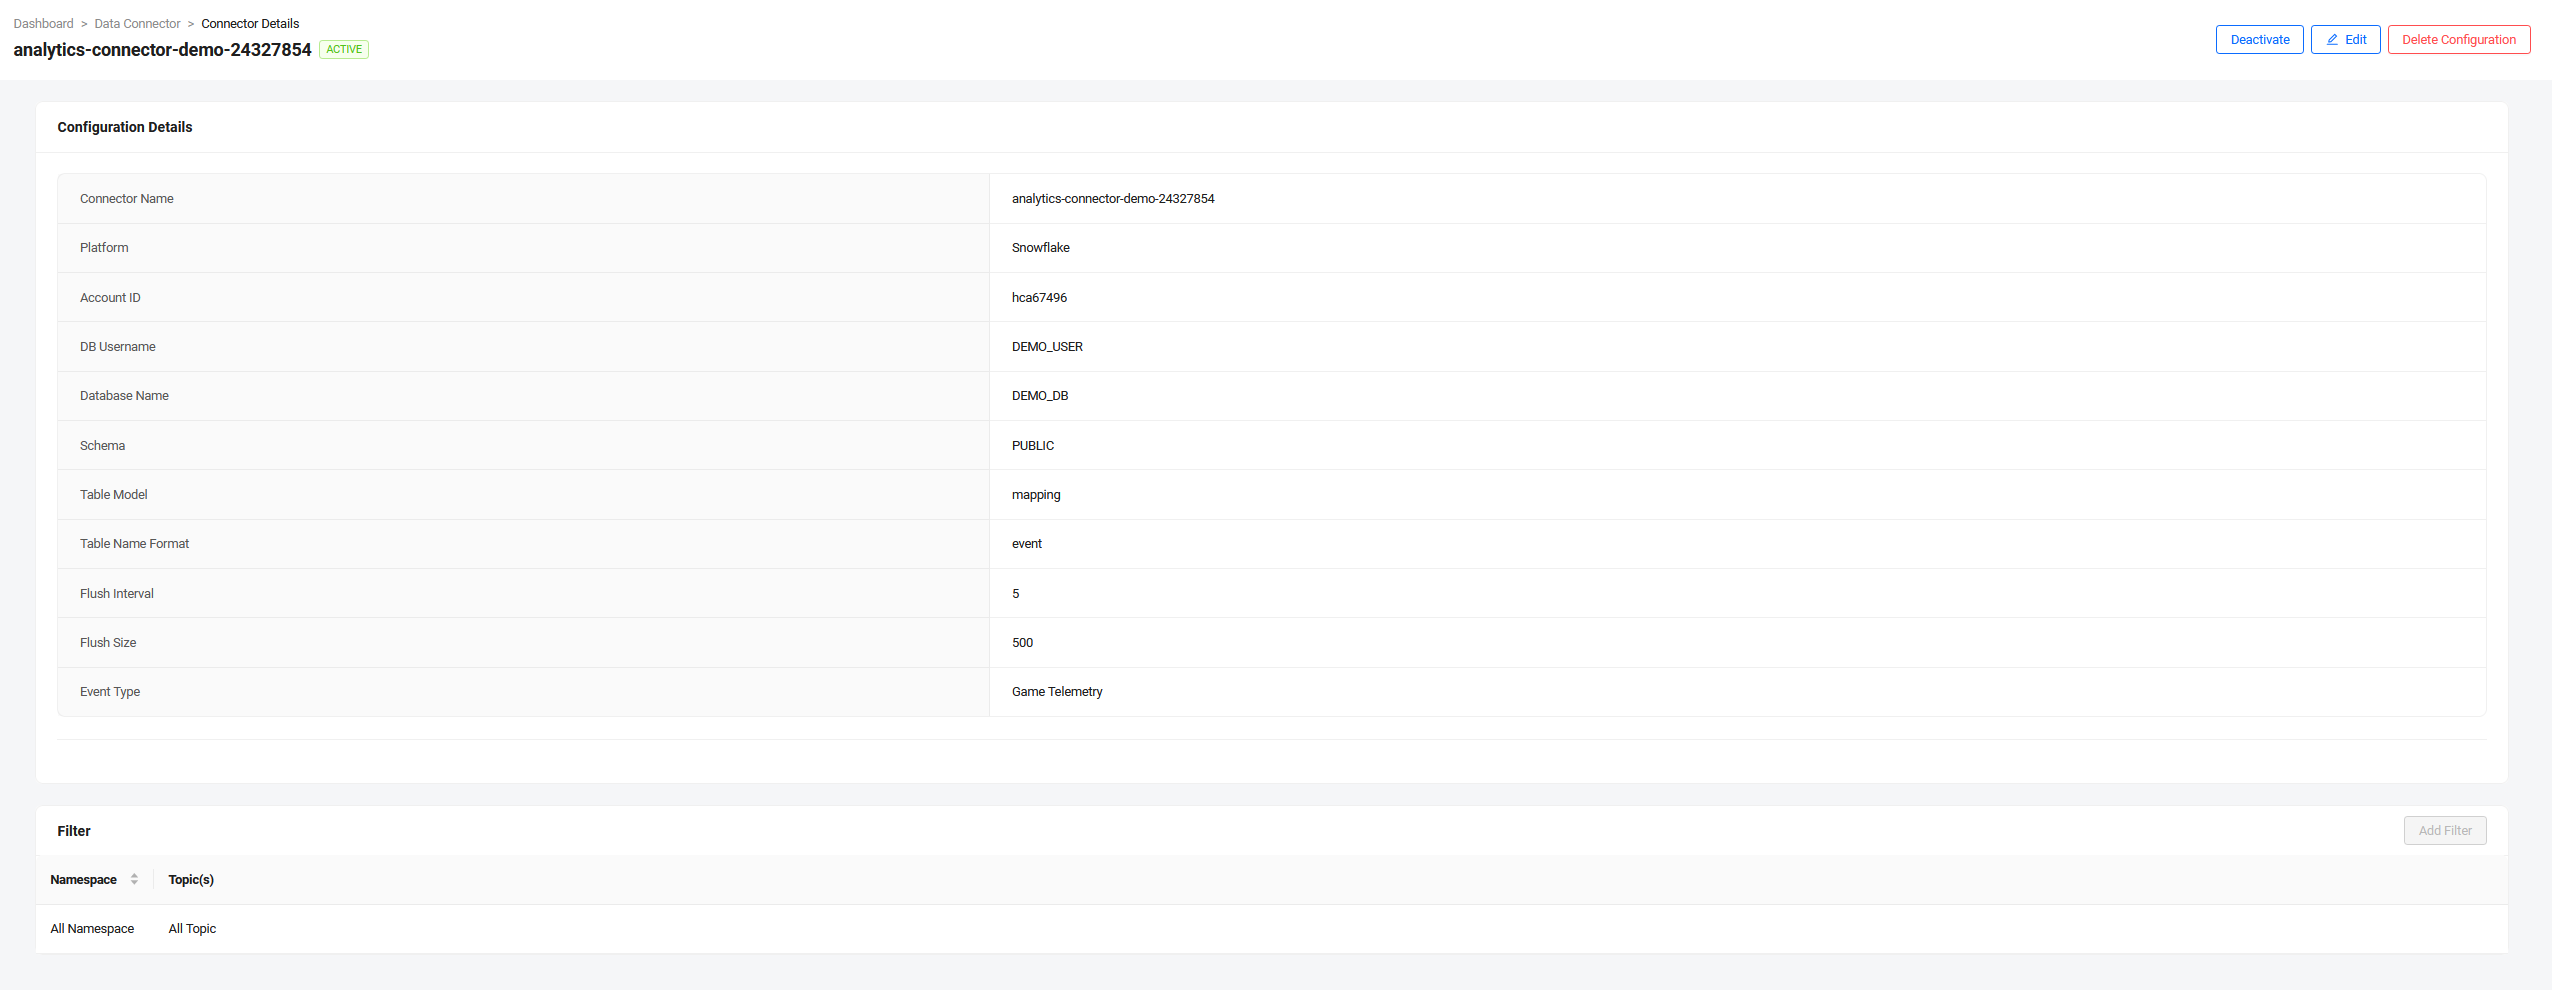
After successfully executing the command in Snowflake, go back to the AGS Admin Portal and click Activate. The Admin Portal will establish the connection between the connector and Snowflake. The details page of the connector will then appear, with the connector status set to "ACTIVE".

List Topic Subscription
The Snowflake connector supports subscribing to a list of specific topics for more granular data streaming control. This feature allows you to define exactly which topics should be streamed to your Snowflake instance, providing better resource management and cost optimization.
This feature is only available for private cloud customers. Additionally, it requires environment variable configuration and can only be enabled by contacting AccelByte support.
How to Request:
- Contact AccelByte support through support channels
- Provide the list of specific topics you want to subscribe to
Once configured by AccelByte support, your connector will only stream data from the specified topics, providing more control over your data pipeline and associated costs.