Add permissions to a role
Overview
This article contains information on how to use AccelByte Gaming Services (AGS) Admin Portal to add permissions to a role that you've previously created.
The ability to manage role will be available soon
Prerequisites
-
You have created at least one role in your environment.
-
You have access to the Admin Portal and have sufficient permissions for roles management.
-
In Private Cloud, make sure you have the following permissions:
Usage Resource Action Create Role ADMIN:ROLECreate Add Role Permissions ADMIN:ROLEUpdate Invite User Admin ADMIN:NAMESPACE:{namespace}:USER:INVITECreate Admin Add User's Role ADMIN:NAMESPACE:{namespace}:ROLE:USER:Update
Add permissions to a role
Follow the steps below to add permissions to a role:
-
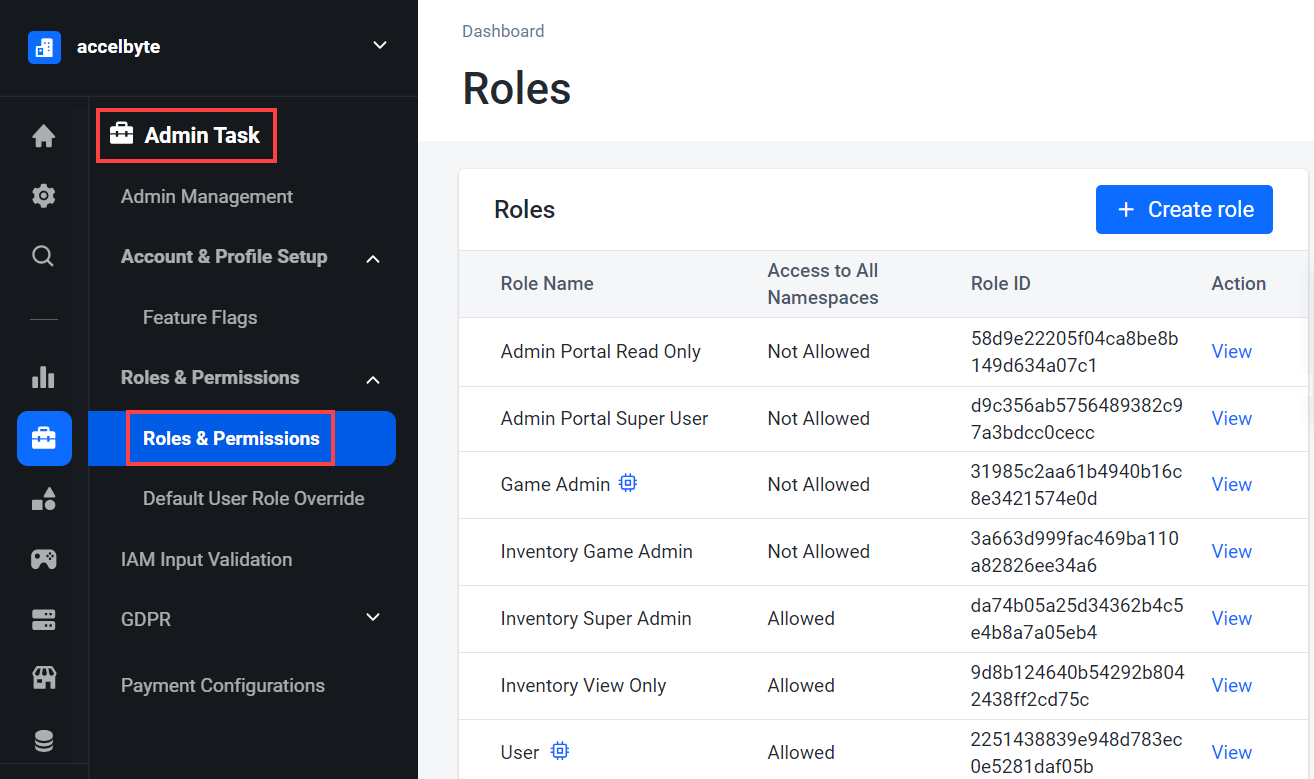
On the Admin Portal sidebar, go to Admin Task > Roles & Permissions.
-
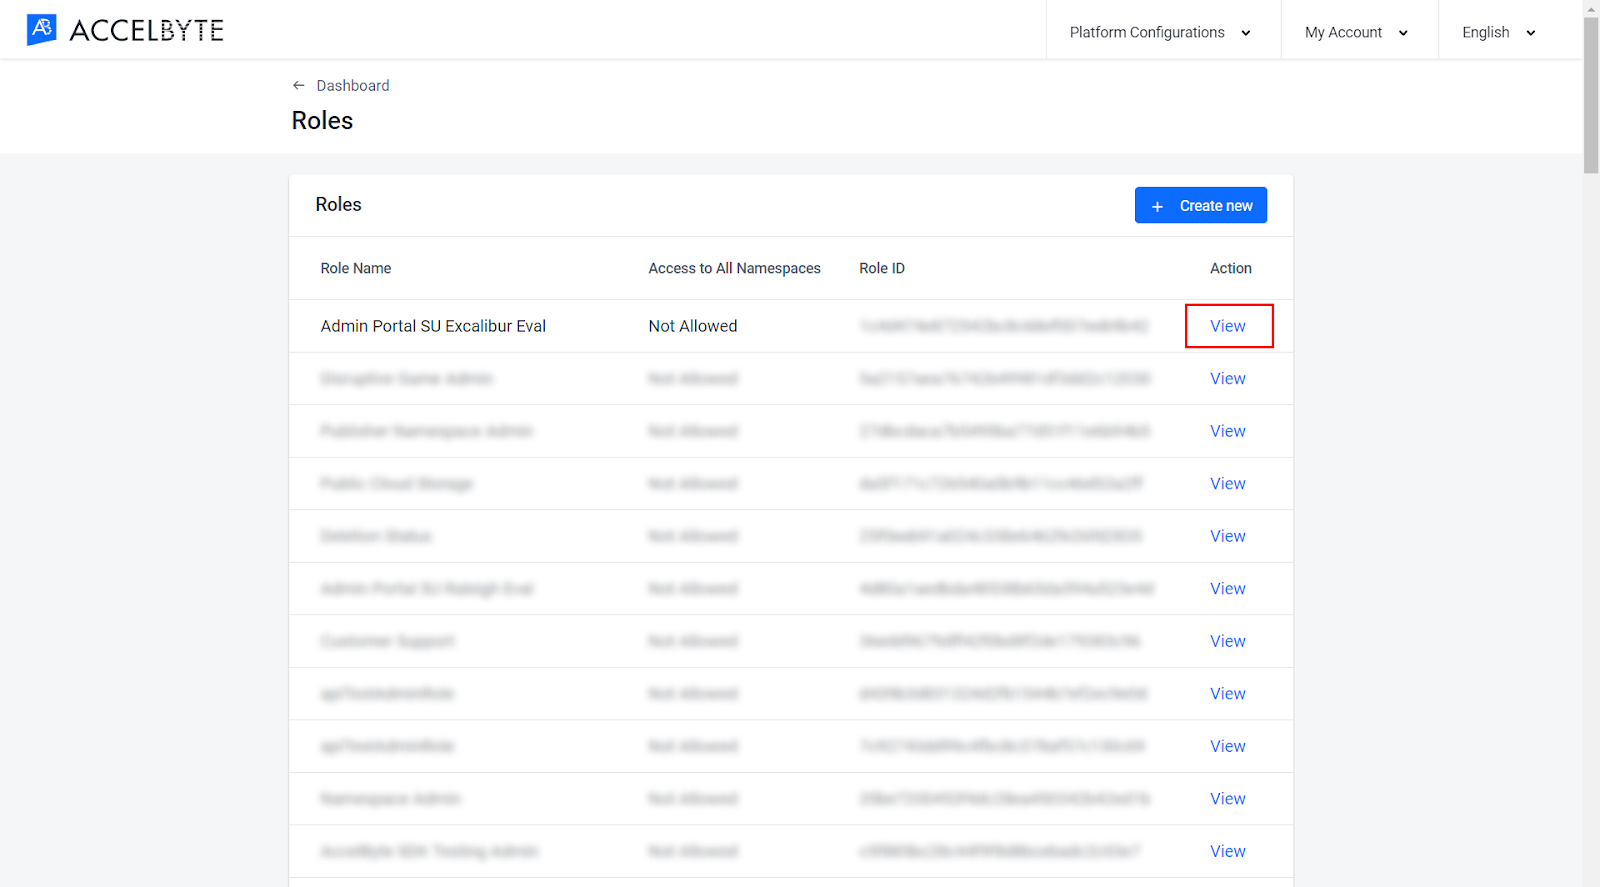
Find the role that you want to add permissions to and click View.
-
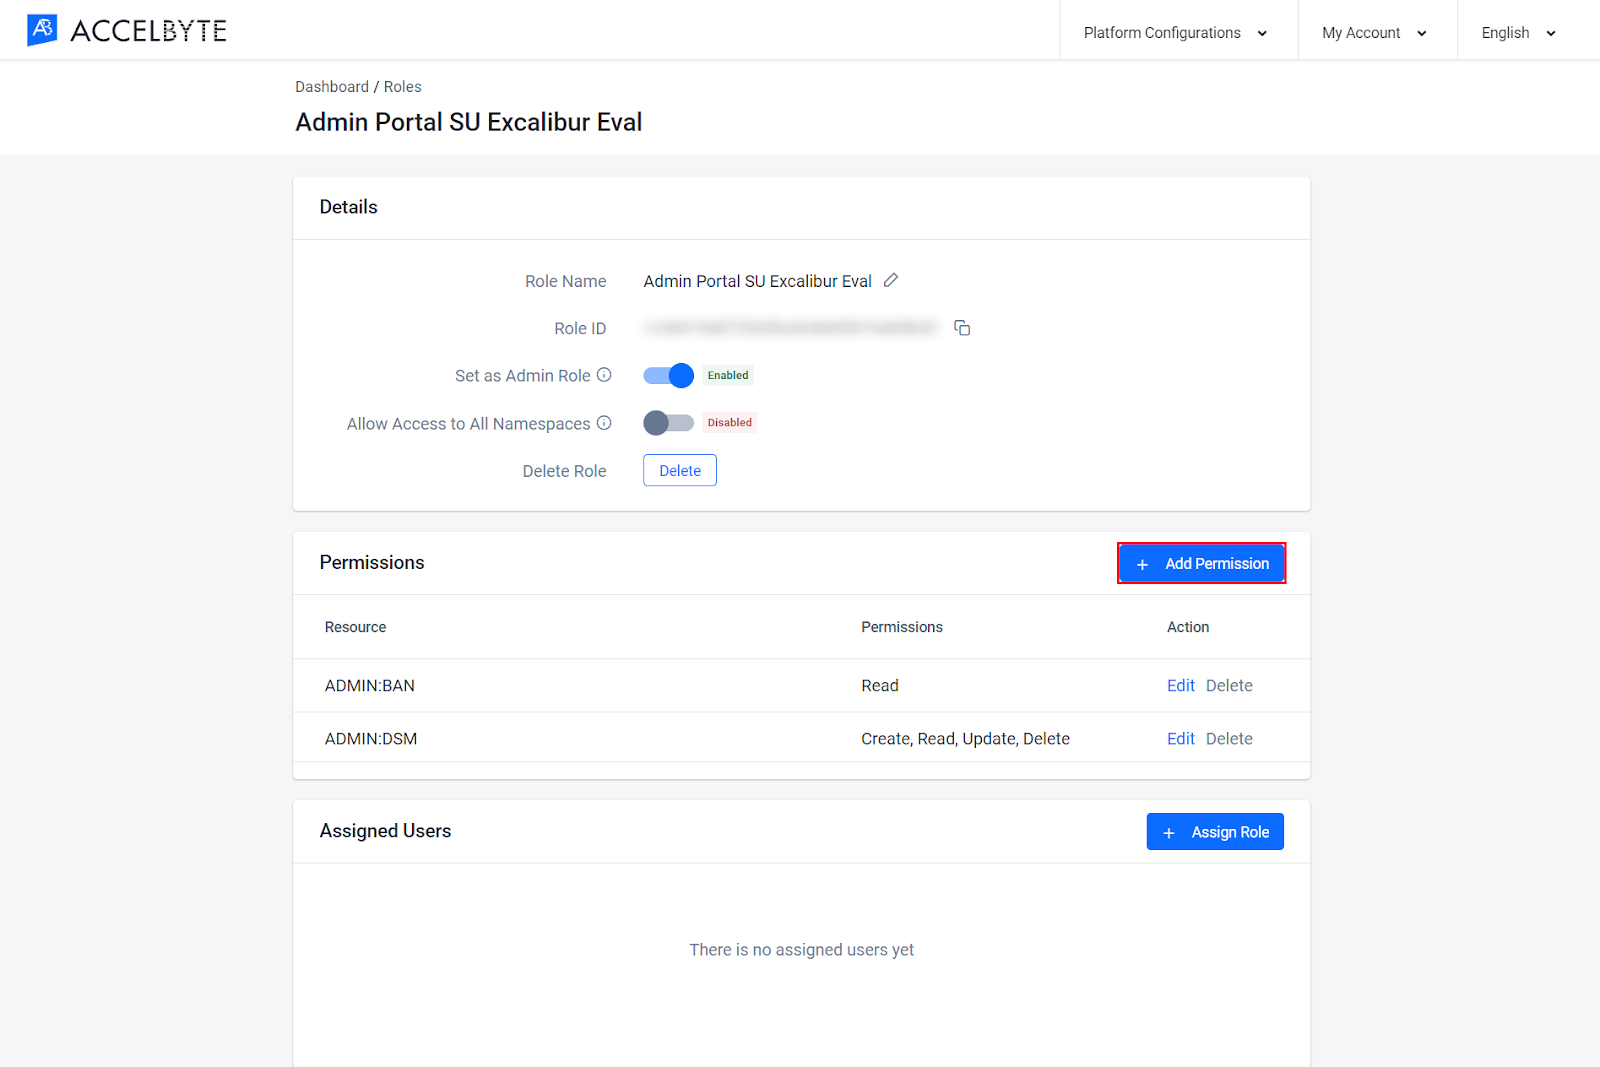
In the Permissions section of the Role page, click Add Permission.
-
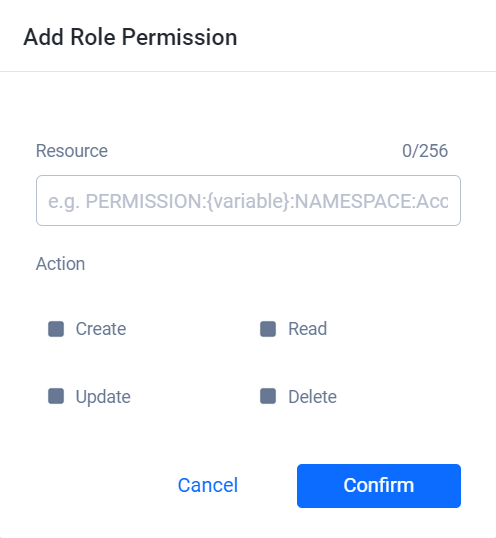
On the Add Role Permission dialog, fill in its fields with the following:
- Type in a permission resource in the Resource field. A permission resource is a string containing multiple tokens that the system uses to grant access to resources.
- Select the actions the permission requires in the Action field.
-
Click Confirm. The system adds the permission to the role.
You've successfully added a permission to a role. You can now assign the role to a user or you can add more permissions to the role.