Create a new role
Overview
This article contains information on how to create a new role in your environment using the AccelByte Gaming Services (AGS) Admin Portal.
The ability to create a new role will be available soon.
Prerequisites
-
You have access to the Admin Portal and have sufficient permissions for roles management.
-
In Private Cloud, make sure you have the following permissions:
Usage Resource Action Create Role ADMIN:ROLECreate Add Role Permissions ADMIN:ROLEUpdate Invite User Admin ADMIN:NAMESPACE:{namespace}:USER:INVITECreate Admin Add User's Role ADMIN:NAMESPACE:{namespace}:ROLE:USER:Update
Create a new role
Follow the steps below to create a new role:
-
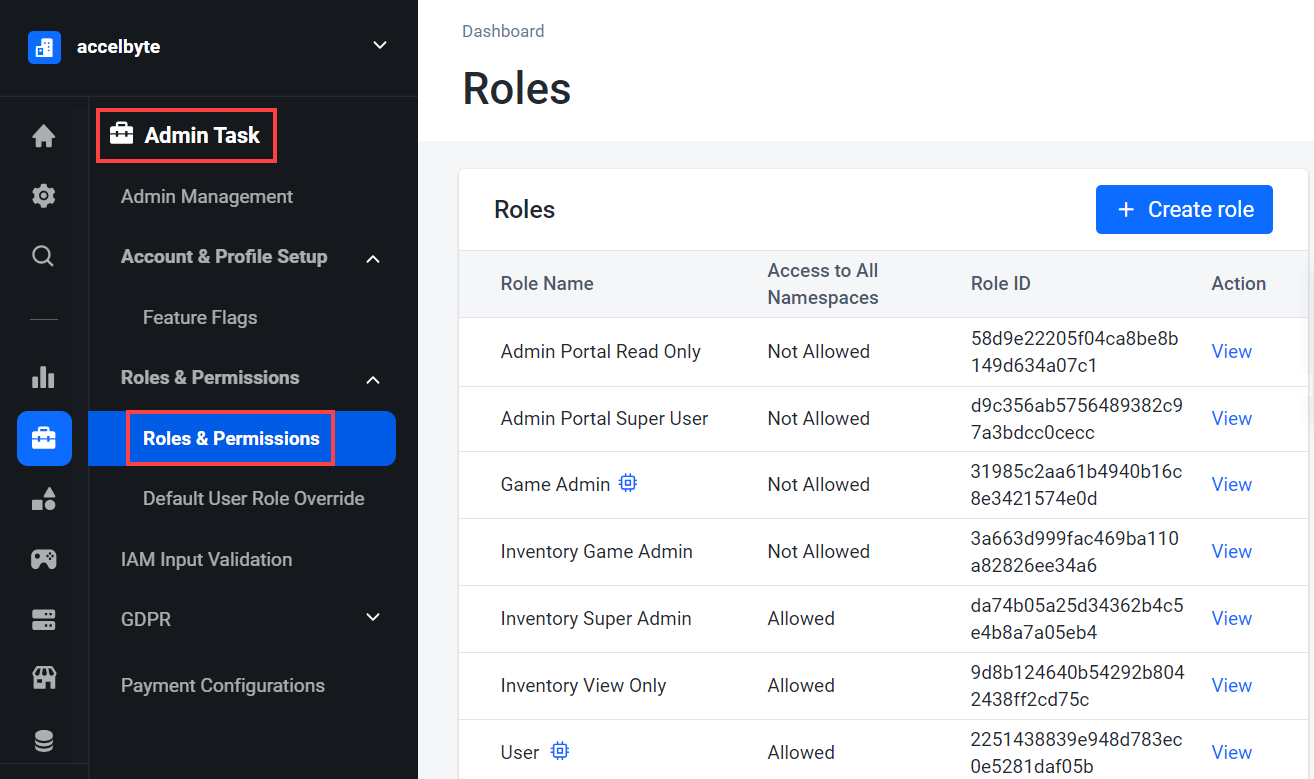
On the Admin Portal sidebar, go to Admin Task > Roles & Permissions.

-
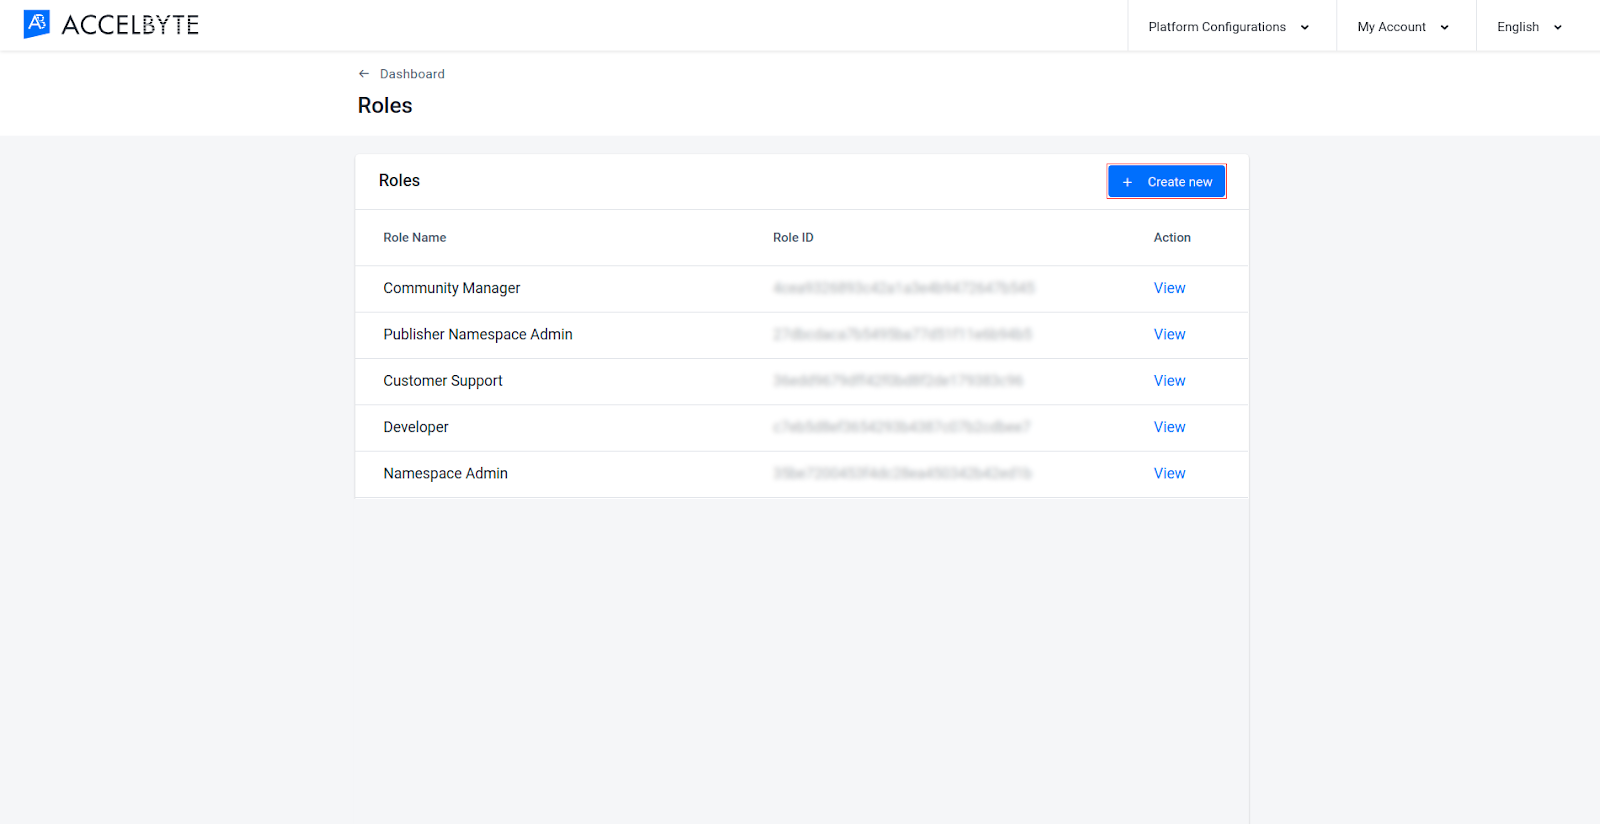
On the Roles page, click Create role.

-
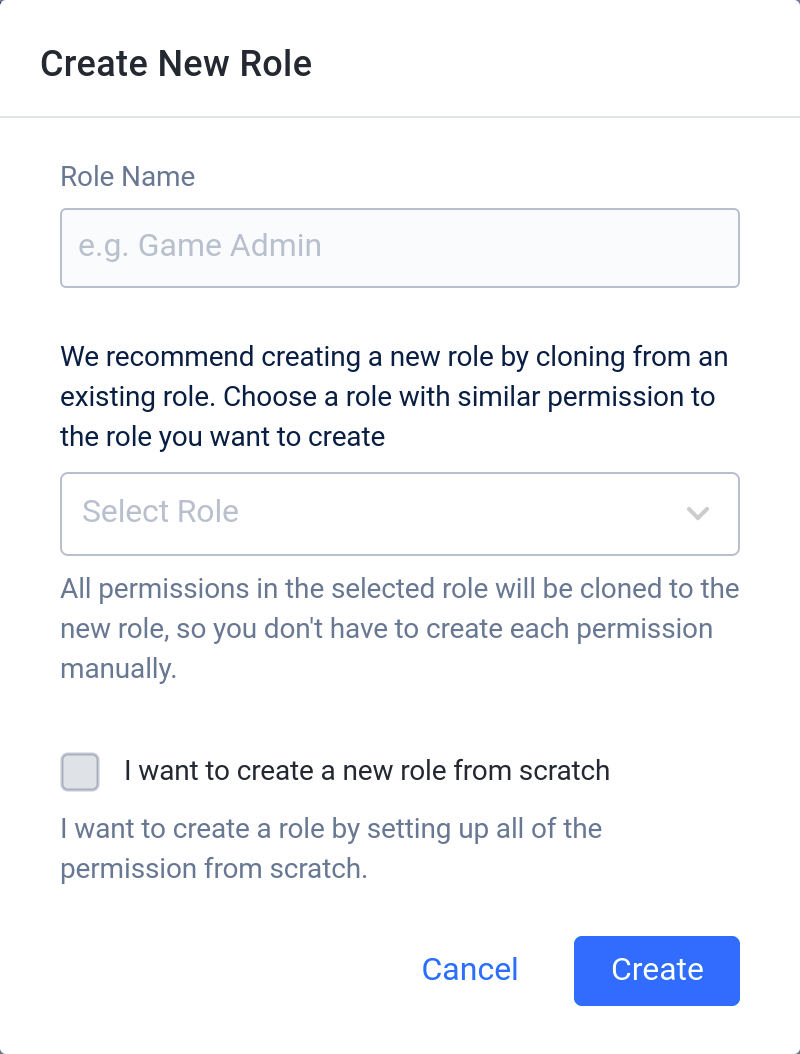
Choose whether to clone an existing role or to create a new role from scratch.
infoThe system default prompts you to clone an existing role. This enables you to quickly create new roles that carry over all the permissions from the cloned role.
-
To clone an existing role, fill in the Create New Role fields with the following information:
-
Type in a name for the role in the Role Name field.
-
Select the existing role that you want to clone from the Select Role dropdown.

-
-
To create a new role without cloning, select the I want to create a new role from scratch checkbox and fill in the fields with the following information:
-
Type in a name for the role in the Role Name field.
-
Select the Set as Admin Role checkbox if you want your role to have access to the Admin Portal.
-
Select the Set as Global Role checkbox if you want your role to be able to access all namespaces.

-
-
-
Click Create.
You've successfully created a new role in your environment. You can now add permissions to it or assign in to a user.