Nintendo Switchビルドの配布
注釈:本資料はAI技術を用いて翻訳されています。
概要
Devkitを追加するには、Target Managerアプリケーションを使用してIPアドレスを指定する必要があります。これにより、AccelByte Development Toolkit(ADT)Webが常に同期されます。Target Managerと同じプロセスを使用して、ADT WebのDevkit Managerを通じてDevkitを登録することもできます。
前提条件
Nintendo Switchビルドを配布する前に、Nintendo Switch SDKとNintendo Switch Target Managerをインストールして接続していることを確認してください。
CLIを使用してNintendo Switchビルドを登録およびアップロード
アップロードやその他の機能を実行する前に、ビルドをNintendo Switchビルドとして登録する必要があります。コマンドについては、このCLIを使用したゲームバイナリのアップロードを参照してください。
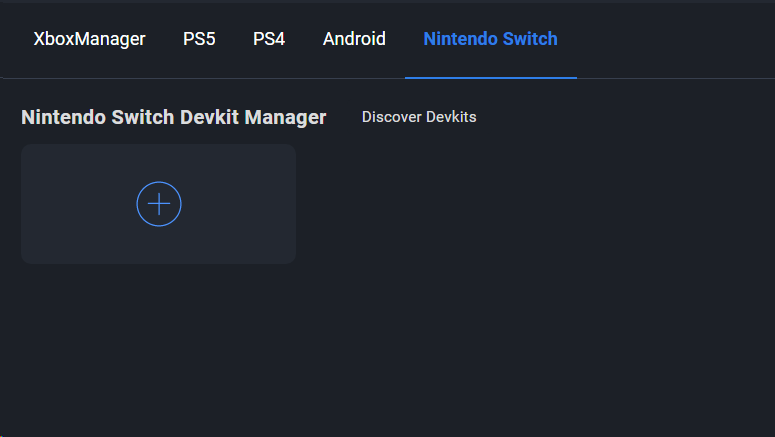
Nintendo SwitchコンソールのDevkitを追加
これらの手順はNintendo Switch用であり、PS4、PS5、Xboxなどの他のコンソールと同様です。
- ADT HubのDevkit Managerページに移動します。
- Nintendo Switchタブをクリックします。
- プラス(+)ボタンをクリックして新しいDevkitを追加します。
- 新しいDevKitのIPアドレスを入力します。

- Addボタンをクリックします。IPアドレスが有効な場合、Devkit Managerに表示されます。
- Devkitに接続するには、三点リーダー(...)メニューをクリックします。
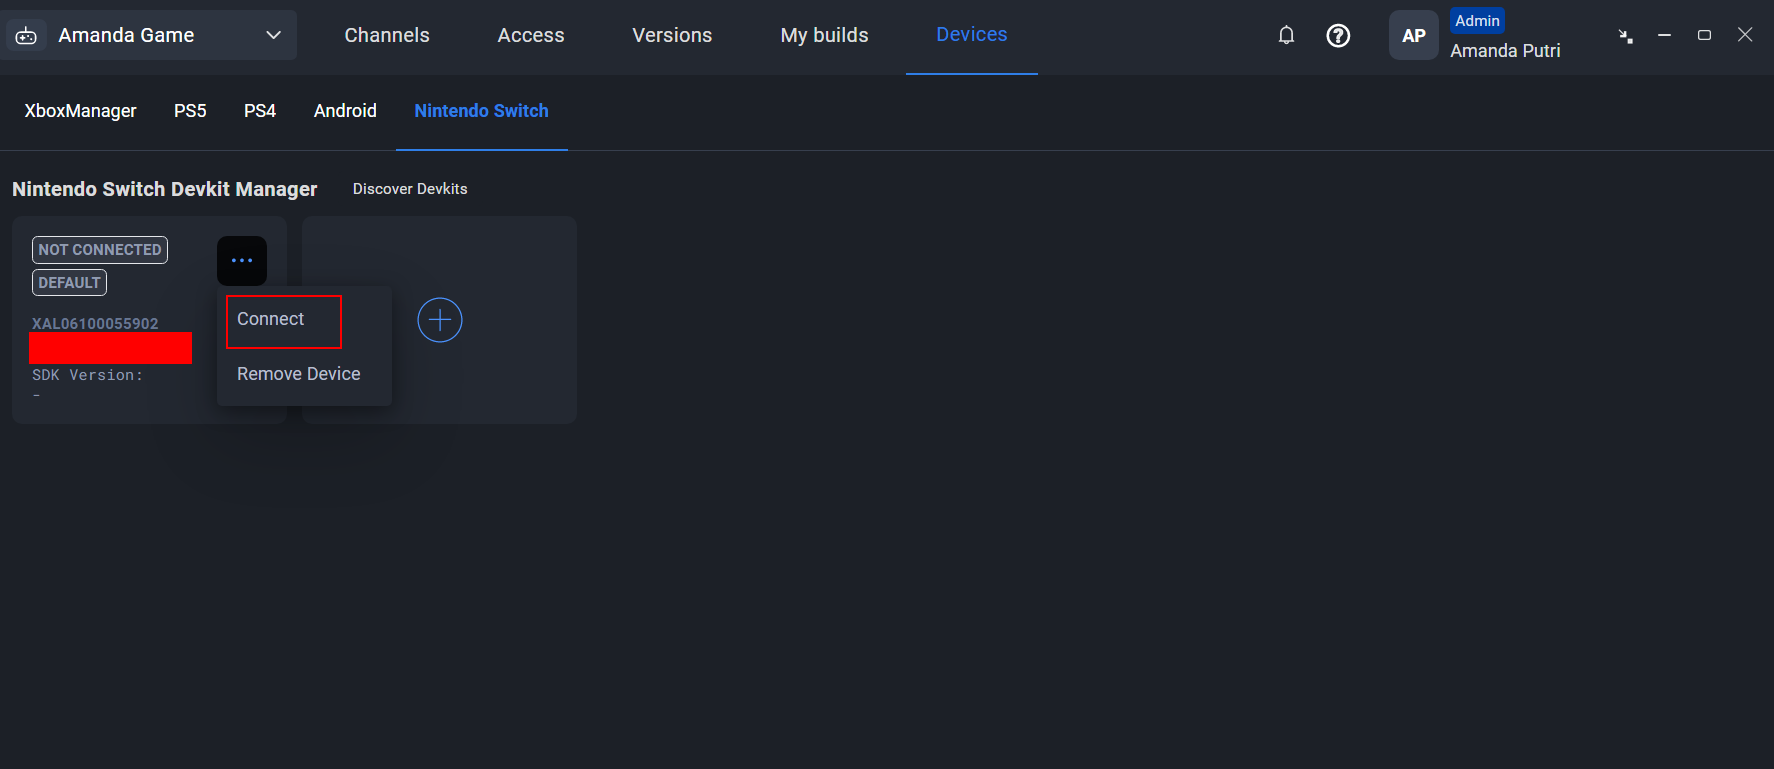
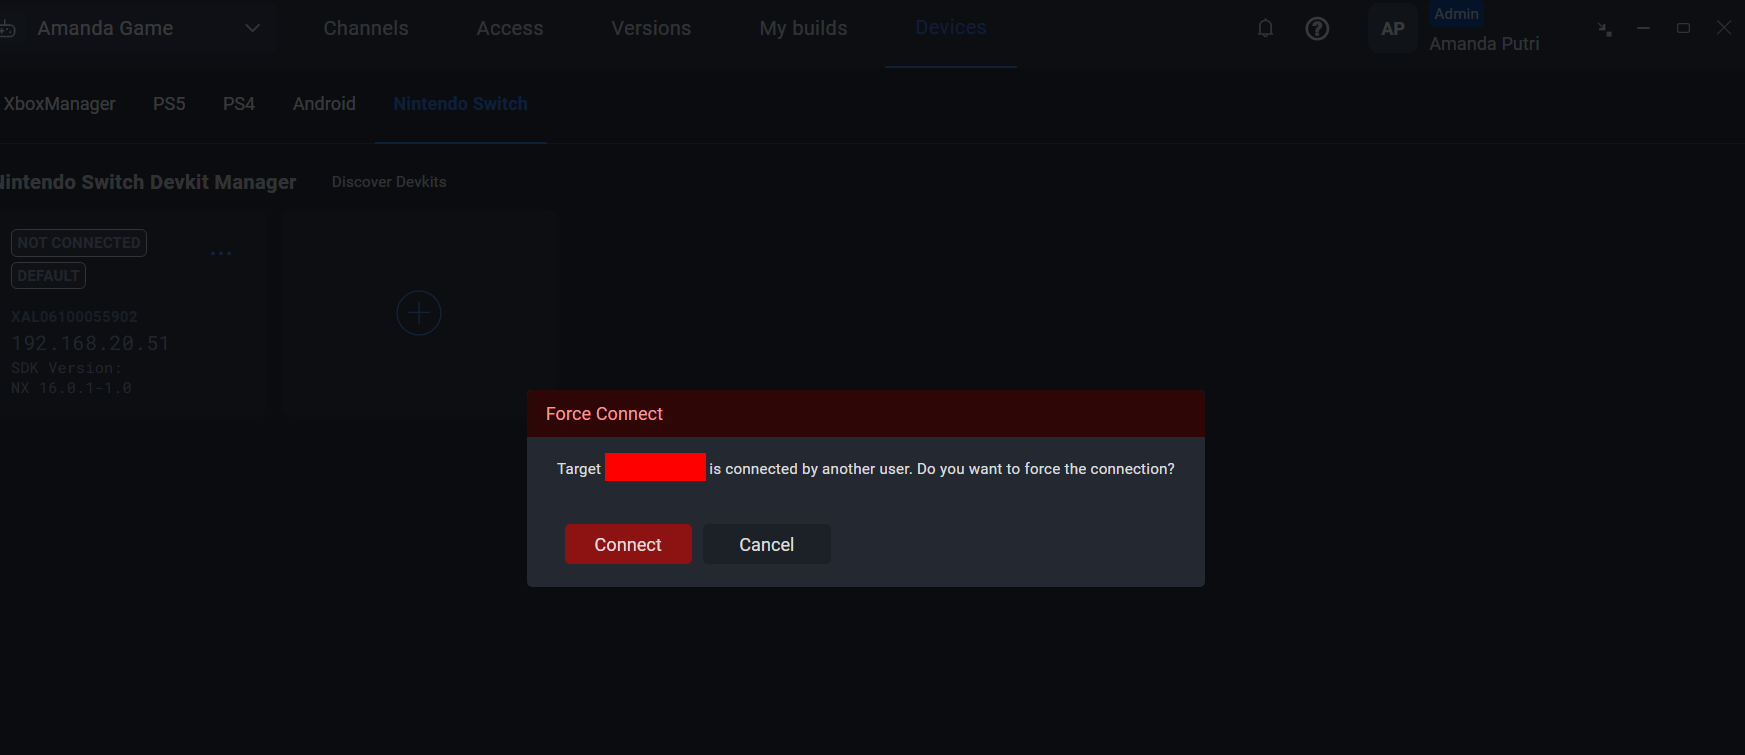
同じDevkitを現在使用している別のユーザーがいる場合、ポップアップ警告が表示され、強制接続のオプションが提供されます。強制接続を選択すると、他のユーザーは自動的に切断され、代わりにDevkitに接続されます。
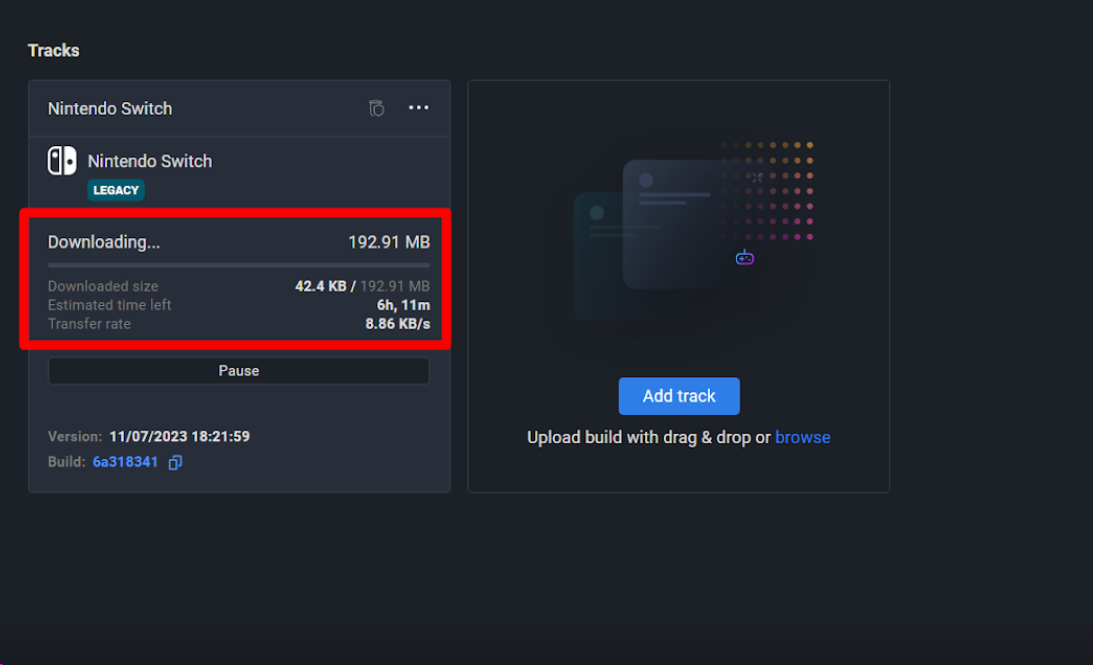
Nintendo Switchビルドをダウンロード
ビルドが正常にアップロードされたら、トラックに割り当てることができ、ADT Hubにビルドがダウンロード可能であることが表示されます。
Nintendo Switchビルドをダウンロードするには、次の手順に従います。
- Downloadをクリックしてビルドのダウンロードを開始します。
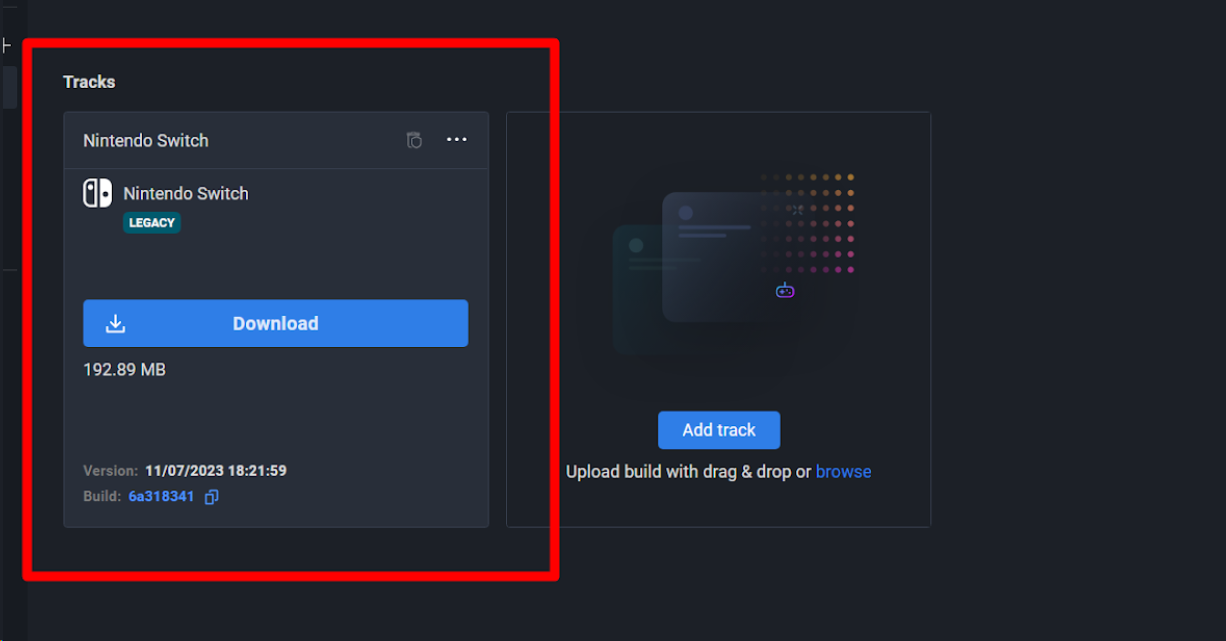
- ファイルが保存されるディレクトリを選択してから、Installボタンをクリックします。
- ビルドのダウンロードが開始され、トラックで進行状況を確認できます。
Nintendo Switchビルドをデプロイ
ビルドのダウンロードに成功すると、DownloadボタンがDeployボタンに変わります。ビルドをデプロイする際、さまざまなシナリオに遭遇する可能性があります。これらのケースの例を以下に示します。
- デプロイしようとして「Default Devkit not Connected」メッセージが表示された場合: a. Select/Connect Devkitをクリックします。 b. 接続したいDevkitを選択します。 c. 登録されているDevkitがない場合は、このドキュメントの冒頭にあるNintendo SwitchコンソールのDevkitの追加の手順に進みます。
- Devkitに既に接続されている場合は、Deploy on Trackをクリックします。
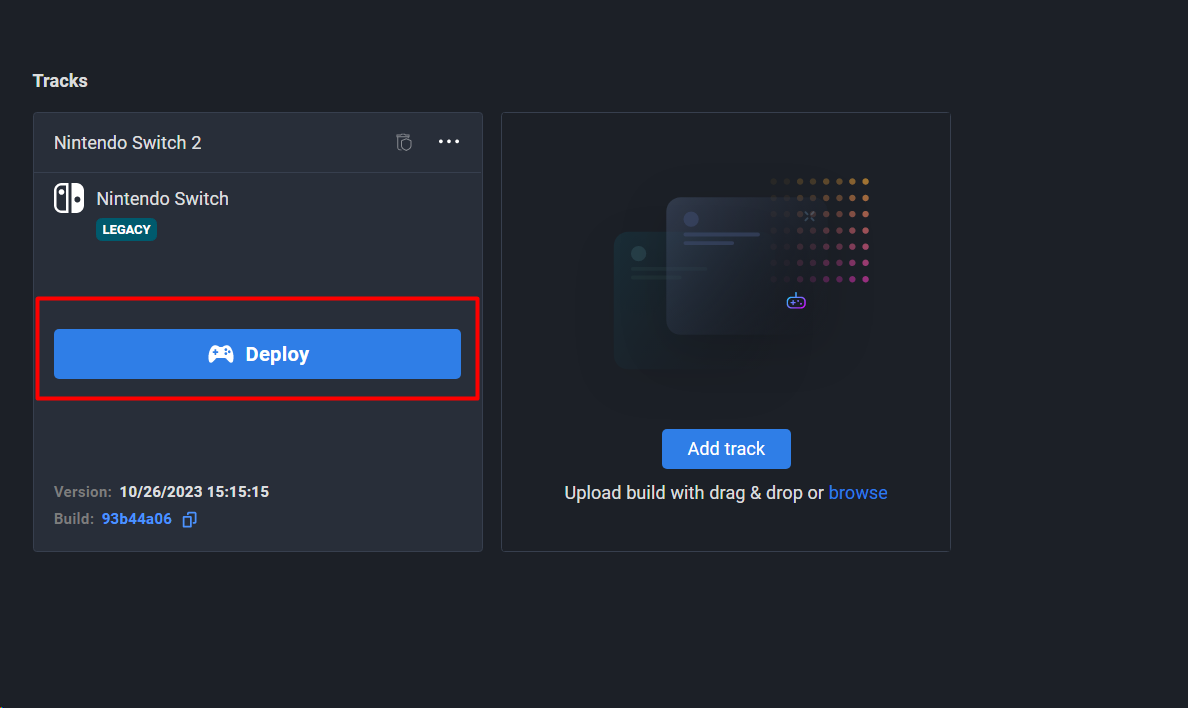
- デプロイの進行状況がトラックに表示されます。デプロイが完了すると、Deployボタンが再び表示されます。Target Managerで進行状況とデプロイ結果を確認することもできます。