Vivox 認証サービス
Overview
The AccelByte Gaming Services (AGS) Extend Service Extension can be used to implement a Vivox authentication service, enabling seamless integration between AGS, Vivox, and game clients. This Vivox authentication service will generate signed Vivox tokens that game clients need to interact with Vivox. Each token is valid for 90 seconds, requiring game clients to regularly request a new token from the service.
Prerequisites
-
Windows 11 WSL2 or Linux Ubuntu 22.04 or macOS 14+ with the following tools installed:
a. Docker (Docker Desktop 4.30+/Docker Engine v23.0+)
-
On Linux Ubuntu:
- To install from the Ubuntu repository, run
sudo apt update && sudo apt install docker.io docker-buildx docker-compose-v2. - Add your user to the
dockergroup:sudo usermod -aG docker $USER. - Log out and log back in to allow the changes to take effect.
- To install from the Ubuntu repository, run
-
On Windows or macOS:
Follow Docker's documentation on installing the Docker Desktop on Windows or macOS.
docker version

...
Server: Docker Desktop
   Engine:
   Version:          24.0.5
...
- Use the available binary from extend-helper-cli.
-
-
Access to the AGS Admin Portal environment.
-
Base URL:
<your environment's domain URL>- Example for AGS Shared Cloud customer:
https://spaceshooter.prod.gamingservices.accelbyte.io - Example for AGS Private Cloud customer:
https://dev.customer.accelbyte.io
- Example for AGS Shared Cloud customer:
-
Create a game namespace if you don't have one yet. Take note of the namespace ID.
-
Create an OAuth Client with
confidentialclient type containing the following permissions:- For AGS Private Cloud customers:
ADMIN:ROLE[READ]ADMIN:NAMESPACE:{namespace}:NAMESPACE[READ]
- For AGS Shared Cloud customers:
- IAM > Roles (Read)
- Basic > Namespace (Read)
Keep the
Client IDandClient Secret. - For AGS Private Cloud customers:
-
-
Your Vivox configuration.
- Vivox application-specific issuer name
- Vivox domain name
- Vivox signing key
Clone the app repository
- C#
- Go
- Java
- Python
git clone https://github.com/AccelByte/extend-vivox-authorization-service-csharp
git clone https://github.com/AccelByte/extend-vivox-authorization-service-go
git clone https://github.com/AccelByte/extend-vivox-authorization-service-java
git clone https://github.com/AccelByte/extend-vivox-authorization-service-python
Deploy in AGS
Deploying an Extend app in AGS involves the following steps in the Admin Portal:
Create the Extend app
- In the AGS Admin Portal, go to the namespace where you wish to create your Extend Override app.
- On the sidebar menu, under ADD-ONS, go to Foundations > Extend > My Extend Apps > Service Extension.
- On the Service Extension page, click on the + Create New button.
- On the Create App form, provide a name and description (optional) for your Extend app.
- Click Create. Your new Extend app is added to the Service Extension app list.
Upload the Extend app
-
Set up an IAM client for extend-helper-cli. Create an IAM client with client type
confidentialand assign the required permissions listed below. Keep a copy of theClient IDandClient Secret.- For AGS Private Cloud customers:
ADMIN:NAMESPACE:{namespace}:EXTEND:REPOCREDENTIALS[READ]ADMIN:NAMESPACE:{namespace}:EXTEND:APP[READ]
- For AGS Shared Cloud customers:
- Extend > Extend app image repository access (Read)
- Extend > App (Read)
- For AGS Private Cloud customers:
-
Export the required environment variables, then build and upload the Extend app container image to AGS using extend-helper-cli.
- Ensure
<project-dir>points to your Extend app project directory - The values for
<namespace>and<app-name>can be found on theApp Detailpage of your Extend app - Use an appropriate image tag e.g.
v0.0.1
- Linux
- Windows (WSL2)
- macOS
# Your AGS environment base URL, e.g., https://spaceshooter.prod.gamingservices.accelbyte.io, https://dev.accelbyte.io, etc.
export AB_BASE_URL='https://xxxxxxxxxx'
# Client ID of OAuth Client for extend-helper-cli (from step 1)
export AB_CLIENT_ID='xxxxxxxxxx'
# Client Secret of OAuth Client for extend-helper-cli (from step 1)
export AB_CLIENT_SECRET='xxxxxxxxxx'

./extend-helper-cli-linux_amd64 image-upload --login --work-dir <project-dir> --namespace <namespace> --app <app-name> --image-tag v0.0.1
# Your AGS environment base URL, e.g., https://spaceshooter.prod.gamingservices.accelbyte.io, https://dev.accelbyte.io, etc.
export AB_BASE_URL='https://xxxxxxxxxx'
# Client ID of OAuth Client for extend-helper-cli (from step 1)
export AB_CLIENT_ID='xxxxxxxxxx'
# Client Secret of OAuth Client for extend-helper-cli (from step 1)
export AB_CLIENT_SECRET='xxxxxxxxxx'
./extend-helper-cli-linux_amd64 image-upload --login --work-dir <project-dir> --namespace <namespace> --app <app-name> --image-tag v0.0.1# Your AGS environment base URL, e.g., https://spaceshooter.prod.gamingservices.accelbyte.io, https://dev.accelbyte.io, etc.
export AB_BASE_URL='https://xxxxxxxxxx'
# Client ID of OAuth Client for extend-helper-cli (from step 1)
export AB_CLIENT_ID='xxxxxxxxxx'
# Client Secret of OAuth Client for extend-helper-cli (from step 1)
export AB_CLIENT_SECRET='xxxxxxxxxx'
./extend-helper-cli-darwin_amd64 image-upload --login --work-dir <project-dir> --namespace <namespace> --app <app-name> --image-tag v0.0.1important- We recommend running the above commands in a separate terminal and from a different working directory than the Extend app project. This helps prevent the extend-helper-cli from inadvertently using environment variables intended for the Extend app.
- If you encounter the following error, see Troubleshooting: Docker login fails for resolution steps.
Error saving credentials: error storing credentials - err: exit status 1, out: `error storing credentials - err: exit status 1, out: `The stub received bad data.`
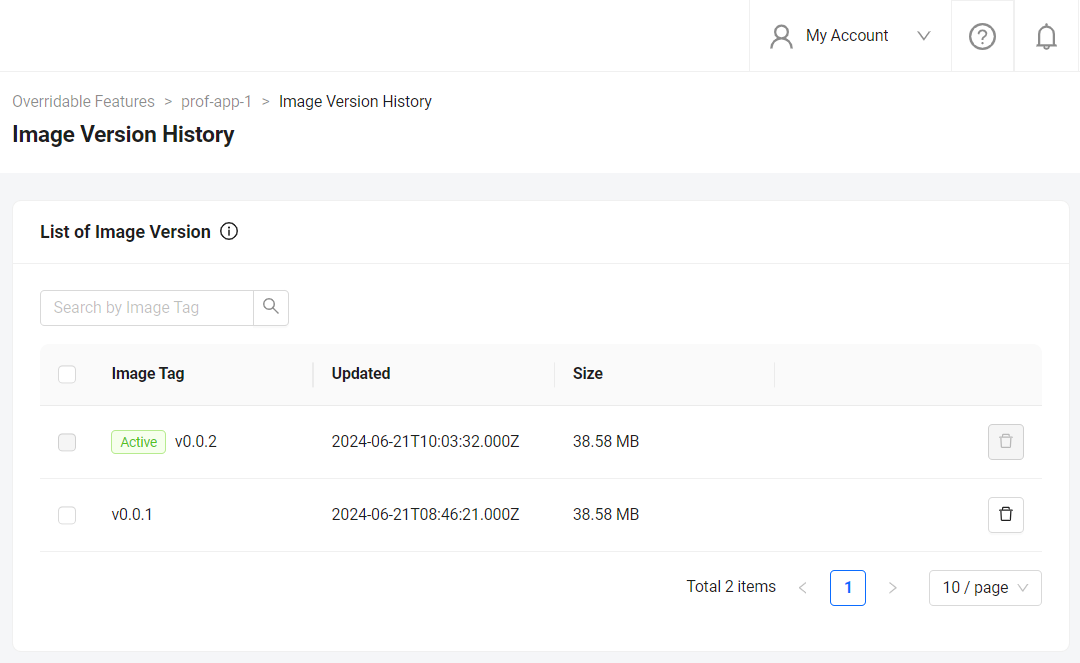
If your images are successfully uploaded, you will see an image with version v0.0.1 on the Image Version History page.
- Ensure
Configure the Extend app
Before deploying the uploaded Extend app, you must configure the environment variables required by the app. In the app's details page, set the following environment variables with the values prepared in the Prerequisites section.
AB_CLIENT_IDAB_CLIENT_SECRETVIVOX_ISSUERVIVOX_DOMAINVIVOX_SIGNING_KEY
Deploy the Extend app
To deploy the Extend app, click Deploy Latest Image. Wait until the app status updates to RUNNING, which indicates that your Extend app is successfully deployed.
Run sample game client
AccelByte provides you a sample game client to try Vivox authentication service. Follow these steps:
- Unreal Engine
- Unity
This sample game client is built on the ShooterGame project using Unreal Engine 4.26. It has not been tested on later versions of Unreal Engine. For a more up-to-date integration approach, see the AccelByte Vivox Unreal plugin section below.
-
Clone the project.
git clone https://github.com/AccelByte/extend-vivox-authorization-sample-game-unreal -
Configure the AGS SDK for Unreal. Follow the steps in the Configure the AGS Game SDK for the IAM client section in the Install the AGS Game SDK guide.
-
Configure the Vivox Unreal SDK.
- Set the values for
VIVOX_VOICE_SERVER,VIVOX_VOICE_DOMAIN,VIVOX_ISSUERin theVivoxGameInstance.cppfile with values that are found in the Vivox Credentials in your Unreal Dashboard project. - Set the value for
VIVOX_TOKEN_PROVIDER_URLin theVivoxTokenProvider.cpp - Locate and modify
Token Provider Urlfield and Inspector field.
- Set the values for
-
Open the project (
Client/ShooterGame.uproject) in your IDE. -
Build and package the for Windows (64-bit).
-
Launch one or more instances of the build. The executable name should be
ShooterGame.exe. -
Have one client host and others join.
-
Clone the project.
git clone https://github.com/AccelByte/extend-vivox-authorization-sample-game-unity -
Link the project to an existing Unity Dashboard project. This will automatically pull in Vivox credentials into the Unity project. For more information, refer to Vivox's documentation.
-
Configure the AGS SDK for Unreal. Follow the steps in the Configure the AGS Game SDK for the IAM client section in the Install the AGS Game SDK guide.
-
Configure the Vivox Unity SDK
- Open
MainScene.unityfile. - Find and select
VivoxVoiceManagerobject in the Hierarcy window. - Locate and modify
Token Provider Urlfield and Inspector field.
- Open
-
Built the project by go to
File->Build Settings->Build. -
Launch 1 or more instance of the build. The executable name should be
Client.exe. -
Fill in the Display Name and click Login.
AccelByte Vivox Unreal plugin
AccelByte provides a standalone Unreal Engine plugin that integrates Vivox voice chat with AccelByte token generation. This plugin handles authentication, multi-channel voice, transmission control, and mute functionality out of the box.
For full details, see the accelbyte-vivox-unreal repository.
Dependencies
- AccelByteUe4Sdk
- AccelByteUe4SdkCustomization — provides
VivoxAuth::ServiceGenerateVivoxToken(). Obtainable via Extend Codegen CLI or from the release page. - VivoxCore — the Vivox SDK (client platforms only, excluded from server/Linux builds)
Configuration
Add the following to your project's DefaultEngine.ini:
[/Script/AccelByteVivox.AccelByteVivoxSettings]
VivoxIssuer=your-issuer
VivoxDomain=your-domain
VivoxServer=your-login-server-uri

[/Script/AccelByteUe4SdkCustomization.AccelByteCustomizationSettings]
VivoxAuthServerUrl=your-extend-vivox-auth-service-url
Setup
-
Enable the plugin in your
.uprojectfile:{
"Name": "AccelByteVivox",
"Enabled": true
} -
Add
AccelByteVivoxto your module's build dependencies.
Basic usage
Access the voice chat singleton and use it for login, channel, and mute operations:
#include "AccelByteVivoxVoiceChat.h"

auto VoiceChat = FAccelByteVivoxVoiceChat::Get();

// Login after AccelByte authentication
VoiceChat->Login(ApiClient, Username);
VoiceChat->OnLoginCompleted.AddLambda([](bool bSuccess) { /* handle result */ });

// Join a voice channel
VoiceChat->JoinChannel(TEXT("party-123"));
VoiceChat->OnChannelJoined.AddLambda([](const FString& ChannelName, bool bSuccess) {});

// Control transmission
VoiceChat->SetTransmissionChannel(TEXT("party-123"));  // Single channel
VoiceChat->SetTransmissionToAll();                     // All channels
VoiceChat->SetTransmissionToNone();                    // Listen only

// Mute controls
VoiceChat->SetLocalMute(true);
VoiceChat->SetPlayerMute(TEXT("party-123"), PlayerId, true);
Event delegates
| Delegate | Description |
|---|---|
OnLoginCompleted | Vivox authentication result |
OnLogoutCompleted | Disconnection signal |
OnChannelJoined | Channel join success/failure |
OnChannelLeft | Channel disconnection |
OnParticipantAdded | Player joined with ID and display name |
OnParticipantRemoved | Player departed |
OnParticipantTalkingChanged | Voice activity state change |
Next step
If you need to customize this Vivox authentication service to better fit your requirements, you may refer to this guide.