Integrate Okta Oauth 2.0
Overview
Integrate Okta OAuth 2.0 to enable your users with existing Okta accounts to log in to the AccelByte Development Toolkit (ADT) Web. Okta Oauth 2.0 controls who is authorized to access a protected resource, like your web app, native app, or API service.
If you want to grant secure access to your application data, use the OAuth 2.0 protocol.
OAuth 2.0 has four important roles:
-
The authorization server issues access tokens. In this case, Okta acts as the authorization server.
-
The resource owner uses an access token to grant access to the resource server. In this case, your application's Administrator is the resource owner.
-
The client application requests the access token from Okta and passes it to the resource server.
-
The resource server accepts and verifies the access token. In this case, the resource server is your application.
This guide will show you how to integrate ADT Web with Okta OAuth 2.0.
Prerequisites
- You need access to the Okta Admin console.
- You need access to ADT Web as an Administrator.
Support question? Contact us at adt-support@accelbyte.net.
Configure Okta OAuth 2.0 for use with ADT
Set up the OAuth 2.0 application
Follow these steps to set up the application:
-
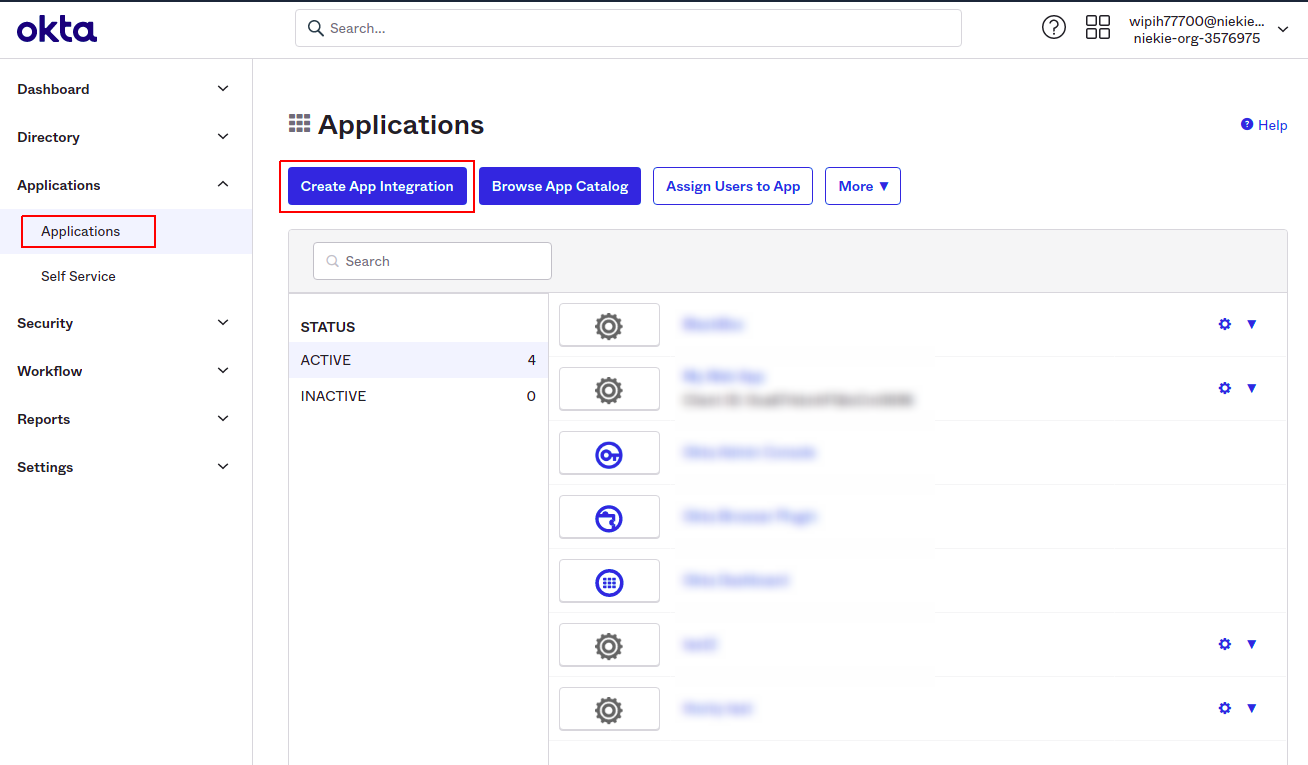
Log in to Okta.
-
Select Applications from the side bar.
-
Click the Create App Integration button.
-
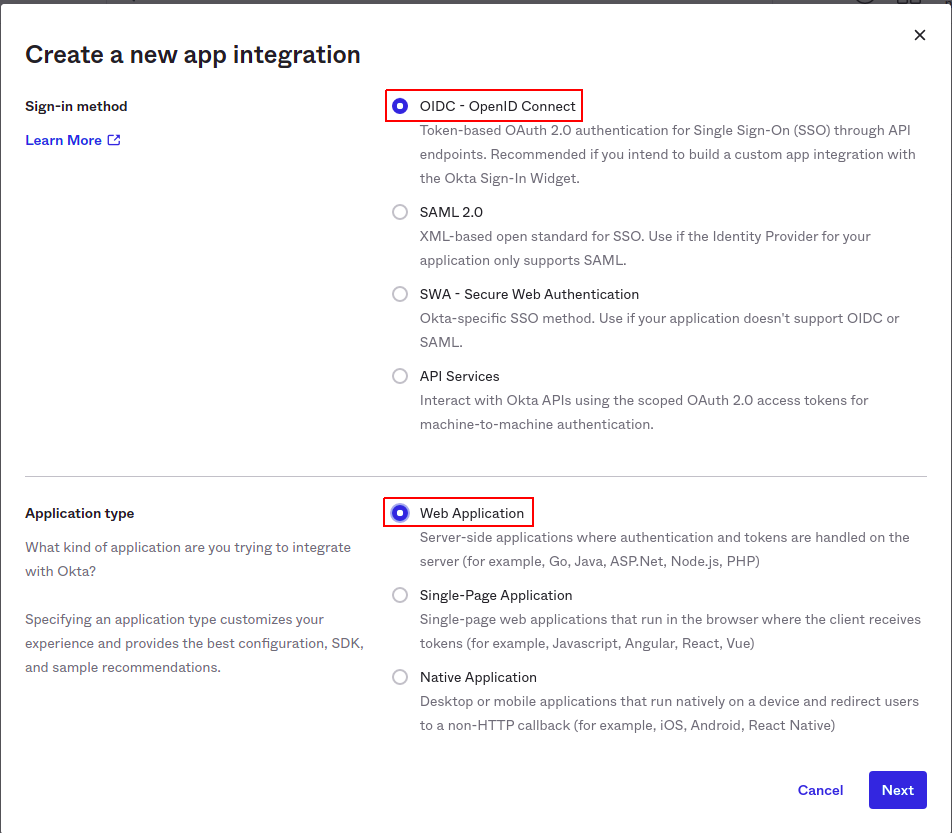
In the Sign-in method section, choose OIDC - OpenID Connect.
-
In the Application type section, choose Web Application.
-
Click Next.
-
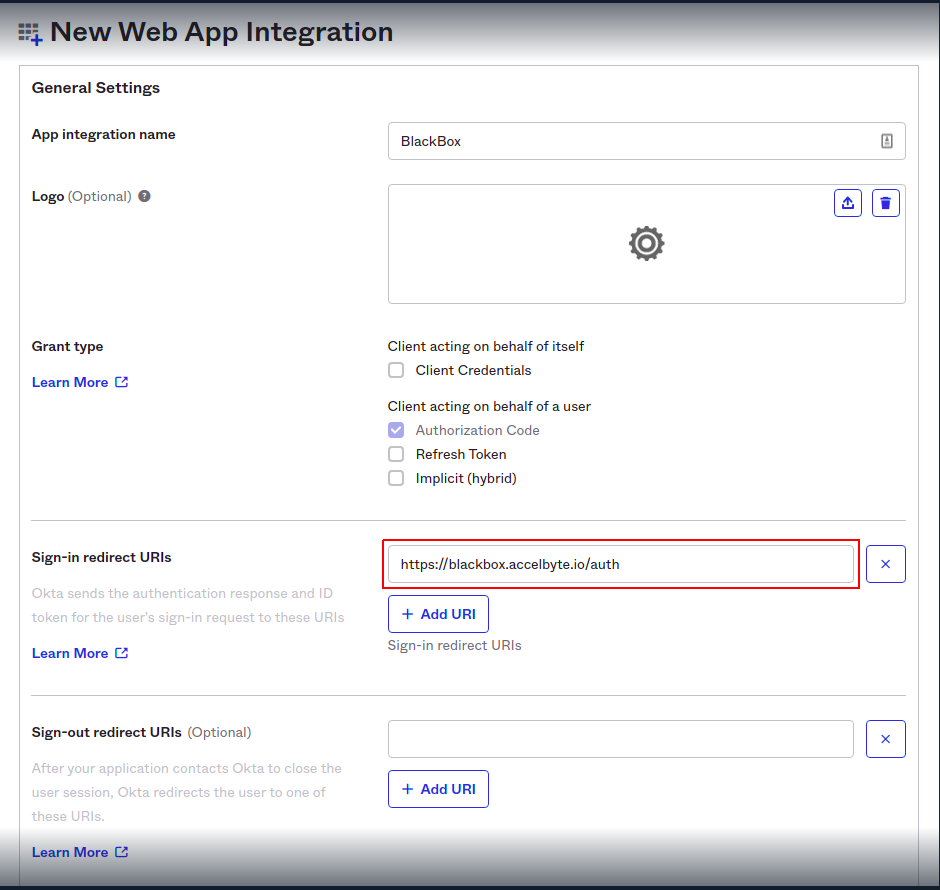
On the New Web App Integration page, type in what you want to name the integration in the App integration name field. In this example, the integratio name is set to Blackbox.
-
In the Sign-in redirect URIs field, enter your ADT URL in this format
<your-blackbox-base-url>/auth. -
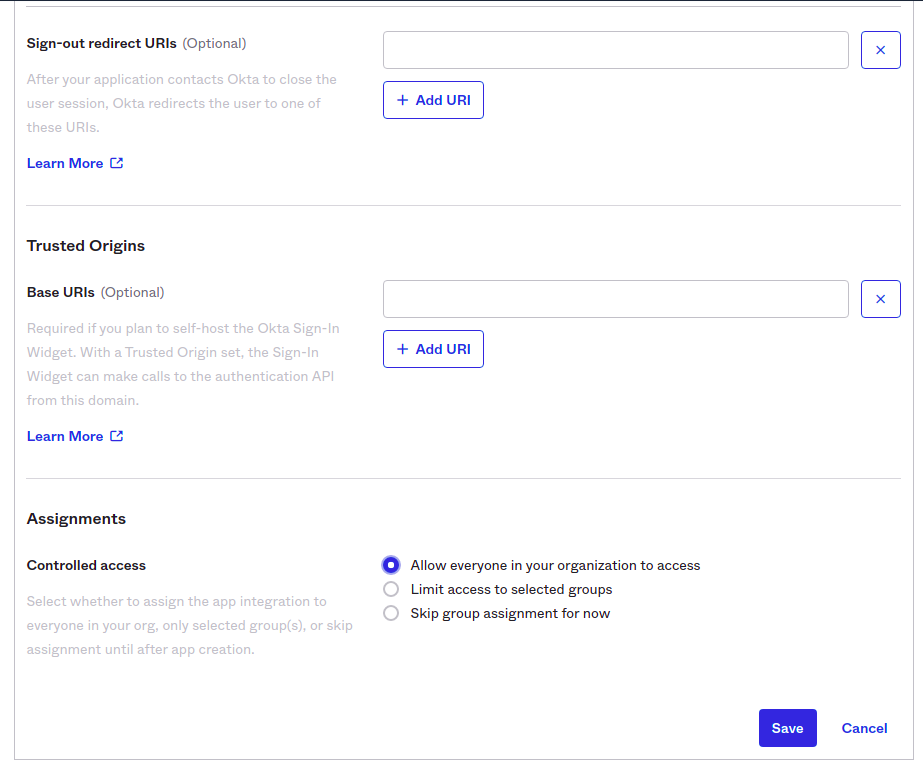
Leave the Sign-out redirect URIs blank.
-
Scroll down to the Assignments section at the bottom of the page, choose the controlled access options to apply to your organization.
-
Click Save.
Configure the ADT Web
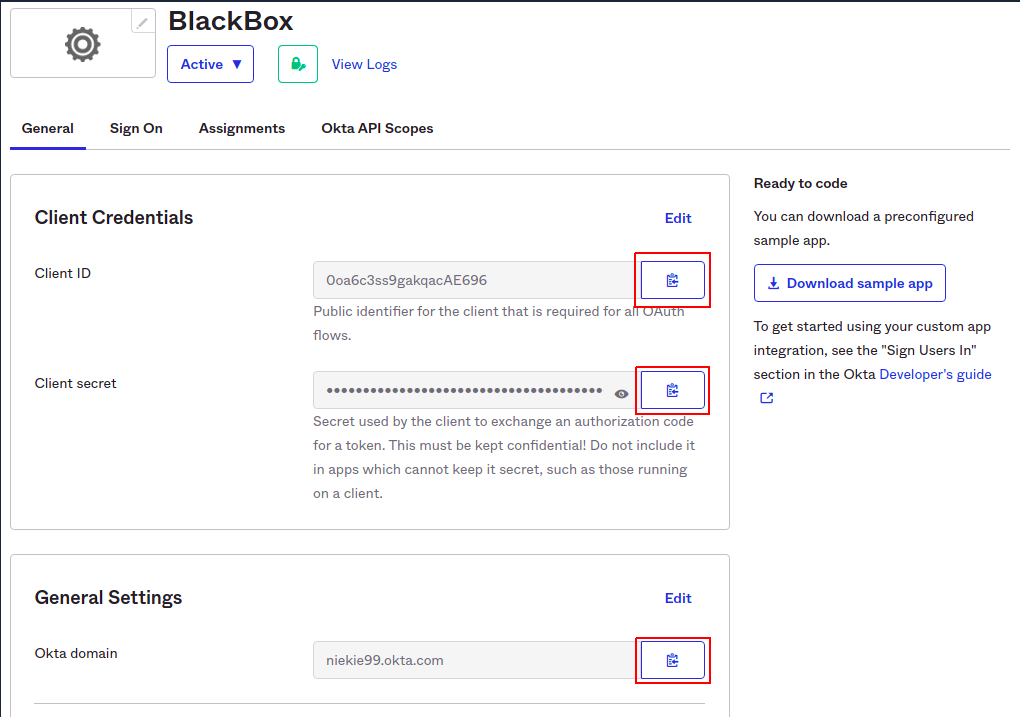
The details of your application integration are displayed on the Okta options screen. You need to note or copy the values for Client ID, Client Secret, and Okta Domain. You will be using these information to configure ADT Web.
To integrate ADT Web with Okta, follow these steps:
-
In a new browser tab, log in to ADT Web as an Administrator.
-
Choose your namespace.
-
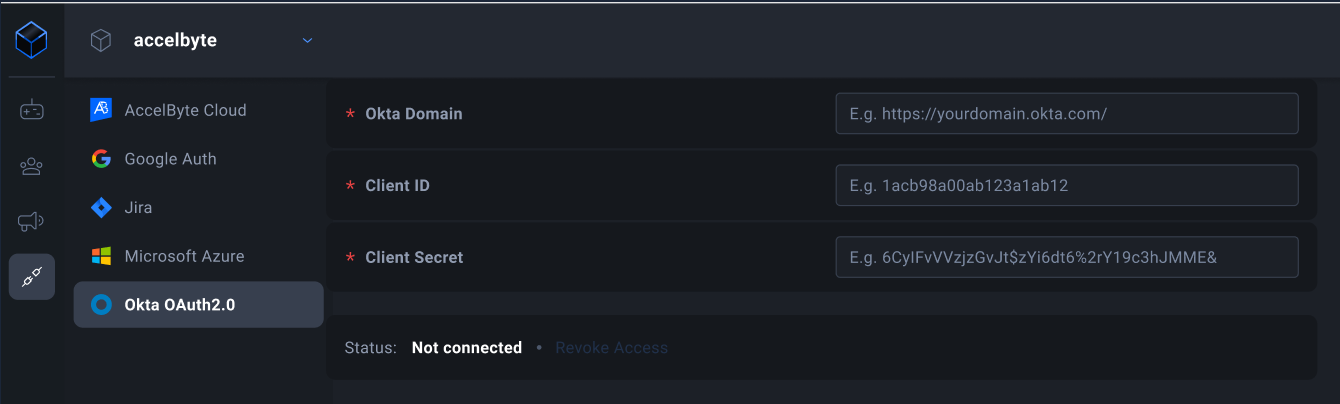
On the sidebar, select Integration menu, then select Okta.
-
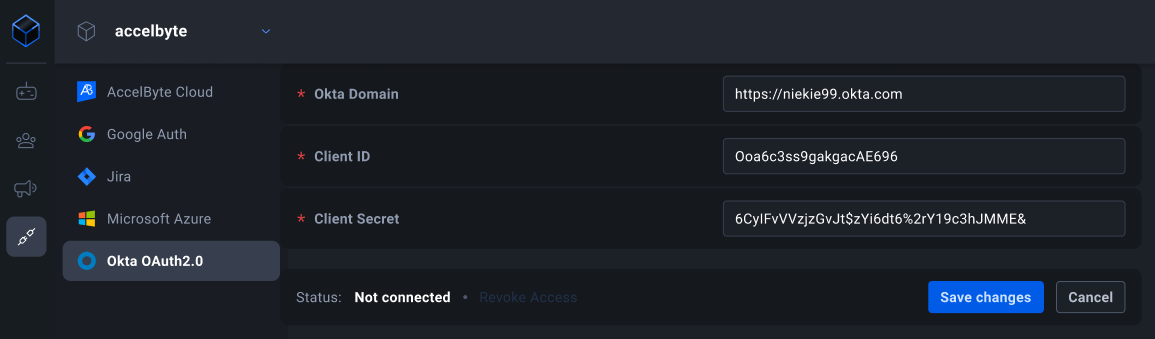
On this page, fill in the values for the Client ID, Client Secret, and Okta Domain from Okta.
noteYou need to add https:// at the beginning of the Okta domain name.
-
Click Save changes.
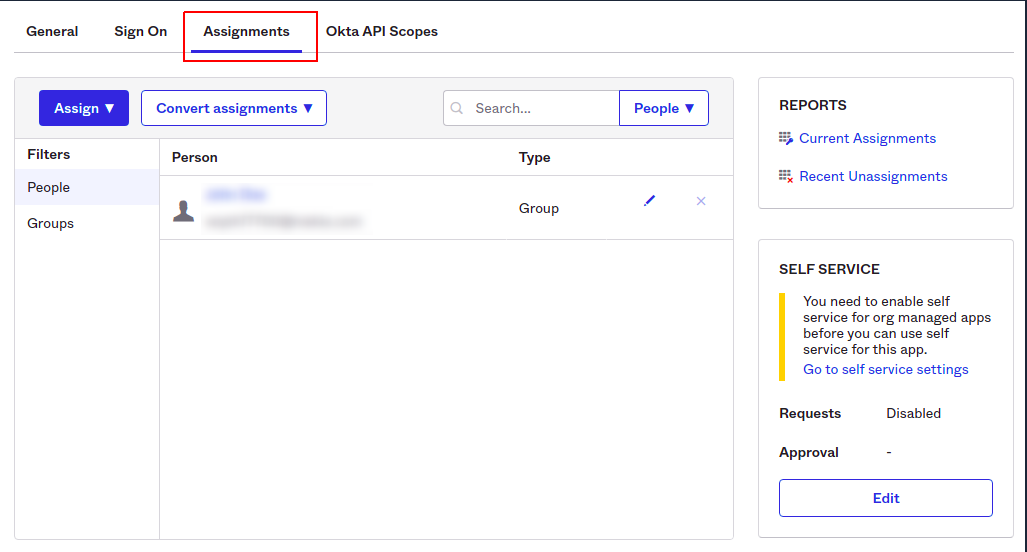
Assign the user/group
In Okta, give certain users or groups access to the OAuth application using the Assignments tab of the application.