Manage build statuses
Introduction
The AccelByte Development Toolkit (ADT) enables you to organize and track game builds effectively by assigning statuses. You can leverage two types of statuses:
- Default statuses: pre-defined statuses provided by ADT for common use cases.
- Custom statuses: statuses that your organization creates within a game namespace. Custom build statuses are created and configured per game namespace but can be imported into other game namespaces.
You can use these statuses to streamline your development process, improve team communication, and gain better insights into the status of each game build.
This article walks you through how to manage default and custom build statuses in ADT Web and in ADT Hub.
Prerequisite
To manage build statuses in ADT, you must have an admin or developer role.
View build statuses
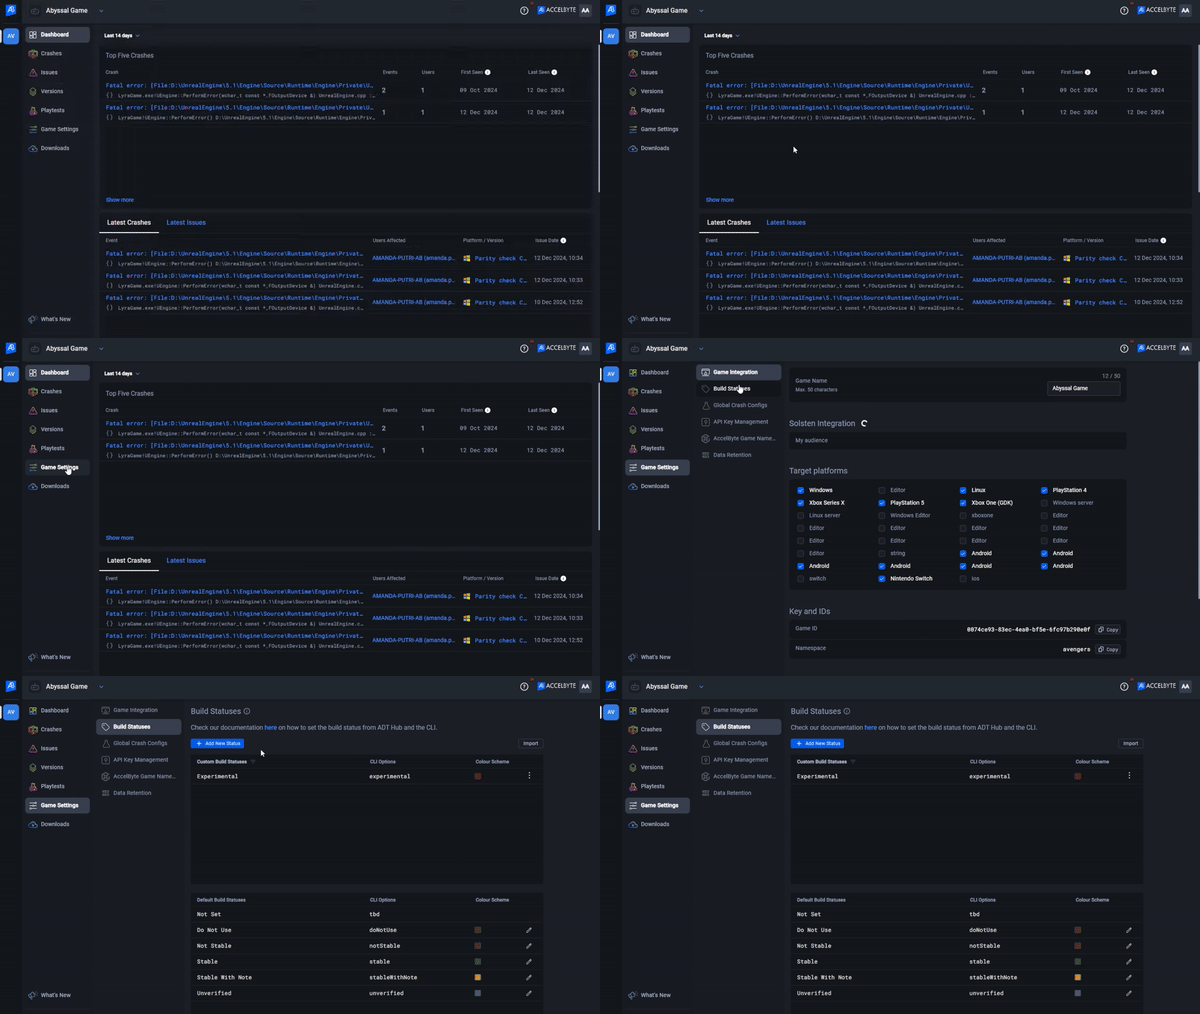
In ADT Web, go to your game namespace.
On the sidebar menu, go to Game Settings > Build Statuses. The Build Statuses page appears, showing two separate lists for custom and default statuses.

Manage default build statuses
ADT has the following default build statuses, applicable across all game namespaces:
- Do Not Use
- Not Stable
- Stable
- Stable with Note
- Unverified
Default build statuses cannot be deleted or modified. All their details are fixed, but you can customize their assigned colors.
Manage custom build statuses
You can use custom build statuses for various purposes, such as:
- Labeling or categorizing builds for specific purposes, for example, "Internal Testing" or "Playtest."
- Tracking different development stages, for example, "Beta Release," "Release candidate," or "Production."
- Highlighting important builds, for example, "Hotfix" or "Internal Only."
This section describes how to create and manage custom build statuses in ADT Web.
Create a new custom build status
- On the Build Statuses page, click on Add New Status. The Add New Custom Build Status form appears.
- Fill in the required information:
- Name: the name of the status as displayed for builds within ADT Hub.
- Option name: the name of the status as use in the ADT CLI.
- Color: the color associated with the status when assigned to builds.
- Click Add. The new status will immediately be available for selection in the game namespace.
Edit build statuses
- On the Build Statuses page, click on the three-dot menu of the status you want to edit and select Edit. The edit form appears.
- On the form, edit the details of the status and click Save to save your changes. Changes to the status are immediately applied to your game namespace, including builds currently assigned to it.
Delete custom build statuses
- On the Build Statuses page, click on the three-dot menu of the status you want to delete and select Delete.
- Click Delete on the confirmation message. The status is immediately deleted from your game namespace and from any builds that were assigned to it.
Import custom build statuses from other games
- On the Build Statuses page, click on Import. The Import Custom Build Statuses window appears.
- Choose the game with the statuses you want to import. A list of that game's build statuses appears.
- Click Import. The imported statuses are immediately added and available in the game namespace.
Assign statuses to builds
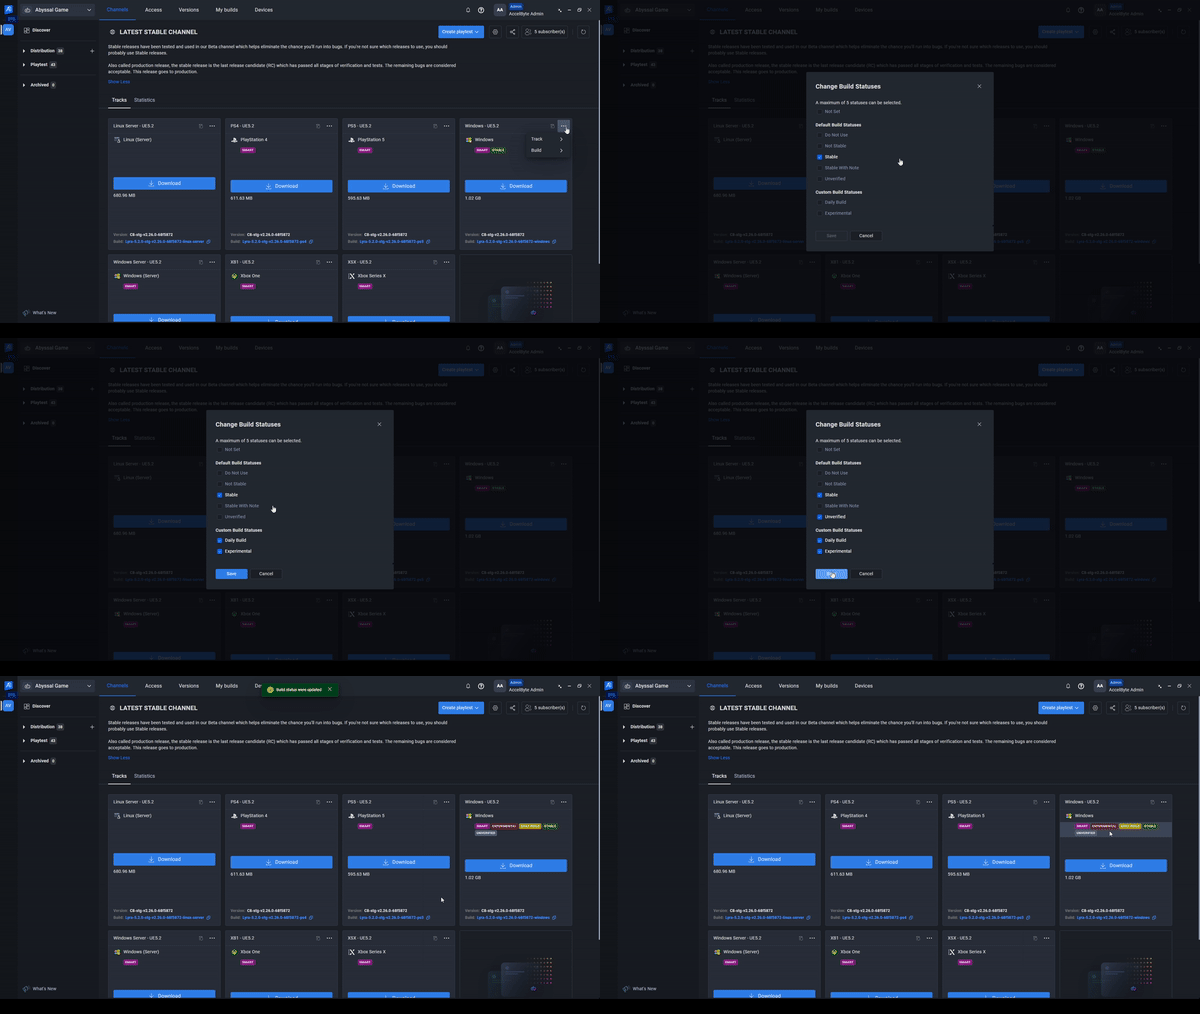
In ADT Hub, you can assign up to five statuses to builds in two locations: on channel tracks and on the Versions page.
On top of any assigned build statuses, smart builds are labeled "Smart" to differentiate them from legacy builds. This label cannot be removed.
On channel tracks
Assigning build statuses to a channel track means assigning them to all the builds within it. To do so, follow these steps:
- In ADT Hub, open the channel with the track you want to update.
- Click the ellipsis menu on the track and select Change Build Statuses.

- Select the statuses you want to assign to the track. You can select up to five statuses.
- Select Save.
On the Versions page
- In ADT Hub, go to the Versions page.
- From the list of builds, find the build you want to update.
- Click its ellipsis (three-dot) menu and select Change build statuses. The Change Build Statuses window appears.
- Select the statuses you want to assign to the build. You can select up to five statuses.
- Select Save.