Moderate UGC reports
Overview
Reporting supports moderating players and their User Generated Content (UGC). The player and their content reports will be specified by reasons you will set to ensure the reports are sorted systematically.
In this guide, you will learn how to utilize the reporting service to moderate the game player and content, display it within the game client, and modify it according to your game use case.
Goals
- Provide an understanding and overview of the reporting user generated content.
- Provide an understanding and overview of the reporting creators.
- Provide an understanding on how to set reasons for the reporting moderation for admins.
- Provide an understanding on how to moderate, such as hiding and deleting the reported content.
Prerequisites
- Access to the AccelByte Gaming Services (AGS) Admin Portal
- AccelByte Unreal or Unity SDK.
- Access to AccelByte UGC API documentation
- To follow the AGS CLI steps, install the AGS CLI and sign in with an account that has access to these features. See Install and sign in. The examples use a Bash shell.
Create a reporting reason
Your players can report offensive content. To enable this, you will need to create the reason why the items can be reported. Once the reason is created, you need to create the reason group to sort it.
- Admin Portal
- AGS CLI
-
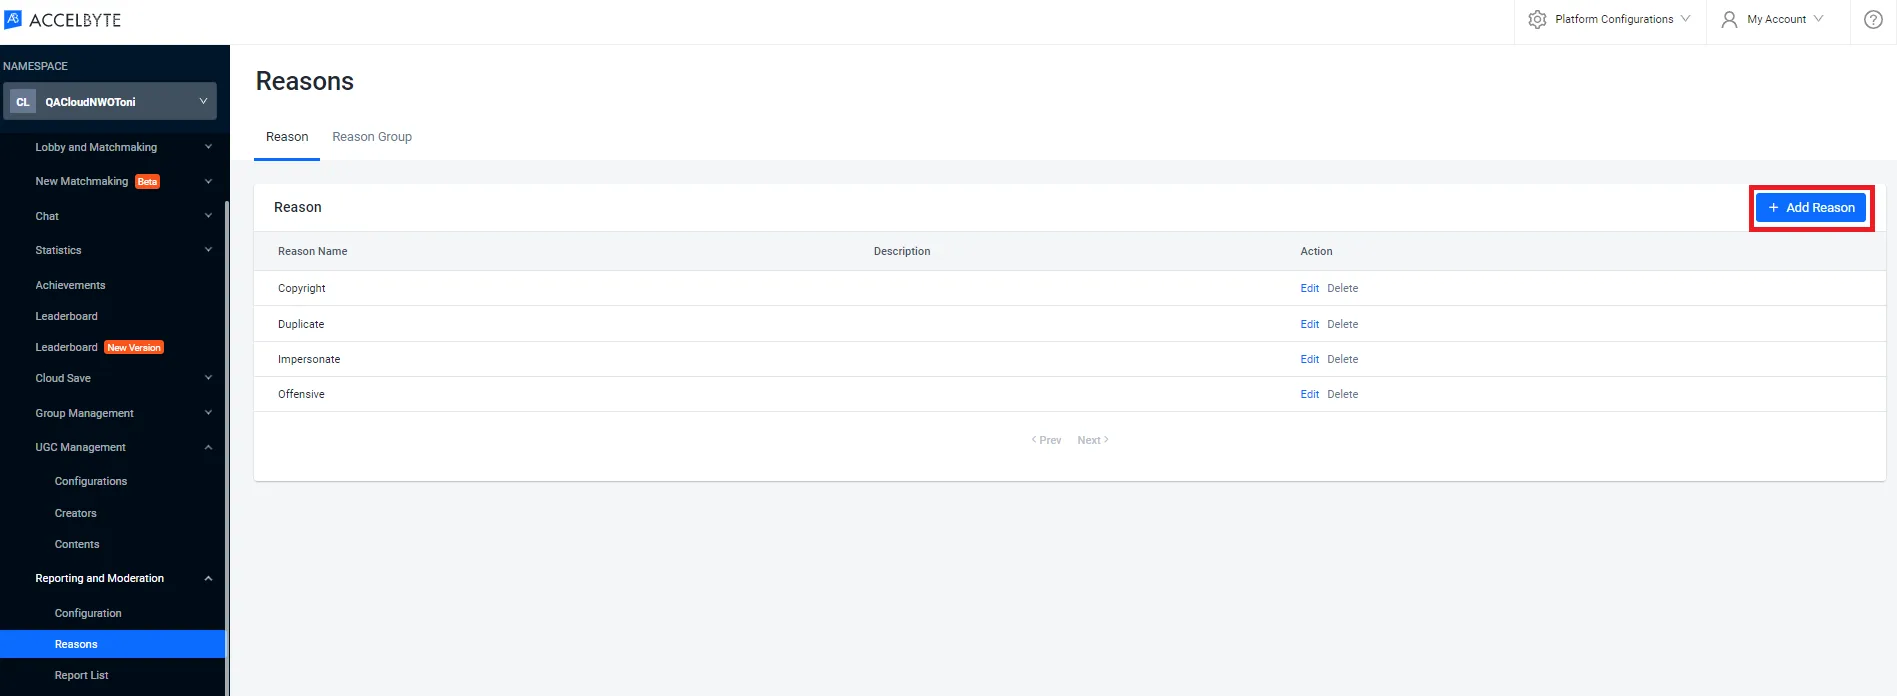
In your game namespace, go to Foundations > Reporting & Moderation > Reasons.
-
On the Reasons page, open the Reason tab and click on the + Add Reason button.
-
On the Add New Reason form, fill in the required information:

- Add the reason name in the Reason Name field.
- OPTIONAL: Pick the category the reason belongs to from the Reason Group Name dropdown. To have the reason group listed, make sure a Reason Group is created. You can add a reason to multiple groups.
- OPTIONAL: Fill the description of the reason in the Description field.
-
When you're done, click the Add button to create your new reason. The new reason will appear in the reason list.
-
(Optional) To add the reason to reason groups, find the IDs of the groups. Each group's
idis in thedatalist of the output.ags reporting reasons list-groups --namespace <YourNamespace> -
Create the reason. Replace
<ReasonName>with the reason name,<Description>with a description, and<ReasonGroupId>with a group ID from step 1:ags reporting reasons create --namespace <YourNamespace> \
--json '{"title": "<ReasonName>", "description": "<Description>", "groupIds": ["<ReasonGroupId>"]}'To skip the description or the groups, send
"description": ""or"groupIds": []. The Admin Portal sends the same values when you leave those fields empty. The command prints the new reason, including itsid.
Create a reason group
Each reason that is created can be sorted into multiple groups. Follow the steps below to create a new reason group.
- Admin Portal
- AGS CLI
-
In your game namespace, go to Foundations > Reporting & Moderation > Reasons.
-
On the Reasons page, open the Reason tab and click on the + Add Reason button.
-
On the Add New Reason Group form, fill in the required information:

- Fill the reason group name in the Reason Group Name field.
- OPTIONAL: Add the reason list into the Reason List field. This list will include any previous reasons you have created. This field is optional.
-
When you're done, click the Add button to create your new reason group. The new reason group will appear in the list.
-
(Optional) To add reasons to the group, find the IDs of the reasons. Each reason's
idis in thedatalist of the output.ags reporting reasons list --namespace <YourNamespace> -
Create the reason group. Replace
<ReasonGroupName>with the group name and<ReasonId>with a reason ID from step 1. To create an empty group, send"reasonIds": [].ags reporting reasons create-group --namespace <YourNamespace> \
--json '{"title": "<ReasonGroupName>", "reasonIds": ["<ReasonId>"]}'
You will be able to edit a Reason Group, edit a Description, or Delete a reason group at any time.
Configure and moderate offensive content
Admins can receive players' reports and view, hide, and remove reported content. Admins can also discipline the reported players by banning them from uploading more content within a specific time frame or permanently.
In this section, you will learn about the actions that can be done by an admin in the AGS Admin Portal or with the AGS CLI, including:
- View reported content and its creator.
- View the reporting player.
- Hide or unhide the reported content.
- Delete the reported content.
- Ban the reported content uploader.
- Resolve or unresolve the reported content.
View reported content lists, the content creator, and the reporting player
When content is reported, an admin can view the reported content, its creator, and the reporting player.
To view the details of a reported content, follow these steps:
- Admin Portal
- AGS CLI
-
In your game namespace, go to Foundations > Reporting & Moderation > Reports List.
-
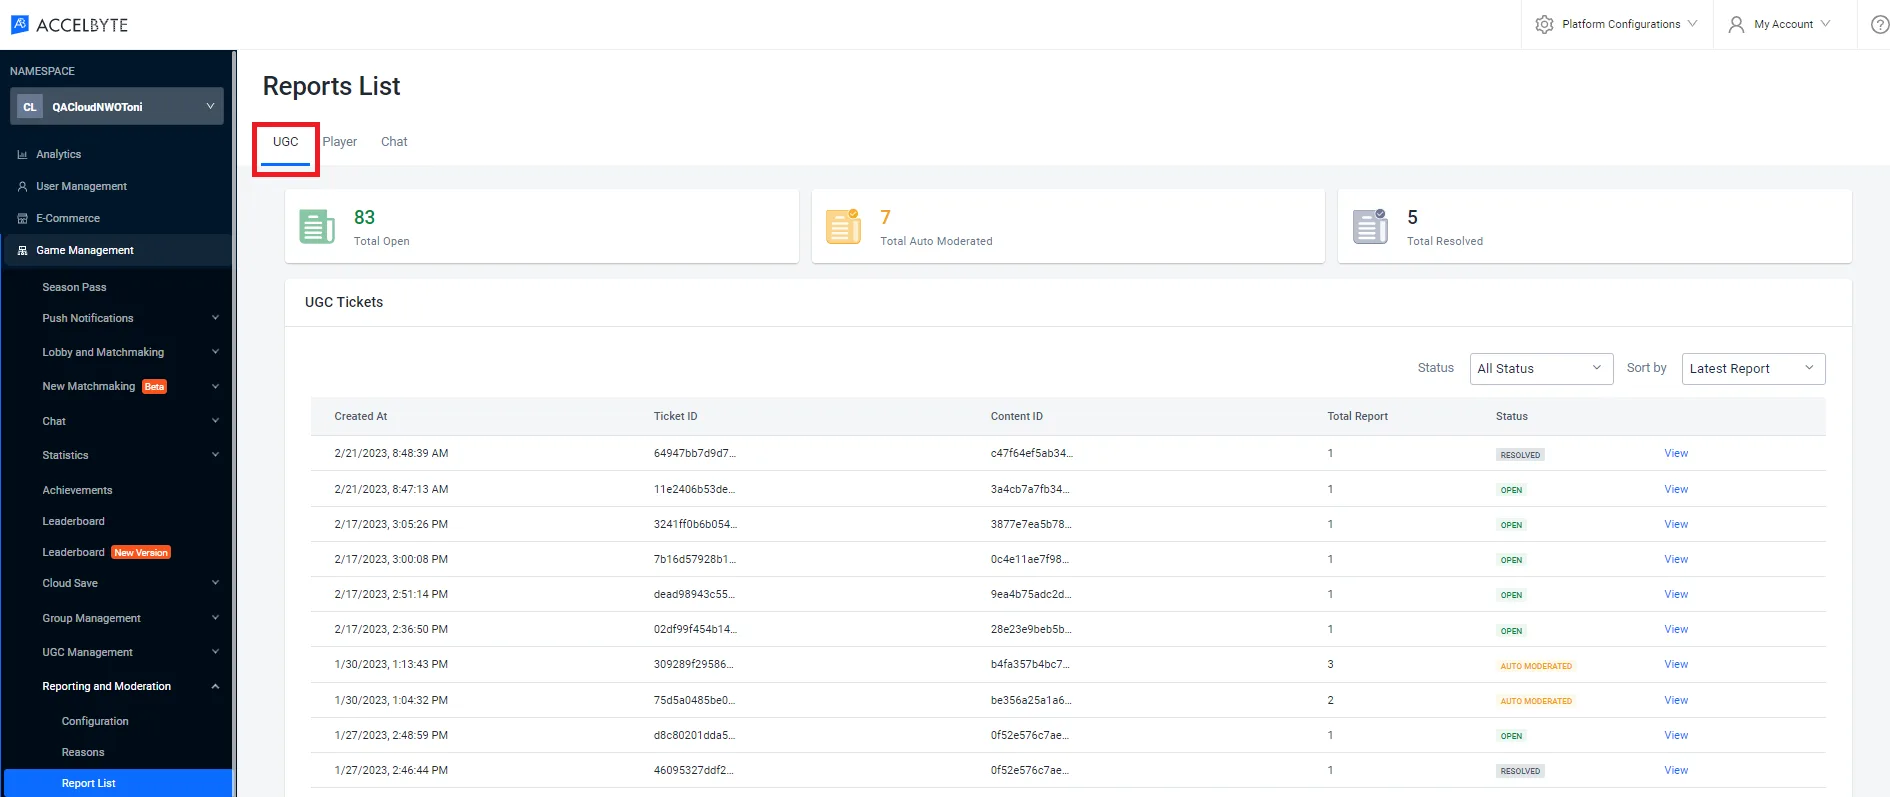
On the Reports List page, open the UGC tab to see the list of reported content.
-
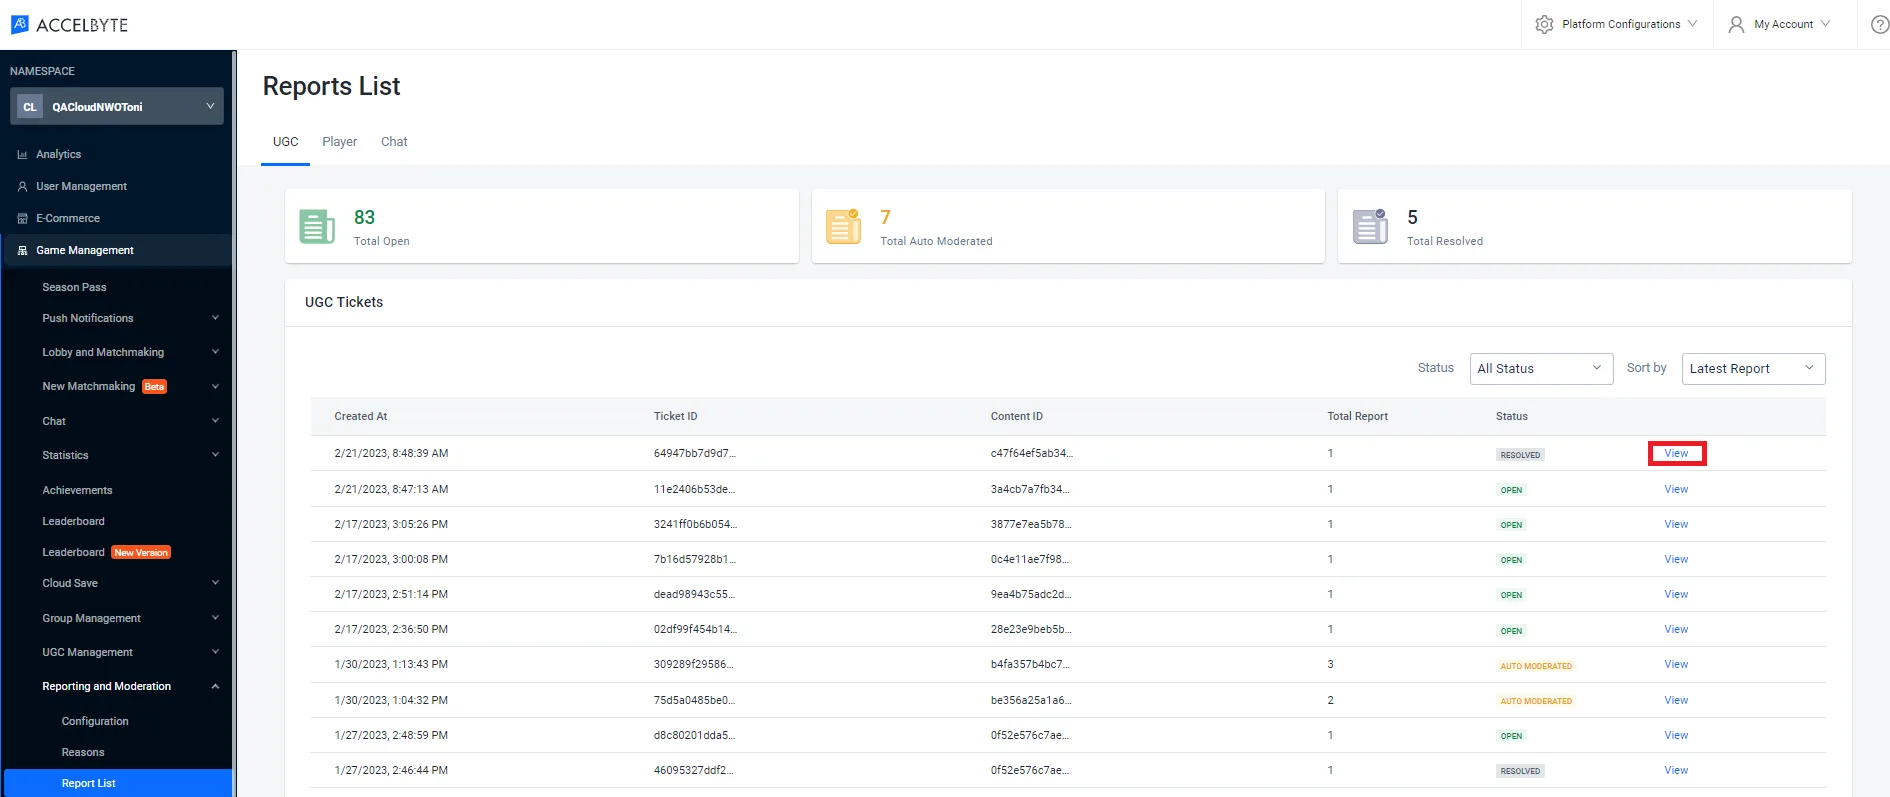
To view the details of a reported content, click on the View option next to it.
-
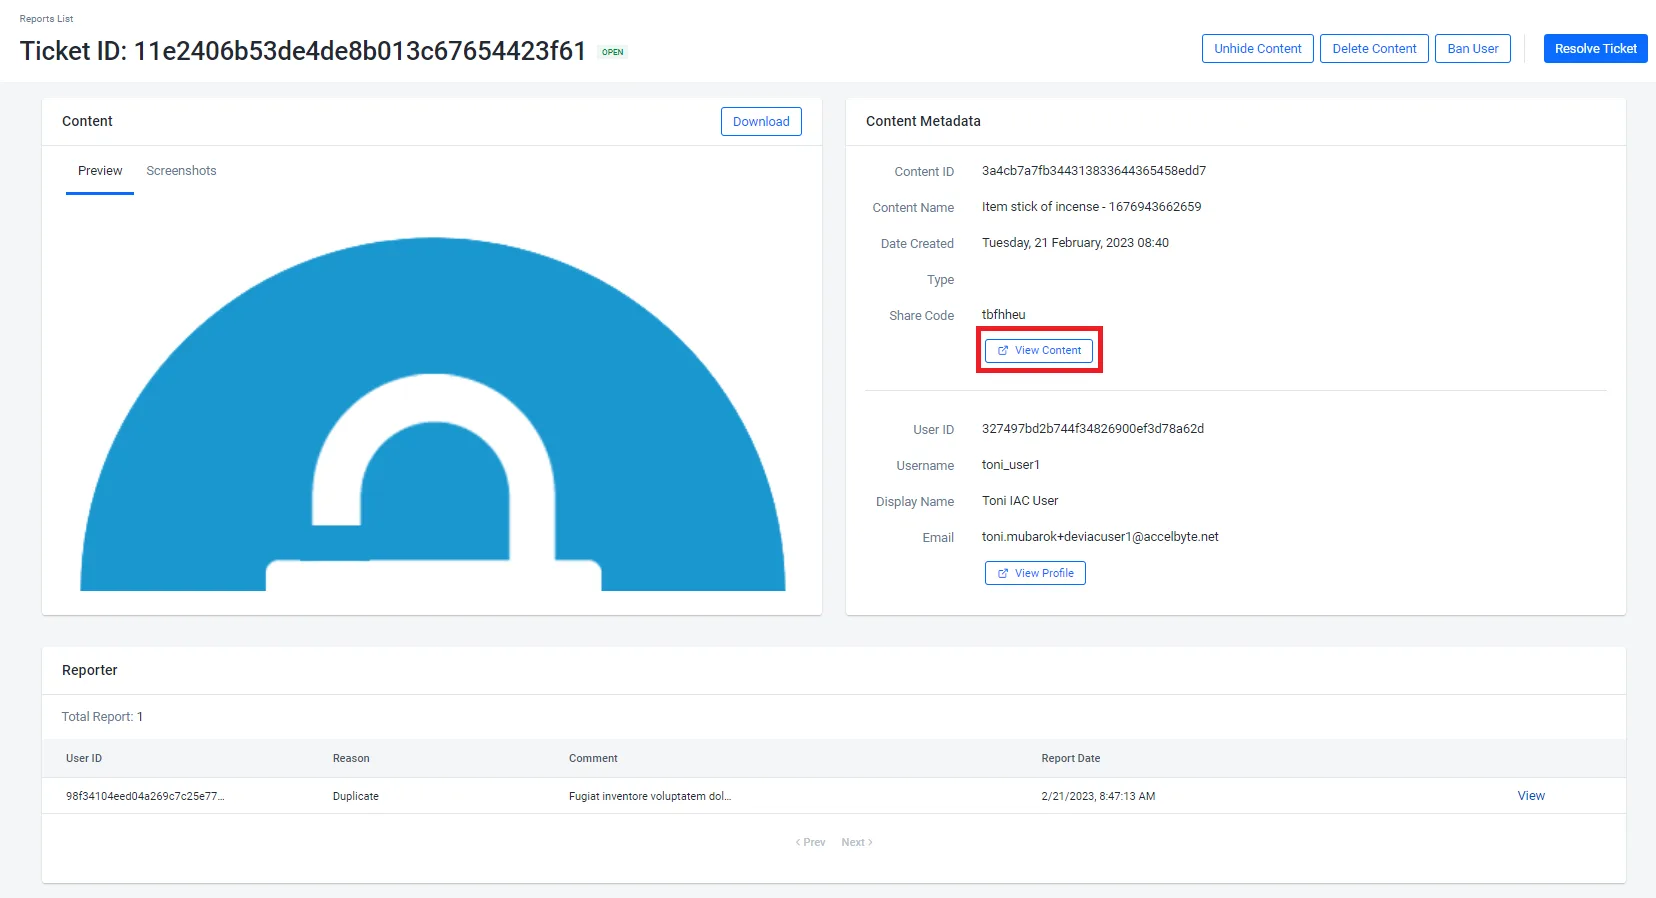
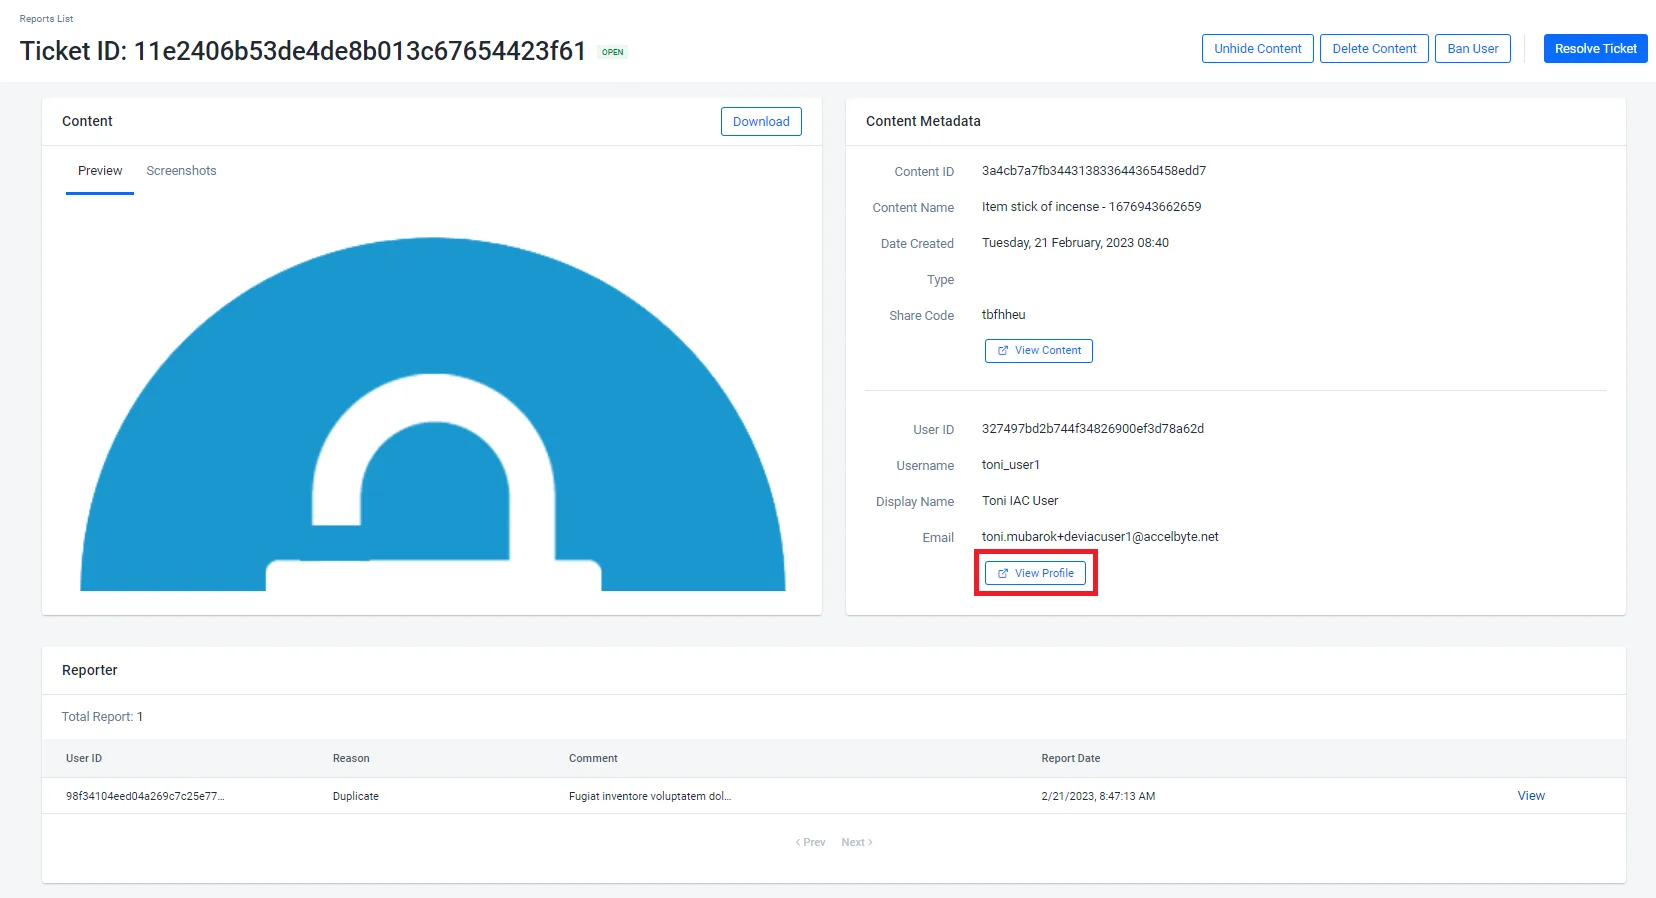
The content will be displayed on the ticket page. To view the content details, click on View Content.
-
To view the content creator, click on View Profile.
-
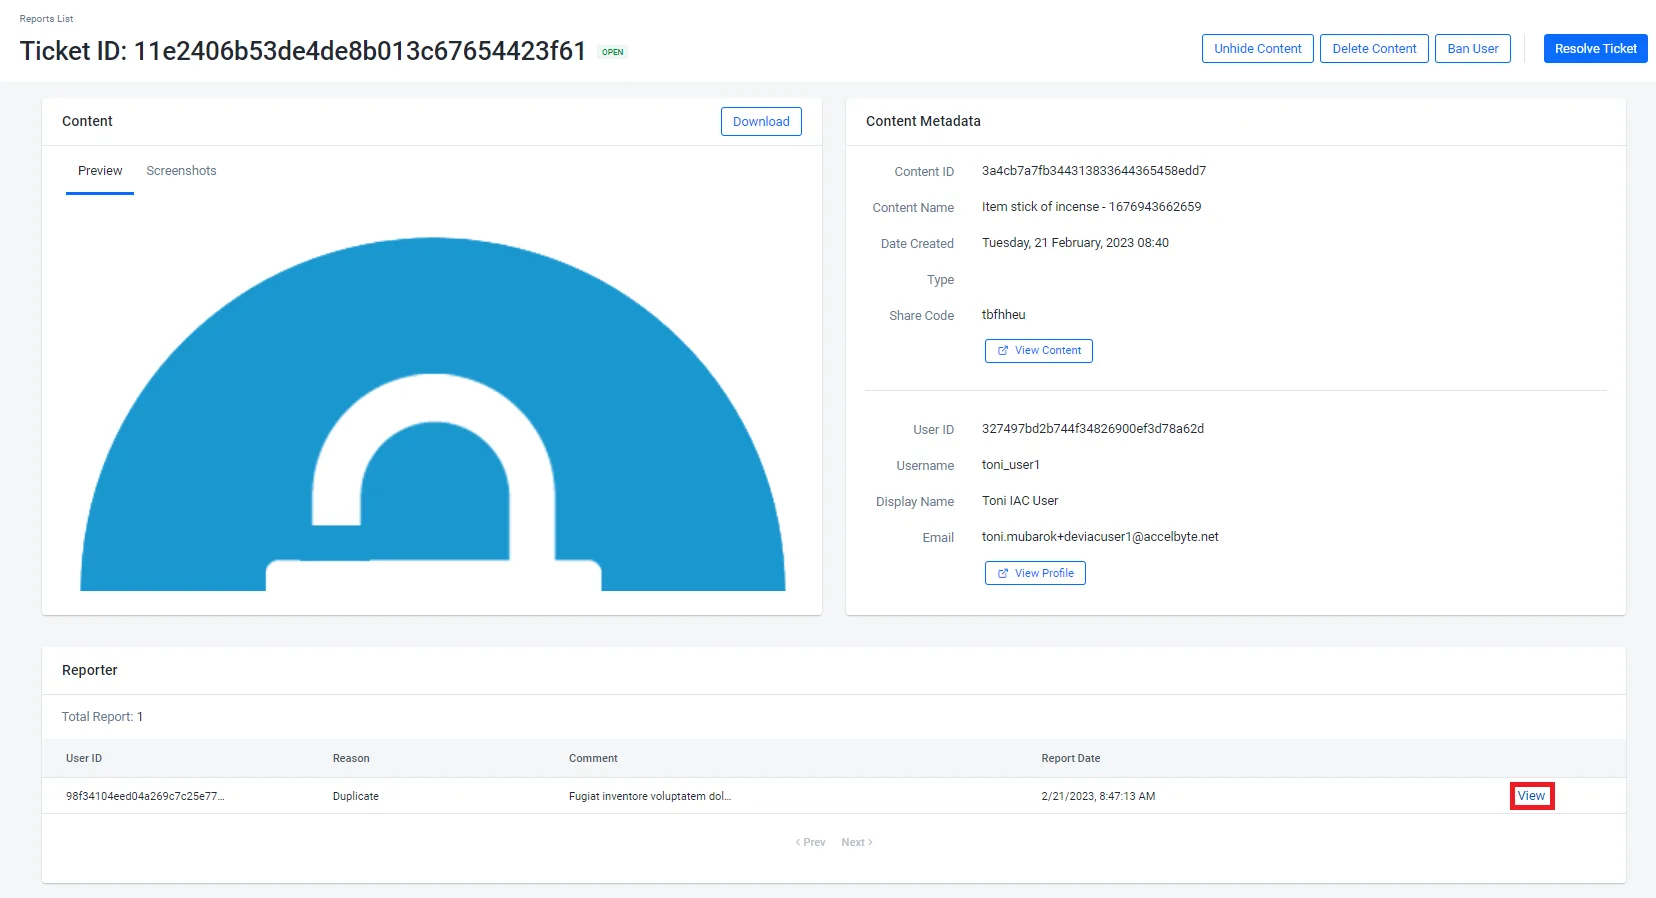
The content reporter is displayed on the ticket details. To display the details, click on the View option.
-
-
List the UGC reports. To show only the reports that are still open, add
--status OPEN.ags reporting tickets list --namespace <YourNamespace> --category UGCEach ticket in the
datalist has these fields:id: the ticket ID.objectId: the ID of the reported content.userId: the user ID of the content creator.status:OPEN,CLOSED, orAUTO_MODERATED.
-
View the details of a ticket. Replace
<TicketId>with the ticket'sid:ags reporting tickets get --namespace <YourNamespace> --ticket-id <TicketId> -
View the reported content. Replace
<ContentId>with the ticket'sobjectId:ags ugc content get --namespace <YourNamespace> --content-id <ContentId>The output includes the content's
name, itschannelId, the creator'suserId, andisHidden, which shows whether the content is hidden. -
View the profile of the content creator. Replace
<UserId>with the ticket'suserId:ags iam users get --namespace <YourNamespace> --user-id <UserId> -
View the reports on the ticket. Each report shows the reporting player's user ID (
reporterId), thereason, and the reporter'scomment. To view the reporting player's profile, run the command from step 4 with thereporterId.ags reporting tickets list-reports --namespace <YourNamespace> --ticket-id <TicketId>
Hide and unhide the reported content
An admin can perform several actions to moderate the content that was reported, including hiding and unhiding content.
To hide and unhide reported content, follow these steps:
- Admin Portal
- AGS CLI
-
In your game namespace, go to Foundations > Reporting & Moderation > Reports List.
-
On the Reports List page, open the UGC tab to see the list of reported content.
-
From the list, find the reported content you want to hide or unhide and click on the View option next to it.
-
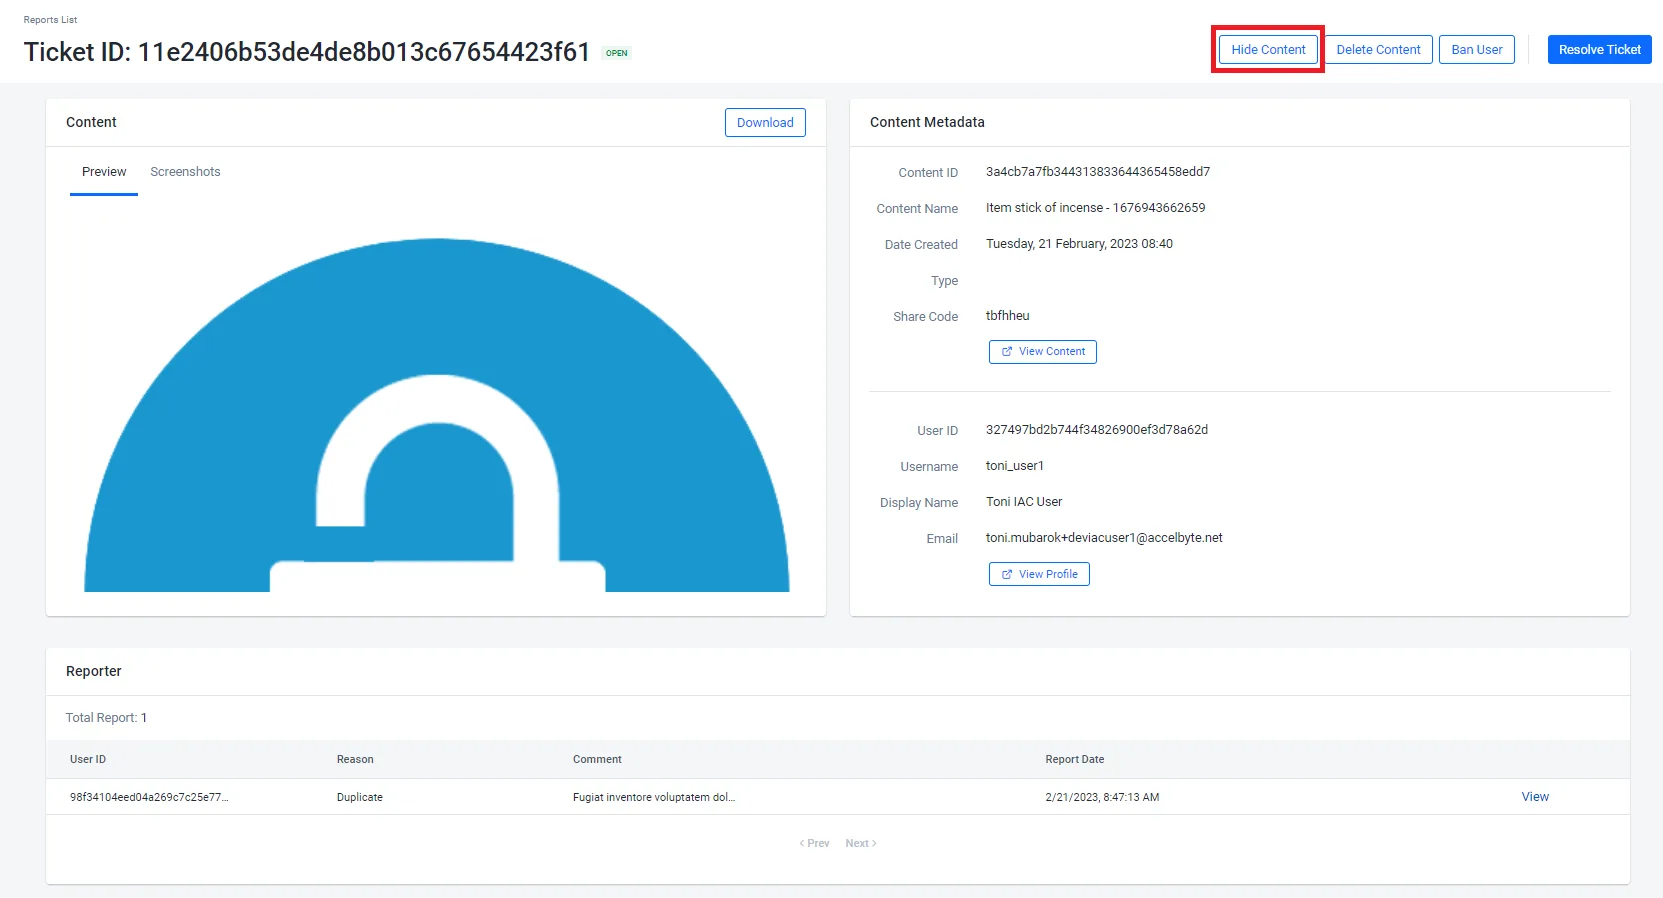
On the content's details page, click on Hide Content or Unhide Content.
-
On the confirmation message, click on Hide or Unhide to confirm.

-
Find the content ID and the creator's user ID. Get the content ID from the ticket's
objectId, then view the content to get itsuserIdand checkisHidden. See View reported content lists, the content creator, and the reporting player.ags ugc content get --namespace <YourNamespace> --content-id <ContentId> -
Hide the content. To unhide it, send
"isHidden": falseinstead.ags ugc content update-visibility --namespace <YourNamespace> --user-id <UserId> --content-id <ContentId> \
--json '{"isHidden": true}'
Delete reported content
An admin can perform several actions to moderate the content that was reported, including removing the reported content.
To delete a reported content, follow these steps:
- Admin Portal
- AGS CLI
-
In your game namespace, go to Foundations > Reporting & Moderation > Reports List.
-
On the Reports List page, open the UGC tab to see the list of reported content.
-
From the list, find the reported content you want to delete and click on the View option next to it.
-
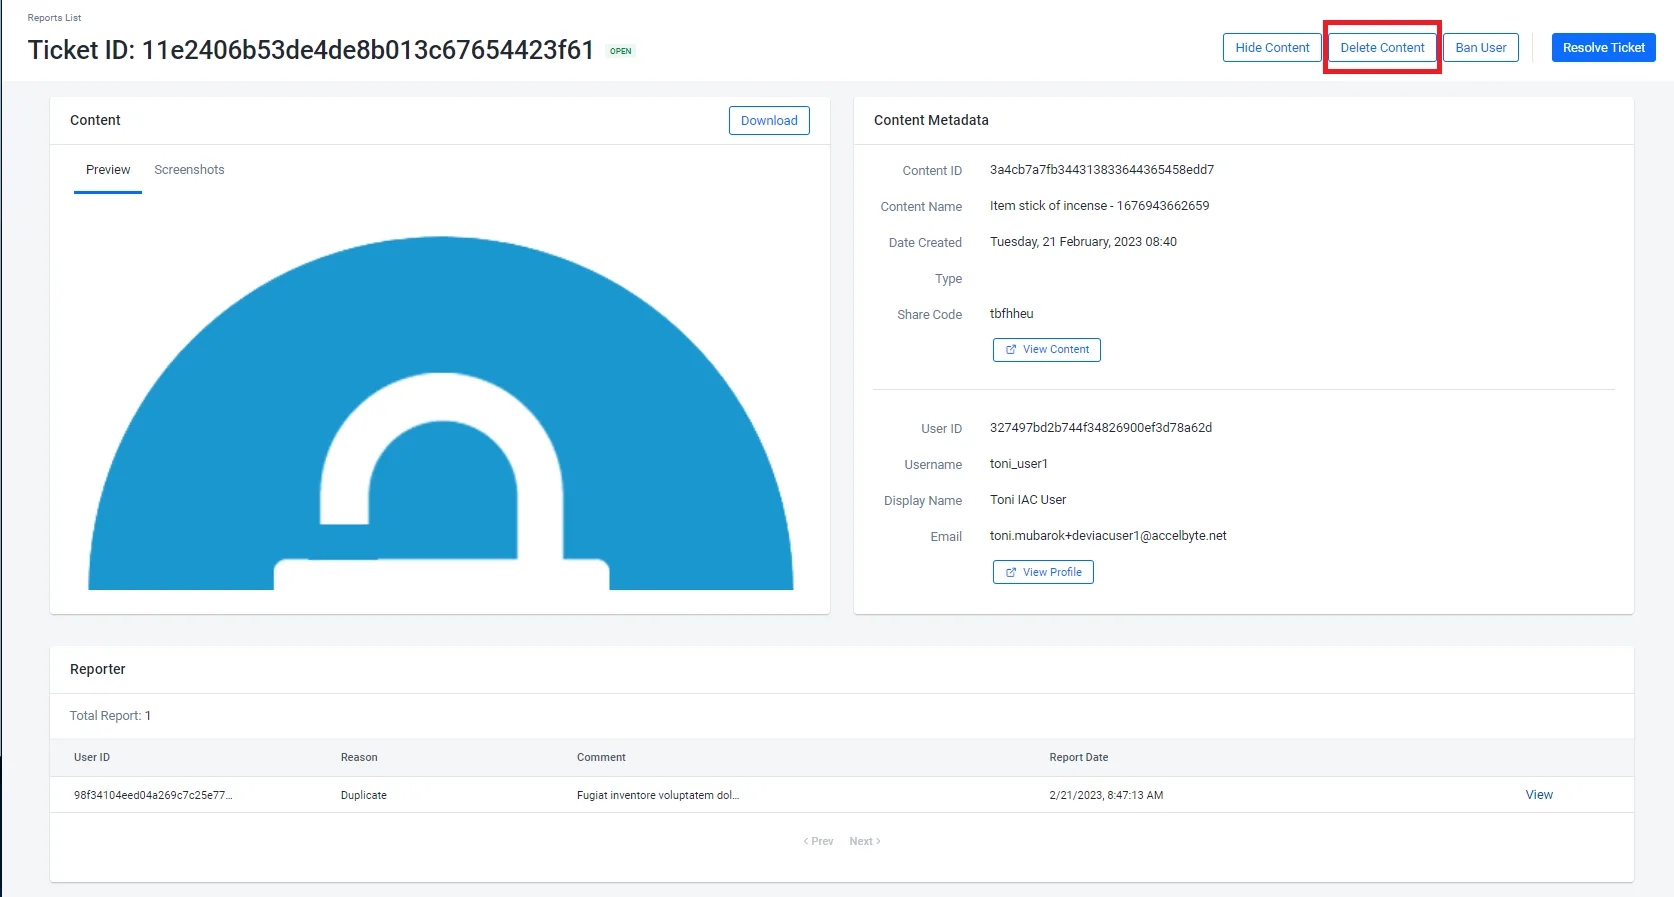
On the content's details page, click on the Delete Content button.
-
On the confirmation message, type DELETE in the box and click the Delete button.
warningThis action is not reversible.

-
View the content to get the creator's
userIdand the content'schannelId. Replace<ContentId>with the ticket'sobjectId.ags ugc content get --namespace <YourNamespace> --content-id <ContentId> -
Delete the content:
ags ugc content delete-user --namespace <YourNamespace> --user-id <UserId> \
--channel-id <ChannelId> --content-id <ContentId>warningThis action is not reversible. Check the IDs before you run it, then confirm when prompted.
Ban the uploader of reported content
An admin can perform several actions to moderate the content that was reported, including banning and unbanning the content uploader.
To ban the uploader of a reported content, follow these steps:
- Admin Portal
- AGS CLI
-
In your game namespace, go to Foundations > Reporting & Moderation > Reports List.
-
On the Reports List page, open the UGC tab to see the list of reported content.
-
From the list, find the reported content with the uploader whom you want to ban and click on the View option next to it.
-
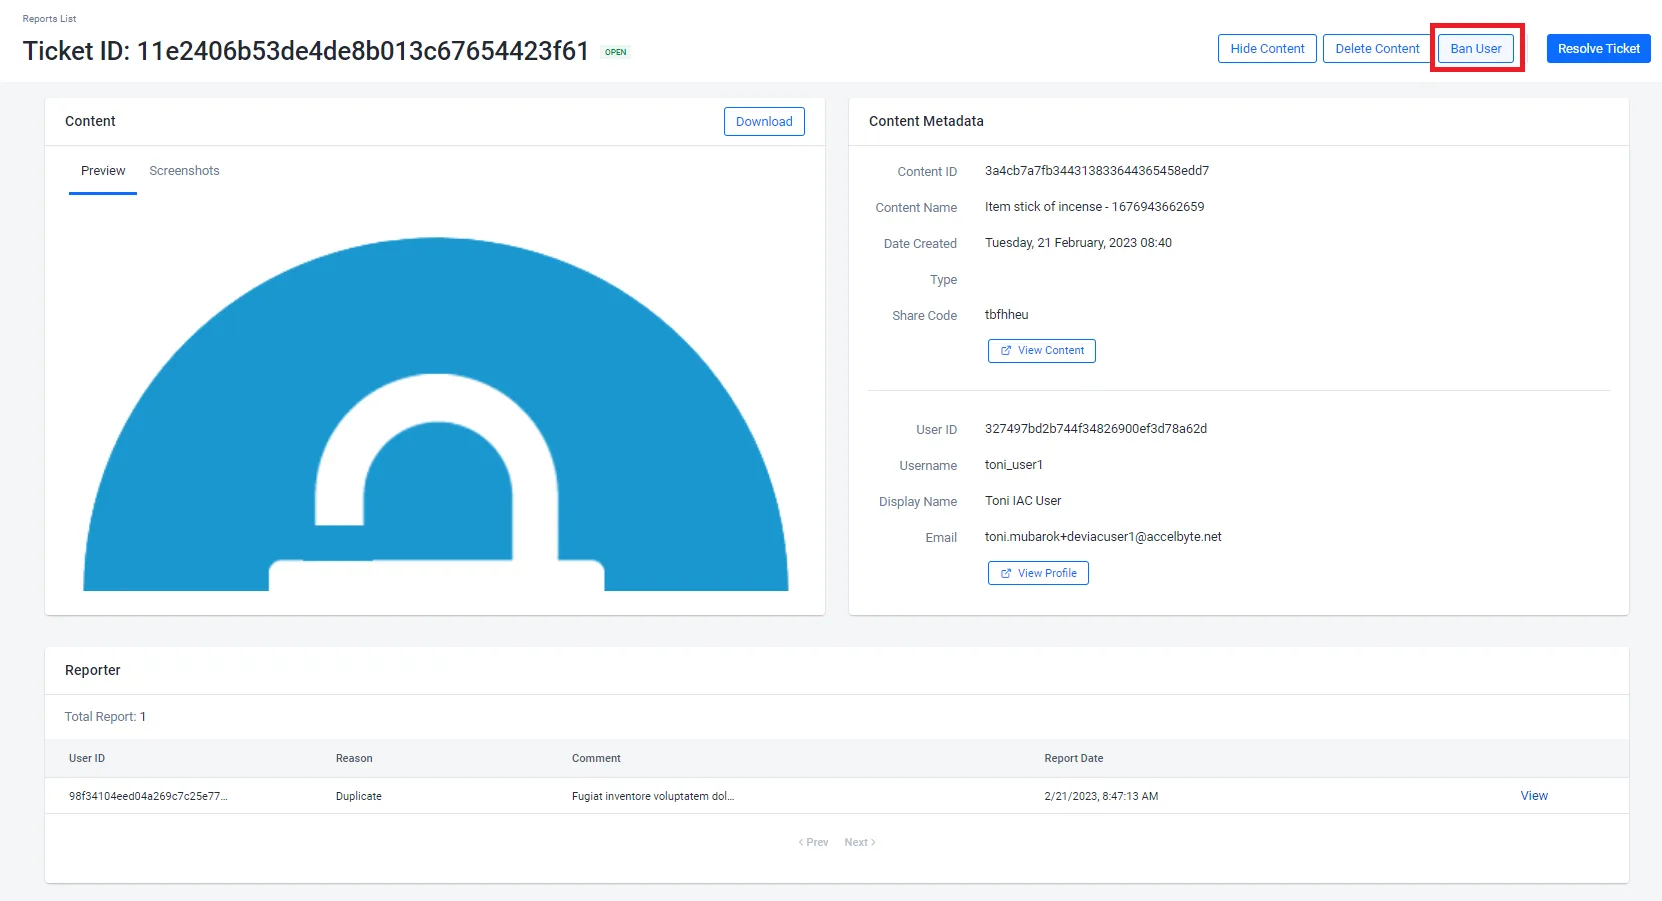
On the content's details page, click on the Ban User button.
-
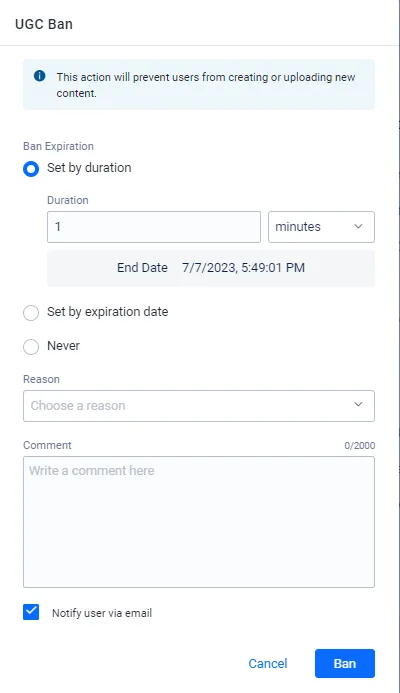
On the UGC Ban form, fill in the required information:
- Configure the Ban Expiration.
- Set by duration: Ban the for a specified amount time. Set the Duration and the measurement of time (minutes, days, etc.) from the dropdown. The ban will expire after the set duration of time has passed.
- Set by expiration date: Select a date for when the ban will expire.
- Never: The ban will never expire and the player must be unbanned manually.
- Select a ban Reason reason from the dropdown.
- Add your comment for the ban reason in the Comment box.
- You can select whether to inform the uploader of reported content by using the Notify user via email option.
- Configure the Ban Expiration.
-
Click on Ban. The uploader of the reported content is immediately banned from your game.
-
Find the uploader's user ID. It's the
userIdof the ticket. See View reported content lists, the content creator, and the reporting player. -
List the ban reasons. Each entry in
reasonshas areasonvalue that you can use.ags iam bans list-reasons -
Create a JSON file with the ban's settings. Any file name works. This example uses
ban.json:{
"ban": "UGC_CREATE_UPDATE",
"reason": "<BanReason>",
"comment": "<Comment>",
"endDate": "<EndDate>",
"skipNotif": false
}ban: the ban type.UGC_CREATE_UPDATEis the type that the Admin Portal's UGC Ban form uses.reason: areasonvalue from step 2.endDate: when the ban expires, in UTC and ISO 8601 format, such as2026-12-31T00:00:00Z. The Admin Portal works out this date from the Ban Expiration you choose. For a ban that never expires, it uses2099-12-31T00:00:00Z.skipNotif:falseto notify the uploader by email, the same as ticking Notify user via email.trueto skip the email.
-
Ban the uploader. After
@, pass the path to your JSON file:ags iam users ban --namespace <YourNamespace> --user-id <UserId> --json @ban.json
Resolve or unresolve reported content
To resolve or unresolve reported content, follow these steps:
- Admin Portal
- AGS CLI
-
In your game namespace, go to Foundations > Reporting & Moderation > Reports List.
-
On the Reports List page, open the UGC tab to see the list of reported content.
-
From the list, find the reported content that you want to resolve or unresolve and click on the View option next to it.
-
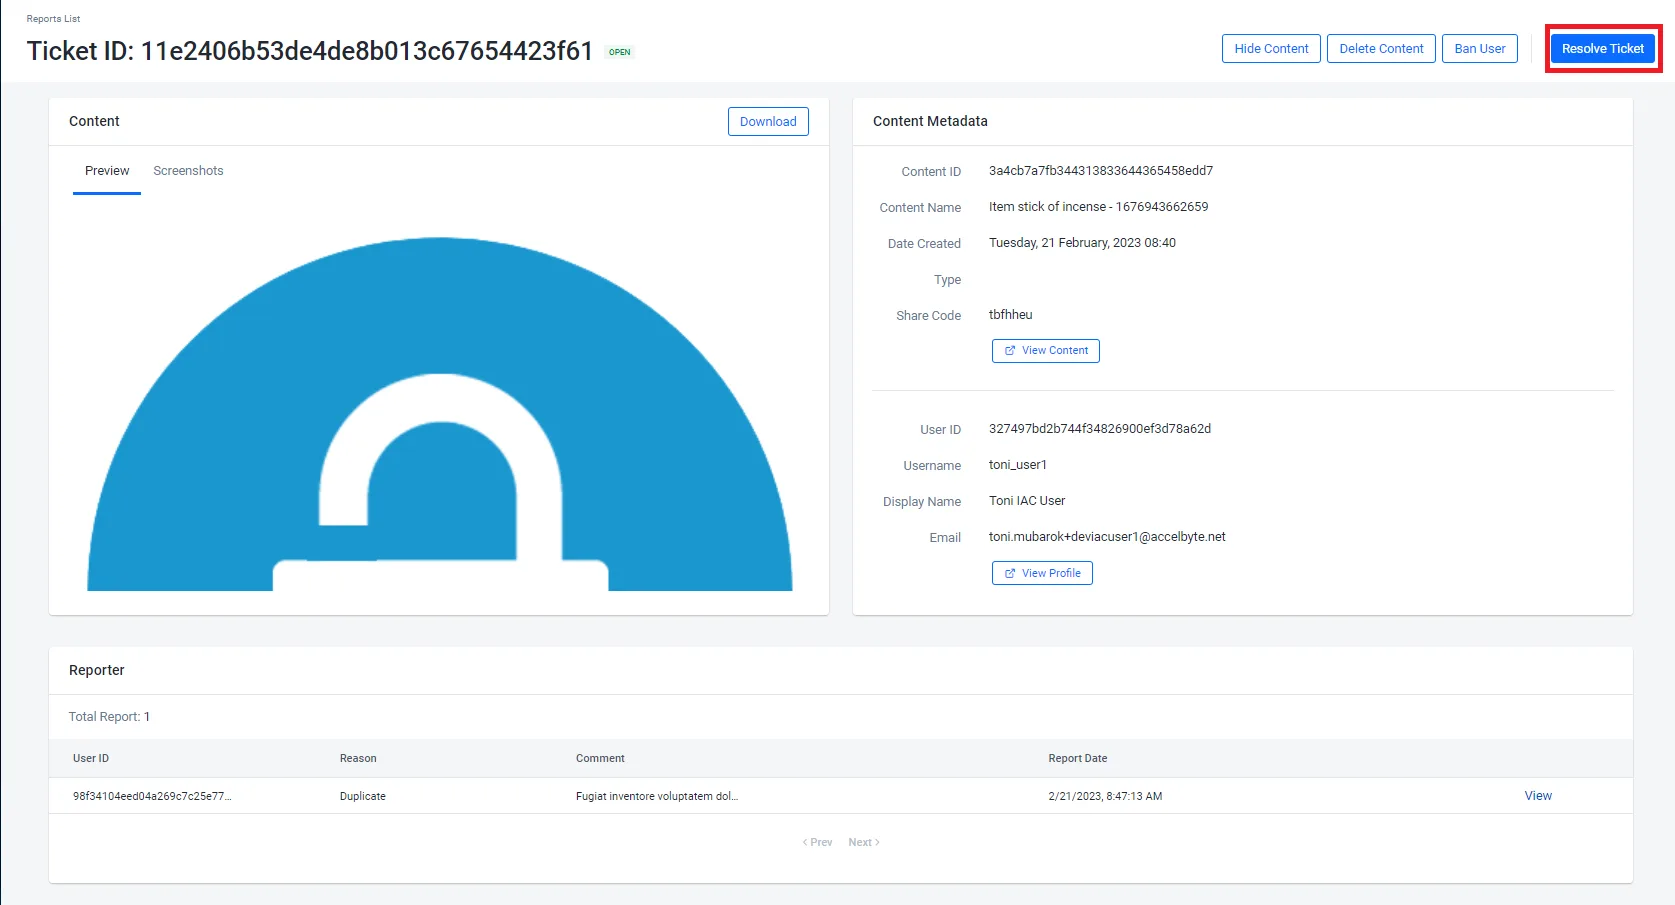
On the content's details page, click on Resolve Ticket or Unresolve Ticket.
-
If resolving a ticket, the Resolve Ticket confirmation message appears. Add a note describing the incident and resolution, then click Resolve to finish.

-
If unresolving a ticket, the Unresolve Ticket confirmation message appears. Add a note describing the incident, then click Unresolve to re-open the ticket.

-
-
Resolve the ticket. Replace
<TicketId>with the ticket ID and<Notes>with a note that describes the incident and resolution, in up to 280 characters.ags reporting tickets update-resolution --namespace <YourNamespace> --ticket-id <TicketId> \
--json '{"status": "CLOSED", "notes": "<Notes>"}'To unresolve the ticket and re-open it, send
"status": "OPEN"instead.