Jira Integration
Overview
Jira Cloud (Jira) is an Atlassian product you can use to add and change issue types, fields, and workflows to manage tasks in your projects. You can easily integrate Jira into AccelByte Development Toolkit (ADT) to create new tickets or link crashes to existing tickets in your system.
Prerequisite
You must be an ADT Admin or Developer to do this integration.
Link your ADT account with Jira
To integrate Jira into your ADT system, you first need to link your ADT account with Atlassian. You can do this in two ways:
-
Linking through a game Crashes Page (for Admin and Developer role)
-
Linking through your namespace integrations page (Admin only)
Link through a game Crash Page
-
Log in to ADT Web.
-
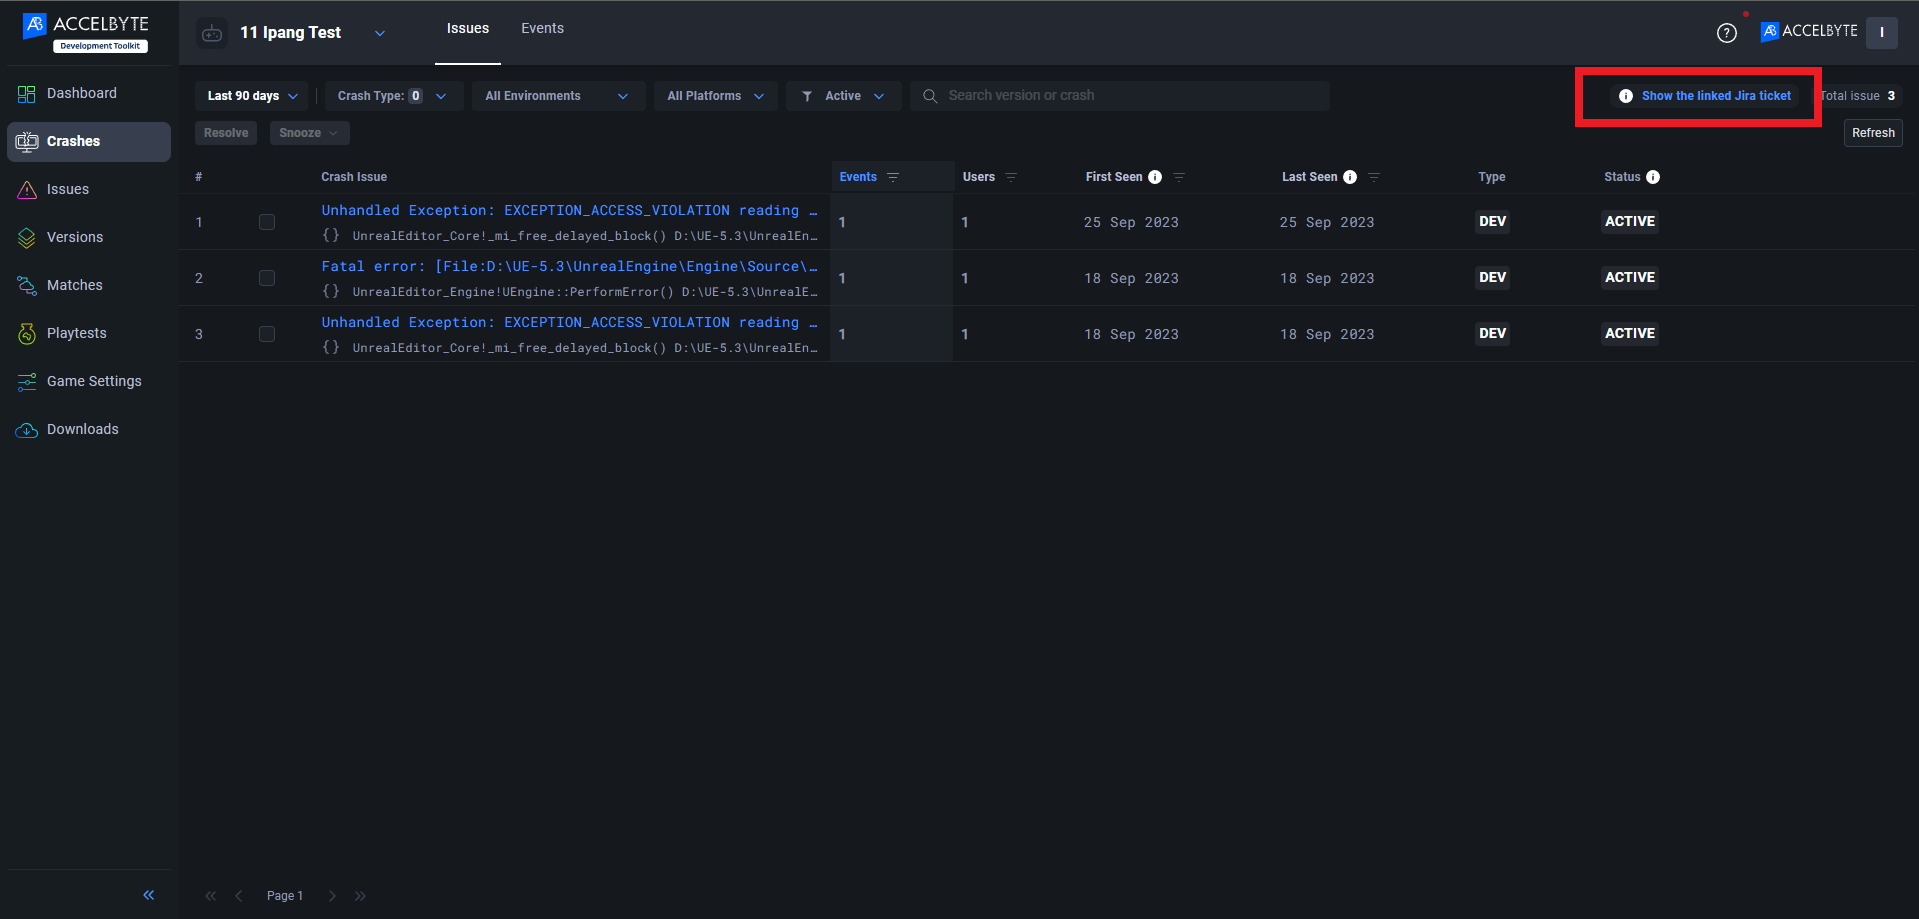
Go to the Crash menu and then click the Show the linked Jira ticket text on the top-right corner.
-
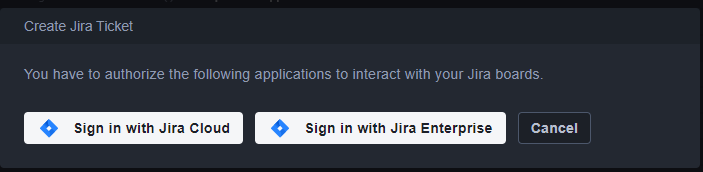
On the Create Jira Ticket page, click Sign in with Jira Cloud.
-
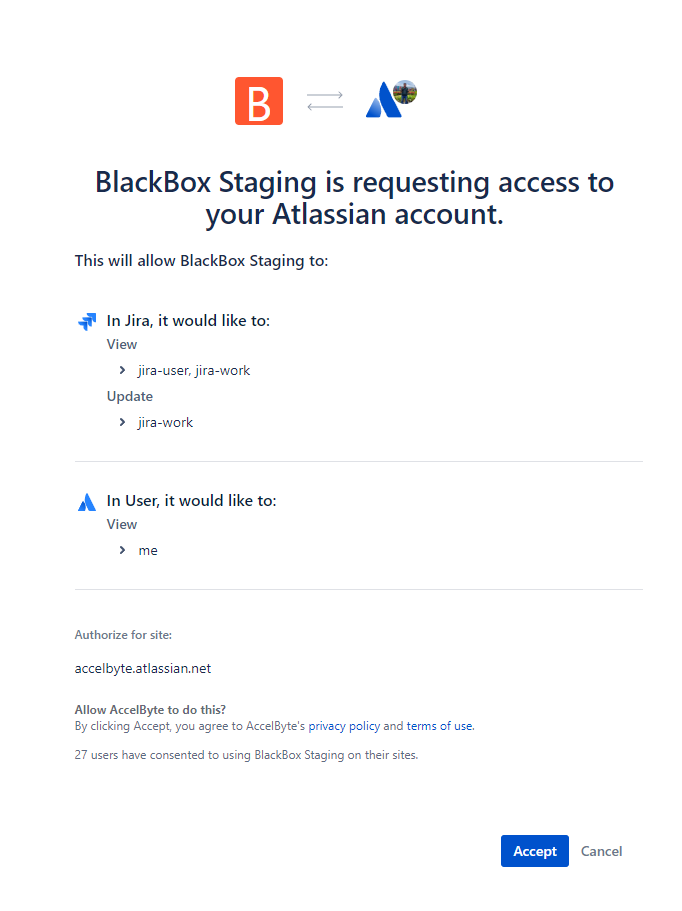
Click Accept to allow ADT to access your Atlassian account.
Link through your namespace integrations page
-
Log in to ADT Web as an administrator.
-
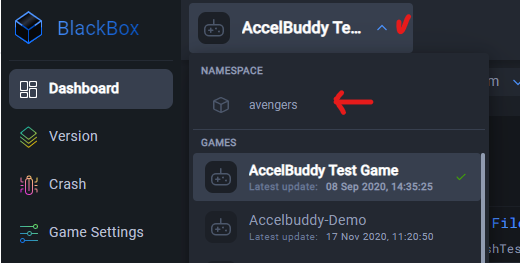
Go to the Namespace Settings menu by clicking the dropdown next to the game name, then select your namespace.
-
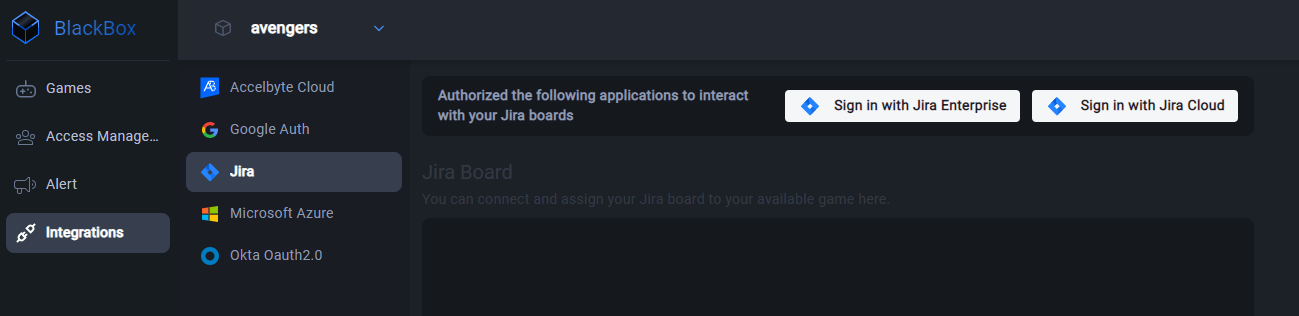
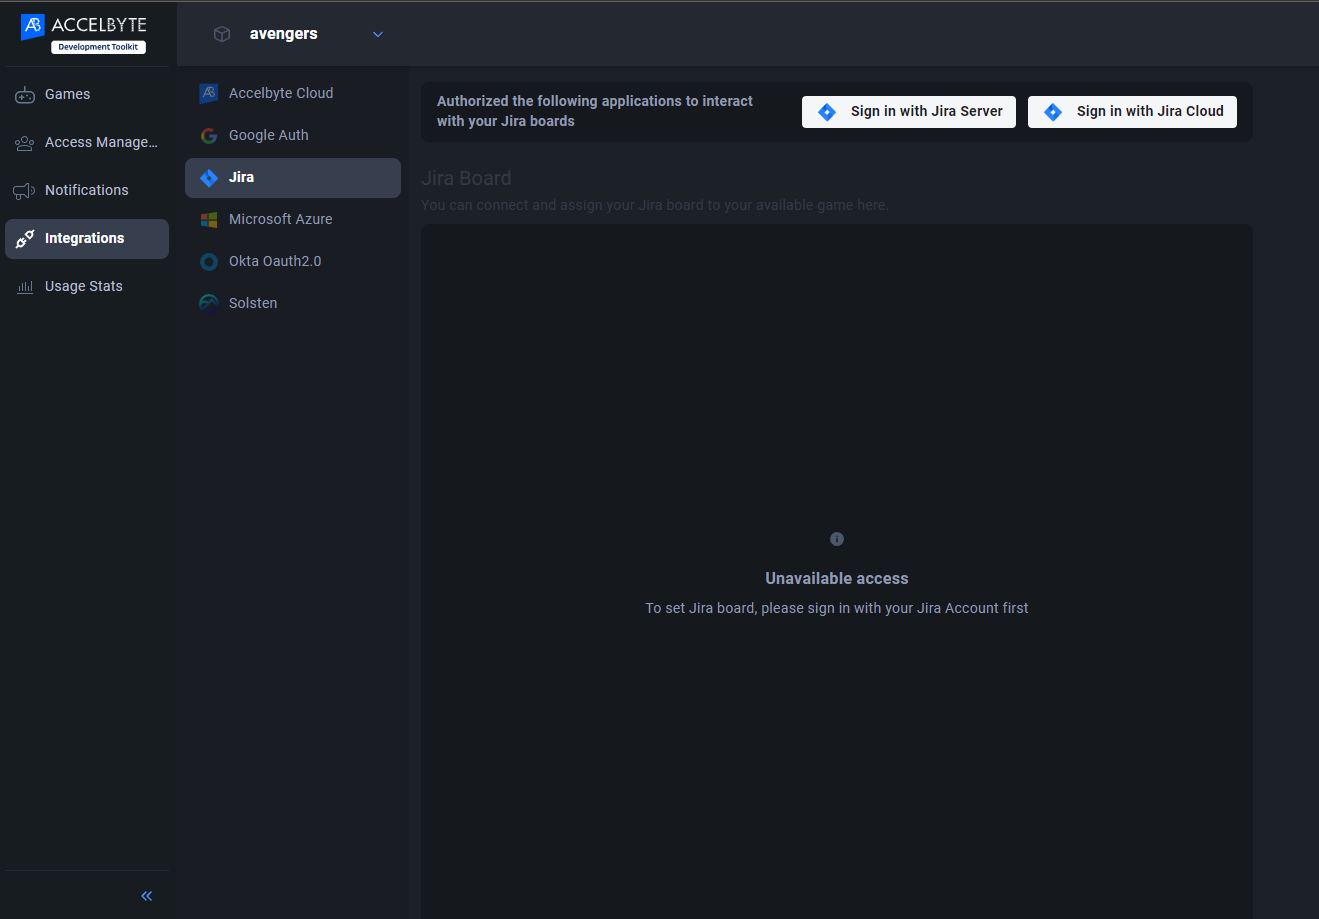
From the Integrations section, choose Jira.
-
Click Sign in with Jira Cloud.
-
Click Accept to allow ADT to access your Atlassian account.
Link your ADT account with Jira Enterprise (Jira Server)
If you want to sign in with Jira Enterprise (Jira Server), contact us at adt-support@accelbyte.net We will provide you with the Public Key that is required to do the next step of the integration.
After you get the Public Key, follow these steps:
-
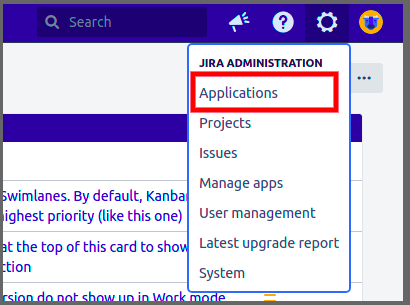
Open the Jira Enterprise (Jira Server) and click Administration Menu in the top right.
-
Select Applications.
-
Under the Applications tab on the Administration page, select Application links.
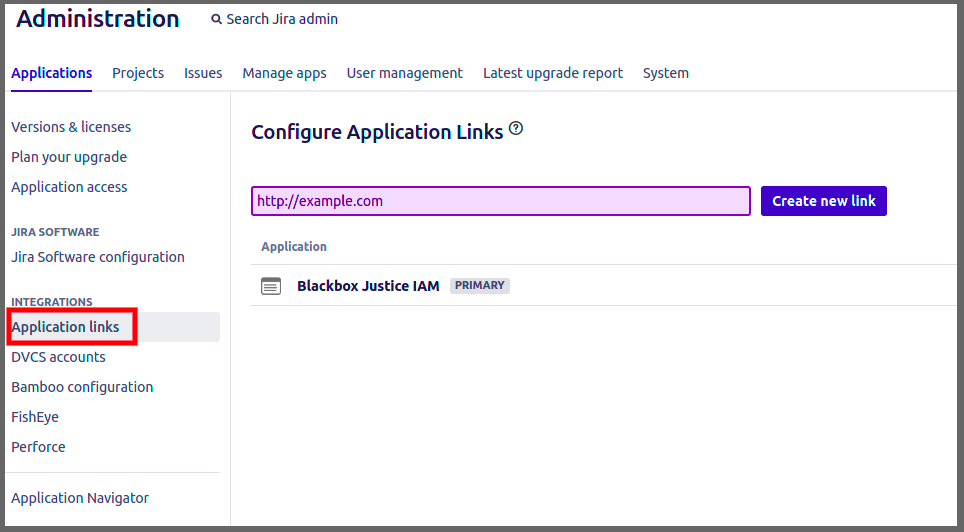
-
Type any name for the new link. It does not have to be a valid link.
-
Click Create New Link.
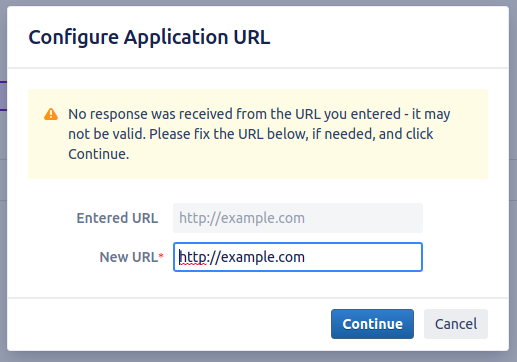
-
On the "Configure Application URL" pop-up, click Continue.
-
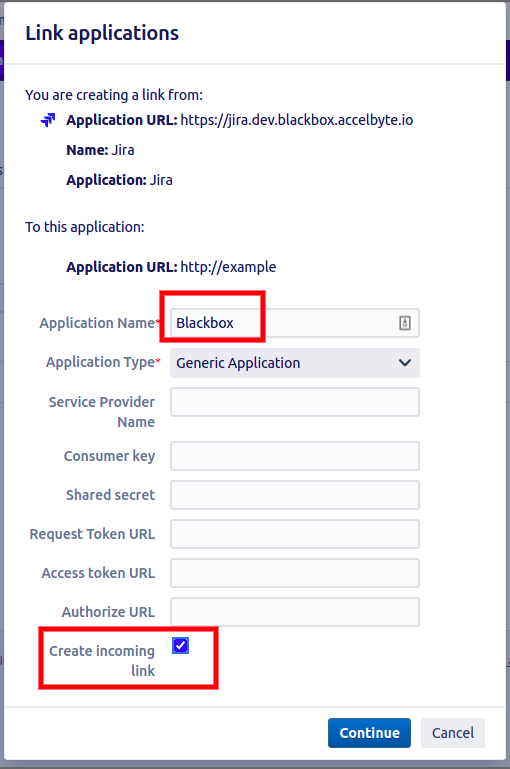
In the link applications form, type ADT in the Application Name field.
-
Tick the Create incoming link checkbox.
-
Click Continue to go to the next step.
-
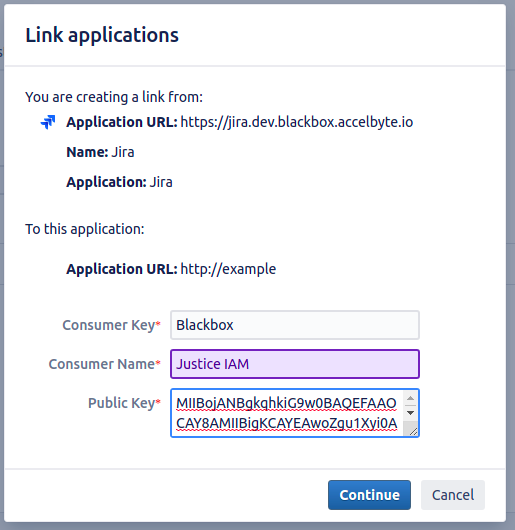
Complete the following fields in the link applications form:
-
Consumer Key (This is the Application name from the previous page.)
-
Consumer Name
-
Public Key
-
-
Click Continue.
-
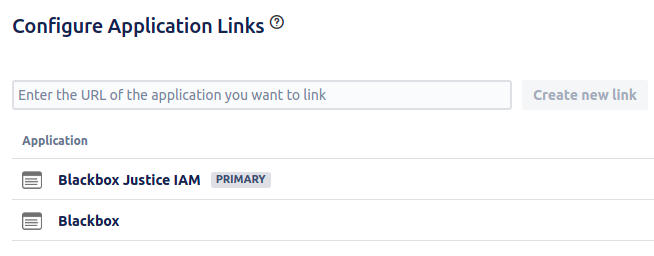
The system adds your application to the Configure Application Links page.
-
Contact us at adt-support@accelbyte.net and give us your Consumer Key and your Jira Enterprise (Jira Server) base URL and we will finish the integration.
Set up a Jira board for your game
-
Log in to ADT Web.
-
Go to the Settings menu.
-
Choose Atlassian Jira from the configuration section.
-
Click Sign in with Jira to link to Atlassian.
-
When the message "Your account has been linked" displays, you can choose the Jira board that connects to your game.
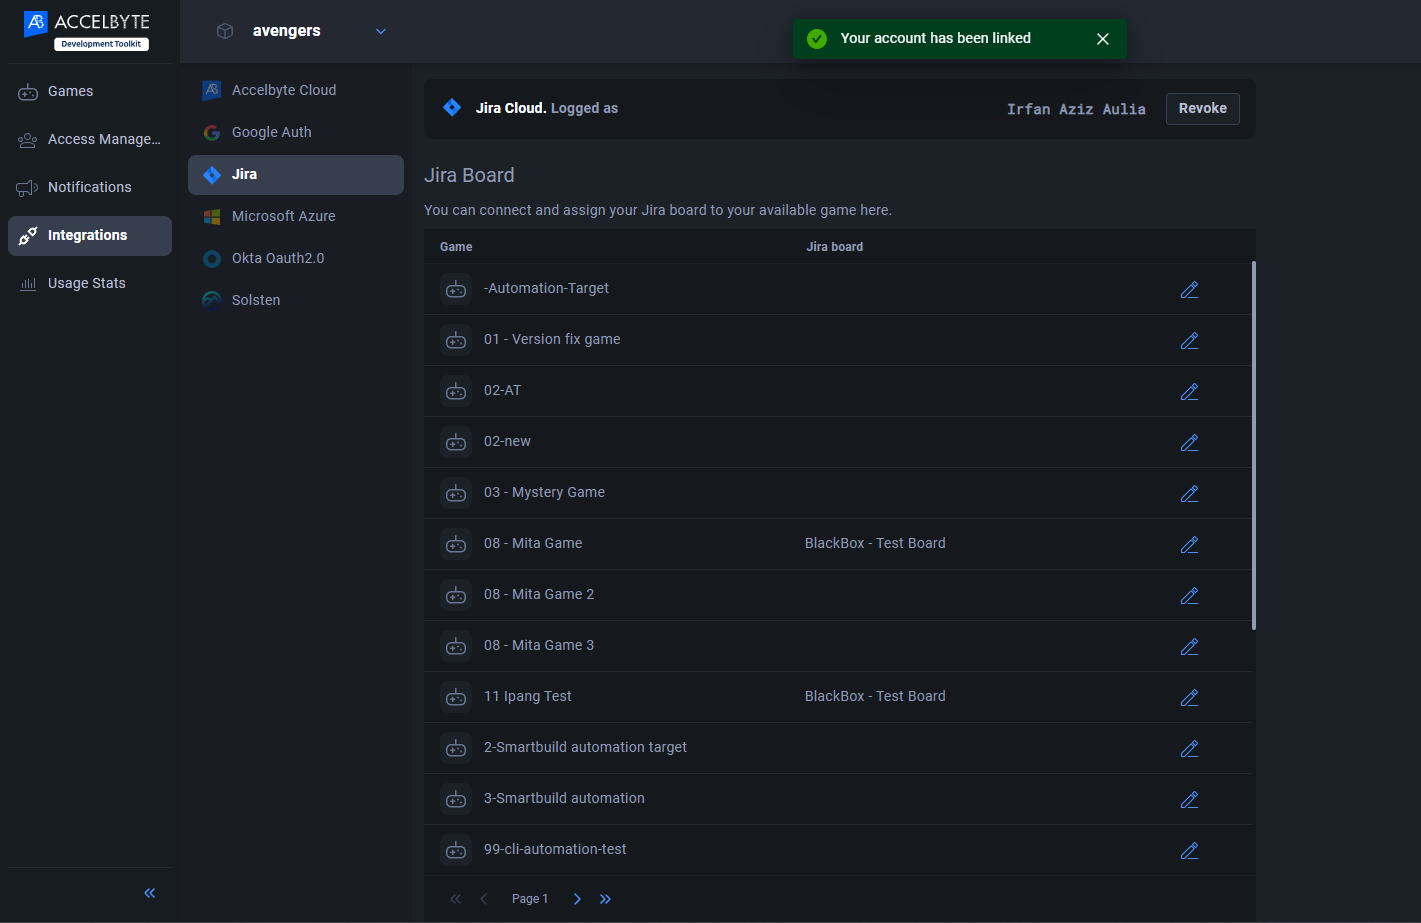
-
Click the edit button and then scroll down to select the Jira board for your game.
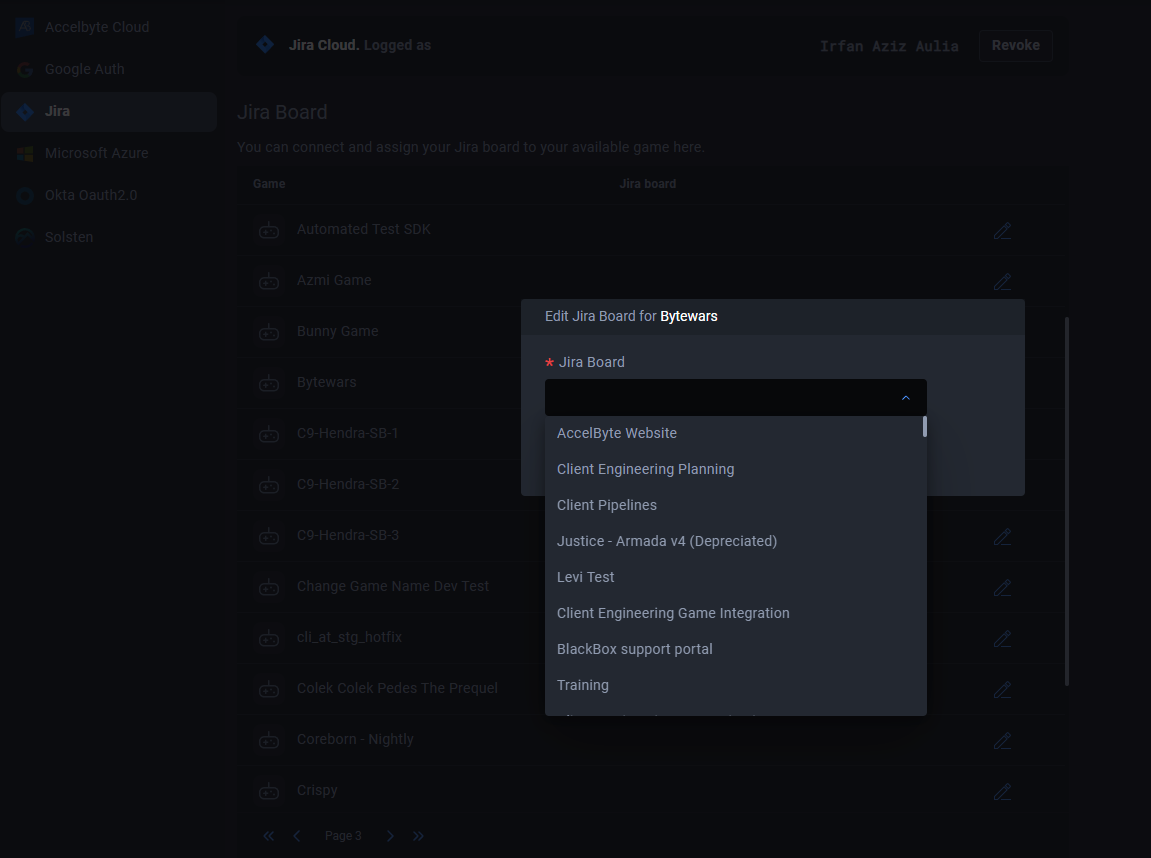
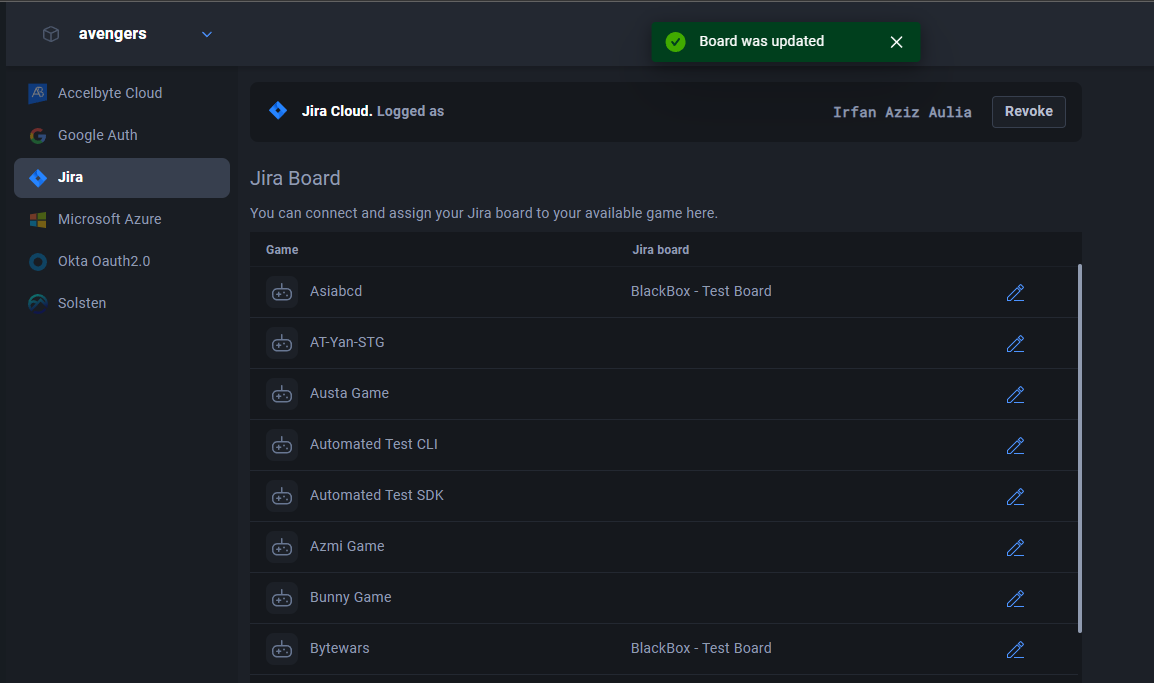
-
Click on the Save changes button. Your game is now integrated to the Jira board.
Create or link a Jira ticket
-
Log in to ADT Web.
-
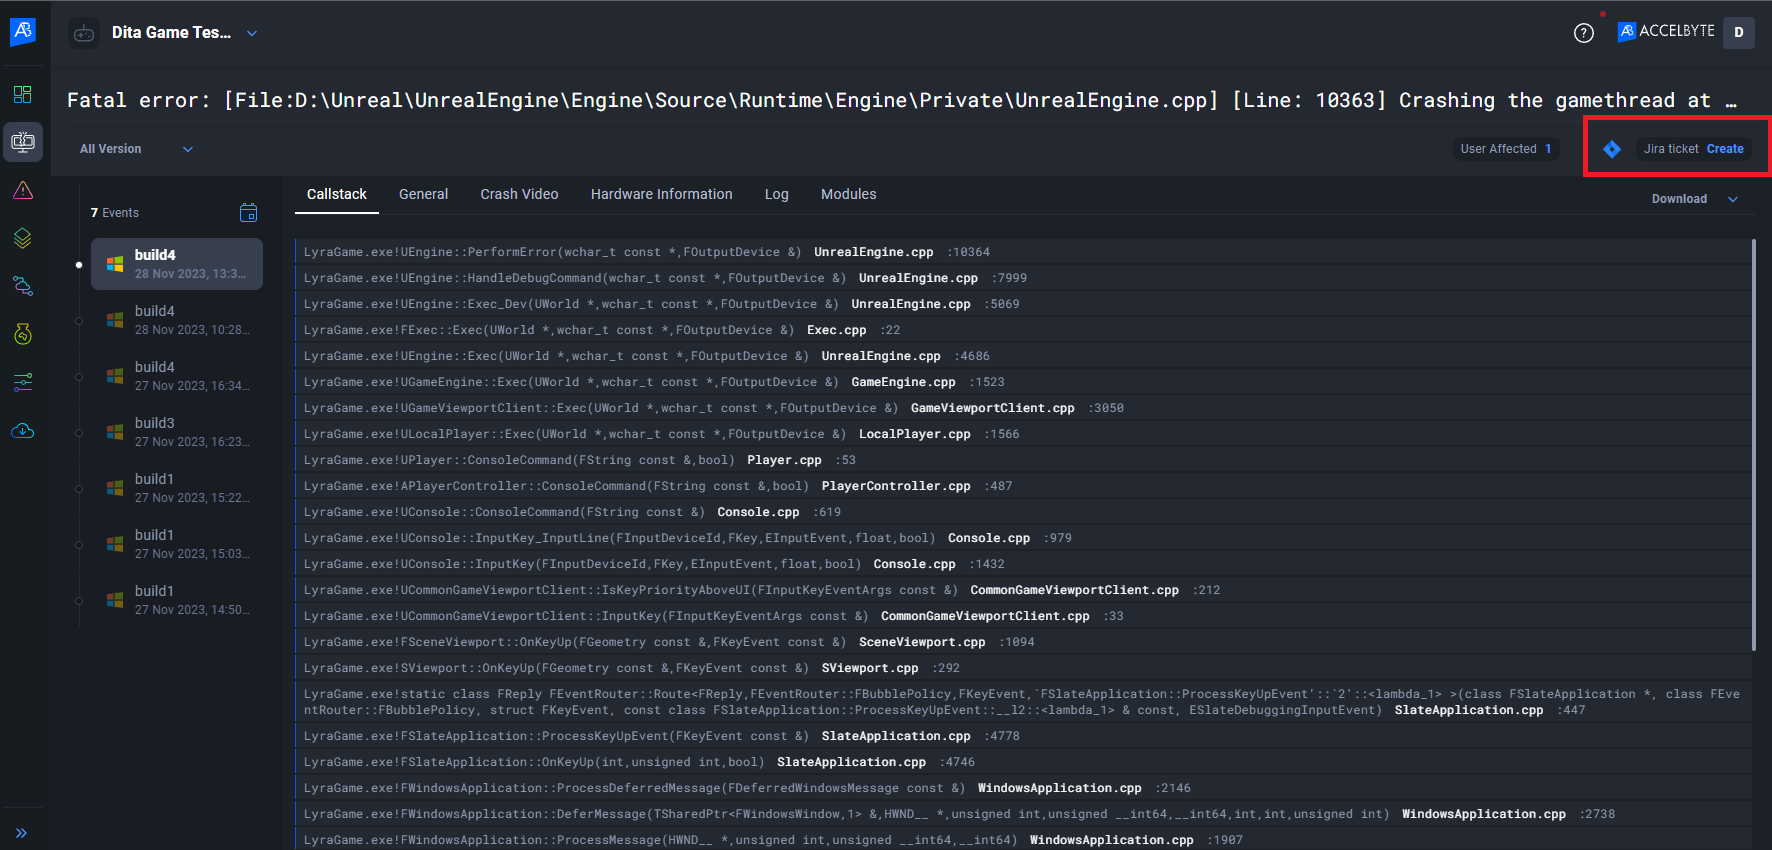
On the crash reports page, select your crash from the list. The issue displays.
-
Click Create on the right to create or link a Jira ticket.
-
In the Create/Link Jira Ticket form:
-
To create a new ticket, click Create ticket, then fill in the mandatory fields from your Jira board.
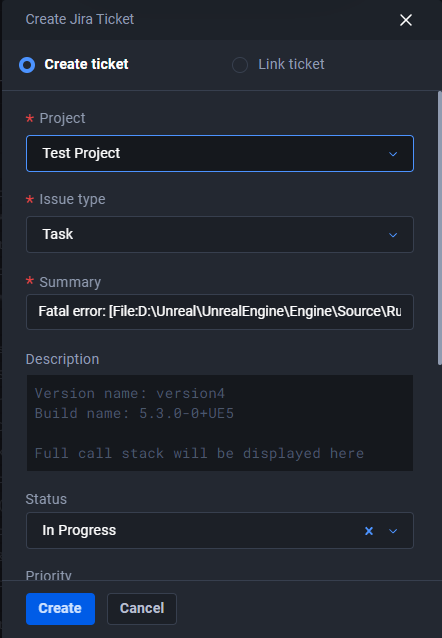
-
Fill in the priority, assignee, and other fields that are available on your Jira board.
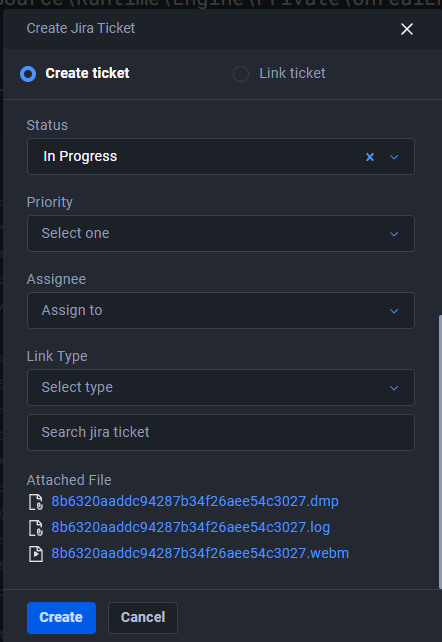
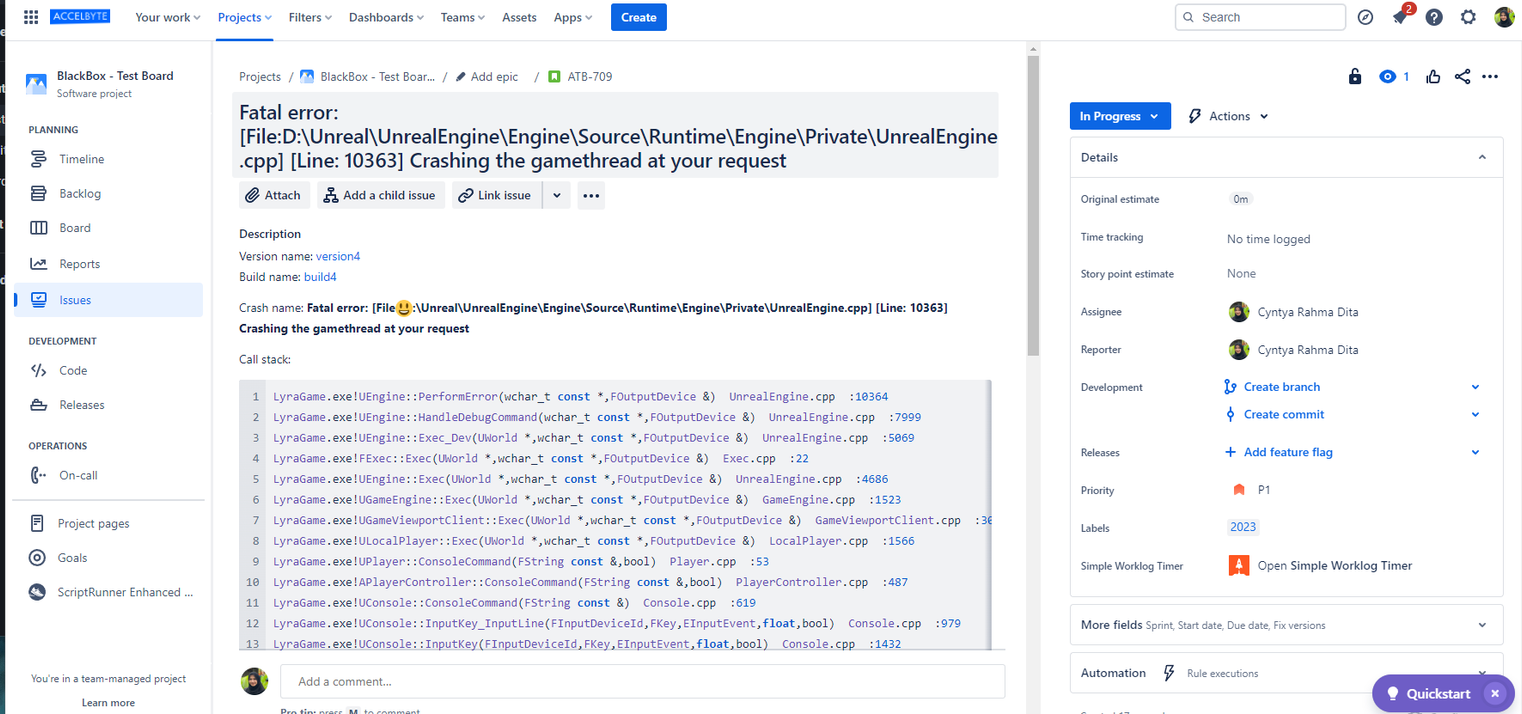
-
Click the Create button. The Jira ticket is created successfully.
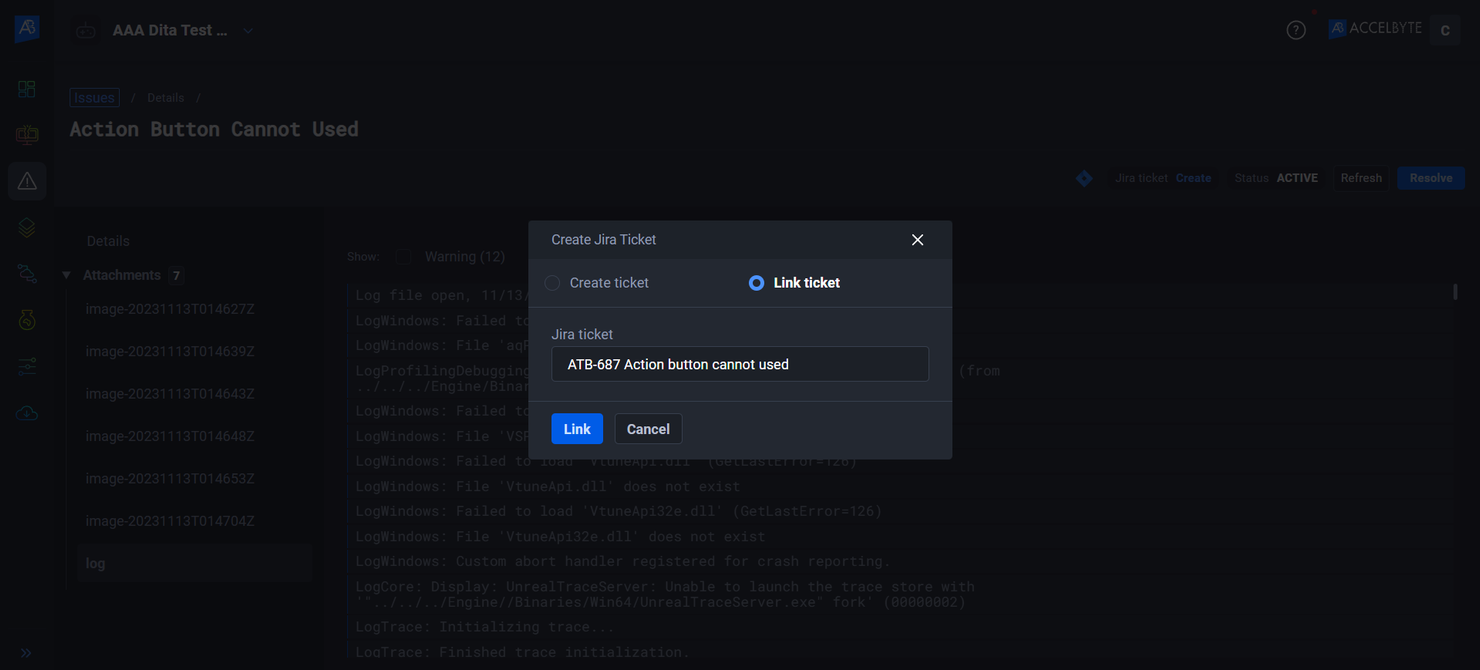
-
To link an existing ticket, click Link ticket, provide the existing ticket details, then click the Link button.
-
Create ticket from Issues page
You can also create Jira tickets from the Issues page. The steps are identical to the crash page. This set of instructions guides users through the seamless process of creating, managing, and linking Jira tickets from ADT crashes. It ensures effective integration and synchronization between ADT and Jira for streamlined issue tracking.