Manage multiple API keys
Overview
In AccelByte Development Toolkit (ADT), you can enable your users to set different operations in a game. We introduced the ability to create and use multiple API Keys for a game. Each API Key has its own scope or permission limit. A scope is congruent with the CRUD (create, read, update, and delete) operations. You can tweak each API Key to the user's needs using a resource or REST endpoint set for allowed operations. For example, you can use one API Key in a game distribution for public use to report crashes, and a private API Key for developers.
Follow these instructions to use this feature.
Prerequisite
Only Admin users have access to the multiple API Key feature.
Add a new API Key
To add a new API Key, follow these steps:
-
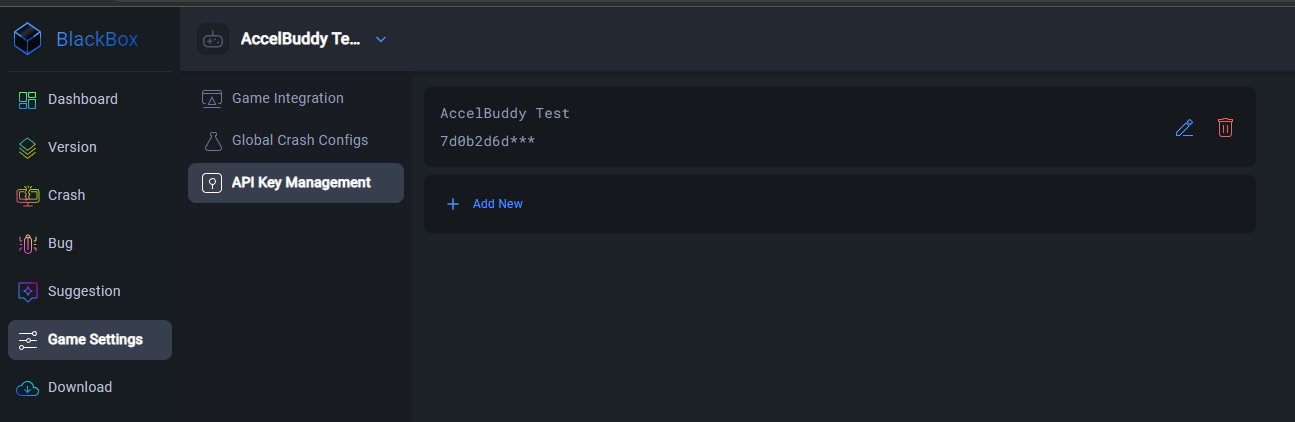
Go to Game Settings, then to the API Key Management menu.
-
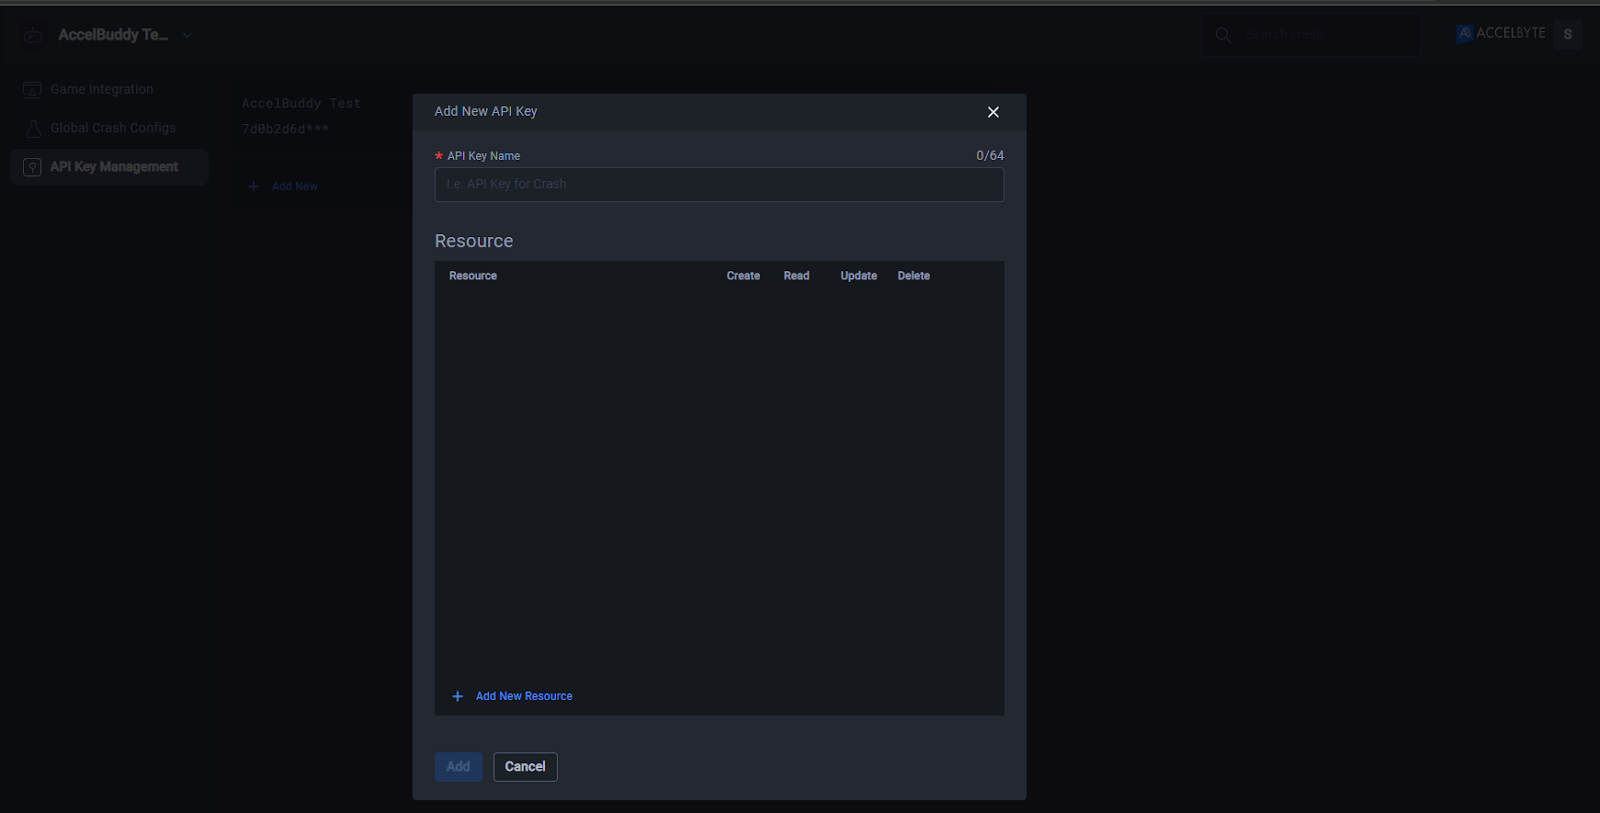
Click Add New and a pop-up will display.
-
Fill in the API Key Name and then add the new resources.

-
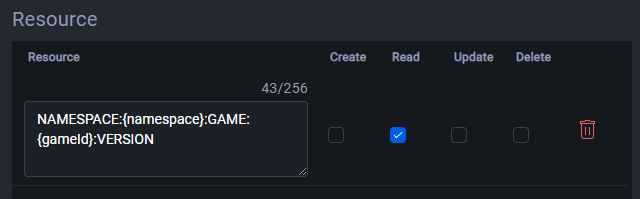
To use the API Key to access specific features, choose one of the following resources:
NAMESPACE:{namespace}:GAME:{gameId}:METADATA
NAMESPACE:{namespace}:GAME:{gameId}:BUILD
NAMESPACE:{namespace}:GAME:{gameId}:VERSION
NAMESPACE:{namespace}:GAME:{gameId}:CHANNEL
NAMESPACE:{namespace}:GAME:{gameId}:SESSION
NAMESPACE:{namespace}:GAME:{gameId}:STREAM
NAMESPACE:{namespace}:GAME:{gameId}:BUILD:SYMBOL
NAMESPACE:{namespace}:GAME:{gameId}:CRASH
NAMESPACE:{namespace}:GAME:{gameId}:PROFILING
NAMESPACE:{namespace}:GAME:{gameId}:SYMBOLnoteYou can only use one resource per box. If you need multiple boxes, add a new resource for each.
-
To use the API Key to access all features, use this string:
NAMESPACE:{namespace}:GAME:{gameId}:* -
Add more resources as needed and click the tick box in the appropriate CRUD column(s) for each resource.
-
Click the Add button. The new API Key is created.
-
Save the API Key somewhere safe as this is the only time you'll see it.

Use the new API Key
Your new API Key is ready to be used with the features and permissions you have set. To give you an example of how your key might work, let's say you have created a new API Key with the resources and permissions shown below:
You can use the API Key to check the available version of the CLI, but will only have read permissions, as shown below.

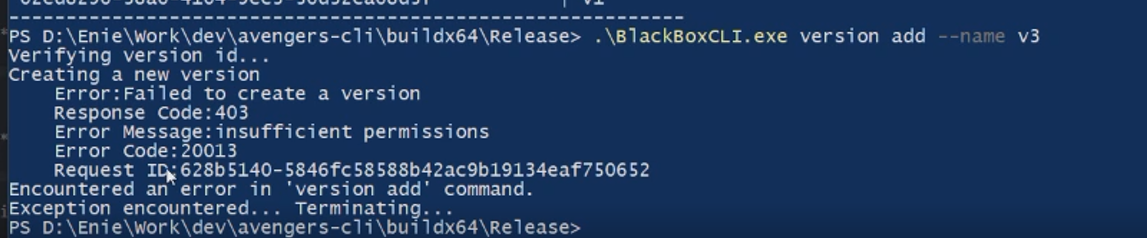
This example shows an error resulting from the use of your new API Key to create, update, or delete the version.
Add more API Keys
To add more API Keys, repeat the steps 1-8 above. Select the resources and permissions that are tied to the new key.
Delete an API Key
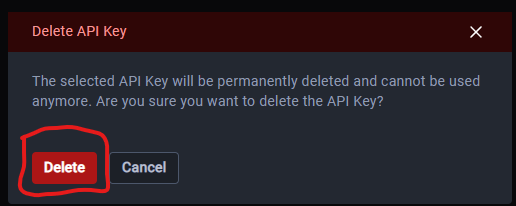
To delete an API Key, click on the trash bin icon.

Click Delete on the message box to confirm you want to delete the API Key. The API Key is deleted.