Set up AWS Cognito as an identity provider
Overview
This guide helps verified Amazon Web Services (AWS) developers connect Amazon Cognito users to AccelByte Gaming Services (AGS). You may need to set up additional features within AWS services that we haven't listed here. For full information about setting up AWS services, we recommend contacting your AWS representative and reviewing AWS documentation.
Goals
Enable the Amazon Cognito authentication method for your publisher website with the AccelByte Player Portal.
Prerequisites
- An AWS Account.
- A Unity or Unreal game project with the latest version of the AccelByte Game SDK imported.
- An AGS Admin Portal account to set up authentication and manage permissions.
- A game namespace.
- Familiarity with AGS Identity and Access Management (IAM) Clients.
Set up Amazon Cognito
Create an Amazon Cognito user pool
A user pool is a user directory in Amazon Cognito. With a user pool, your users can sign in to your game through Amazon Cognito. Follow the guide for creating a user pool to create a new user pool.
Under the Integrate your app section, you need to:
- Set your initial app client type to
public. - Add your BaseURL as Allowed callback URLs (BaseURL is your domain address, e.g.,
https://development.accelbyte.io). - Set
ALLOW_USER_PASSWORD_AUTHon the Authentication flows.
Set up Amazon Cognito users
After creating a user pool, you have to manage your users in your user pool. For more details, refer to the guide for managing users in your user pool.
Set up Amazon Cognito login methods
Use the following steps to set up Amazon Cognito logins in your game. This will allow your players to sign in to your game using their Amazon Cognito accounts.
In the AGS Admin portal, go to your publisher namespace.
On the sidebar menu, go to Game Setup > 3rd Party Configuration > Auth & Account Linking.
On the Auth & Account Linking page, click on the + Add New button.
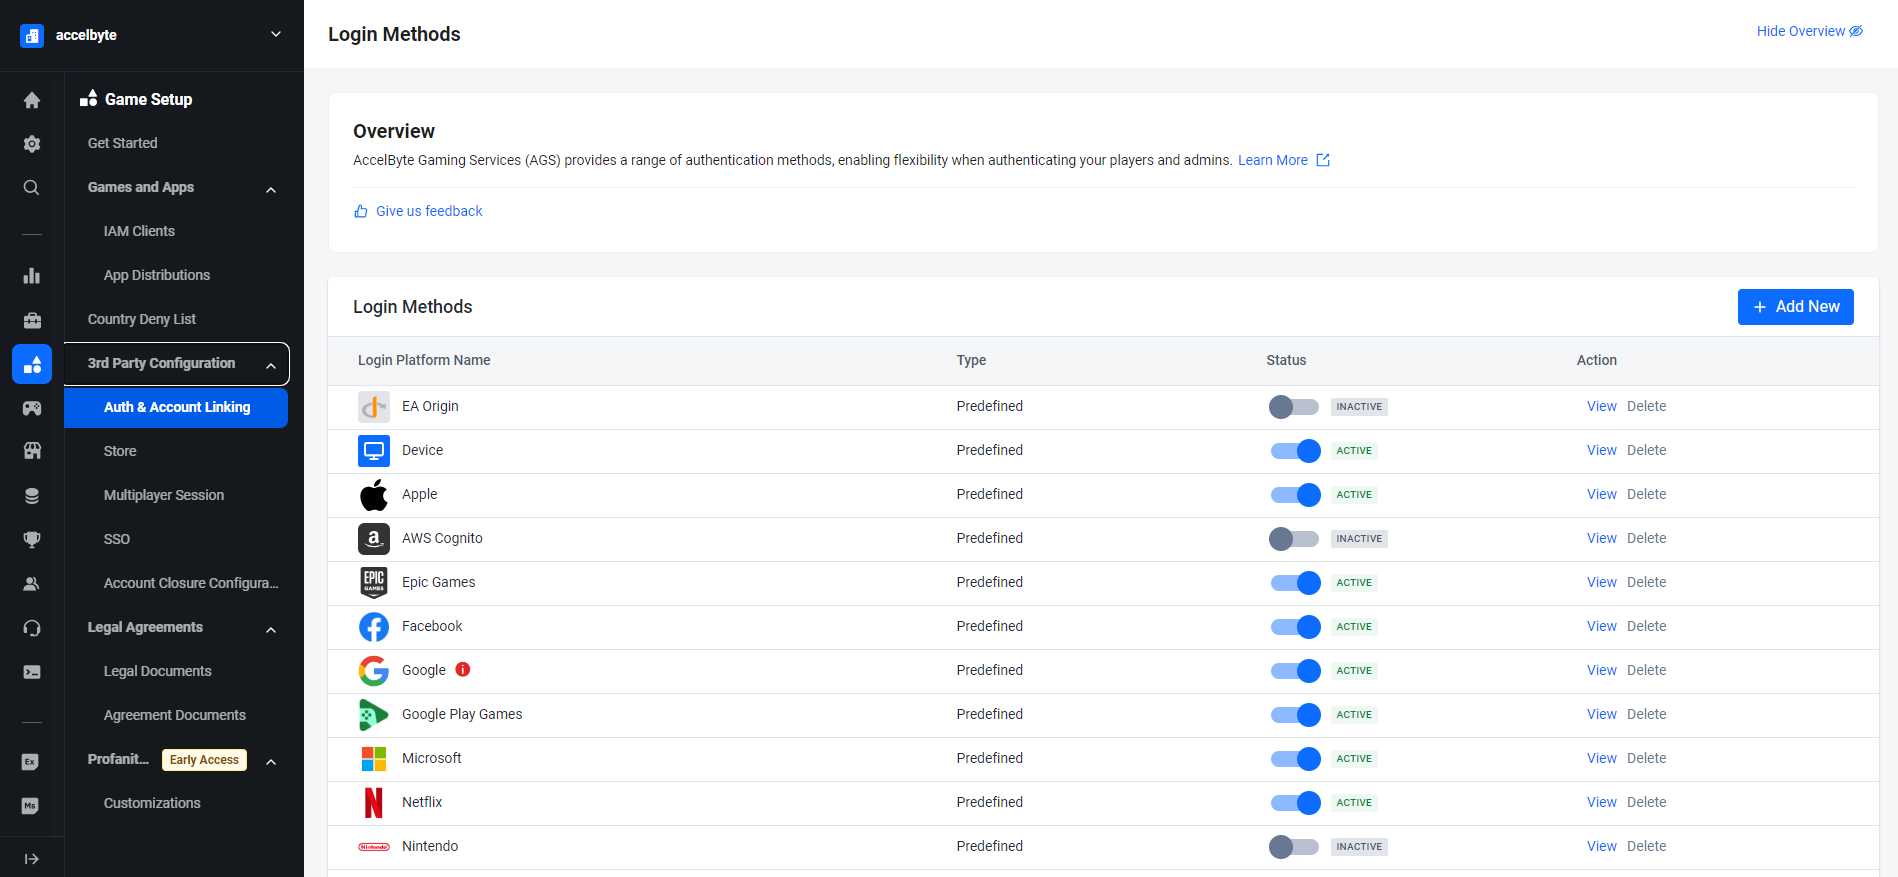
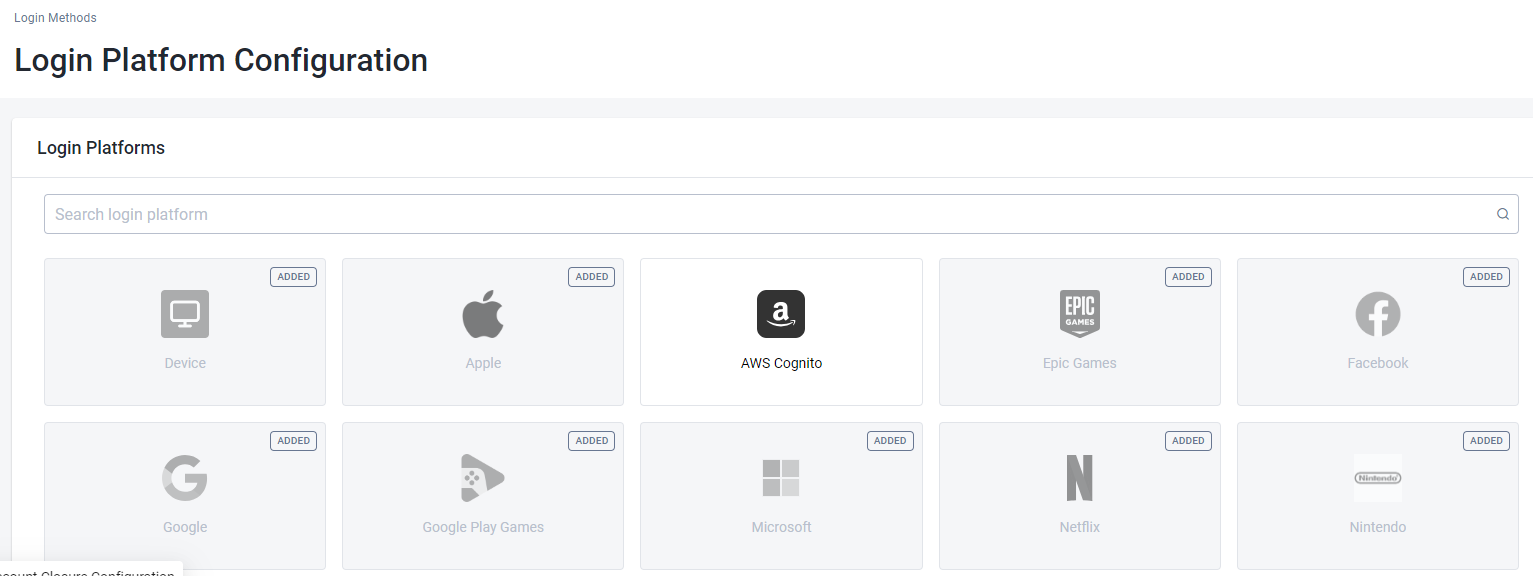
From the list of login method options, select AWS Cognito.
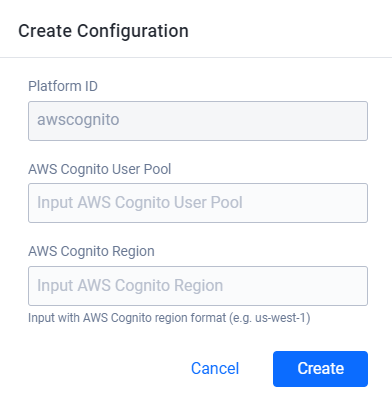
Fill the AWS Cognito User Pool field with your User Pool ID and the AWS Cognito Region field with your Amazon Cognito region.
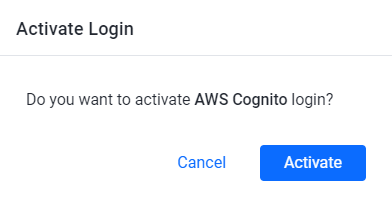
You will redirect to the details page. At this point, you just need to activate it and it can be used.
Create IAM client
An IAM client is a representation of the game client that you want to release on your target platform.
If you already have an IAM Client for your game on a specific SDK Platform (e.g., Xbox, Steam, or Playstation), you don't have to create a new IAM Client. Since AWS Cognito is not a platform on which to build games, you can use an existing IAM Client. Learn more about IAM Clients by reading Manage access control for applications.
In-game login instructions
The setup for each game engine is different. Select your game engine from the available tabs.
- Unreal Engine Instructions
- Unity Engine Instructions
In-game login integration (Unreal)
You can integrate your game to sign in with AccelByte SDK so that your players can log in to games using Amazon Cognito credentials and the implementation will use AWS SDK.
Preparation and configuration (Unreal)
Adding dependency (Unreal)
First you need to add public dependency modules called AccelByteUe4Sdk. This dependency is needed for integrating your project to use the AccelByte SDK Plugin within Unreal Engine.
public ABThirdPartyLogin(ReadOnlyTargetRules Target) : base(Target)
{
  PCHUsage = PCHUsageMode.UseExplicitOrSharedPCHs;

  PublicDependencyModuleNames.AddRange(new string[] { "Core", "CoreUObject", "Engine", "InputCore" , "AccelByteUe4Sdk", "Slate", "SlateCore" , "AWSCore"});

  PrivateDependencyModuleNames.AddRange(new string[] { "Json", "HTTP" });

}
Add AccelByteUe4Sdk in <YourProject>.Target.cs and <YourProjectEditor>.Target.cs.
public ABThirdPartyLoginTarget( TargetInfo Target) : base(Target)
{
  Type = TargetType.Game;
  DefaultBuildSettings = BuildSettingsVersion.V2;
  ExtraModuleNames.AddRange( new string[] { "ABThirdPartyLogin", "AccelByteUe4Sdk" } );
}
public ABThirdPartyLoginEditorTarget( TargetInfo Target) : base(Target)
{
  Type = TargetType.Editor;
  DefaultBuildSettings = BuildSettingsVersion.V2;
  ExtraModuleNames.AddRange( new string[] { "ABThirdPartyLogin", "AccelByteUe4Sdk" } );
}
Project settings for Amazon Cognito login (Unreal)
Add your AccelByte credentials in your DefaultEngine.ini file.
[/Script/AccelByteUe4Sdk.AccelByteSettings]
ClientId=<Your Client_Id>
ClientSecret=<Your Client_Secret>
Namespace=<Your Namespace>
PublisherNamespace=<Your Publisher Namespace>
RedirectURI="http://127.0.0.1"
BaseUrl="https://prod.gamingservices.accelbyte.io"
IamServerUrl="https://prod.gamingservices.accelbyte.io/iam"
PlatformServerUrl="https://prod.gamingservices.accelbyte.io/platform"
Sample code implementation (Unreal)
Here's how you can include the AWS SDK for C++ in your Unreal Engine project:
- Open your Unreal Engine project.
- Create a new folder in your project's "Source" directory. You can name it something like "AWS".
- Copy the
aws-cpp-sdk-corefolder from the extracted AWS SDK source code to the newly created "AWS" folder in your Unreal Engine project. - In your Unreal Engine project's source code, locate the
<YourProjectName>.Build.csfile. It is usually located in the Source directory and has the same name as your project. - Open the
<YourProjectName>.Build.csfile in a text editor. - Inside the
<YourProjectName>.Build.csfile, add the "AWSCore" following lines to the PublicDependencyModuleNames section - Save the changes and close the file.
- Build your Unreal Engine project. The AWS SDK for C++ code will be compiled along with your project.
After completing these steps, you should be able to include the necessary AWS SDK headers and use the AWS SDK classes and functions in your Unreal Engine project and Get Access Token to able login into AccelByte. Below is a sample that you can implement into your code.
// Set up AWS credentials
Aws::Auth::AWSCredentials credentials("YOUR_ACCESS_KEY_ID", "YOUR_SECRET_ACCESS_KEY");

// Create an Amazon Cognito Identity Provider client object
Aws::CognitoIdentityProvider::CognitoIdentityProviderClient cognitoClient(credentials);

// Construct the authentication request
Aws::CognitoIdentityProvider::Model::InitiateAuthRequest initiateAuthRequest;
initiateAuthRequest.SetAuthFlow(Aws::CognitoIdentityProvider::Model::AuthFlowType::USER_PASSWORD_AUTH);
initiateAuthRequest.SetClientId("YOUR_USER_POOL_CLIENT_ID");
initiateAuthRequest.SetAuthParameters({
   {"USERNAME", "YOUR_USERNAME"},
   {"PASSWORD", "YOUR_PASSWORD"}
});

// Send the authentication request to Amazon Cognito
auto initiateAuthOutcome = cognitoClient.InitiateAuth(initiateAuthRequest);

if (initiateAuthOutcome.IsSuccess())
{
   // Retrieve the access token from the authentication response
   const auto& challengeResponse = initiateAuthOutcome.GetResult().GetChallengeParameters();
   const auto& accessToken = challengeResponse["ACCESS_TOKEN"];

   // Use the access token for AWS SDK calls
   // Create an S3 client object
   Aws::S3::S3Client s3Client(credentials);

   // Example API call: List S3 buckets
   Aws::S3::Model::ListBucketsRequest listBucketsRequest;
   auto listBucketsOutcome = s3Client.ListBuckets(listBucketsRequest);

   if (listBucketsOutcome.IsSuccess())
   {
       // Handle successful response
       FString Message = TEXT("Successfully listed S3 buckets!");
       UE_LOG(LogTemp, Warning, TEXT("%s"), *Message);
       OnActionInfoUpdated.Broadcast(Message);
       const FString PlatformToken = accessToken;
       UE_LOG(LogTemp, Warning, TEXT("PlatformToken : %s"), *PlatformToken);
       OnActionInfoUpdated.Broadcast(FString::Printf(TEXT("PlatformToken : %s"), *PlatformToken));

       FRegistry::User.LoginWithOtherPlatform(EAccelBytePlatformType::AWSCognito, PlatformToken, OnLoginSuccessDelegate, OnLoginErrorDelegate);
       UE_LOG(LogTemp, Warning, TEXT("Request LoginWithOtherPlatform"));
       OnActionInfoUpdated.Broadcast(TEXT("Request LoginWithOtherPlatform"));
   }
   else
   {
       // Handle error
       FString Message = FString::Printf(TEXT("Error listing S3 buckets: %s"), *listBucketsOutcome.GetError().GetMessage().c_str());
       UE_LOG(LogTemp, Warning, TEXT("%s"), *Message);
       OnActionInfoUpdated.Broadcast(Message);
   }
}
else
{
   // Handle authentication error
   FString Message = FString::Printf(TEXT("Authentication error: %s"), *initiateAuthOutcome.GetError().GetMessage().c_str());
   UE_LOG(LogTemp, Warning, TEXT("%s"), *Message);
   OnActionInfoUpdated.Broadcast(Message);
}
platform_token for Amazon Cognito authentication is the Access Token.
After adding this sample code to your project, compile your project, then build and run it. That's it!
Sample code testing (Unreal)
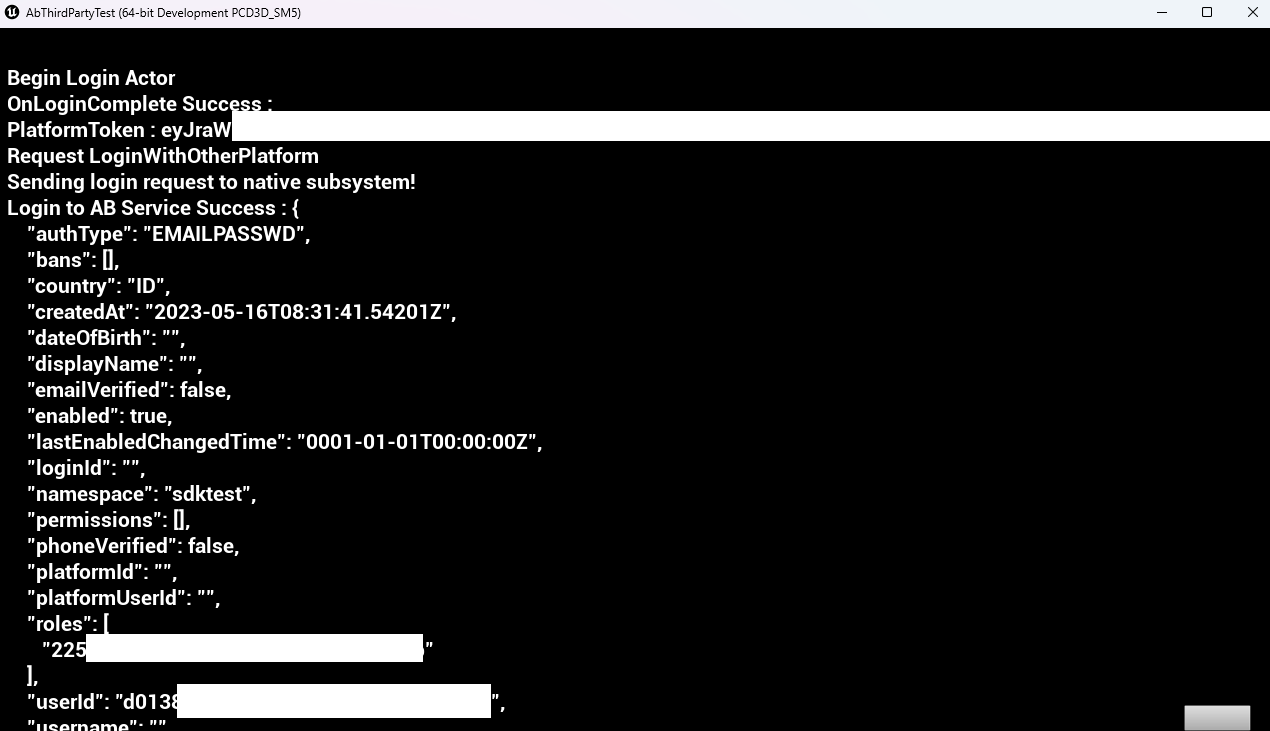
The screenshot below demonstrates that the code works and we are able to log in using Amazon Cognito with the sample code.
In-game login integration (Unity)
You can integrate your Amazon Cognito to sign in with AccelByte SDK so that your players can log in to games using Amazon Cognito credentials.
Preparation and configuration (Unity)
- Download and import the AWS SDK for Unity into your Unity project. You can find the SDK on the AWS SDK for .NETGitHub repository.
- In your Unity project, navigate to the "Assets" folder and create a new folder named "AWSAssemblies". Extract the downloaded AWS SDK to that folder.
Project settings for AGS (Unity)
Before AccelByte SDK can run properly in your project, you need to fill in the values that you created previously in the AGS Admin Portal and follow each step below:
- Create a file for game client configuration named
AccelByteSDKConfig.json. - Copy the AccelByteSDKConfig.json file and add it to your Unity project directory in the Assets/Resources directory.
- Fill in the AccelByteSDKConfig.json file using the information based on your game. Here is an example of the JSON file:
{
 "Default": {
    "Namespace": "<Your Game Namespace>",
    "UsePlayerPrefs": true,//It will use Player Preferences
    "EnableDebugLog": true,//Enable Debug Logging
    "DebugLogFilter": "Log",//Type of Debug Log
    "BaseUrl": "https://prod.gamingservices.accelbyte.io",
    "RedirectUri": "http://127.0.0.1",
    "AppId": "<Your AppId>",
    "PublisherNamespace": "<Your Publisher Namespace>"
  }
}
- Create a file called AccelByteServerSDKConfig.json and add it to your Unity project directory in the Assets/Resources directory.
- Update the AccelByteServerSDKConfig.json with the code below that will be used as the game server configuration. Here is an example of the JSON file:
{
  "Default": {
    "Namespace": "<Your Game Namespace>",
    "BaseUrl": "https://prod.gamingservices.accelbyte.io",
    "RedirectUri": "http://127.0.0.1"
  }
}
- Create two files named AccelByteSDKOAuthConfig.json and AccelByteServerSDKOAuthConfig.json. Add both of these files to your Unity project directory in the Assets/Resources directory. The contents of both these JSON files should be as follows:
{
  "Default": {
    "ClientId": "<Your IAM Client ID>",
    "ClientSecret": "<Your IAM Client Secret>"
  }
}
Sample code implementation (Unity)
Next step, we will show you how to implement the Amazon Cognito authentication method for your game with sample code below. You need to create a custom SDK to call the Amazon Cognito API. Below is an example.
public class AwsCognitoLoginHandler : MonoBehavior
{
   [SerializeField] Button AwsLoginButton;
   [SerializeField] Text LoginStatus;
   [SerializeField] private string userPoolId  = "<Your_UserPoolID>";
   [SerializeField] private string clientId = "<Your_AWS_Cognito_AppClientId>";
   [SerializeField] private string username = "<Your_AWS_Cognito_username>";
   [SerializeField] private string password = "<Your_AWS_Cognito_password>";
   // AccelByte's Multi Registry references
   private ApiClient apiClient;
   private User user;

   private async void Start()
   {
       AwsLoginButton.onClick.AddListener(OnLoginClick);
   }

   private void OnEnable()
   {
       LoginStatus.text = "Please Login";
       AwsLoginButton.onClick.AddListener(() =>
       {
           LoginStatus.text = "Attempting Login";
           OnLoginClick();
       });
   }

   private async void OnLoginClick()
   {
       AwsLoginButton.interactable = false;
       LoginStatus.text = "Logging in...";

       // Configure the Cognito client
       AmazonCognitoIdentityProviderClient client = new AmazonCognitoIdentityProviderClient(new Amazon.Runtime.AnonymousAWSCredentials(), RegionEndpoint.USWest2);

       // Create the authentication request
       InitiateAuthRequest authRequest = new InitiateAuthRequest
       {
           ClientId = clientId,
           AuthFlow = AuthFlowType.USER_PASSWORD_AUTH,
           AuthParameters = new Dictionary<string, string>
           {
               { "USERNAME", username },
               { "PASSWORD", password }
           }
       };

       try
       {
           // Send the authentication request
           InitiateAuthResponse authResponse = await client.InitiateAuthAsync(authRequest);

           // Check the authentication result
           if (authResponse.AuthenticationResult != null)
           {
               // User is successfully authenticated
               string accessToken = authResponse.AuthenticationResult.AccessToken;
               Debug.Log("Login successful. Access Token: " + accessToken);
               LoginStatus.text = "Login AWS successful";
              PLEASE FILL THIS PART WITH ACCELBYTE API TO LOGIN TO AB SERVICE
              OR YOU CAN FILL IT BASED ON EXAMPLE SECTION CODE BELOW THIS PART
           }
           else if (authResponse.ChallengeName == ChallengeNameType.NEW_PASSWORD_REQUIRED)
           {
               // User requires a new password
               Debug.Log("New password required. Please handle this case.");
               LoginStatus.text = "New password required";
           }
           else
           {
               // Authentication failed
               Debug.Log("Authentication failed.");
               LoginStatus.text = "Authentication failed";
           }
       }
       catch (Exception e)
       {
           Debug.Log("Error: " + e.Message);
           LoginStatus.text = "Error: " + e.Message;
       }

       AwsLoginButton.interactable = true;
   }
}
The code below will handle LoginWithOtherPlatform, which is the part of AccelByte SDK that handles third-party platform login by the auth token obtained from the method above.
var apiClient = AccelByteSDK.GetClientRegistry().GetApi();
var user = apiClient.GetUser();
Result<TokenData, OAuthError> loginResult = null;
user.LoginWithOtherPlatform(PlatformType.AWSCognito, accessToken, (Result<TokenData, OAuthError> loginResult) =>
{
    if (loginResult.IsError)
    {
        //If we error, grab the Error Error and Description to print in the Log
        Debug.Log($"Login failed : {loginResult.Error.error} Description : {loginResult.Error.error_description}");
        //Set the Status Text to display the Error if there is any
        LoginStatus.text = $"Login failed : {loginResult.Error.error} Description : {loginResult.Error.error_description}";
    }
    else
    {
        Debug.Log($"Login successful : {loginResult.Value.ToJsonString()}");
        LoginStatus.text = $"Success Login With AWS Cognito : {loginResult.Value.ToJsonString()} ";
    }

    //Enable interaction with the Button again
    AwsLoginButton.interactable = true;
});
platform_token for Amazon Cognito authentication is the Access Token.
After adding the Login Handler script into your project, you can compile your project.
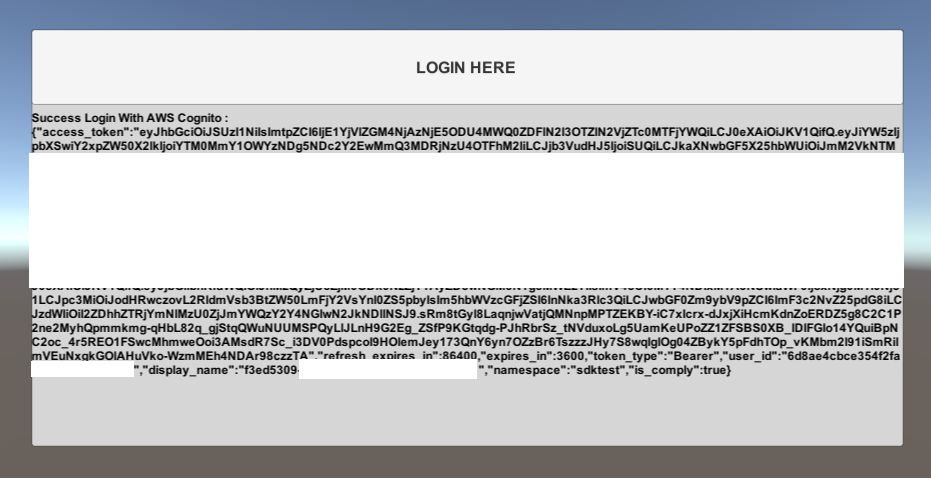
Sample code testing (Unity)
Now, you can build and run your project. Below is a screenshot demonstrating that the code works and we are able to log in using Amazon Cognito and our test app.
