Set up Epic as an identity provider
Overview
This guide is intended to help verified Epic Games developers connect Epic Games Accounts to the AccelByte Gaming Services (AGS). Depending on your game, you may need to set up additional features within Epic Games services which are not listed here. For full information about setting up Epic Games services, we recommend contacting your Epic Games representative and reviewing the Epic Games documentation directly.
This guide is intended for public use and contains limited information due to confidentiality. We recommend you refer to the full confidential guide first. To request a copy of the confidential guide, contact your AccelByte Technical Producer.
Goals
- Enable the Epic authentication method for your game with the AccelByte Game SDK.
- Enable the Epic authentication method for your publisher website with the AccelByte Player Portal.
Prerequisites
Web login integration
An Epic Developer Account.
An AccelByte Admin Portal Account to set up authentication and manage permissions.
A publisher Namespace for your Player Portal and Launcher
A Player Portal.
AGS Shared CloudIn the Shared Cloud tier, you will need to provide your own player portal website.
In-game login integration
- An Epic Developer Account.
- If you using Unreal Engine, you will need to install UE version 4.27 or 5.0.
- If you using Unity, you need PlayEveryWare/eos_plugin_for_unity.
- An AccelByte Admin Portal Account to set up authentication and manage permissions.
- A game Namespace.
- A Unity or Unreal game project with the latest version of the AccelByte Game SDK imported.
- Familiarity with AGS Identity and Access Management (IAM) Clients.
Set up Epic Product
Create organization
You must have an Organization under your Developer Account and then add a verified Domain to it.
Epic will take some time to verify your Domain.
Configure Product Brand
Configure your product Brand Settings, Permissions, and Linked Clients. Follow the How to set up EOS Epic Account Services Guide.
Brand Settings requires a verified Domain. If you lack one, you can proceed without it, but players will receive a warning message when they login. For more information, see the Domain Verification page
Create a client
Create a client under your product. Follow the Adding New Clients Guide
Create Epic Account Services Application
Create your Application. Follow the Setting Up an EOS Epic Account Services Application Guide.
- In Permissions you will need to enable Basic Profile, Online Presence, and Friends List.
- In Linked Clients, choose the Client you previously created.
Please contact Customer Support to get the guide from AccelByte if you have trouble setting up on Epic Developer Portal.
Set up Epic Games Login Method
Web login
In the AGS Admin portal, go to your publisher namespace.
On the sidebar menu, go to Game Setup > 3rd Party Configuration > Auth & Account Linking.
On the Login Methods page, click on the + Add New button.
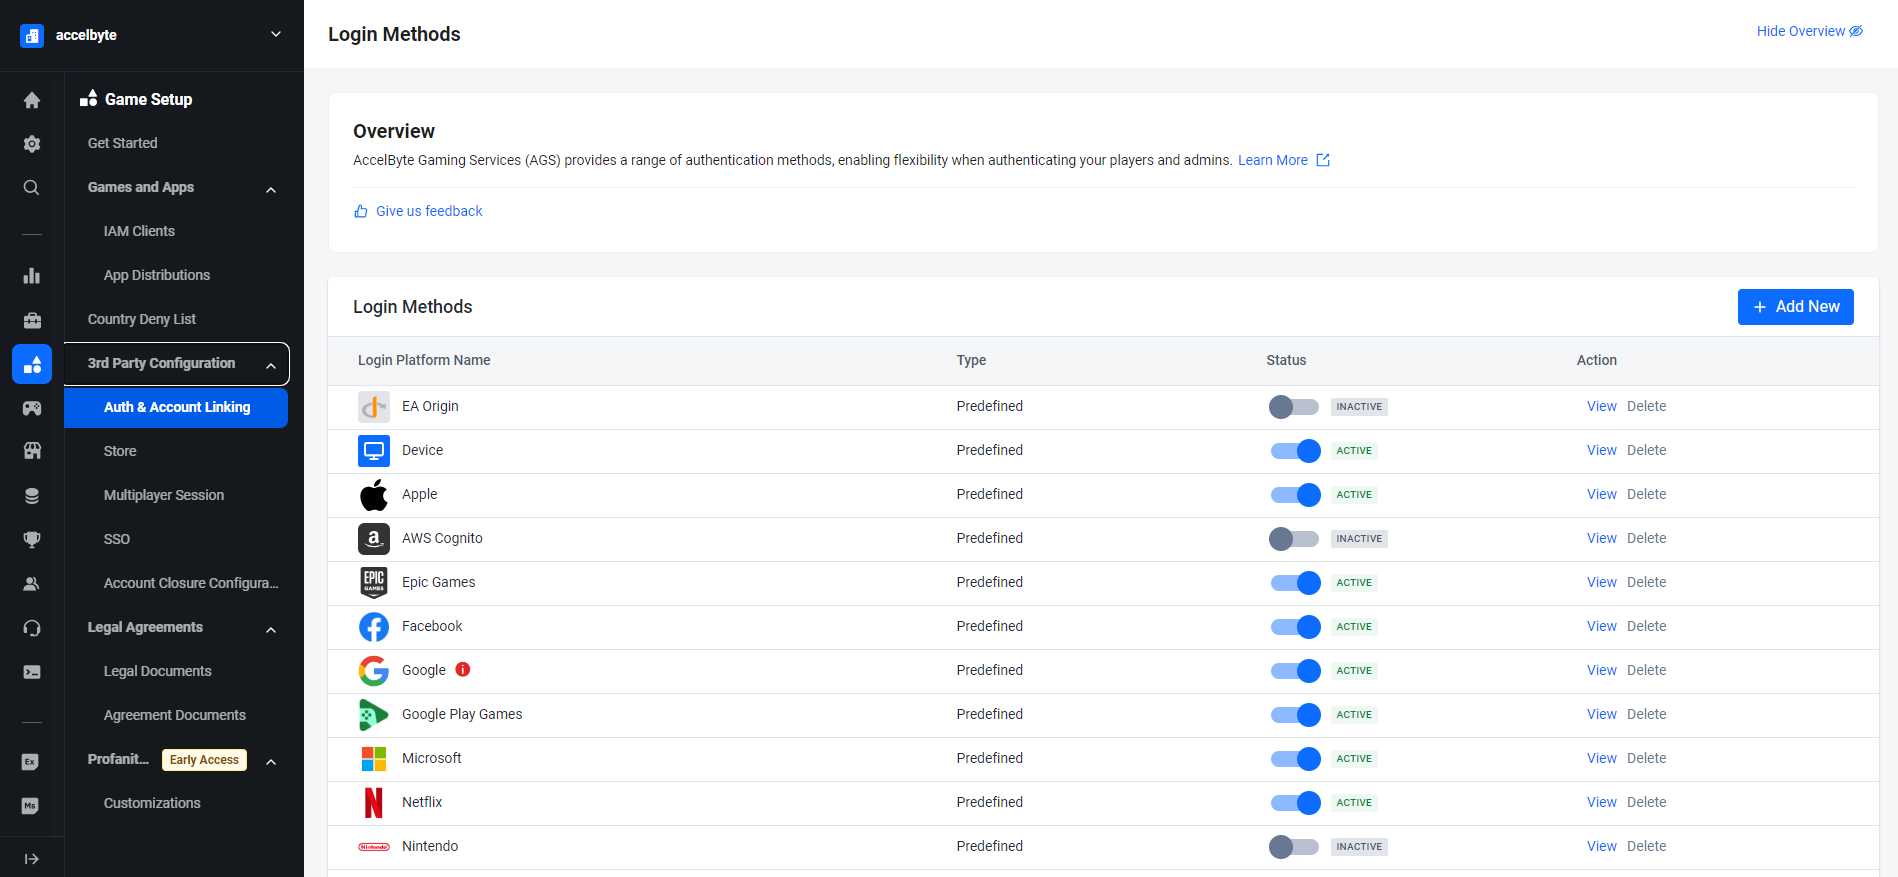
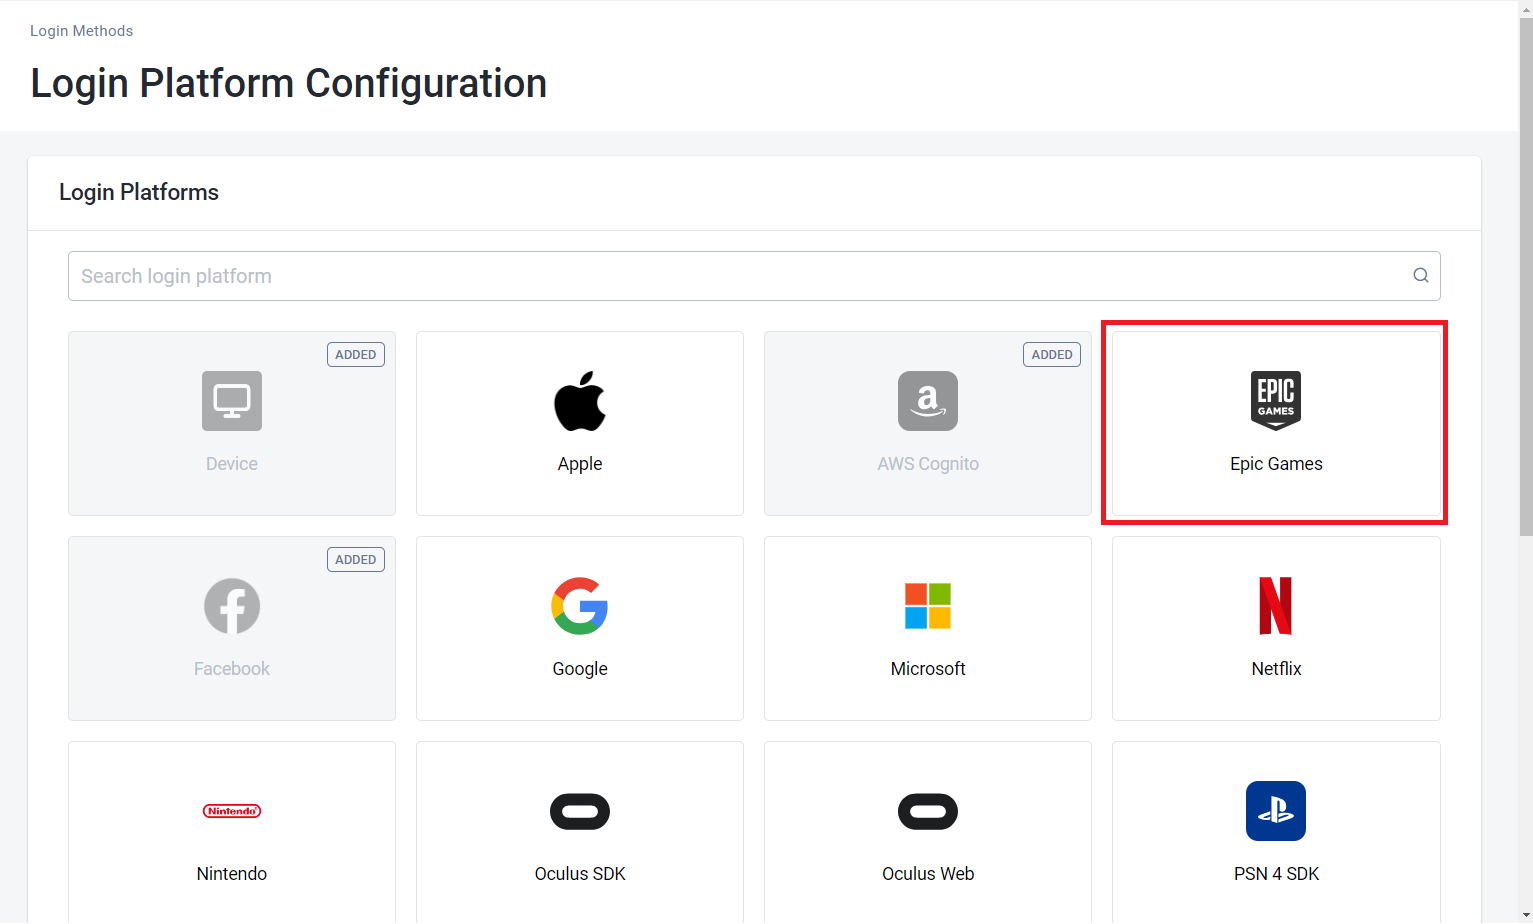
From the list of login method options, select Epic Games.
Fill the login configuration with your Epic Games client credential, Fill Client ID with your epic client ID, Client Secret with your epic client secret and Fill in Redirect URI with
<BaseURL>/iam/v3/authenticate(BaseURL is your domain address, e.g., https://prod.gamingservices.accelbyte.io), and then click the Create Button.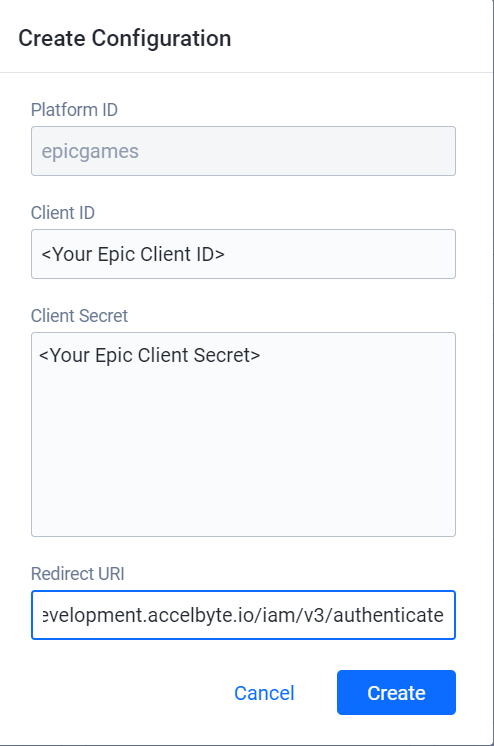
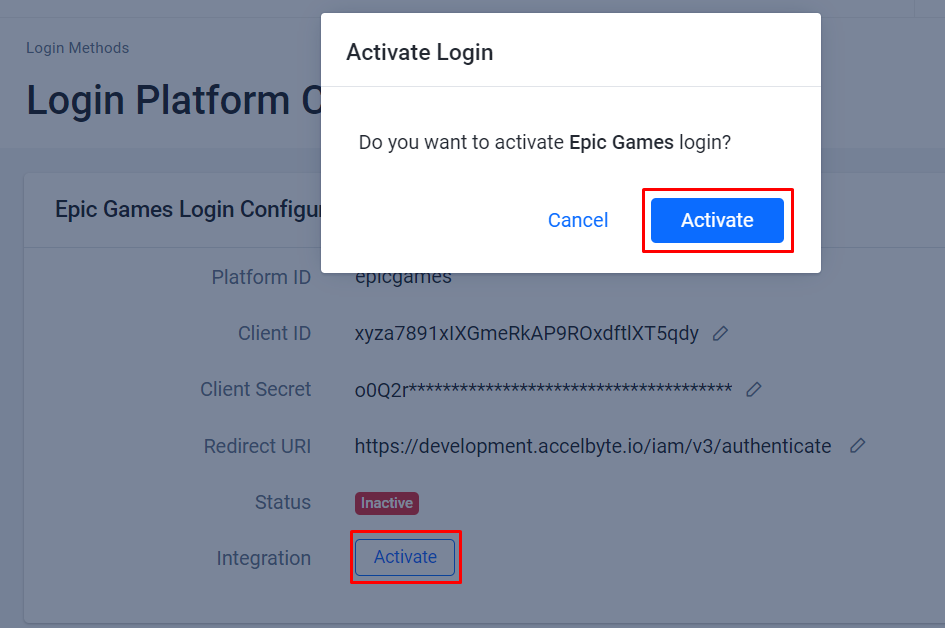
Activate it.
Give it a try
Go through the Player Portal and click the Login button.
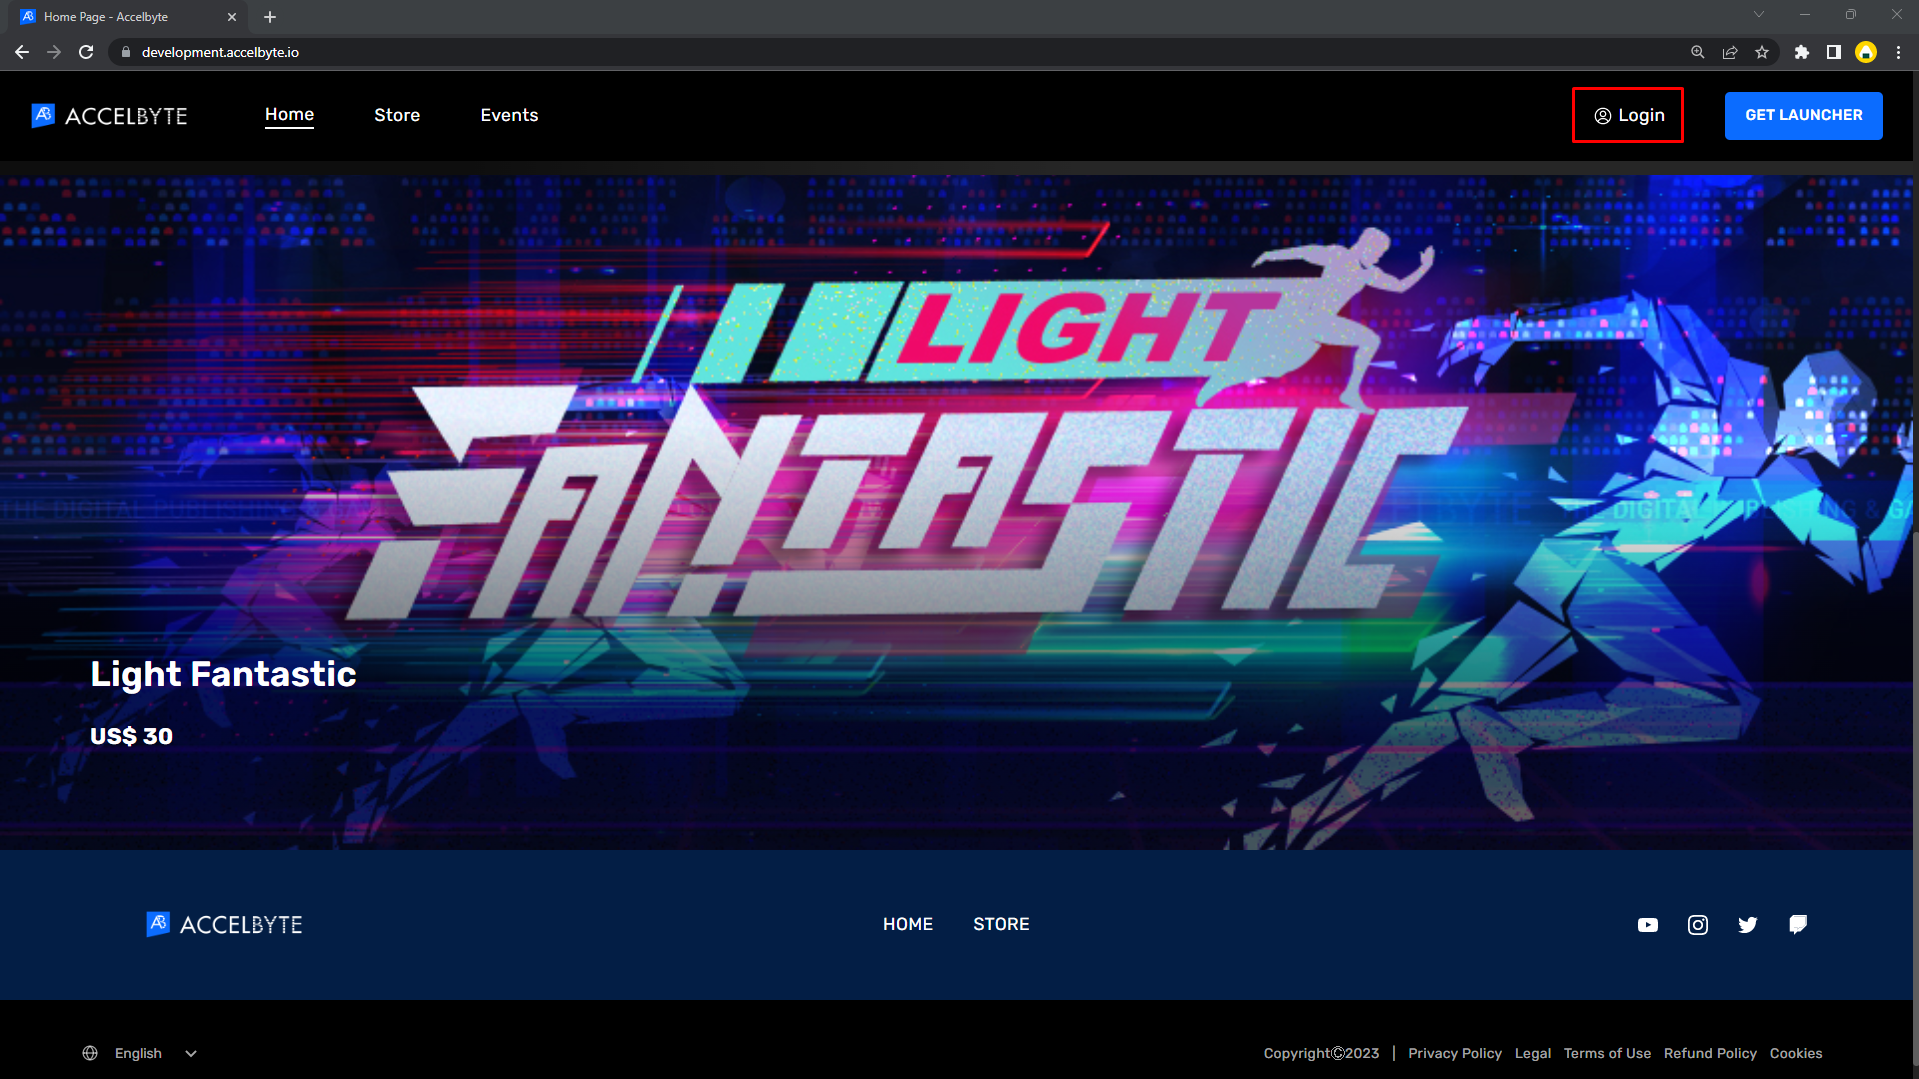
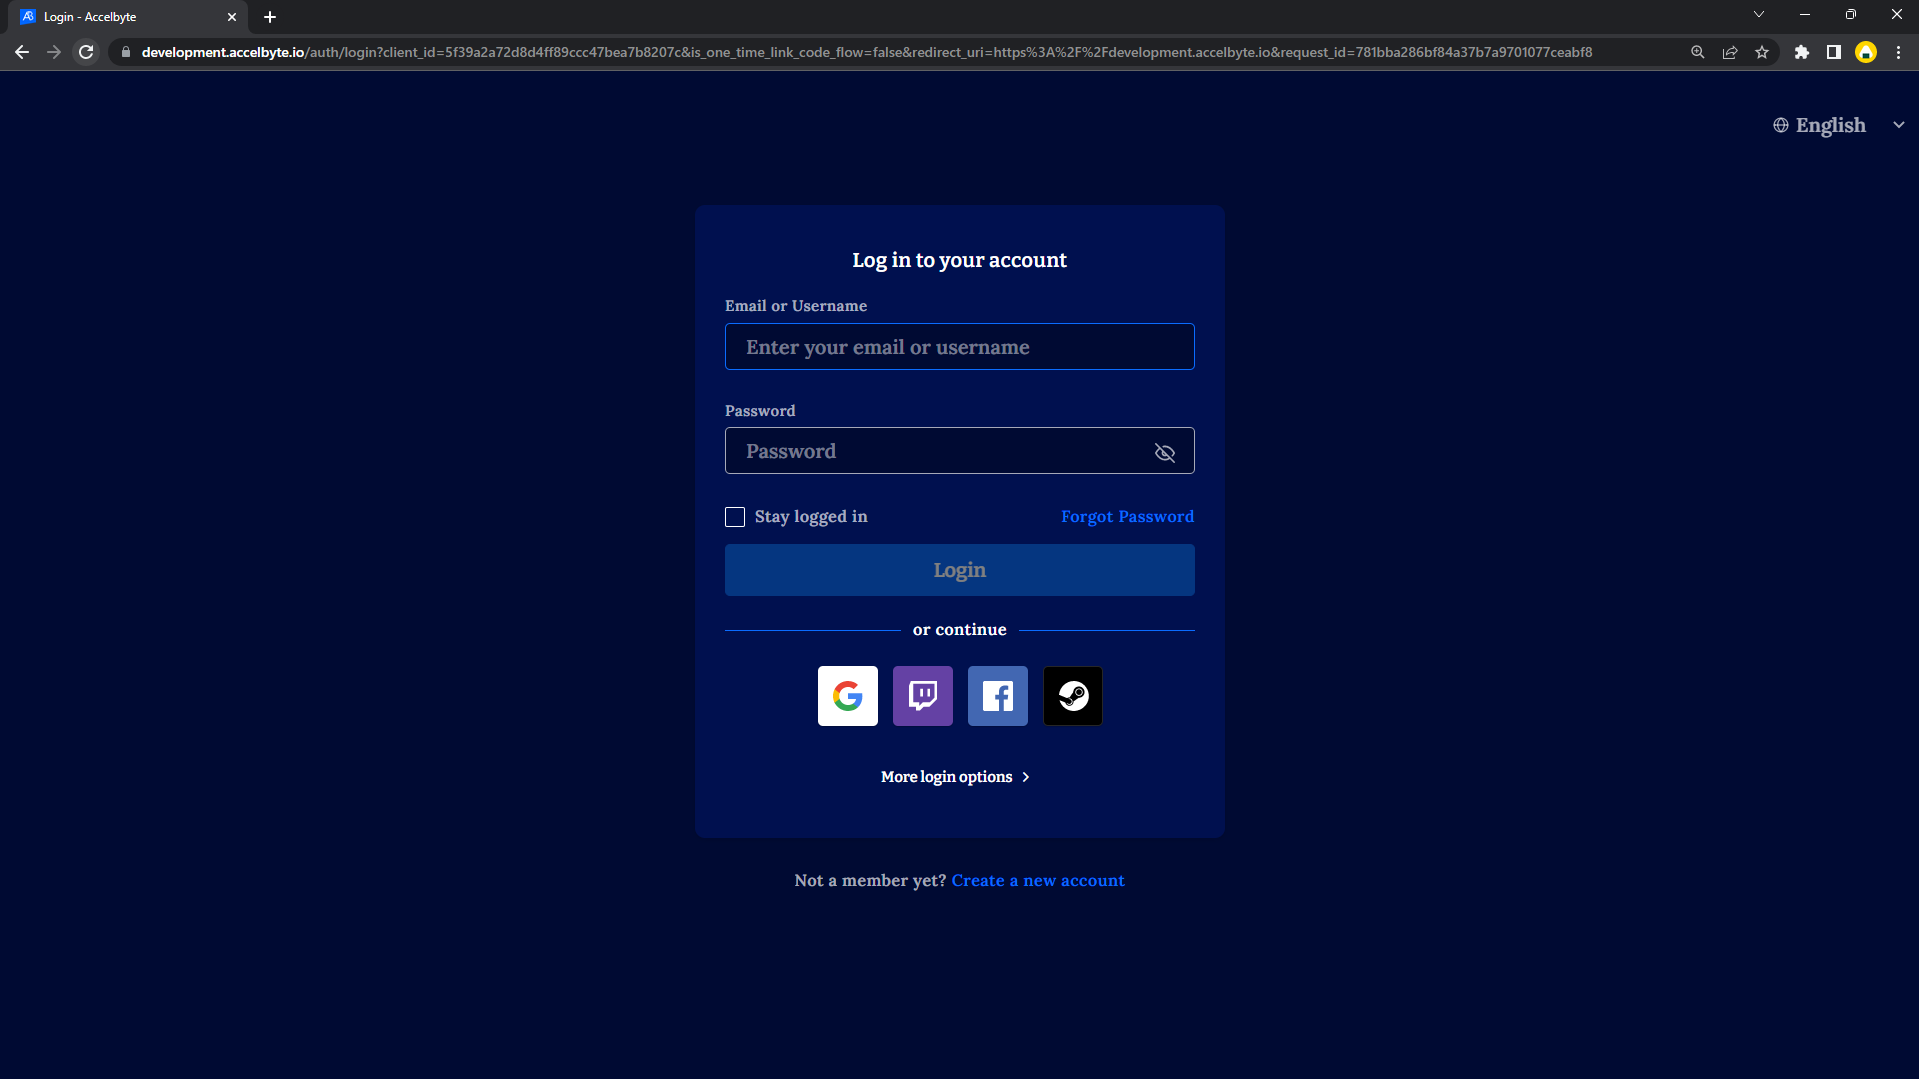
Click on Epic Games Icon, If you can't find it, you can click More login options.
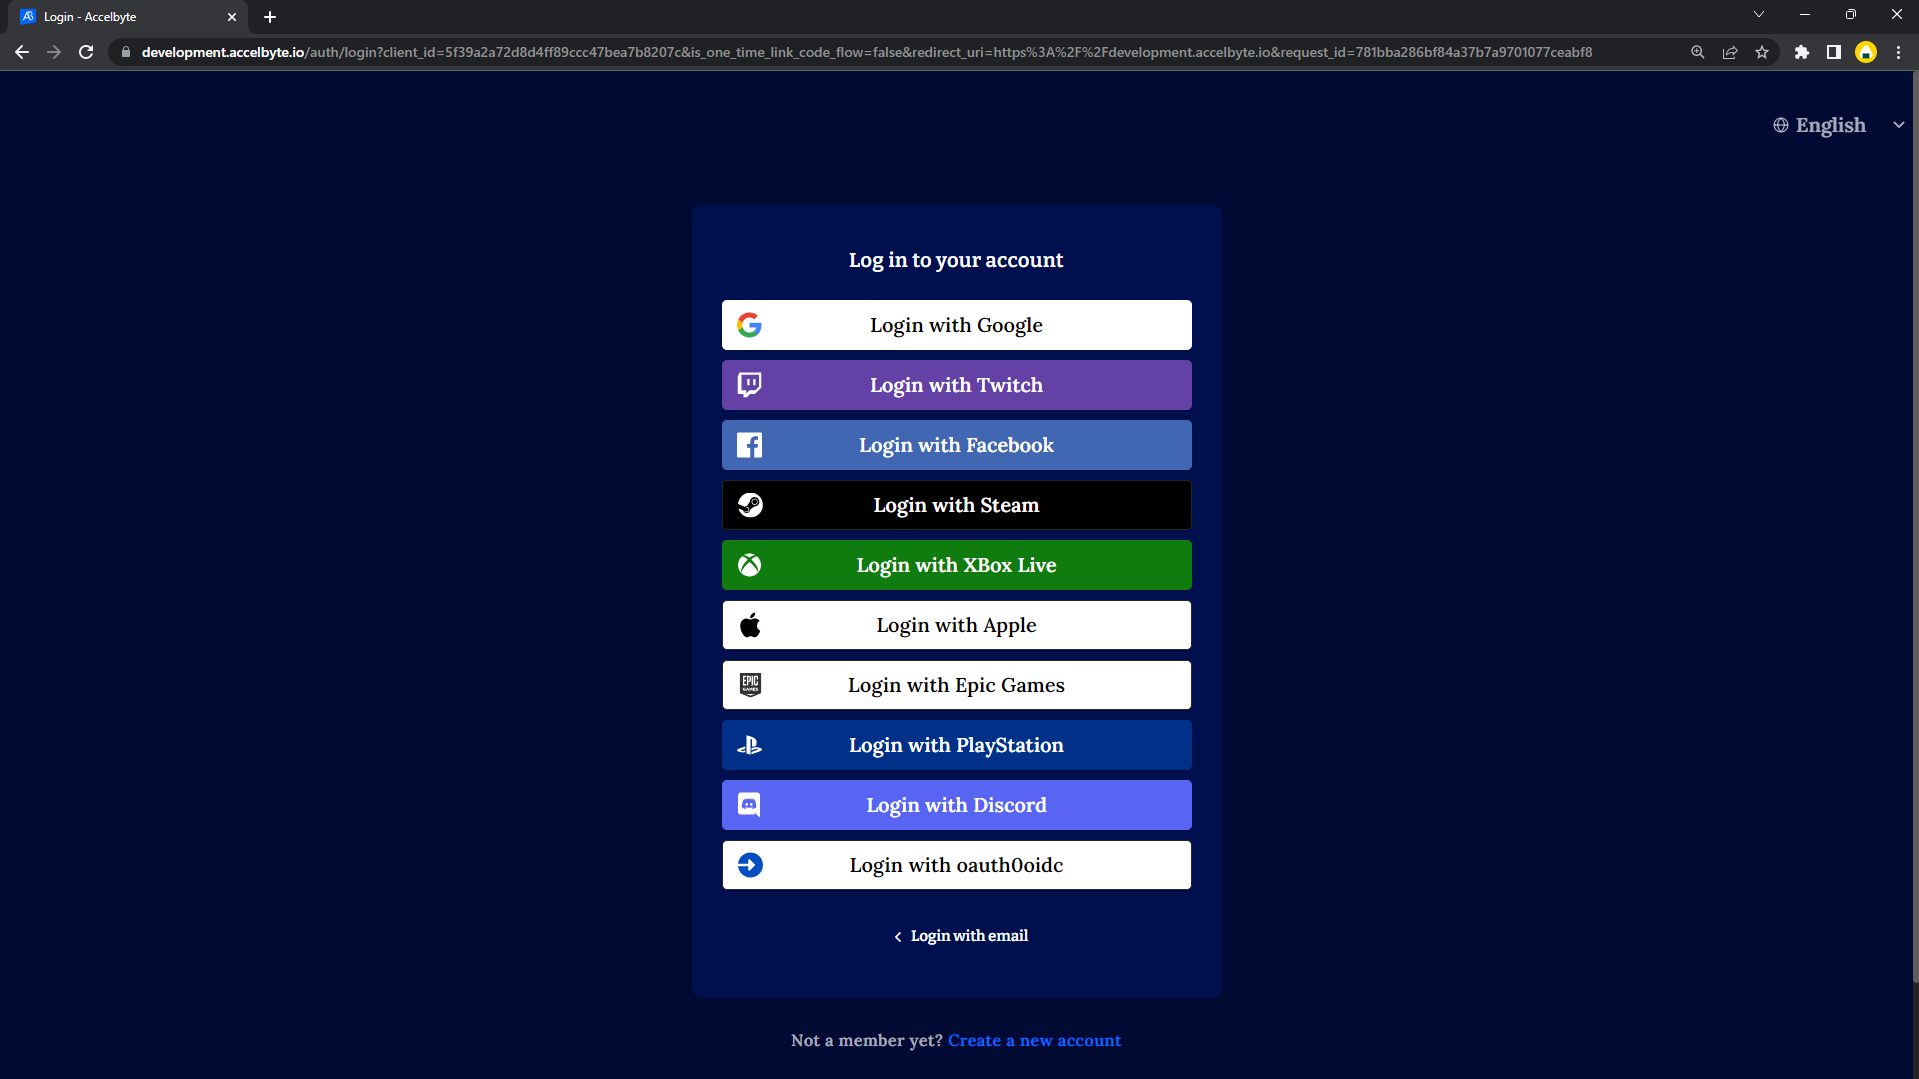
Click Login with Epic Games.
You will be redirected to the Epic Games Web Login page where you can fill in your Epic credentials to proceed. That's it. You've completed the required steps.
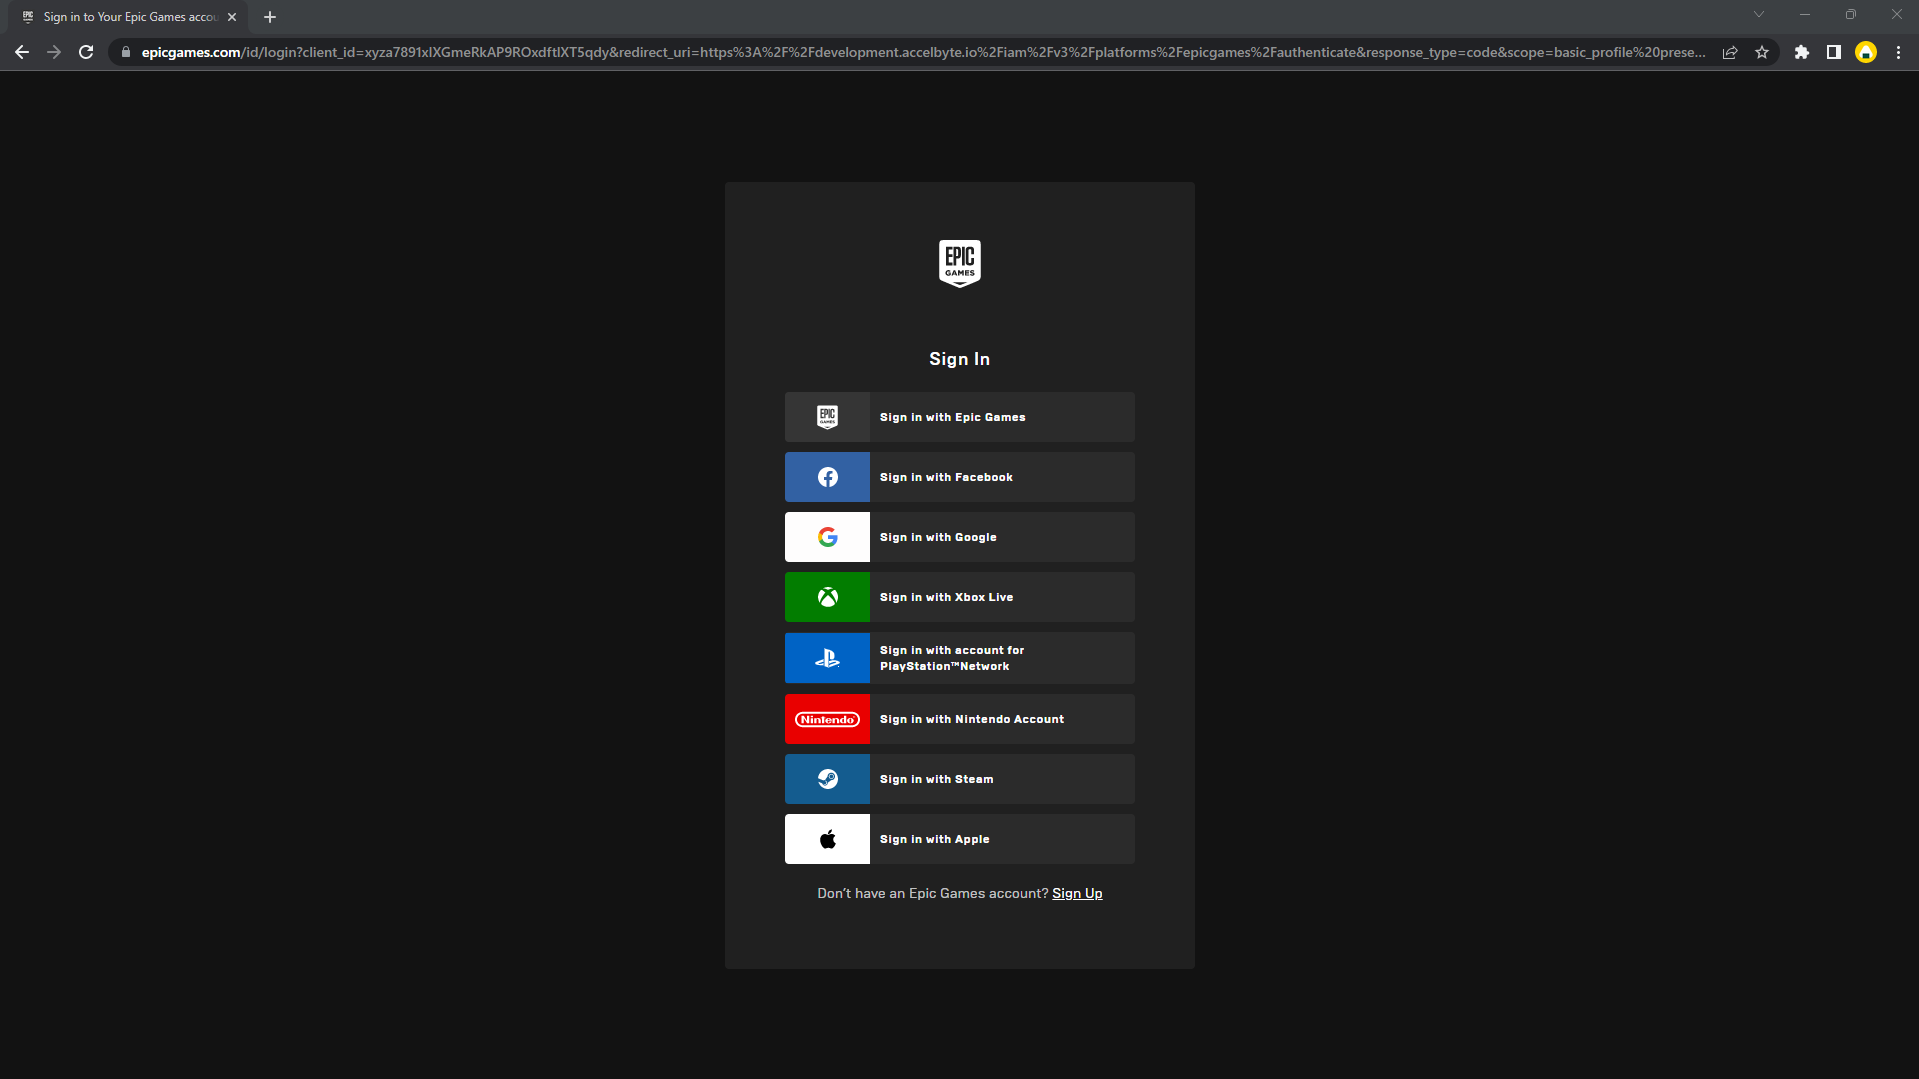
Currently, players will be asked to link their Epic account with an existing AccelByte account or link it with a new account. There is an effort underway at AccelByte to make this configurable so that players can login to the Player Portal directly with a headless account.
In-Game Login
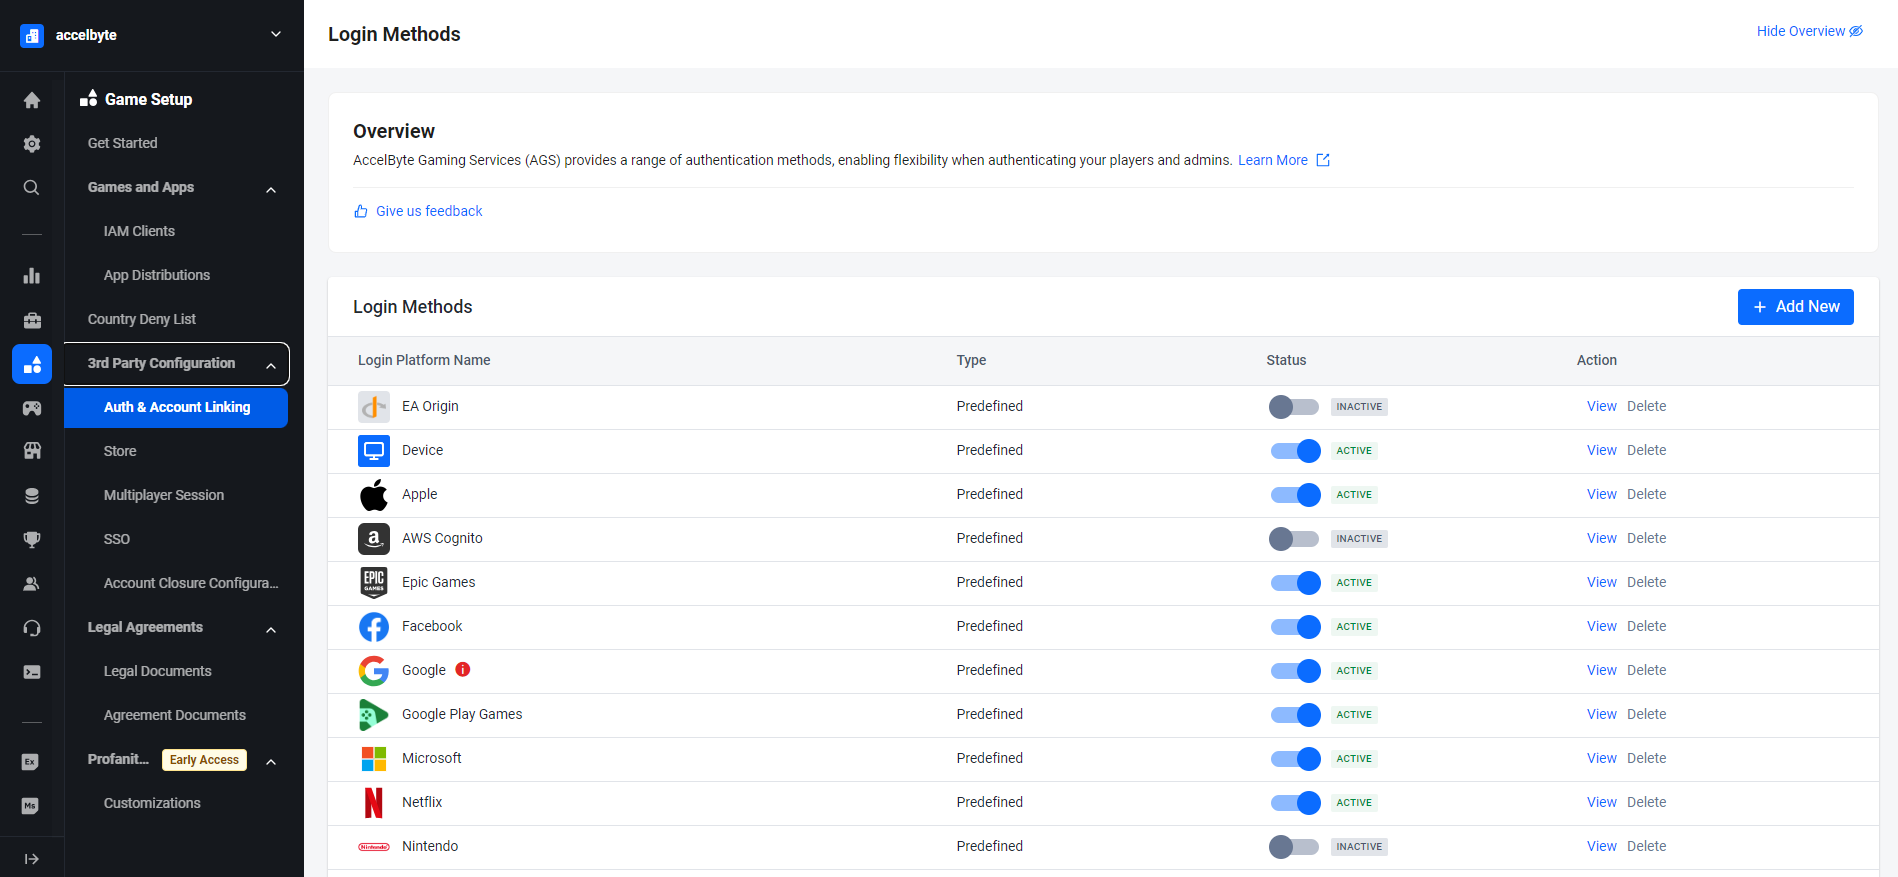
In the AGS Admin portal, go to your game namespace.
On the sidebar menu, go to Game Setup > 3rd Party Configuration > Auth & Account Linking.
On the Login Methods page, click on the + Add New button.
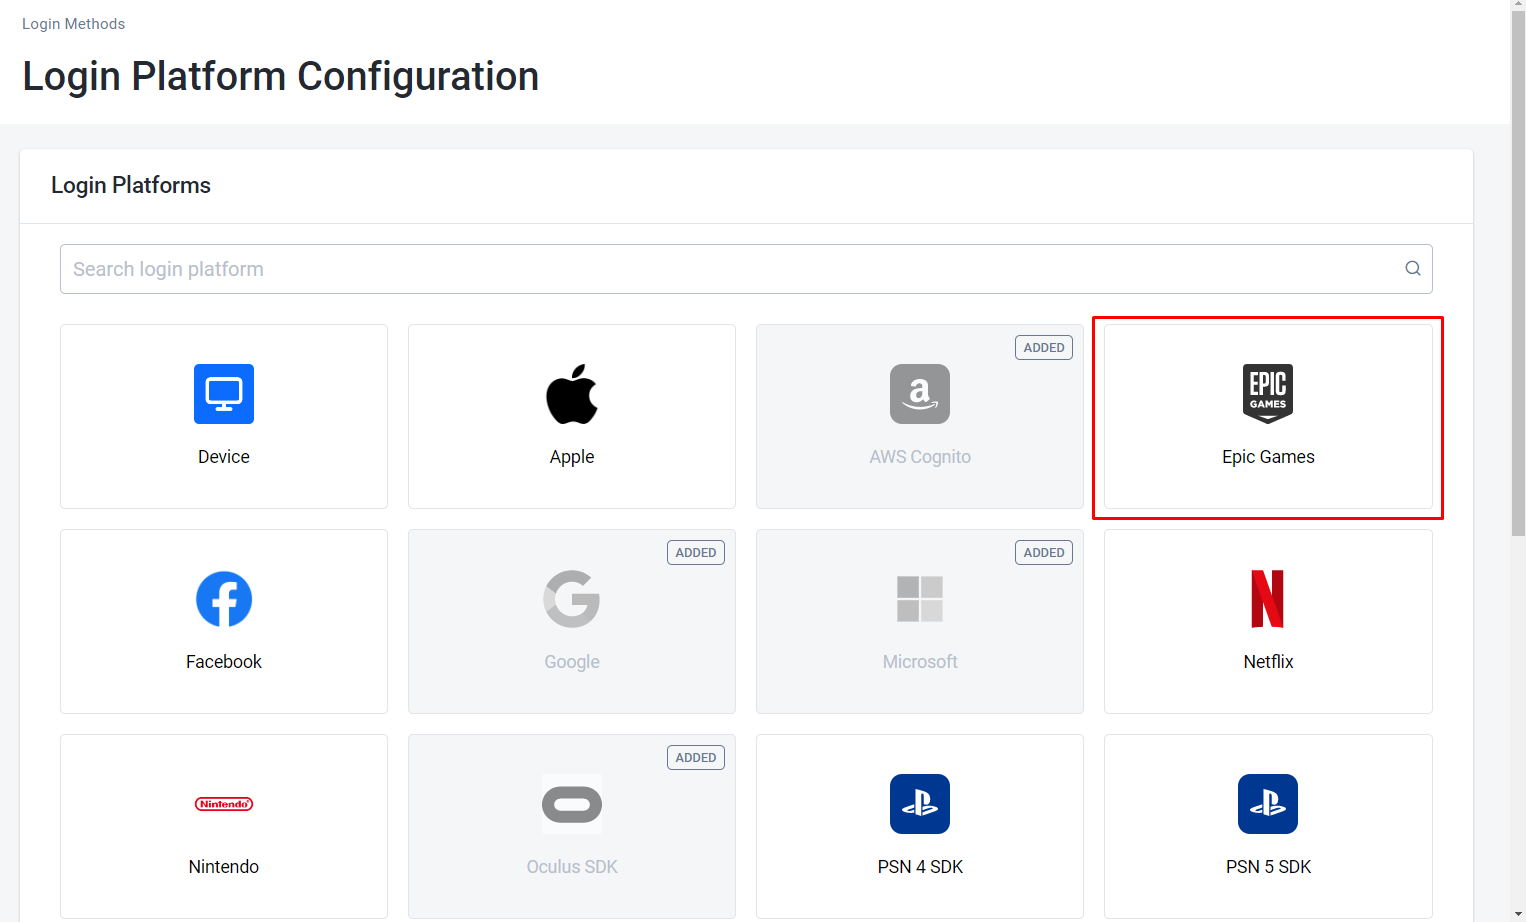
From the list of login method options, select Epic Games.
Fill the login configuration with your Epic Game client credential, Fill Client ID with your epic client ID, Client Secret with your epic client secret and Fill in Redirect URI with
http://127.0.0.1(localhost), and then click the Create Button.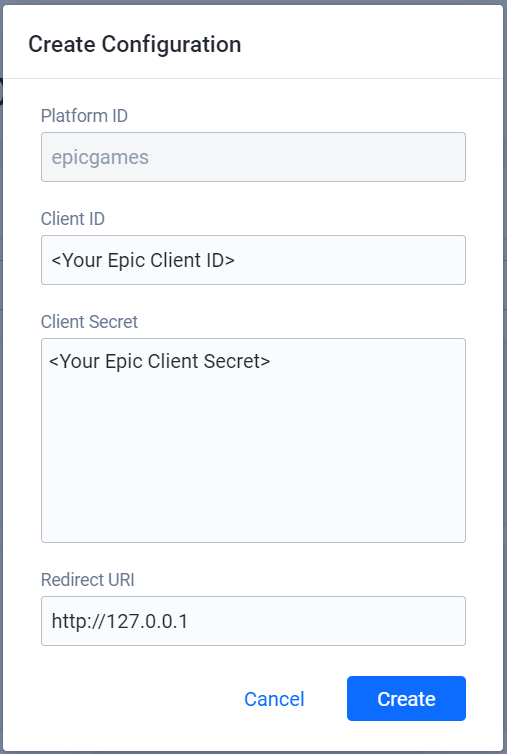
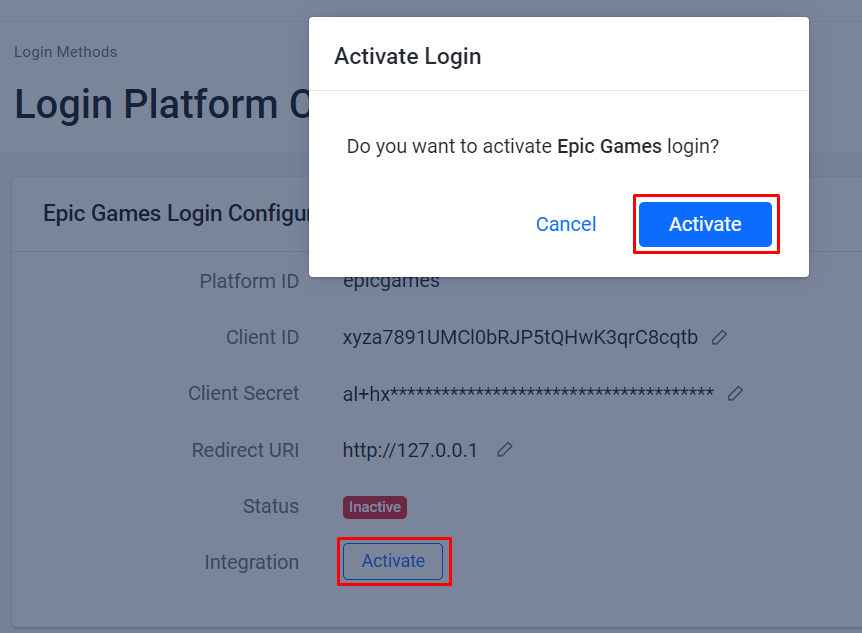
Activate it.
Create an IAM client for Epic Games
An IAM client is a representation of the game client that you want to release on your target platform. Learn more about IAM Clients in Manage access control for applications.
- Unreal Engine Instructions
- Unity Instructions
Unreal in-game login integration
You can integrate your game sign-in using the AccelByte SDK so that your players can log in to games using their Epic credentials.
Unreal preparation and configuration
Add dependencies
First, you need to add the public dependency modules OnlineSubsystem and OnlineSubsystemEOS to your <YourProject>.Build.cs file. These are all the dependencies needed for integrating your project to use the online subsystem EOS from within Unreal Engine.
public ABThirdPartyLogin(ReadOnlyTargetRules Target) : base(Target)
{
  PCHUsage = PCHUsageMode.UseExplicitOrSharedPCHs;

  PublicDependencyModuleNames.AddRange(new string[] { "Core", "CoreUObject", "Engine", "InputCore" , "AccelByteUe4Sdk", "Slate", "SlateCore" });

  PrivateDependencyModuleNames.AddRange(new string[] { "Json", "OnlineSubsystem", "OnlineSubsystemEOS", "HTTP" });

}
Add OnlineSubsystemEOS inside <YourProject>.Target.cs:
public ABThirdPartyLoginTarget( TargetInfo Target) : base(Target)
{
  Type = TargetType.Game;
  DefaultBuildSettings = BuildSettingsVersion.V2;
  ExtraModuleNames.AddRange( new string[] { "ABThirdPartyLogin", "OnlineSubsystem", "AccelByteUe4Sdk", "OnlineSubsystemEOS" } );
}
Add OnlineSubsystemSteam inside <YourProject>.Target.cs and <YourProjectEditor>.Target.cs files.
public ABThirdPartyLoginEditorTarget( TargetInfo Target) : base(Target)
{
  Type = TargetType.Editor;
  DefaultBuildSettings = BuildSettingsVersion.V2;
  ExtraModuleNames.AddRange( new string[] { "ABThirdPartyLogin", "OnlineSubsystem", "AccelByteUe4Sdk", "OnlineSubsystemEOS" } );
}
Unreal Engine Project Setting for Epic Games login
Inside your DefaultEngine.ini file you need to add several variables for the Epic configuration. You need this configuration to make certain when you open the project, the Epic Online Service will initiate automatically.
To tell Unreal Engine to use Online Subsystem EOS, add the following setting:
[OnlineSubsystem]
DefaultPlatformService=EOS
Now that you've told Unreal Engine that you want your application to use the EOS Online Subsystem, you'll need to configure the OnlineSubsystemEOS module by adding the following settings:
[OnlineSubsystemEOS]
bEnabled=true
You can fill the values below based on the values you got from the Epic Developer Portal.
[/Script/OnlineSubsystemEOS.NetDriverEOS]
bIsUsingP2PSockets=true

[/Script/OnlineSubsystemEOS.EOSSettings]
CacheDir=CacheDir
DefaultArtifactName=YOUR Product Name
TickBudgetInMilliseconds=0
bEnableOverlay=True
bEnableSocialOverlay=True
bShouldEnforceBeingLaunchedByEGS=False
TitleStorageReadChunkLength=0
+Artifacts=(ArtifactName="[Your Product Name]",
ClientId="[Your Client ID]",//This ID should start with "xyz" as the first 3 characters
ClientSecret="[Your Client Secret]",//This is the password that is used to verify your Client ID
ProductId="[Your Product ID]",//The EOS SDK uses this ID to identify your product
SandboxId="[Your Sandbox ID]",//The artifact belongs to the sandbox with this ID value.
DeploymentId="[Your Deployment ID]",//Deployment IDs differ for each artifact
EncryptionKey="[Your Encyption Key]")//When you upload data to an EOS service, this 64-byte hexadecimal string is used to encrypt it
bUseEAS=True
bUseEOSConnect=True
bMirrorStatsToEOS=True
bMirrorAchievementsToEOS=True
bUseEOSSessions=True
bMirrorPresenceToEAS=True

zUnreal Engine Project Setting for AccelByte Gaming Services
Add your AccelByte credentials here in DefaultEngine.ini
[/Script/AccelByteUe4Sdk.AccelByteSettings]
ClientId=<Your IAM_Client_Id>
ClientSecret=<Your IAM_Client_Secret>
Namespace=<Your Namespace>
PublisherNamespace=<Your Publisher Namespace>
RedirectURI=
BaseUrl="https://prod.gamingservices.accelbyte.io"
AppId=133xxx
IamServerUrl="https://prod.gamingservices.accelbyte.io/iam"
PlatformServerUrl="https://prod.gamingservices.accelbyte.io/platform"
Unreal Engine sample code implementation
Next, we will show you how to implement the Epic authentication method for your game using the sample code below.
The IOnlineSubsystem reads the DefaultPlatformService value defined in DefaultEngine.ini. The IdentityInterface manages interactions with these services related to user accounts, enabling user authentication and access token retrieval. Once the operation is successful, the LoginWithOtherPlatform function of the AccelByte SDK handles third-party platform login using the authentication token obtained from the Identity Interface.
FOnlineAccountCredentials Credentials;
Credentials.Id = FString();
Credentials.Token = FString();
Credentials.Type = FString("accountportal");

UE_LOG(LogTemp, Warning, TEXT("%s"), TEXT("Begin Login"));
const IOnlineSubsystem* OnlineSubsystem = IOnlineSubsystem::Get();
if (OnlineSubsystem == nullptr)//will get active OSS Platform Service
{
  FString Message = TEXT("Cannot login with no online subsystem set!");
  UE_LOG(LogTemp, Warning, TEXT("%s"), *Message);
  return;
}

const IOnlineIdentityPtr OnlineIdentity = OnlineSubsystem->GetIdentityInterface();
if (!OnlineIdentity.IsValid())
{
  FString Message = TEXT("Could not retrieve identity interface from native subsystem.");
  UE_LOG(LogTemp, Warning, TEXT("%s"), *Message);
  return;
}
APlayerController* MyPlayerController = UGameplayStatics::GetPlayerController(GetWorld(), 0);;

const ULocalPlayer* LocalPlayer = Cast<ULocalPlayer>(MyPlayerController->Player);
if (LocalPlayer == nullptr)
{
  FString Message = TEXT("Can only login with native platform for local players");
  UE_LOG(LogTemp, Warning, TEXT("%s"), *Message);
  return;
}
const FVoidHandler OnLoginSuccessDelegate = FVoidHandler::CreateLambda([=]() {
  FAccountUserData AccountUserData = FRegistry::Credentials.GetAccountUserData();
//if Success will return some user credential
  FString AccountUserDataString;
  FJsonObjectConverter::UStructToJsonObjectString(AccountUserData, AccountUserDataString);

  FString Message = FString::Printf(TEXT("Login to AB Service Success : %s"), *AccountUserDataString);
});
const FCustomErrorHandler OnLoginErrorDelegate = FCustomErrorHandler::CreateLambda([=](int32 ErrorCode, const FString& ErrorMessage, const FJsonObject& ErrorObject) {
     FString Message = FString::Printf(TEXT("Error Login to AB Service : %s"), *ErrorMessage);//Failed Login to AB Service
});

const FOnLoginCompleteDelegate NativeLoginComplete = FOnLoginCompleteDelegate::CreateLambda([=]
(int32 LocalUserNum, bool bWasSuccessful, const FUniqueNetId& UserId, const FString& Error) {
  UE_LOG(LogTemp, Warning, TEXT("OnLoginComplete %s : %s"), bWasSuccessful ? TEXT("Success") : TEXT("Fail"), *Error);
  FString Message = FString::Printf(TEXT("OnLoginComplete %s : %s"), bWasSuccessful ? TEXT("Success") : TEXT("Fail"), *Error);
  OnActionInfoUpdated.Broadcast(Message);

  if (bWasSuccessful)
  {
     const FString PlatformToken = OnlineIdentity->GetAuthToken(LocalPlayer->GetControllerId());
     UE_LOG(LogTemp, Warning, TEXT("PlatformToken : %s"), *PlatformToken);
     OnActionInfoUpdated.Broadcast(FString::Printf(TEXT("PlatformToken : %s"), *PlatformToken));//Will Obtained Auth Ticket from OnlineIdentity

     FRegistry::User.LoginWithOtherPlatform(EAccelBytePlatformType::EpicGames, PlatformToken, OnLoginSuccessDelegate, OnLoginErrorDelegate);
     UE_LOG(LogTemp, Warning, TEXT("Request LoginWithOtherPlatform"));
     OnActionInfoUpdated.Broadcast(TEXT("Request LoginWithOtherPlatform"));
  }//this method will hitting the AccelByte endpoint and will return value after success
});
OnlineIdentity->AddOnLoginCompleteDelegate_Handle(LocalPlayer->GetControllerId(), NativeLoginComplete);
const bool bWaitForDelegate = OnlineIdentity->Login(LocalPlayer->GetControllerId(), Credentials);
if (!bWaitForDelegate)
{
  FString Message = TEXT("The online subsystem couldn't login");
  UE_LOG(LogTemp, Warning, TEXT("%s"), *Message);
}

FString Message = TEXT("Sending login request to native subsystem!");
UE_LOG(LogTemp, Warning, TEXT("%s"), *Message);
platform_token for Epic Games Authentication is Access Token/Auth Code
After adding this code to your project, compile, build, and run your project. That's it.
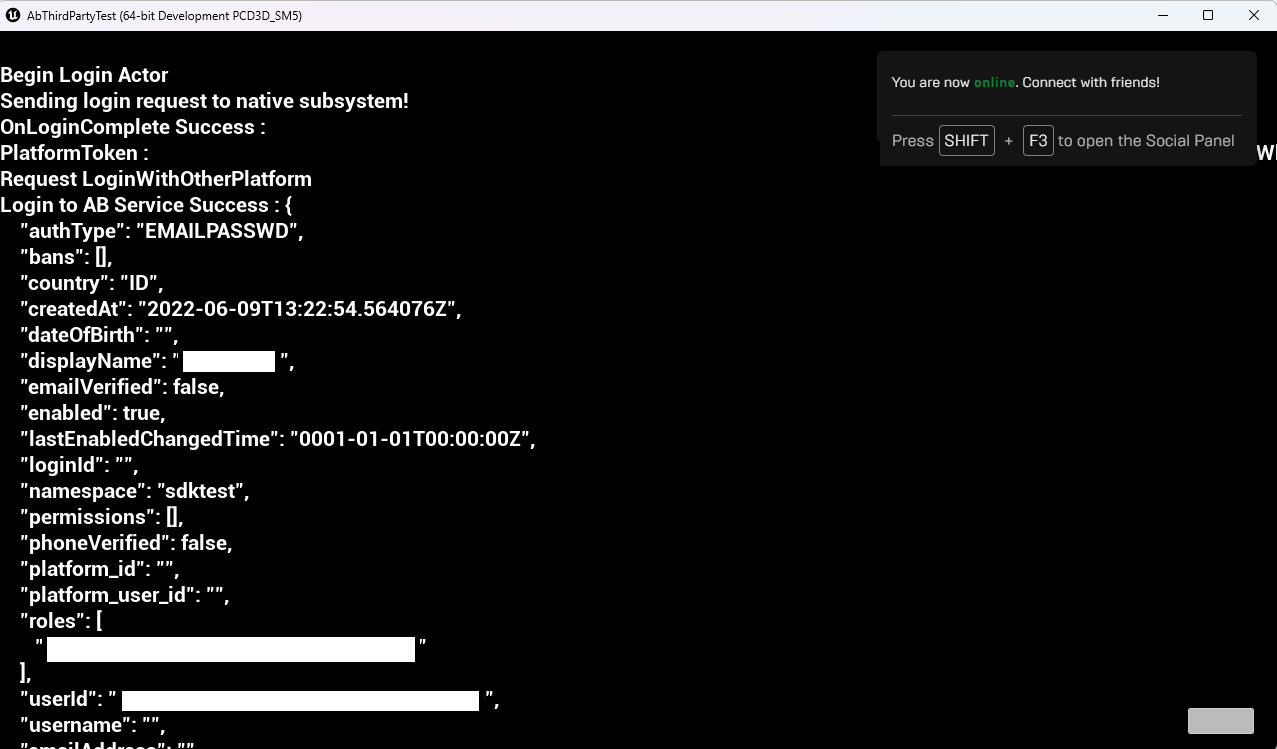
Sample code testing
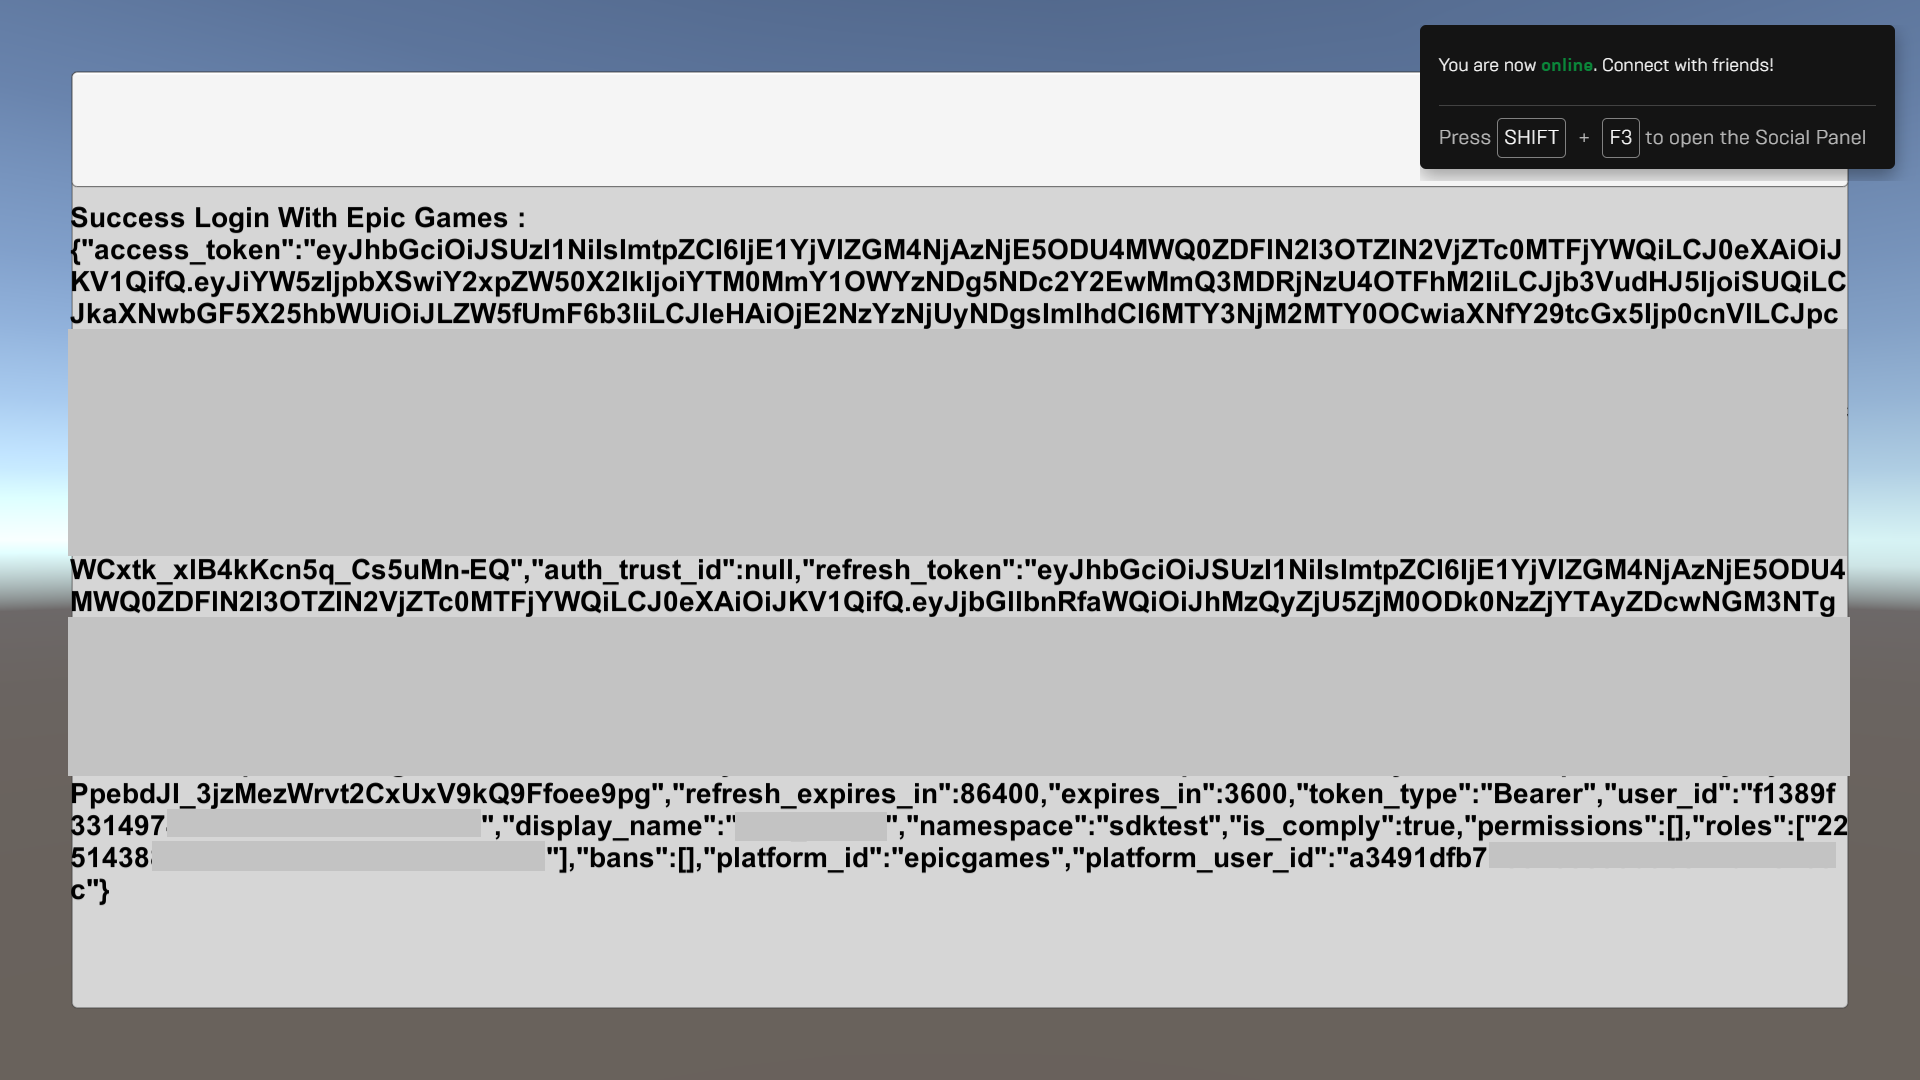
The image below shows a successful login using an Epic account to our test app.
Unity in-game login integration
You can integrate your Epic Game to sign-in with the AccelByte SDK so that your players can log in using their Epic credentials.
Unity preparation and configuration
Unity project setting for Epic Games login
For more information about opening the SDK Config, see Install and configure the SDK. Then, fill in each attribute based on the AGS Admin Portal values and save the configuration.
Unity sample code implementation
In this sample code implementation, we will use the open source Epic Online Service Plugin from PlayEveryWare as the wrapper of Epic Game SDK.
To make the Plugin works, make sure that we put the Attach the Plugin and time ticker into Awake and Update method.
    float platformTickTimer = 0f;
    const float platformTickInterval = 0.1f;

    // In the editor, make sure to dynamically load and unload the SDK between play sessions.
    // This initializes the SDK each time the game is run in editor.
#if UNITY_EDITOR
    [DllImport("Kernel32.dll")]
    private static extern IntPtr LoadLibrary(string lpLibFileName);

    [DllImport("Kernel32.dll")]
    private static extern int FreeLibrary(IntPtr hLibModule);

    [DllImport("Kernel32.dll")]
    private static extern IntPtr GetProcAddress(IntPtr hModule, string lpProcName);

    private IntPtr libraryPointer;
#endif

    private void Awake()
    {
#if UNITY_EDITOR
        var libraryPath = "Assets/" + Epic.OnlineServices.Config.LibraryName;

        libraryPointer = LoadLibrary(libraryPath);
        if (libraryPointer == IntPtr.Zero)
        {
            throw new Exception("Failed to load library" + libraryPath);
        }

        Bindings.Hook(libraryPointer, GetProcAddress);
#endif
    }

    private void OnApplicationQuit()
    {
        if (platformInterface != null)
        {
            platformInterface.Release();
            platformInterface = null;
            PlatformInterface.Shutdown();
        }

#if UNITY_EDITOR
        if (libraryPointer != IntPtr.Zero)
        {
            Bindings.Unhook();

            // Free until the module ref count is 0
            while (FreeLibrary(libraryPointer) != 0) { }
            libraryPointer = IntPtr.Zero;
        }
#endif
    }

    // Calling tick on a regular interval is required for callbacks to work.
    private void Update()
    {
        if (platformInterface != null)
        {
            platformTickTimer += UnityEngine.Time.deltaTime;

            if (platformTickTimer >= platformTickInterval)
            {
                platformTickTimer = 0;
                platformInterface.Tick();
            }
        }
    }
You can generate an Epic token with the Login method from that EOS Plugin. Make sure that it is also initialized correctly.
    private void GetEpicToken(string productName
        , string productVersion
        , string productId
        , string sandboxId
        , string deploymentId
        , string epicClientId
        , string epicClientSecret
        , LoginCredentialType credentialType
        , string credentialId
        , string credentialToken
        , Action<string> onGetEpicTokenFinished)
    {
        var initializeOptions = new InitializeOptions()
        {
            ProductName = productName,
            ProductVersion = productVersion
        };

        var initializeResult = PlatformInterface.Initialize(ref initializeOptions);
        if (initializeResult != Epic.OnlineServices.Result.Success)
        {
            Debug.LogError("Failed to initialize platform: " + initializeResult);
            return;
        }

        var options = new Options()
        {
            ProductId = productId,
            SandboxId = sandboxId,
            DeploymentId = deploymentId,
            ClientCredentials = new ClientCredentials()
            {
                ClientId = epicClientId,
                ClientSecret = epicClientSecret
            }
        };

        PlatformInterface platformInterface = PlatformInterface.Create(ref options);
        if (platformInterface == null)
        {
            Debug.LogError("Failed to create platform");
            return;
        }

        var loginOptions = new LoginOptions()
        {
            Credentials = new Credentials()
            {
                Type = credentialType,
                Id = credentialId,
                Token = credentialToken
            },

            // Change these scopes to match the ones set up on your product on the Developer Portal.
            ScopeFlags = Epic.OnlineServices.Auth.AuthScopeFlags.BasicProfile |
                         Epic.OnlineServices.Auth.AuthScopeFlags.FriendsList |
                         Epic.OnlineServices.Auth.AuthScopeFlags.Presence
        };

        string authCode = string.Empty;
        platformInterface.GetAuthInterface().Login(ref loginOptions, null,
            (ref LoginCallbackInfo loginCallbackInfo) =>
            {
                if (loginCallbackInfo.ResultCode == Epic.OnlineServices.Result.Success)
                {
                    Debug.Log("Epic Login succeeded");
                    CopyUserAuthTokenOptions tokenOptions = new CopyUserAuthTokenOptions();

                    Token? token = null;
                    platformInterface.GetAuthInterface().CopyUserAuthToken(ref tokenOptions, loginCallbackInfo.LocalUserId, out token);
                    if (token == null)
                    {
                        Debug.Log("Could not get token");
                        return;
                    }

                    authCode = token.Value.AccessToken;
                }
                else if (Common.IsOperationComplete(loginCallbackInfo.ResultCode))
                {
                    Debug.Log("Epic Login failed: " + loginCallbackInfo.ResultCode);
                    authCode = loginCallbackInfo.ResultCode.ToString();
                }

                onGetEpicTokenFinished?.Invoke(authCode);
            });
    }
platform_token for Epic Games Authentication is Access Token/Auth Code
Log in to the AccelByte IAM Service.
    private void LoginAccelByteEpicPlatform(string productName
        , string productVersion
        , string productId
        , string sandboxId
        , string deploymentId
        , string epicClientId
        , string epicClientSecret
        , LoginCredentialType credentialType
        , string credentialId
        , string credentialToken)
    {
        GetEpicToken(productName, productVersion, productId, sandboxId, deploymentId, epicClientId, epicClientSecret, credentialType, credentialId, credentialToken, epicToken =>
        {
            if (string.IsNullOrEmpty(epicToken))
            {
                Debug.LogError("Epic Token is empty");
                return;
            }

            AccelByte.Api.User user = AccelByteSDK.GetClientRegistry().GetApi().GetUser();
            user.LoginWithOtherPlatform(AccelByte.Models.PlatformType.EpicGames, epicToken, OnLoginWithEpicDone);
        });
    }

    private void OnLoginWithEpicDone(Result<TokenData, OAuthError> loginResult)
    {
        if (loginResult.IsError)
        {
            Debug.Log($"Login failed, Error: {loginResult.Error.error}, Description {loginResult.Error.error_description}");
        }
        else
        {
            Debug.Log("Login success");
        }
    }
After adding the Login Handler Script into your project, you can compile your project.
Sample code testing
Now, you can build and run your project. The image below shows a successful login using an Epic Account and our test app.
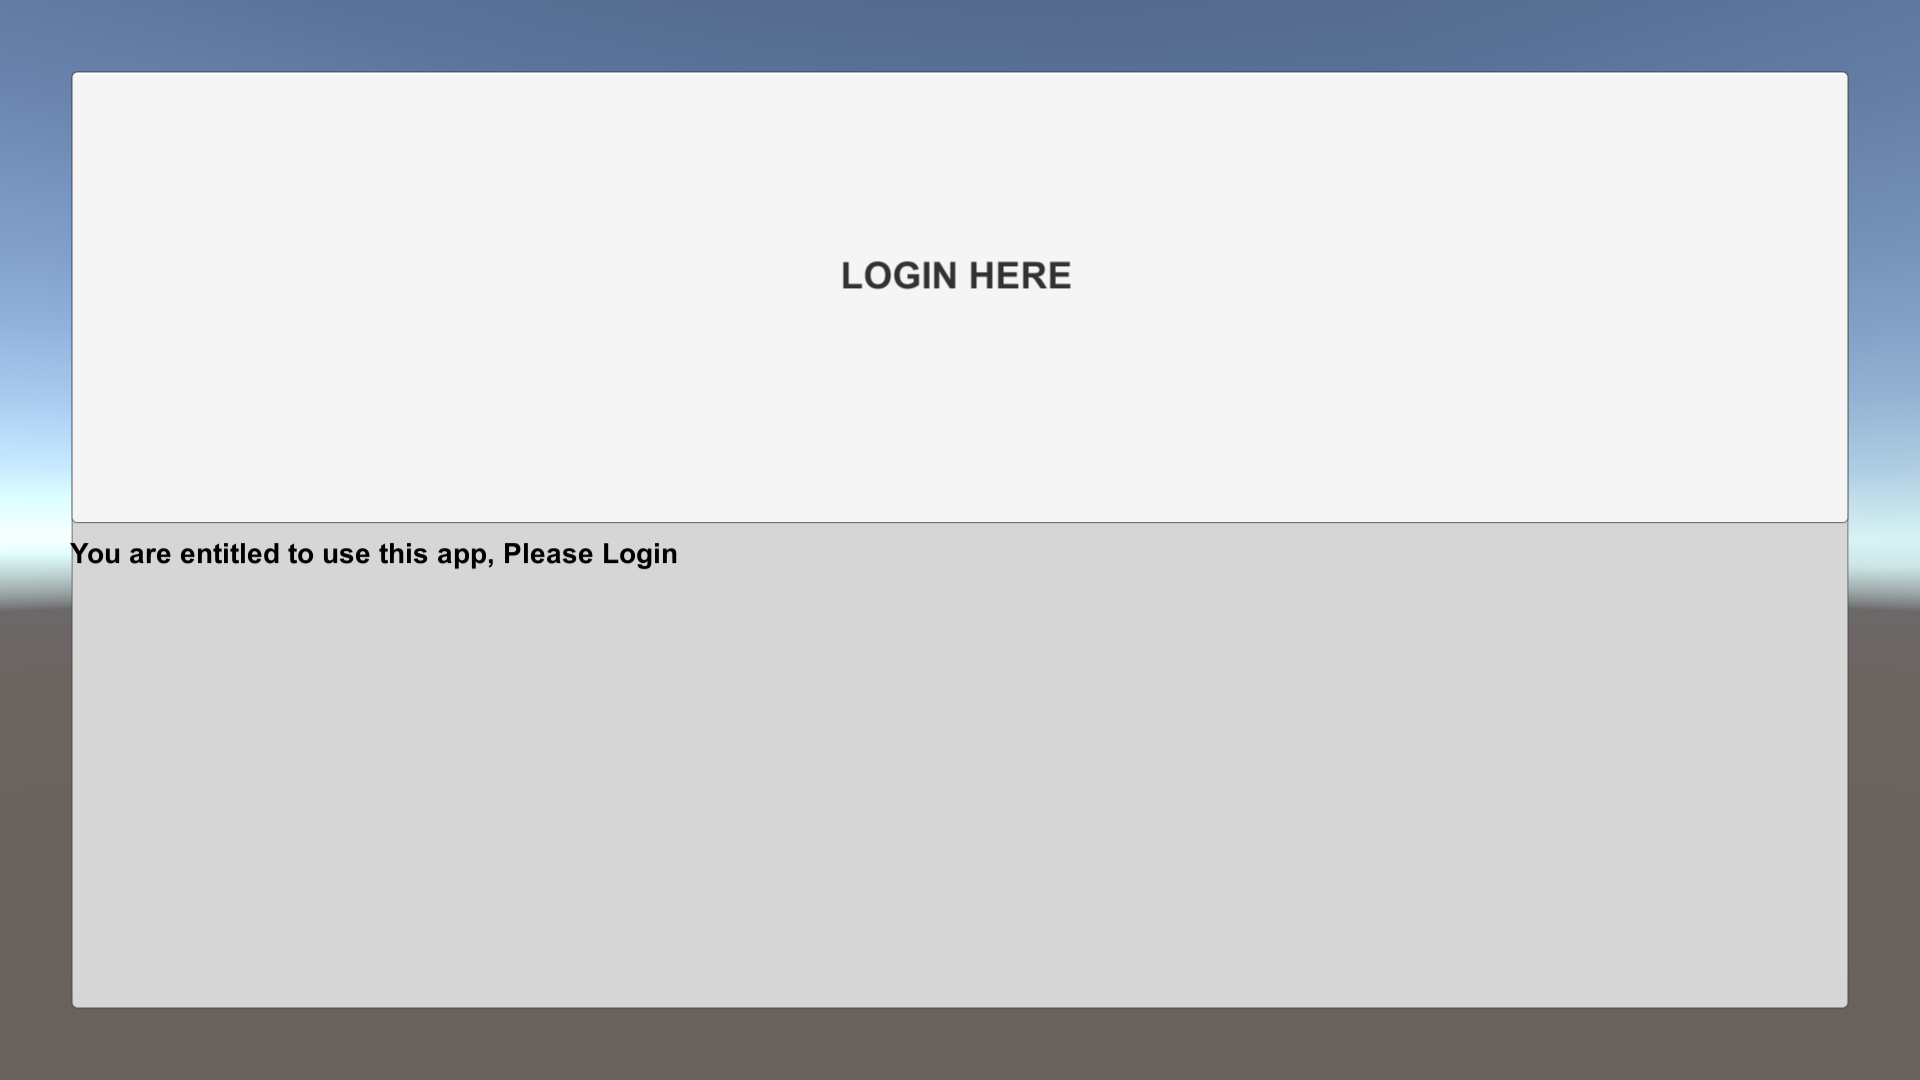
Fill in your Epic Games login credentials to complete the login.
