DLC を設定および販売する
Overview
In-app Purchase integration enables you to sync player purchases from third-party platforms such as PlayStation or Xbox to AccelByte Gaming Services (AGS). In order to achieve this, items sold on a third-party platform need to be correctly mapped to items created in AGS. This guide focuses on how to map durable items in AGS to items defined on third-party platforms.
This article walks you through how to:
- Configure DLCs in AGS manually or using JSON file
- Add DLC mappings for third-party platforms manually or using JSON file
Prerequisites
- Items are properly configured on a third-party platform
- Corresponding items are created in the AGS Store
Add DLCs
This section covers how to add DLCs in two ways: manually or by using a JSON file.
Manually add a DLC
To sell DLCs on a third-party platform (e.g., Epic, Steam, Xbox, PlayStation, etc.) after creating the DLCs on a third-party platform, you must add DLCs on the Admin Portal.
To create DLCs on the Admin Portal, follow these steps:
Go to your namespace.
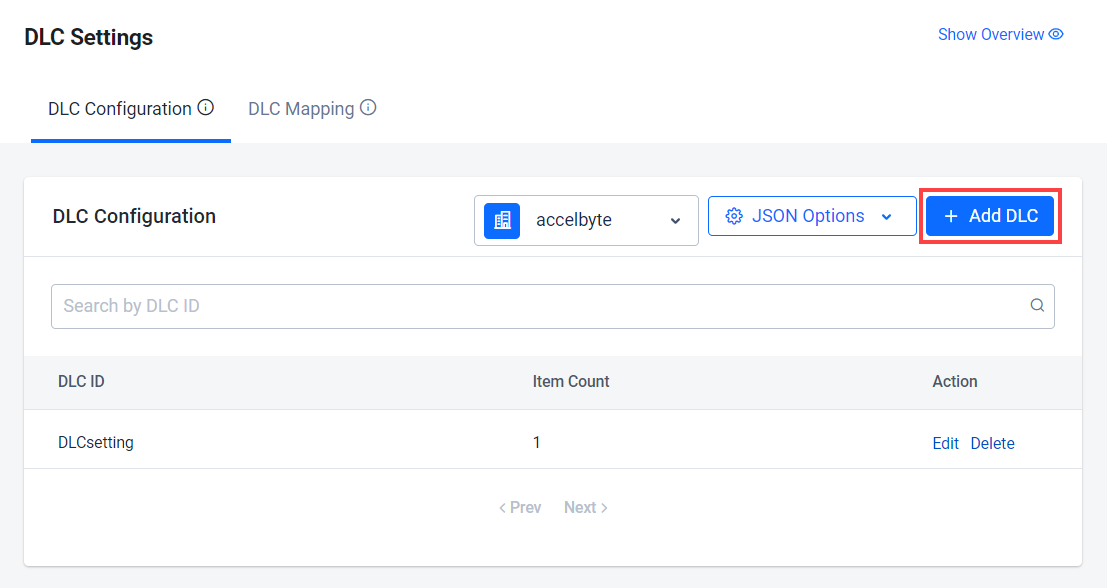
On the sidebar, select Commerce > In-App Purchase > DLC Settings.
On the "DLC Settings" page, open the DLC Configuration tab and click on the +Add DLC button. The "Add DLC" form appears.
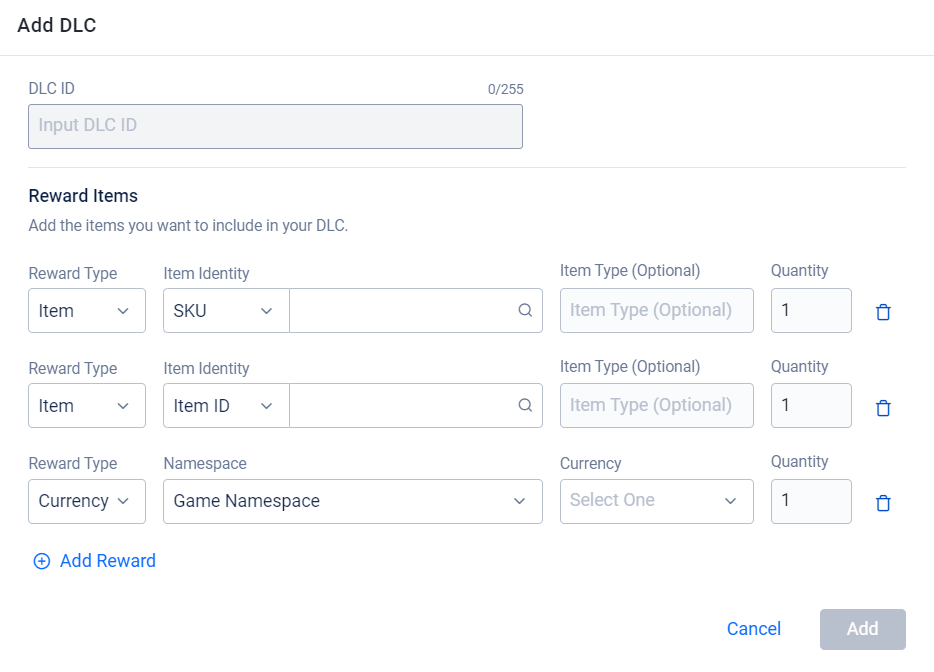
Fill in the required information on the form:
- Fill in the DLC ID.
- Choose Item or Currency as the Reward Type.
- Choose SKU or ID as the Item Identity. Search an item by using an item name.
- Choose COINS, INGAMEITEM, BUNDLE, CODE, SEASON, or MEDIA as the Item Type.
- Fill in an amount for the Quantity.
- Click on the Add button to save the DLC.
Add DLCs using a JSON file
Go to your namespace.
On the sidebar, select Commerce > In-App Purchase > DLC Settings.
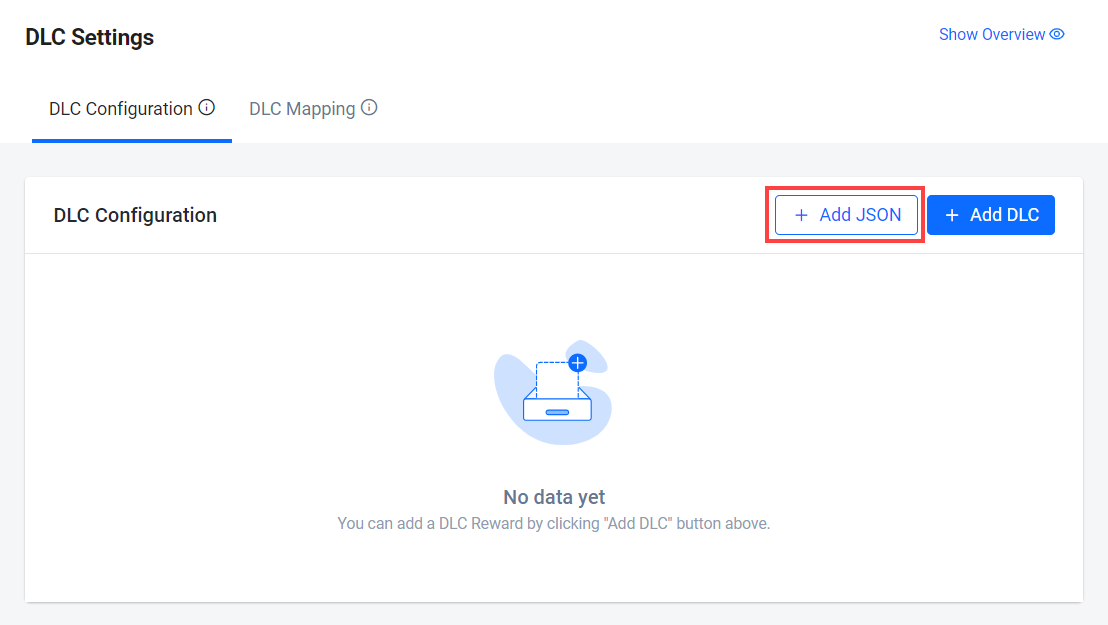
On the "DLC Settings" page, open the DLC Configuration tab and click on the + Add JSON button. A JSON template appears.
注記If there is an existing DLC configured already, click on the JSON Options button. Then, click Edit to modify the existing DLC JSON file or Delete to replace it with a new one.
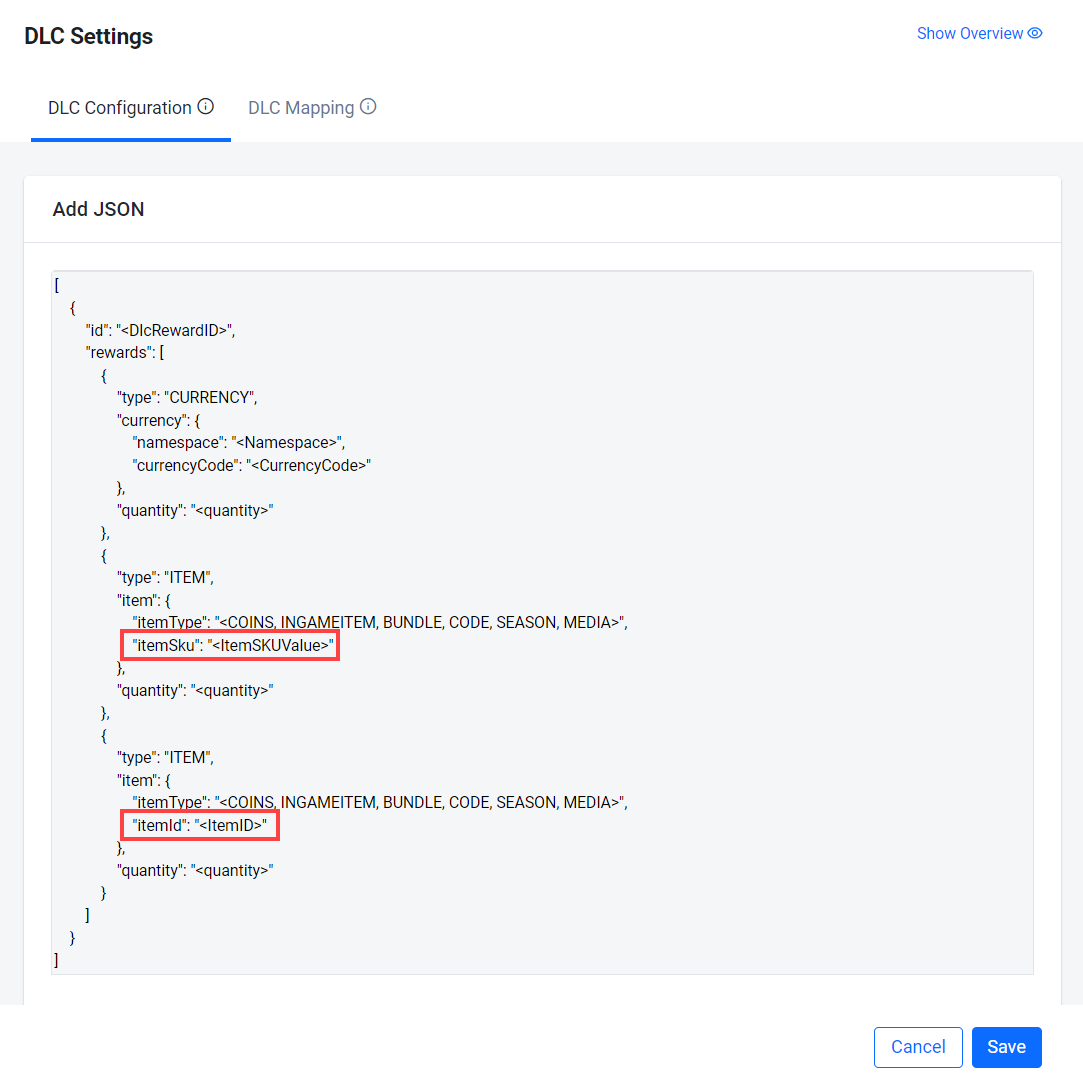
Follow the template to configure your JSON file.
Map DLCs in AGS to third-party platforms
After completing the DLC Configuration, you can proceed to the DLC Mapping tab to map the DLC you created to the corresponding DLCs on each of the third-party platforms. This section covers how to map DLCs in two ways: manually or by using a JSON file.
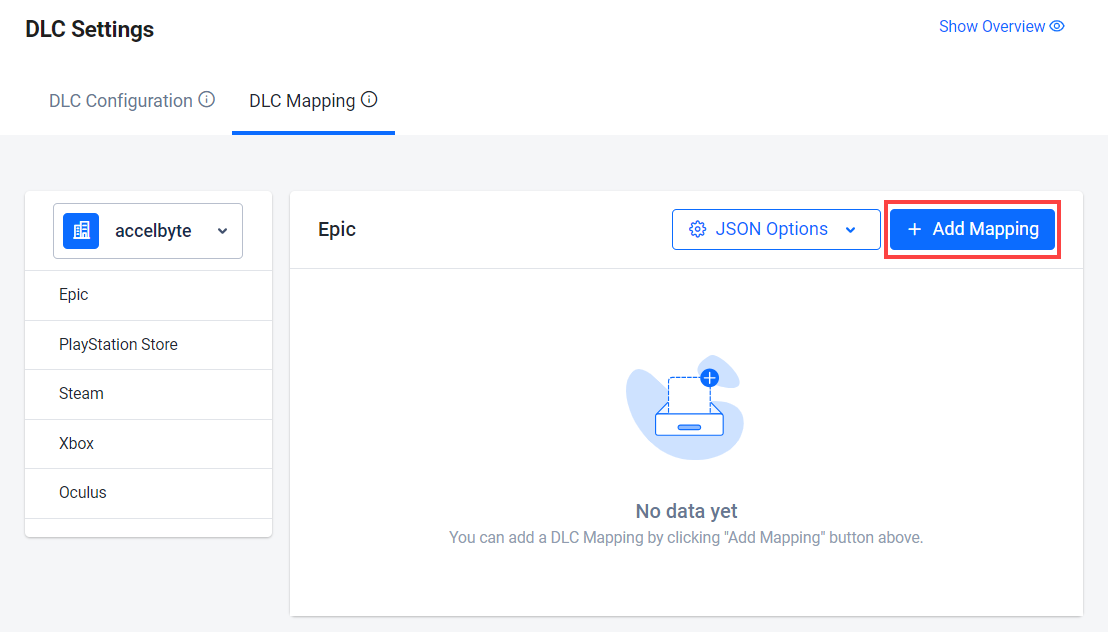
Manually add DLC Mapping
Go to your namespace.
On the sidebar, select Commerce > In-App Purchase > DLC Settings.
In the DLC Mapping tab, click on the platform with the DLC that you want to map. Then, click on the Add Mapping button. The "Add DLC Mapping" form appears.
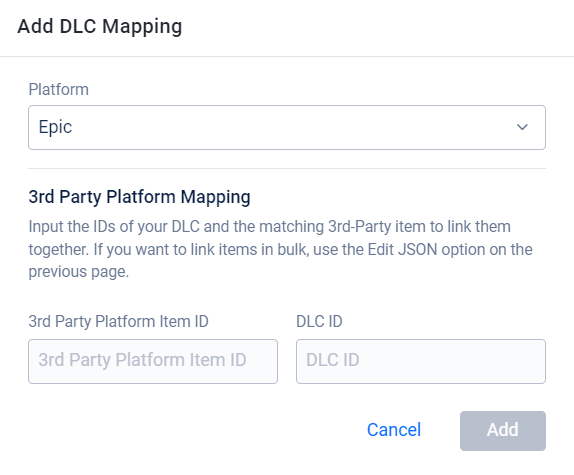
Fill in the required information on the form:
- Fill in the 3rd Party Platform Item ID.
- Fill in the DLC ID.
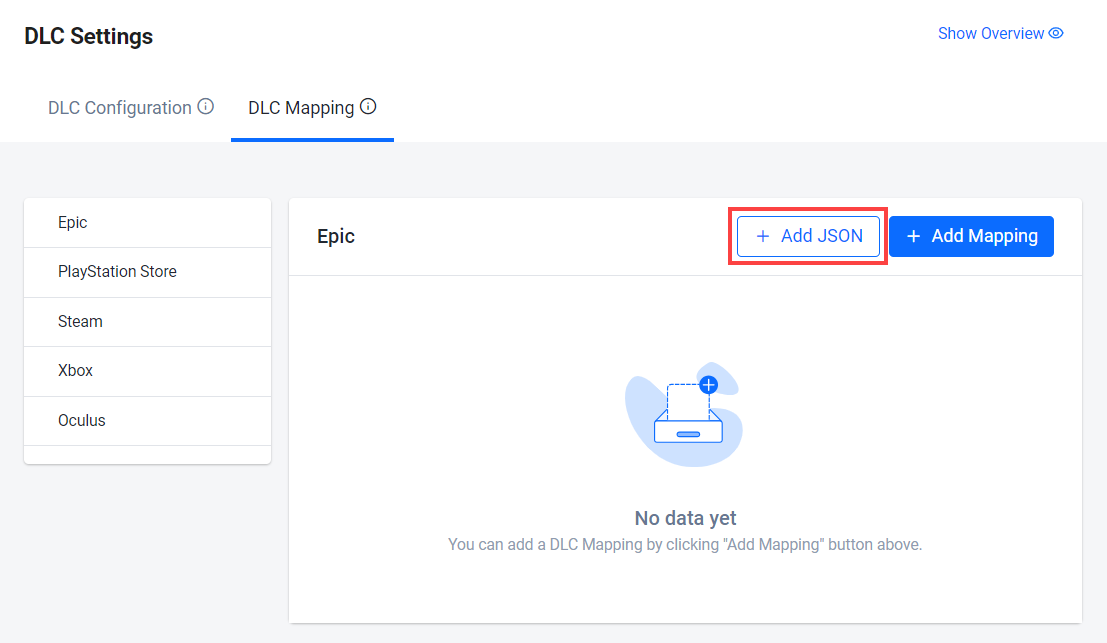
Add DLC Mapping using JSON file
Go to your namespace.
On the sidebar, select Commerce > In-App Purchase > DLC Settings.
In the DLC Mapping tab, click on the platform with the DLC that you want to map. Then, click on the + Add JSON button. A JSON template appears.
注記If there is an existing DLC mapping already in the platform, click on the JSON Options button. Then, click Edit to modify the existing DLC JSON file or Delete to replace it with a new one.
Follow the template to configure your JSON file.
