10-second Crash Video
Overview
AccelByte Development Toolkit (ADT) continuously capture videos of gameplay that you can use to view events occurring up to 10-seconds before a crash. These crash videos provide you the information you need to investigate and reproduce crashes. You can also control the quality and length of crash videos.
ADT's 10-second Crash Video feature is lightweight, so it will only have minimal impact on your game's performance.
The 10-second crash video isn't supported via the Unity ADT SDK at this time.
Prerequisites
-
The Enable Crash Reporter feature must be enabled in your game.
-
Your game must be integrated with the ADT Unreal SDK.
-
For PlayStation 4 (PS4) and PlayStation 5 (PS5) consoles, you must set the Uploader URL in the Target Manager for PS5 with the URL from ADT Web. Follow these steps:
-
Copy the Uploader URL from the ADT Web. In ADT Web, go to your game settings and click on Game Integration. Scroll down to the bottom of the page. IN the URL section,copy the Playstation 5 Uploader URL.
noteThe URL applies to both PS4 and PS5; just replace PS5 with PS4 for PlayStation.
-
Set the Uploader URL in Target Manager for PS5. In Target Manager for PS5, select the IP address of your target console. Right-click on the desired machine and go to Apps > Target Settings. Within the Core Dump - Uploader subcategory, replace the Uploader URL with the URL you copied from ADT Web.
-
Enable and configure Crash Video settings
-
In ADT Web, go to your game namespace with the crash video settings you want to configure.
-
On the sidebar, select Game Settings.
-
On the Game Settings menu, select Global Crash Configs. The Global Crash Configs page appears.
-
In the Enable Crash Reporter section, turn on the toggle for the Store Crash Video option.
-
Under the Store Crash Video option, you can adjust the following crash video settings as needed:
- Frame Per Second (FPS): you can set this for a minimum of 1 FPS up to a maximum of 30 FPS.
- Key Per Second (KPS): you can set this for a minimum of 1 KPS up to a maximum of 30 KPS.
- Video Length: you can set this for a minimum of 5 seconds up to a maximum of 30 seconds.
noteIncreasing FPS, KPS, and video length will cause the crash reporter to respond longer, which may take around five minutes for the video to appear on ADT Web.
-
At the bottom of the page, click on the Save Changes button.
Capture game crashes
Follow these steps:
-
Play your game and make it crash. You can do this in two ways:
-
Type ~ to bring up the console
-
Type debug crash
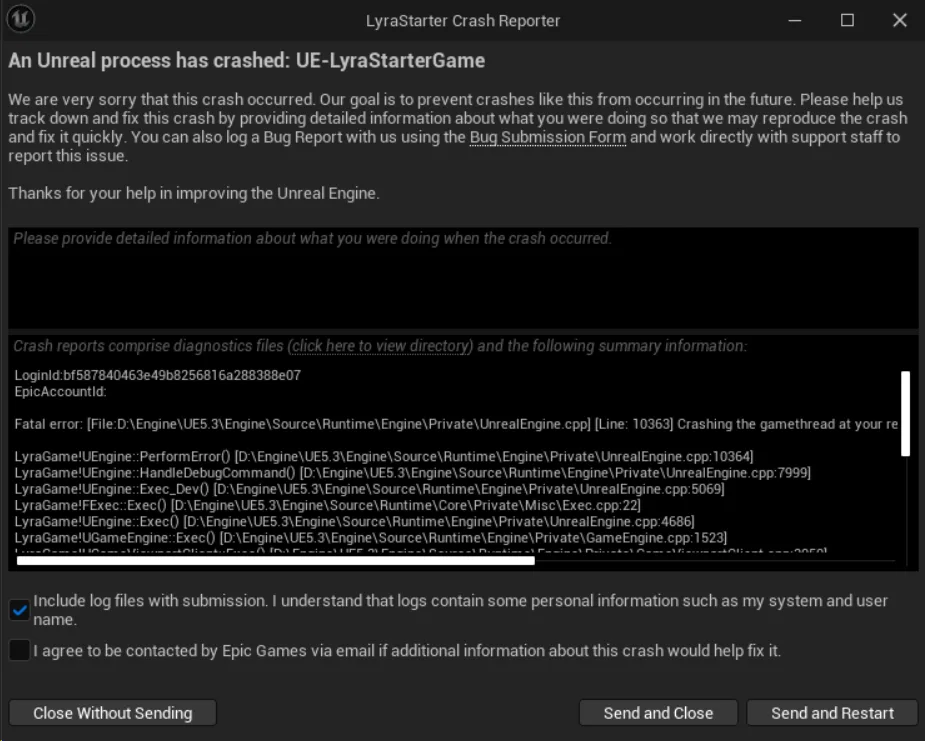
Once the game crashes, the system sends a report to the Crash Reporter Client.
-
-
When the Crash Reporter notifies you of the crash, click Send and Close/Restart. The system sends details of the crash to the dashboard page on the ADT Web.
-
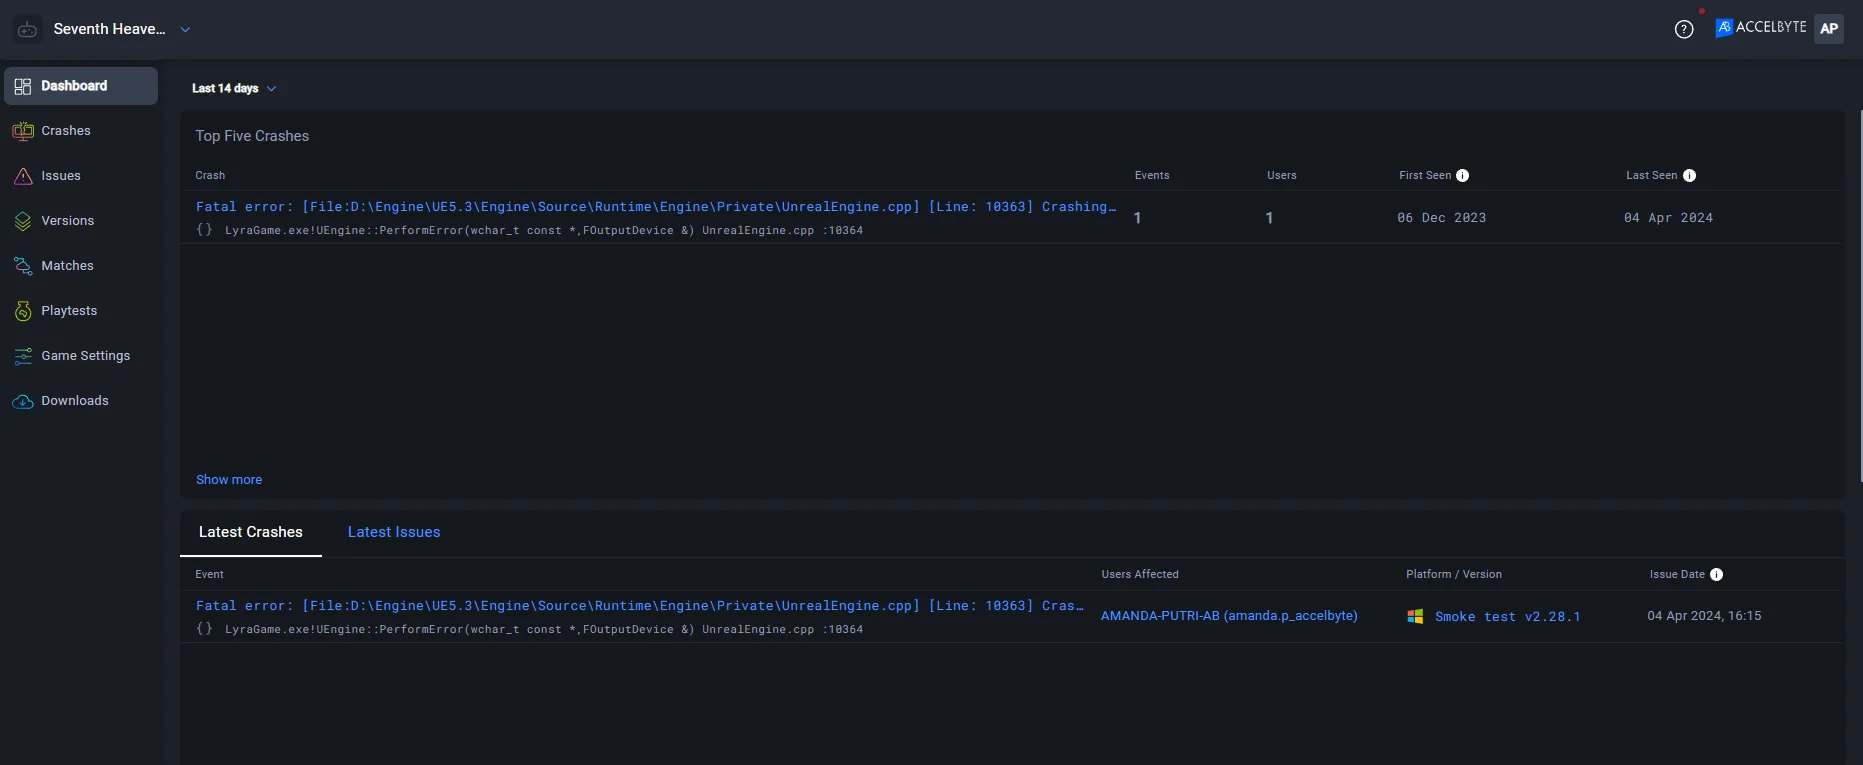
Open the dashboard page. A list of crashes appears that includes yours.
-
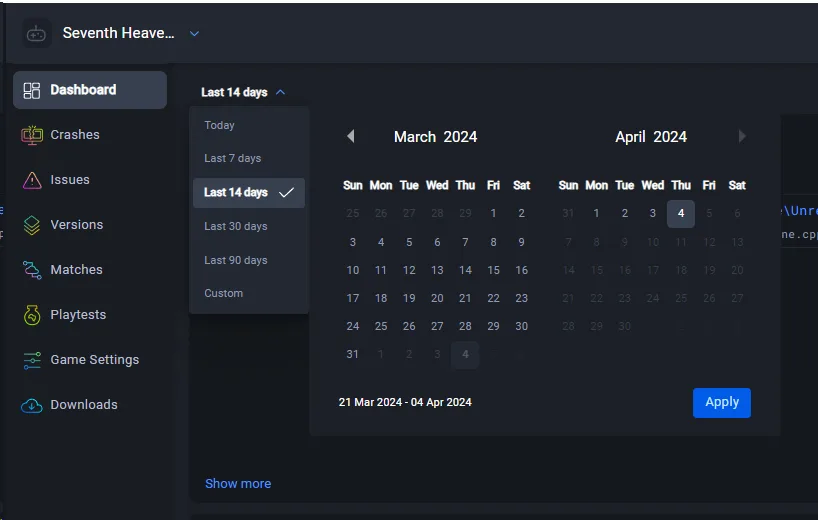
Check that the date filter shows the crash date. If you can't remember the date, click Custom and type a date range.
-
The system highlights the crash you chose or the crashes within the date range you selected in blue text; select the one you need.

-
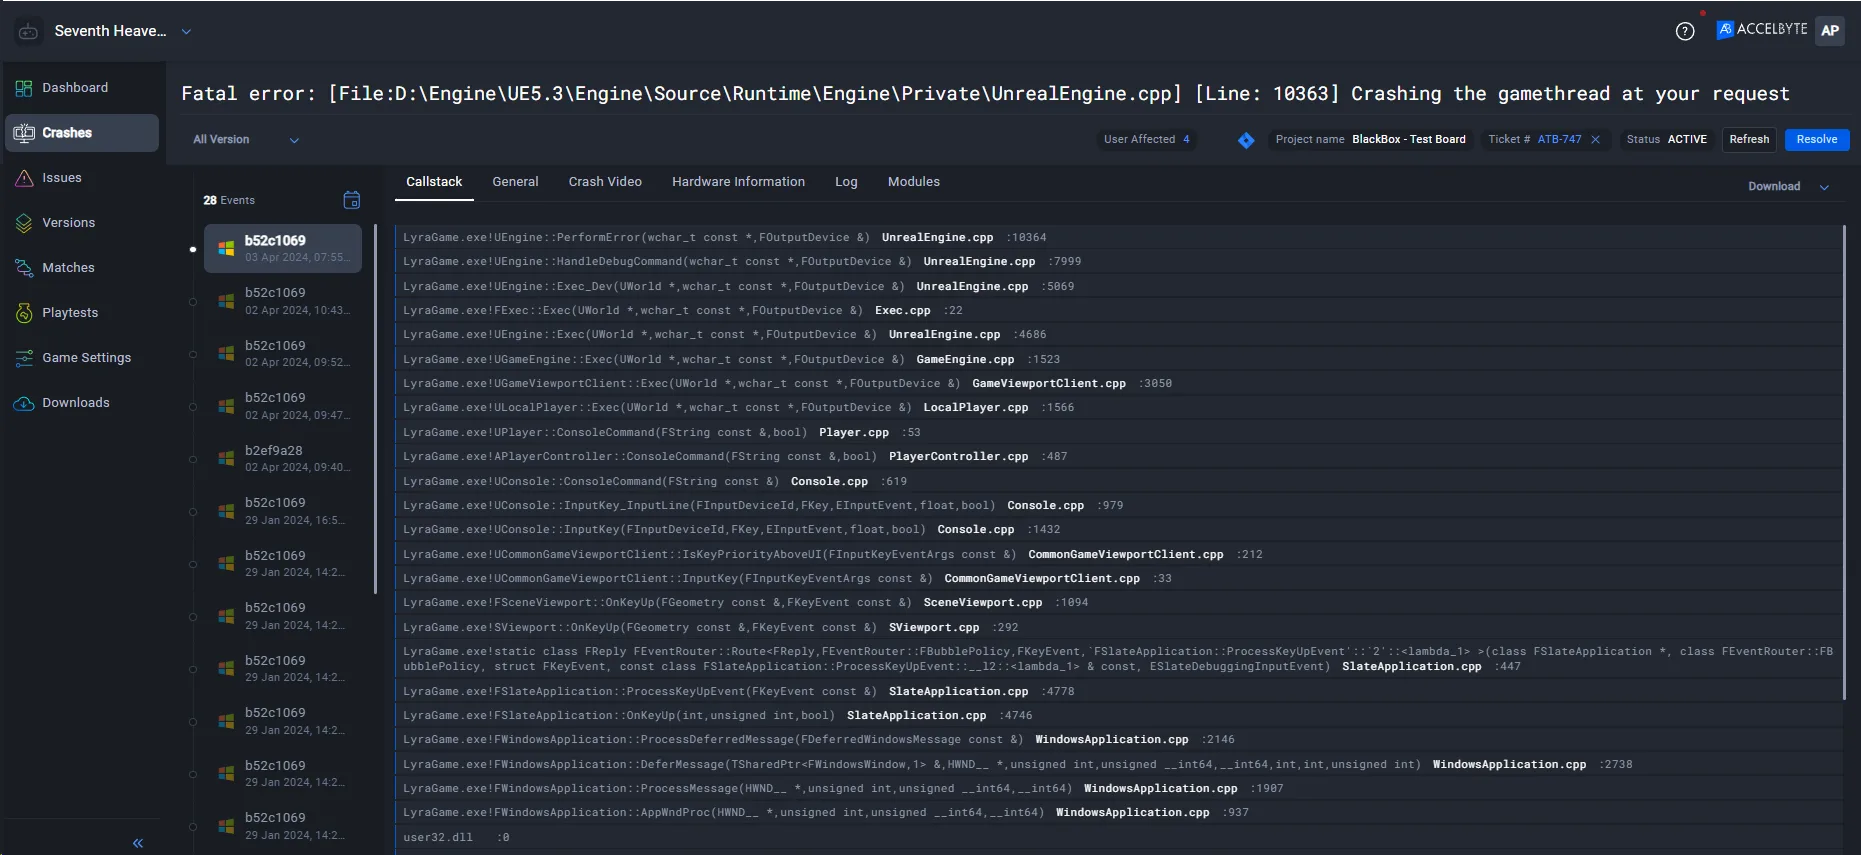
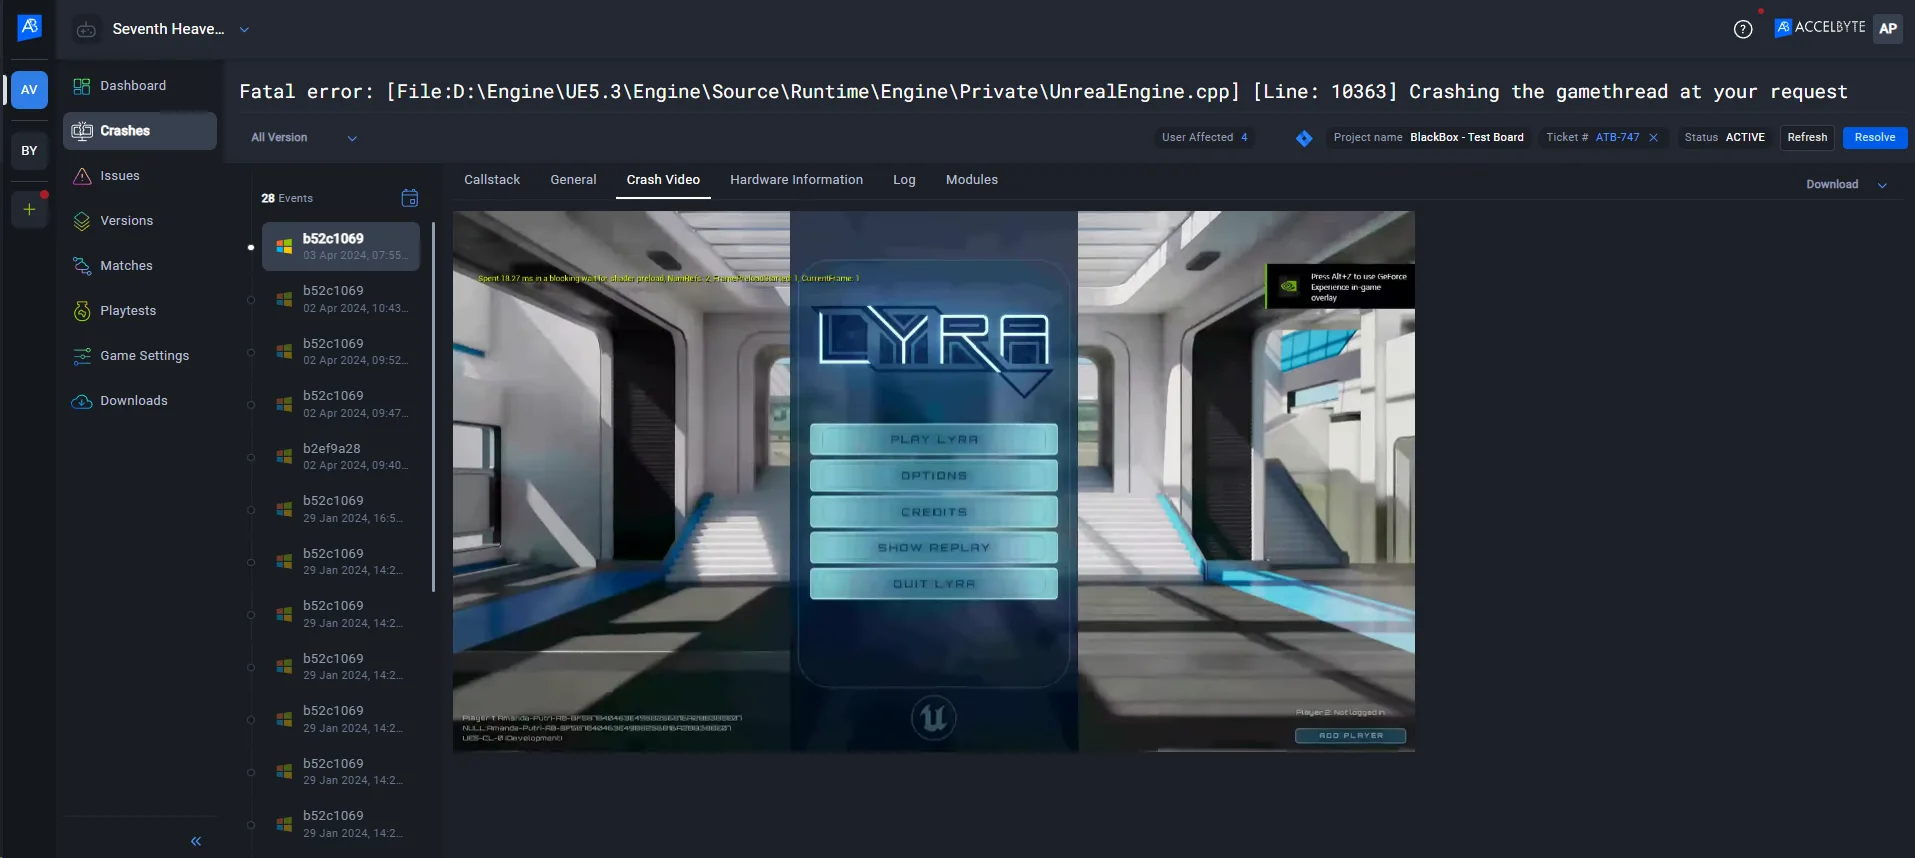
On the Crash Detail page, click the Callstack tab to identify crash's cause.
-
You can use the Crash Video option to reproduce and analyze crash steps.
-
To view information about the crash, you can do the following:
- Click the Log tab to download the log file.
- Click the Module tab to see the complete module information.