Manage real and virtual currencies
Overview
This article will explain how you can configure the currencies that can be accepted for Store transactions using your Admin Portal. You can configure both real-world and virtual currencies to allow your players to transact using those currencies. Virtual currencies that you create can also be earned by or awarded to players. You will need to set up at least one currency prior to creating a store or item.
- If you create your currency in the publisher namespace, your currency will be available in every namespace.
- If you create your currency in a specific game namespace, your currency will only be available in that specific namespace.
- If you create a currency with the same code and symbol in multiple namespaces, they will be treated as different currencies.
This article walks you through how:
- Manage real currencies
- Manage virtual currencies
Prerequisites
- Access to your publisher and game namespaces in the AccelByte Gaming Services (AGS) Admin Portal.
Manage real currencies in the Admin Portal
The Real Currencies feature is not yet supported in AGS Shared Cloud.
Creating a real currency in the Admin Portal will make that currency available to your players for transactions.
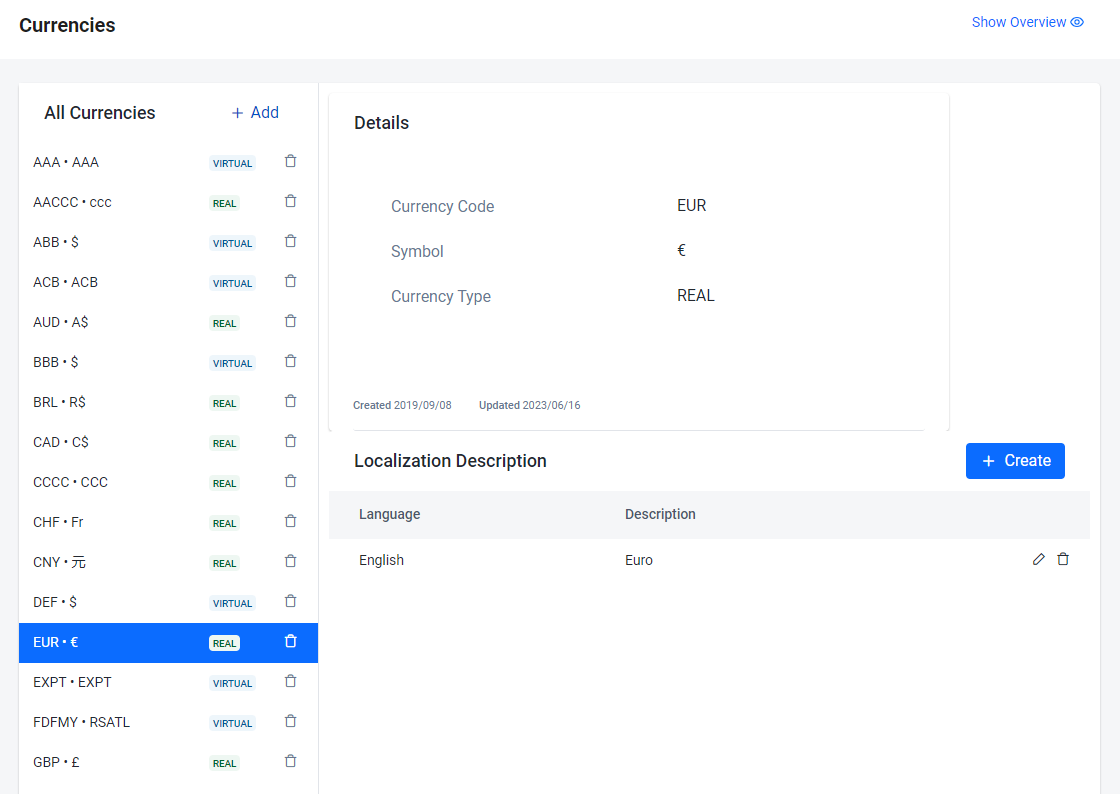
On the Admin Portal sidebar, go to Commerce > Wallets > Currencies.
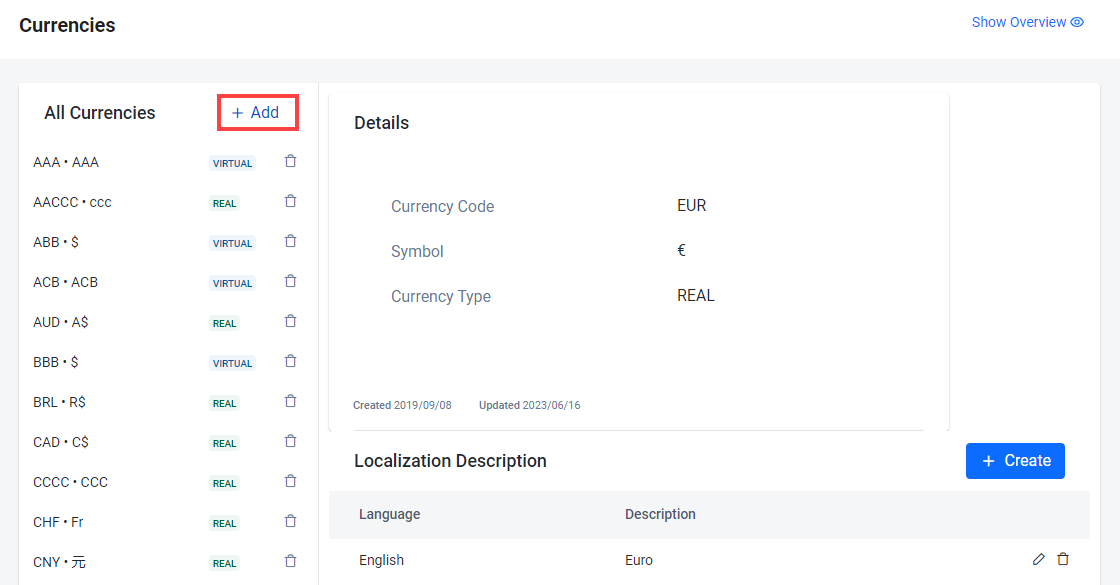
On the Currencies page, click Add to add a new currency.
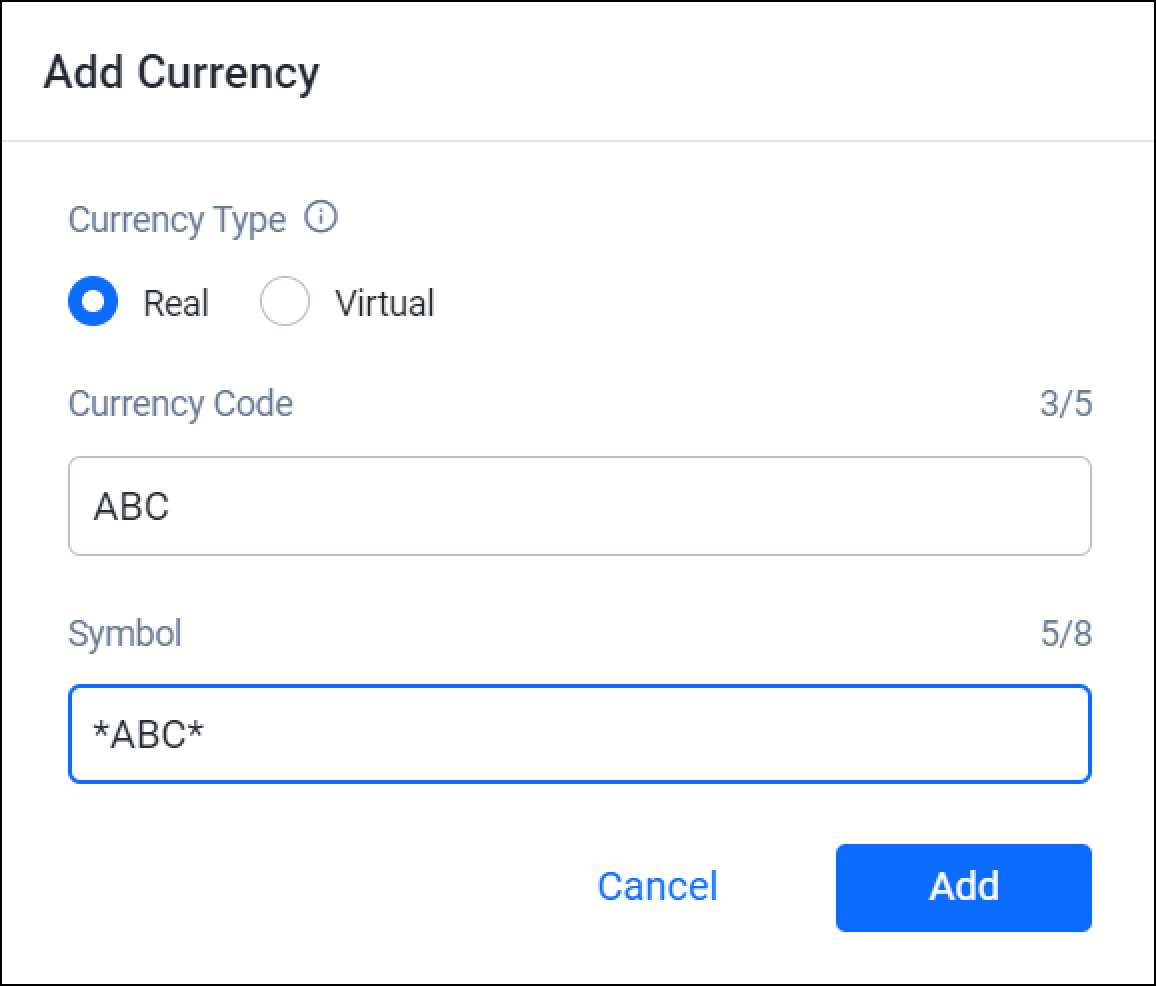
The Add Currency form will open. Fill out the required fields:
- Real Currency will have two decimals when used in prices.
- Select the Currency Type and select Real to create a real currency.
- Input the unique identifying code for the currency in the Currency Code field. For real currencies, follow ISO_4217 standardization, such as USD for United States Dollar.
- Input the symbol associated with the currency in the Currency Symbol field, such as "$". To input a symbol that isn't on your keyboard, input the Unicode for that symbol.
Once completed, click Add. Your new currency will be added to the list.
Manage virtual currencies in the Admin Portal
Creating a virtual currency in the Admin Portal will make that currency available to your players for transactions.
On the Admin Portal sidebar, go to Commerce > Wallets > Currencies.
On the Currencies page, click Add to add a new currency. The Add Currency form appears.
Fill in the required information on the form:
- Select the Currency Type, and select Virtual to create a virtual currency.
- For virtual currencies, you can create your own currency code.
- Type in the symbol associated with the currency in the Currency Symbol field (e.g., "$"). To use a symbol that isn't on your keyboard, use the Unicode for that symbol. For virtual currencies, you can input any character combination you like, up to eight characters.
Click Add. Your new currency will be added to the list.
Retrieve Supported Currencies Using the SDKs
Our client SDKs for Unity and Unreal Engine, or Extend SDKs can also be used to allow game clients to retrieve information about the currencies you've configured in the Admin Portal.
- Unreal Engine
- Unity
- Go Extend SDK
- Python Extend SDK
- Java Extend SDK
- C# Extend SDK
FAccelByteModelsCurrencyList currencyListResult;
bool bGetCurrencyListDone = false;

FString Namespace = TEXT("sample-namespace");
TArray<FAccelByteModelsCurrencyList> GetCurrencyListAllTypeResult;

FApiClientPtr ApiClient = FMultiRegistry::GetApiClient(TEXT("your-key"));
ApiClient->Currency.GetCurrencyList(Namespace,
THandler<TArray<FAccelByteModelsCurrencyList>>::CreateLambda([=]
(const TArray<FAccelByteModelsCurrencyList>& Result)
{
    // Do something if GetCurrencyList succeeds
    UE_LOG(LogTemp, Error, TEXT("   Success"));
}), FErrorHandler::CreateLambda([](int32 ErrorCode, const FString& ErrorMessage)
{
    // Do something if QueryUserAchievements fails
    UE_LOG(LogTemp, Error, TEXT("Error. Code: %d, Reason: %s"), ErrorCode, *ErrorMessage)
});
var currencies = AccelByteSDK.GetClientRegistry().GetApi().GetCurrencies();

Result<CurrencyList[]> currencyListResult = null;

// Check for CurrencyType
currencies.GetCurrencyList(result =>
{
    if (result.IsError)
    {
        // Do something if QueryUserAchievements fails
        Debug.Log($"Error GetCurrencyList, Error Code: {result.Error.Code} Error Message: {result.Error.Message}");
        return;
    }

        // Do something if GetCurrencyList succeeds
        currencyListResult = result;
});
currencyService := &platform.CurrencyService{
Client: factory.NewPlatformClient(&repository.ConfigRepositoryImpl{}),
TokenRepository: &repository.TokenRepositoryImpl{},
}
namespace := "mygame"
input := ¤cy.PublicListCurrenciesParams{
Namespace: namespace,
}
result, err := currencyService.PublicListCurrenciesShort(input)
import accelbyte_py_sdk.api.platform as platform_service

result, error = platform_service.public_list_currencies()
if error:
    exit(error)
Currency currencyWrapper = new Currency(sdk);
List<CurrencyInfo> response;
try {
    response = currencyWrapper.publicListCurrencies(PublicListCurrencies.builder()
        .namespace("<namespace>")
        .build());
} catch (Exception e) {
    // Do something when failed
    return;
}

if (response == null) {
    // Null response from server
} else {
    // Do something when successful
}
var response = sdk.Platform.Currency.PublicListCurrenciesOp
    .Execute(sdk.Namespace);
if (response != null)
{
    //do something if success
}