Manage display and section
Overview
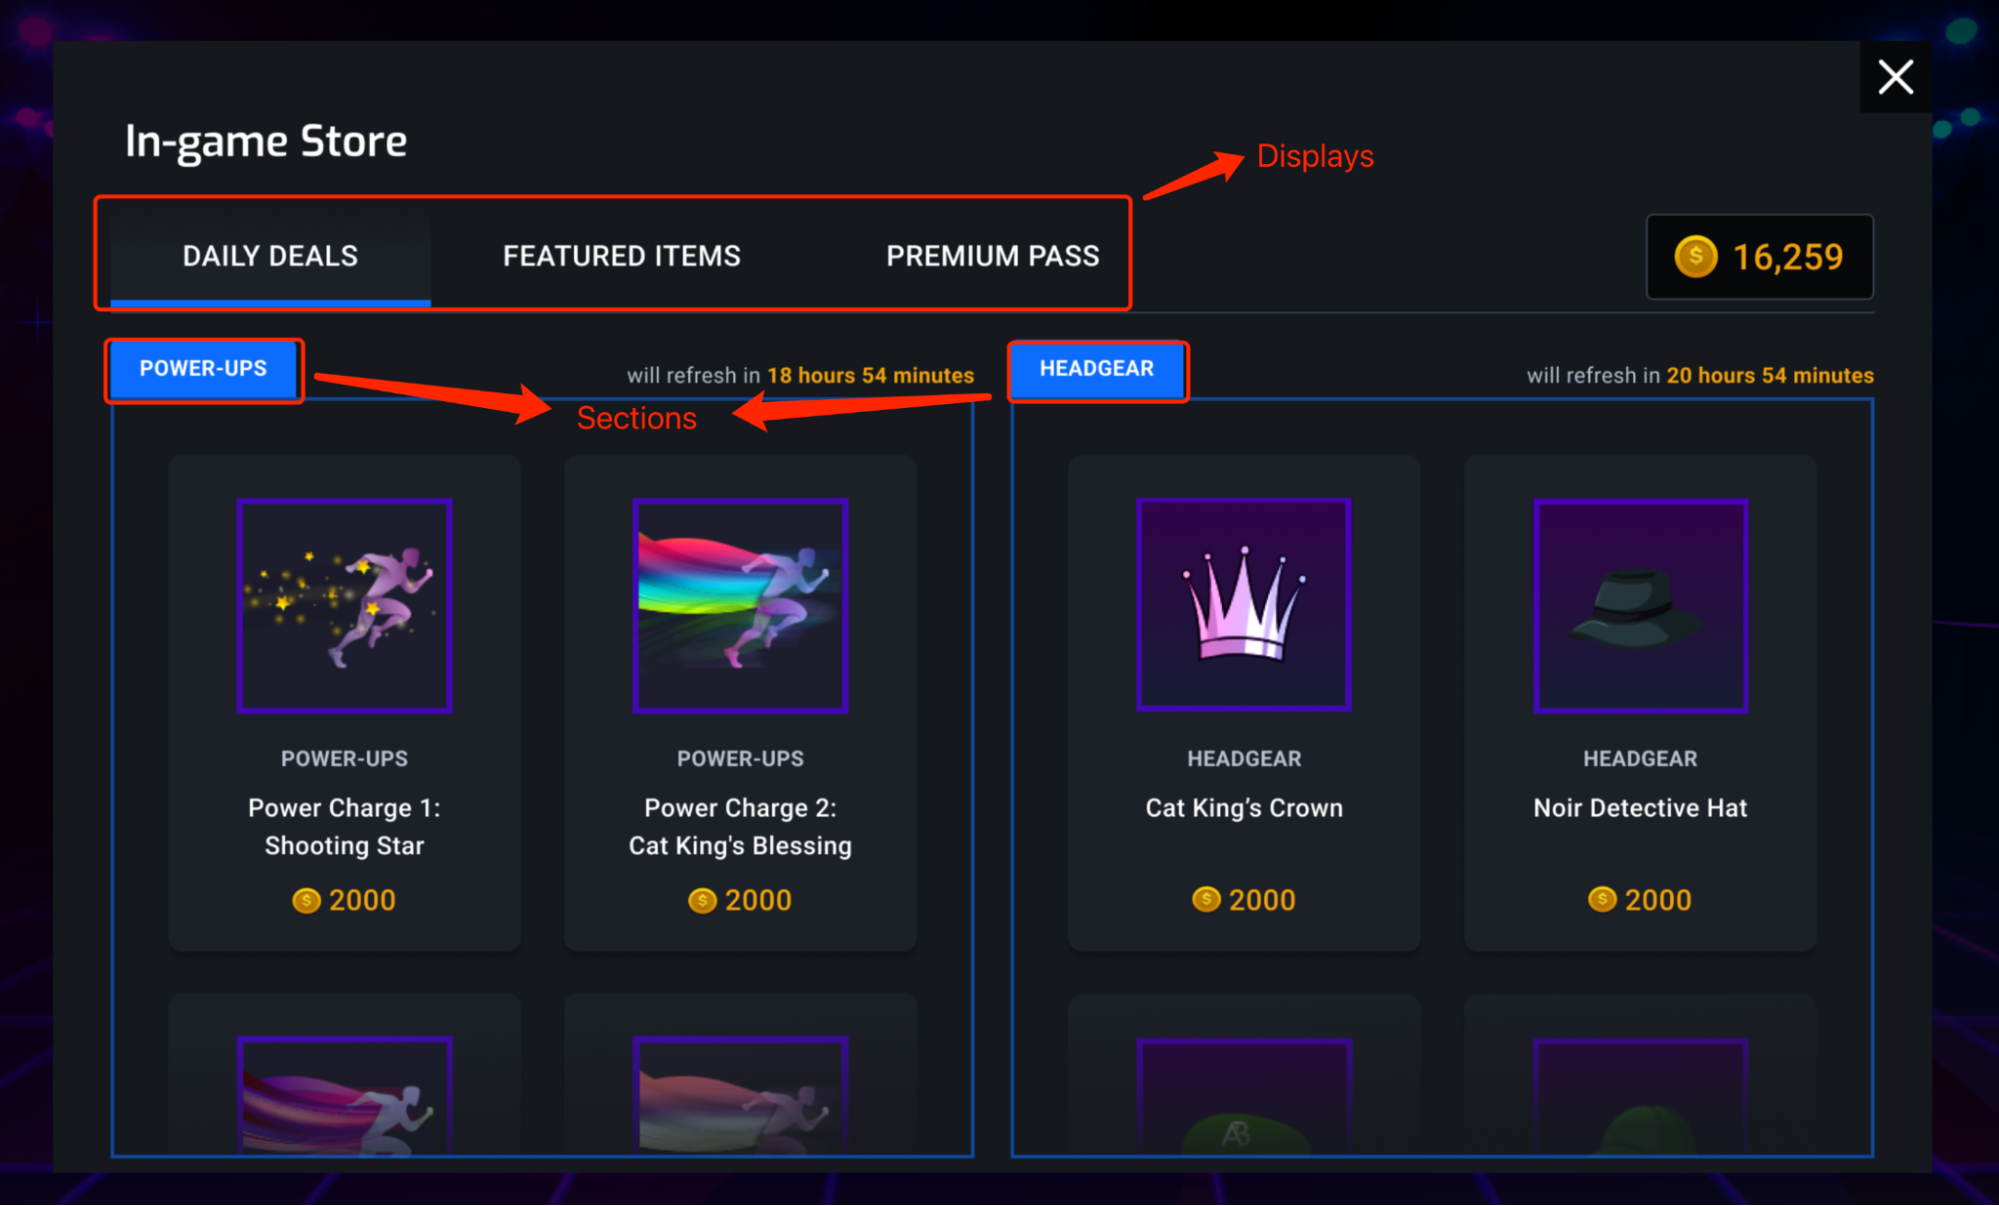
The AccelByte Gaming Services (AGS) Store Display & Section service allows you to better manage the store catalog, and offer players more choices in your in-game stores. A rotation of items can be configured, to allow an in-game store to display a different set of items for each set period of time. A Store Display can be considered as a page of store catalogs displayed for players in an in-game store. A Section on a Display can be considered as a placeholder for one or more items to be sold in an in-game store.
As demonstrated in our example below, Daily Deals, Featured Items and Premium Pass are set up using Display; Power-Ups & Headgear are Sections under Daily Deals; Power Charge 1: Shooting Star is an item selling under Power-Ups.

Goals
- Explain in detail what Display & Section are
- Explain the item rotation capability in the Store
- Guide the configuration of Display & Section, and explain how to customize the service
Prerequisites
- Access to your AccelByte admin portal
- Appropriate namespaces are created
- A Store is set up and configured properly
Manage Display & Section in the Admin Portal
Create a Display
A Store Display can be considered as a page of store catalogs displayed for players in an in-game store. Use the following steps to create a Display,
-
On the Admin Portal sidebar, go to Commerce > Store.
-
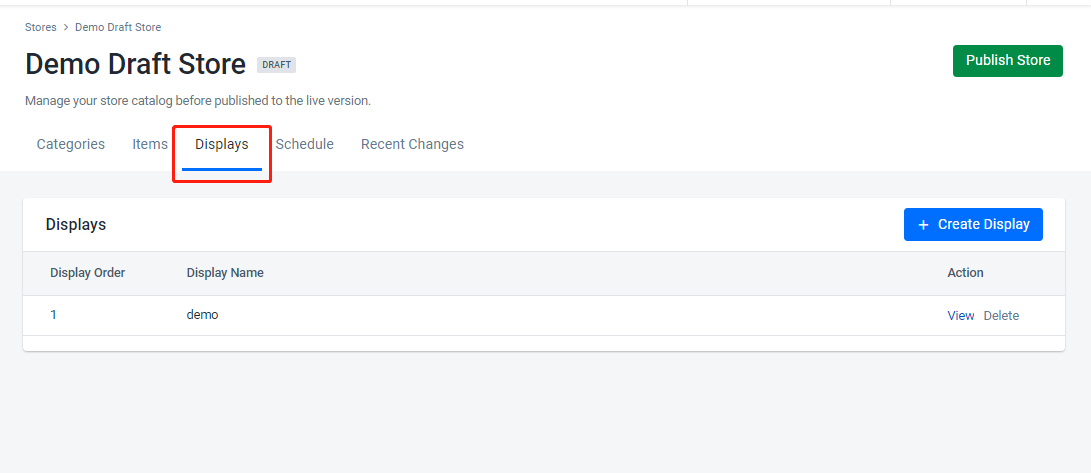
Open the draft store Draft Store and select the Displays tab.

-
Click Create Display button and fill up the pop-up to create a Display
Display Order manages the order the Display will be shown in the in-game store.
Create a Section
A Display page consists of a number of sections and each Section can be considered as a placeholder for one or more items to be sold. Individual merchandise for sale must be put within a section. Use the following steps to create a Section on a Display.
-
Click Create Section on the Display Details tab after a Display is successfully created.
-
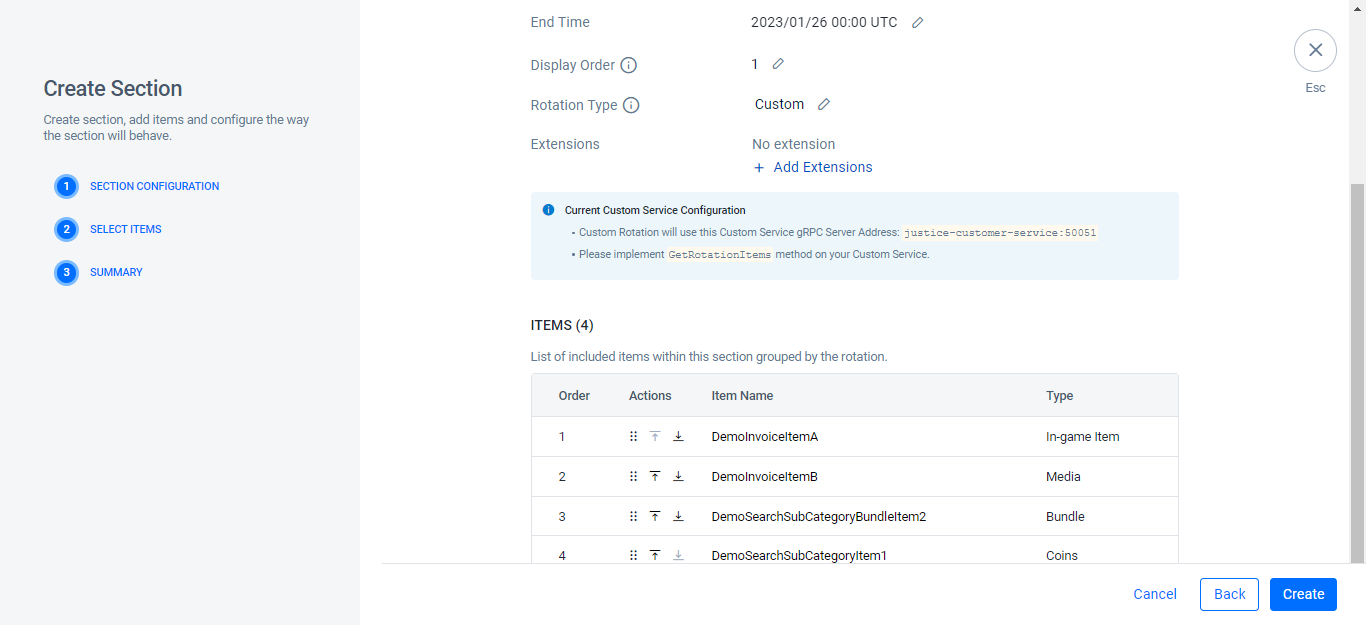
Fill in the form to create a Section. There are three types of Item Rotation to choose from:
- None: There will be no item rotation, which means all items chosen in the next step (add items to the Section) will be included in the Section at the same time for the entire period, defined by Start Time & End Time.
- Fixed: There will be a fixed-period rotation for items chosen in the next step. A rotation means a swap of items placed in a Section.
- Total items per Rotation: The amount of items to be changed for each Rotation cycle.
- Rotation Duration: This defines how long the set of items will stay in the Section for each Rotation cycle.
- Item Backfilling: Item backfilling is made possible using a gRPC solution. Therefore, to enable this, please make sure a Custom Service is configured. When this is turned on, if a player already owns an item currently sold in the Rotation cycle, the system will replace the item based on rules defined in the Custom Service. Otherwise, the system will not intervene.
- Custom: The system will change items displayed for a Section based on rules defined in your Custom Service.
noteItem Backfilling and Custom rotation requires a Custom Service. You have to configure the Custom Service first before you are able to enable the options. View the instructions in the Custom Service Configuration section of this document.
-
Click Next to add items to the Section.
After adding all the items to the Section, a summary page is shown and details of the section can be edited on this page.

Backfill an Owned Item in Section
-
Login to the Admin Portal and choose your namespace
-
Configure your gRPC server address on the Custom Service Configuration page
-
Implement your own
Backfill()function in your gRPC servicenoteYou need to use the item ID or item SKU which exists in the Store of your namespace when you implement your own
Backfill()function. -
Now create a Display and create a section in this Display, choose Rotation Type as Fixed and enable Item Backfilling.
Custom Rotation Items in a Section
-
Admin login to the Admin Portal and choose your namespace
-
Configure your gRPC server address on the Custom Service Configuration page
-
Implement your own
GetRotationItems()function in your gRPC servicenoteYou need to use the item ID or item SKU which exists in the Store of your namespace when you implement your own
GetRotationItems()function. -
Now create a Display and create a section in this Display, and choose Rotation Type as Custom.
Custom Service Configuration
Custom Service refers to the use of a custom gRPC service. In order to use Custom Service, you will need to configure a gRPC server first.
Configure Custom Service in the Admin Portal
Configure a Custom Service
-
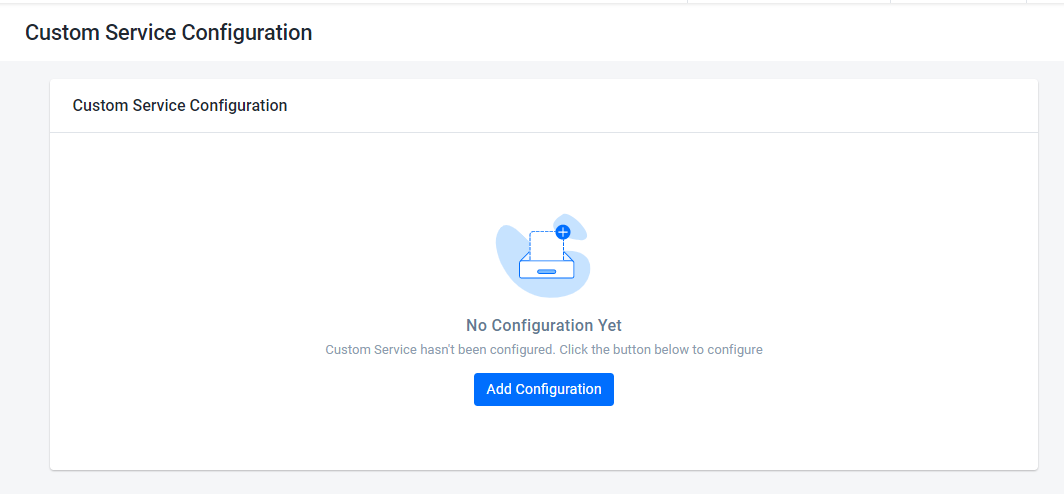
Go to Custom Service Configuration section on the side menu.

-
Click Add Configuration and enter your gRPC Server Address, then click Add in the pop-up window to finish the configuration.
-
Once you have configured the Custom Service, you can also update or remove the configuration on the Custom Service Configuration page.