New ADT Hub v1.0.0 App Layout
The new ADT Hub v1.0.0
Release date: October 2nd, 2023
We are very excited to announce that the AccelByte Development Toolkit (ADT) Hub has been revamped. The new design and UI aim to provide a better build distribution and playtesting experience. Previously, the build channels could only contain a single build. Build channels in the new ADT Hub can now contain several builds with various platforms.
Let's get to know the new ADT Hub v1.0.0 and debug it together.
What's new in our UI?
Here's what's different in the new ADT Hub:
- A new Discover page.
- The Overview menu is replaced by Channels.
- New Access and My Builds menus have been added.
- Tracks inside a channel have been added.
- Playtesting is easier to create and manage.
- You can invite team members and notify them via email.
Find an available Channel to join in the Discover menu
Click the tabs below to compare UI differences.
- Old Hub - Subscribe Channel
- New Hub - Discover
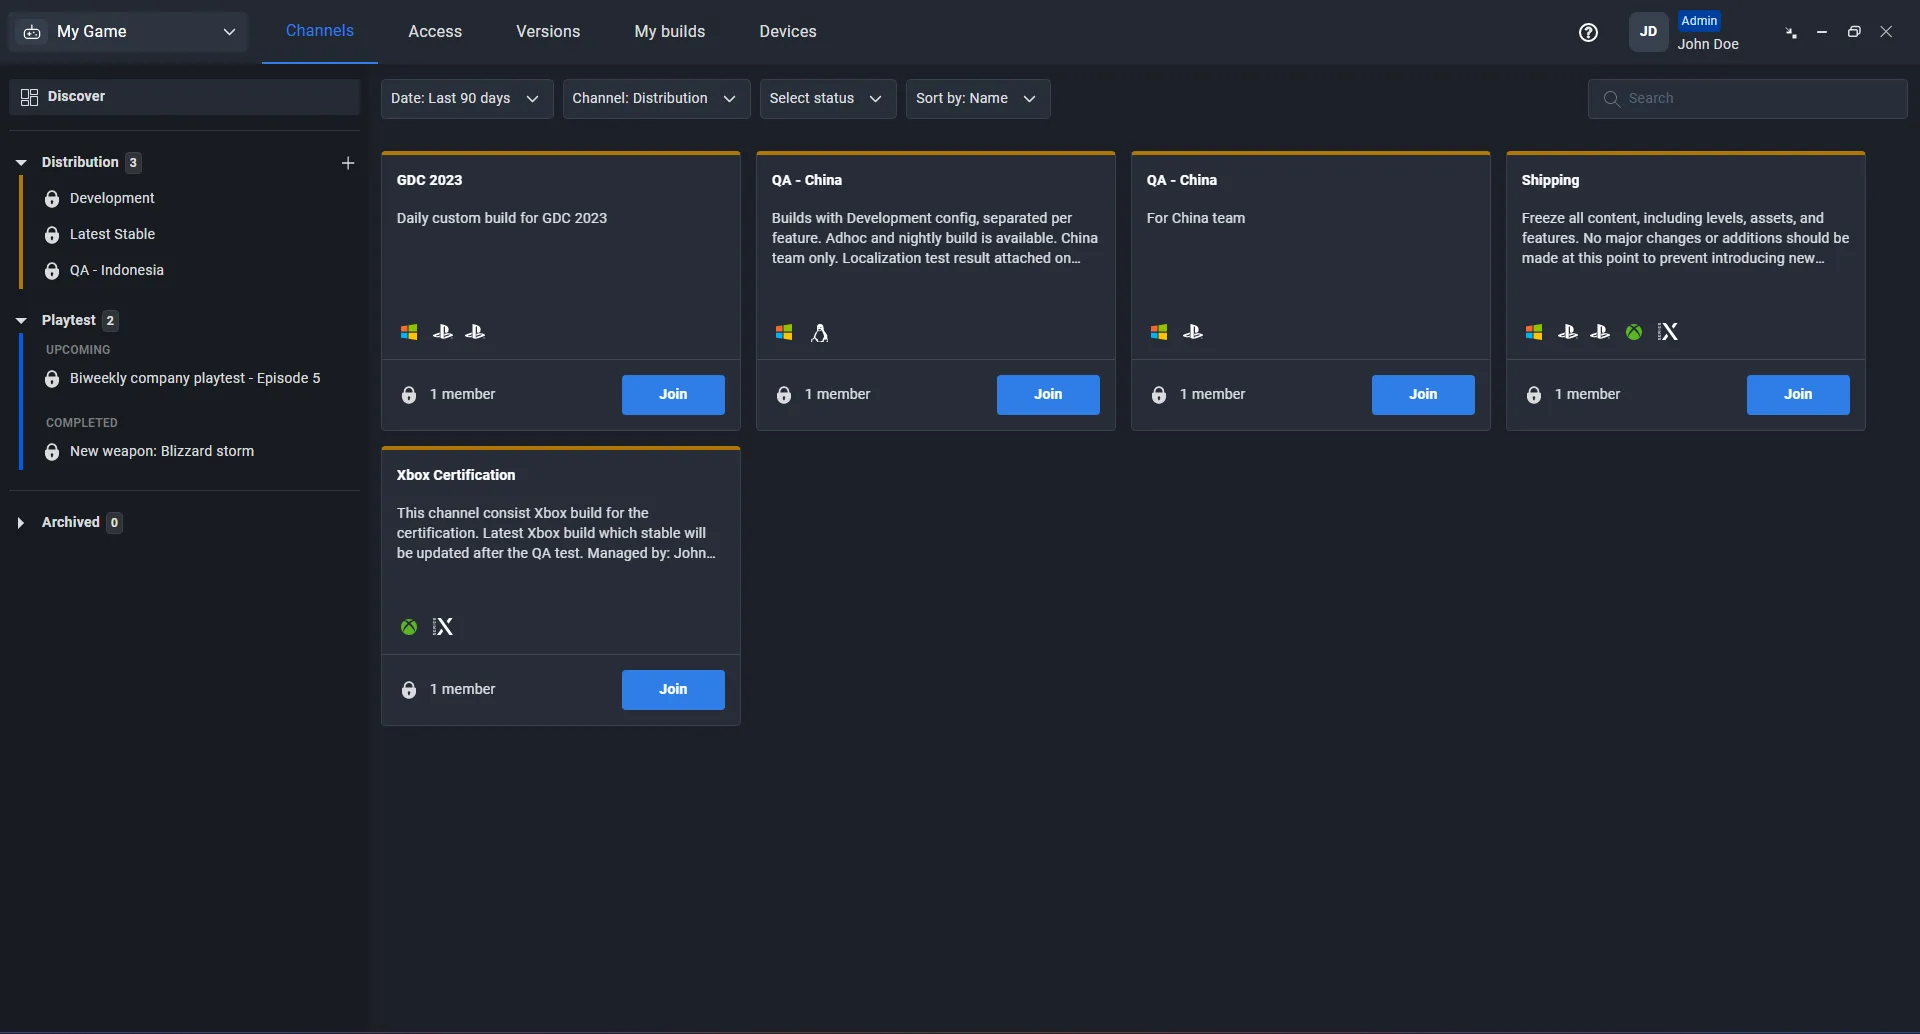
The Discover page is the place for you to find all the channels on your namespace. You can join lists of both Distribution and Playtest channels from the page. The list shown on the page depends on your role.
A Developer, QA, and User role cannot see or join private channels if the Admin didn't give them access. Contact your administrator if you can't see your assigned channel.
The Distribution channel is marked with a yellow stripe on the card, while the Playtest channel is marked in blue.
See your joined channels on the sidebar
- Old Hub - Overview page
- New Hub - Channels sidebar
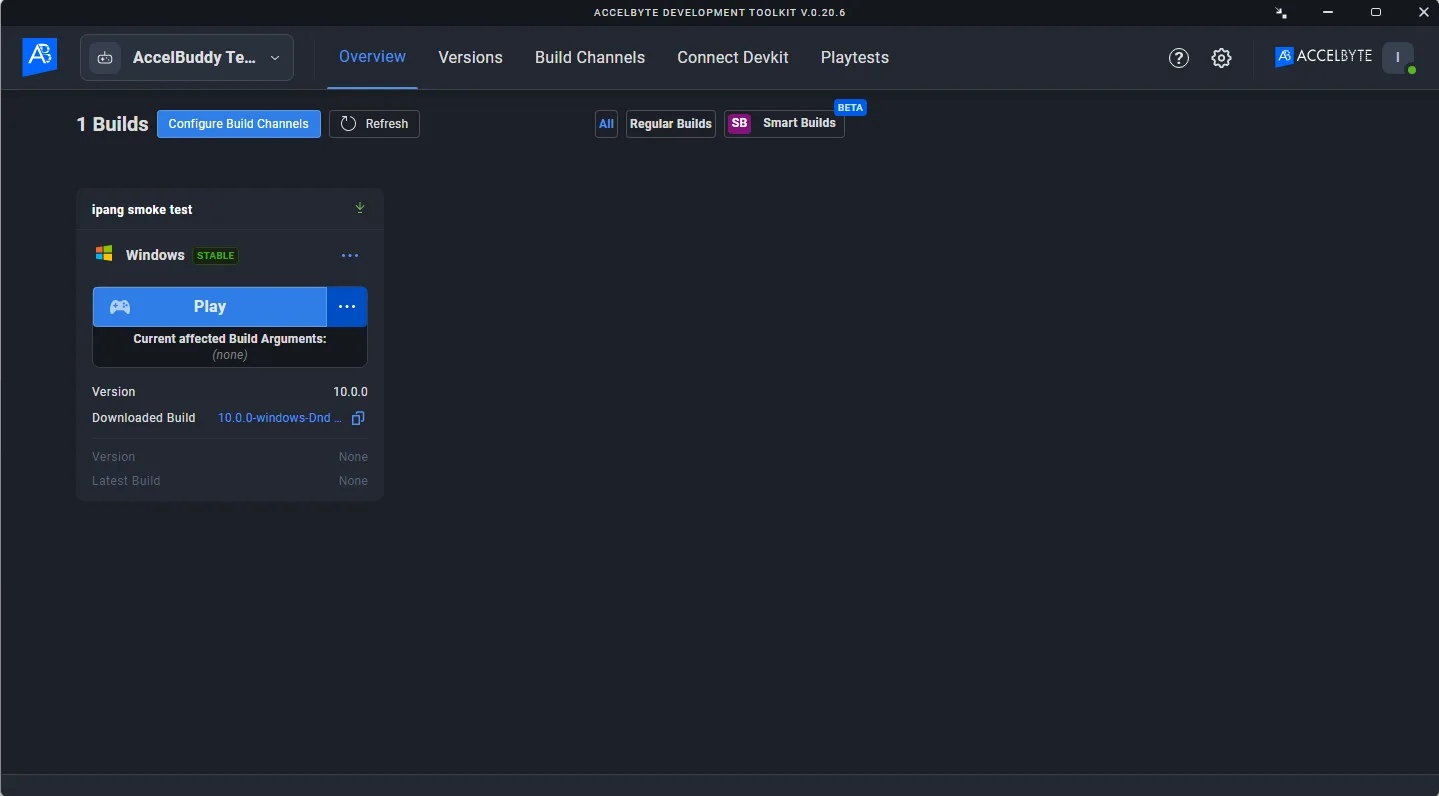
In the new ADT Hub, you will see a new sidebar that lists all joined (subscribed) distribution and playtest channels.
The sidebar is divided into three sections: Distribution, Playtest, and Archived. After you join a channel, the channel's name will be added to the sidebar depending on the channel type.
Group your builds of any platform into one channel
- Old Hub - One build platform per channel
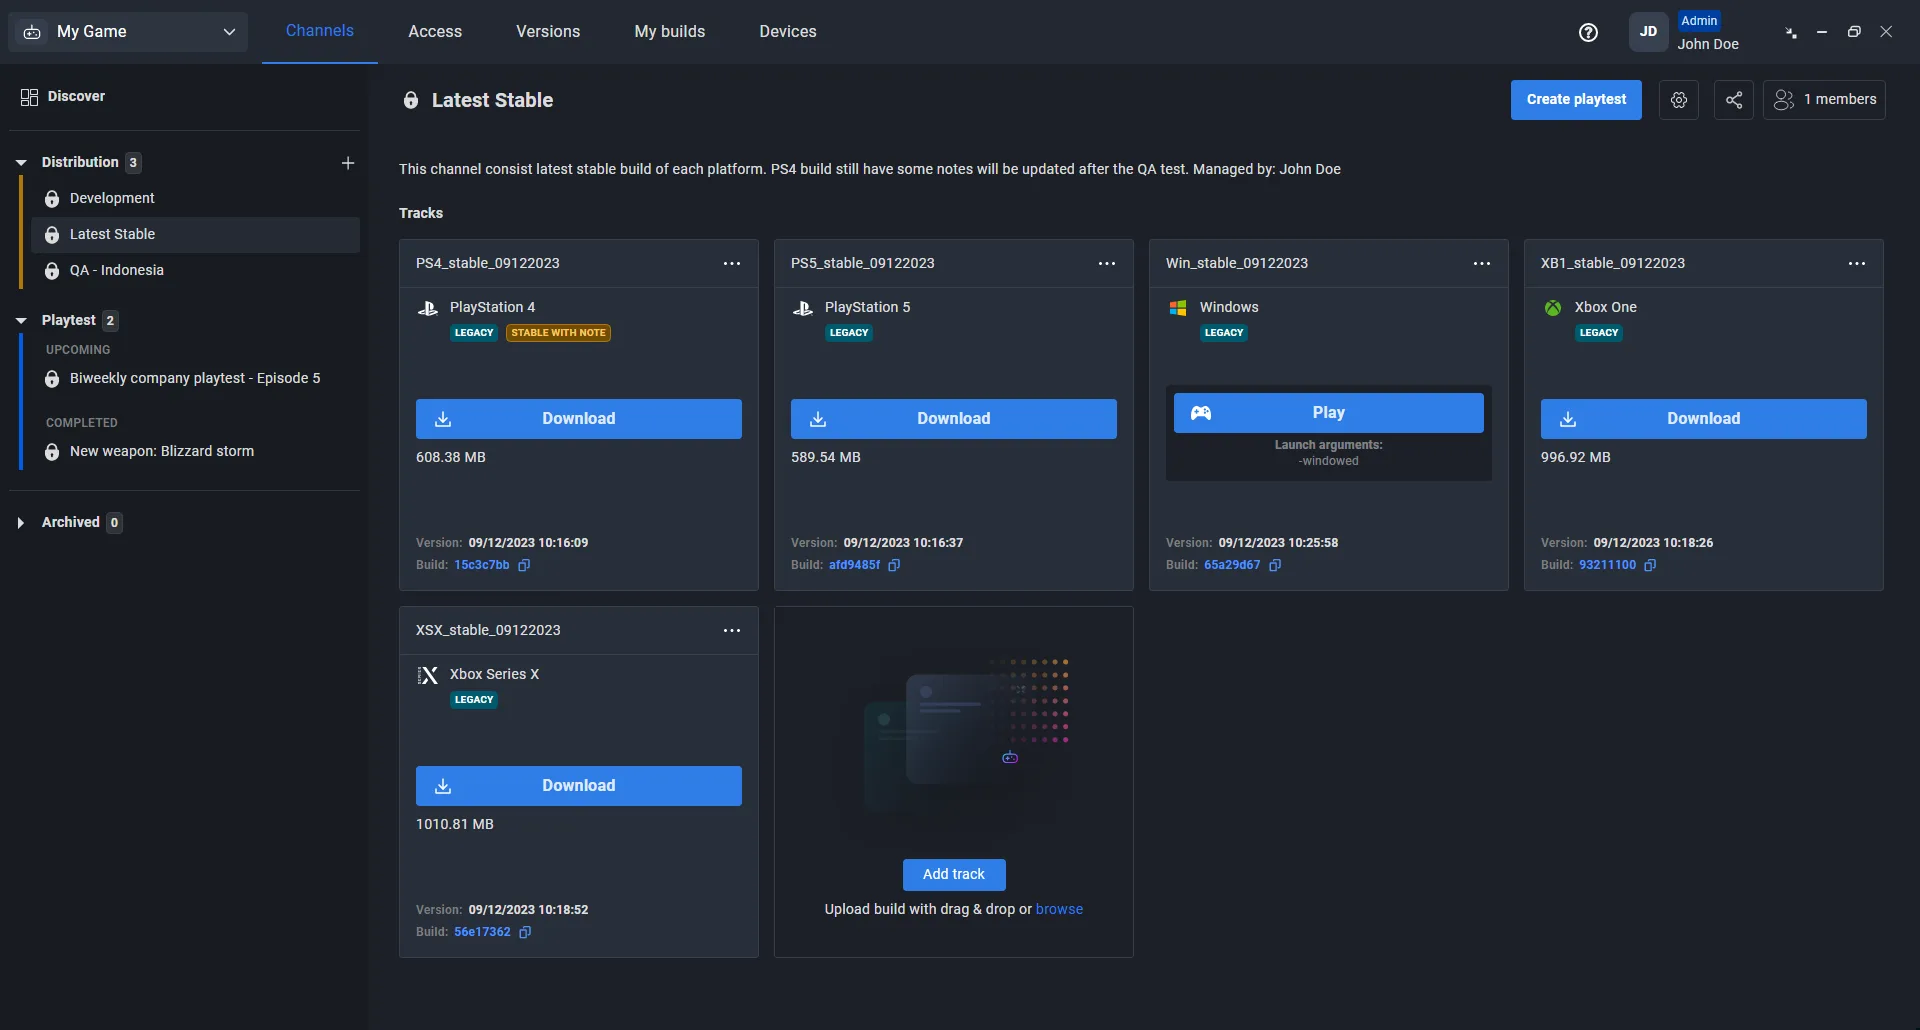
- New Hub - Channel consists of tracks
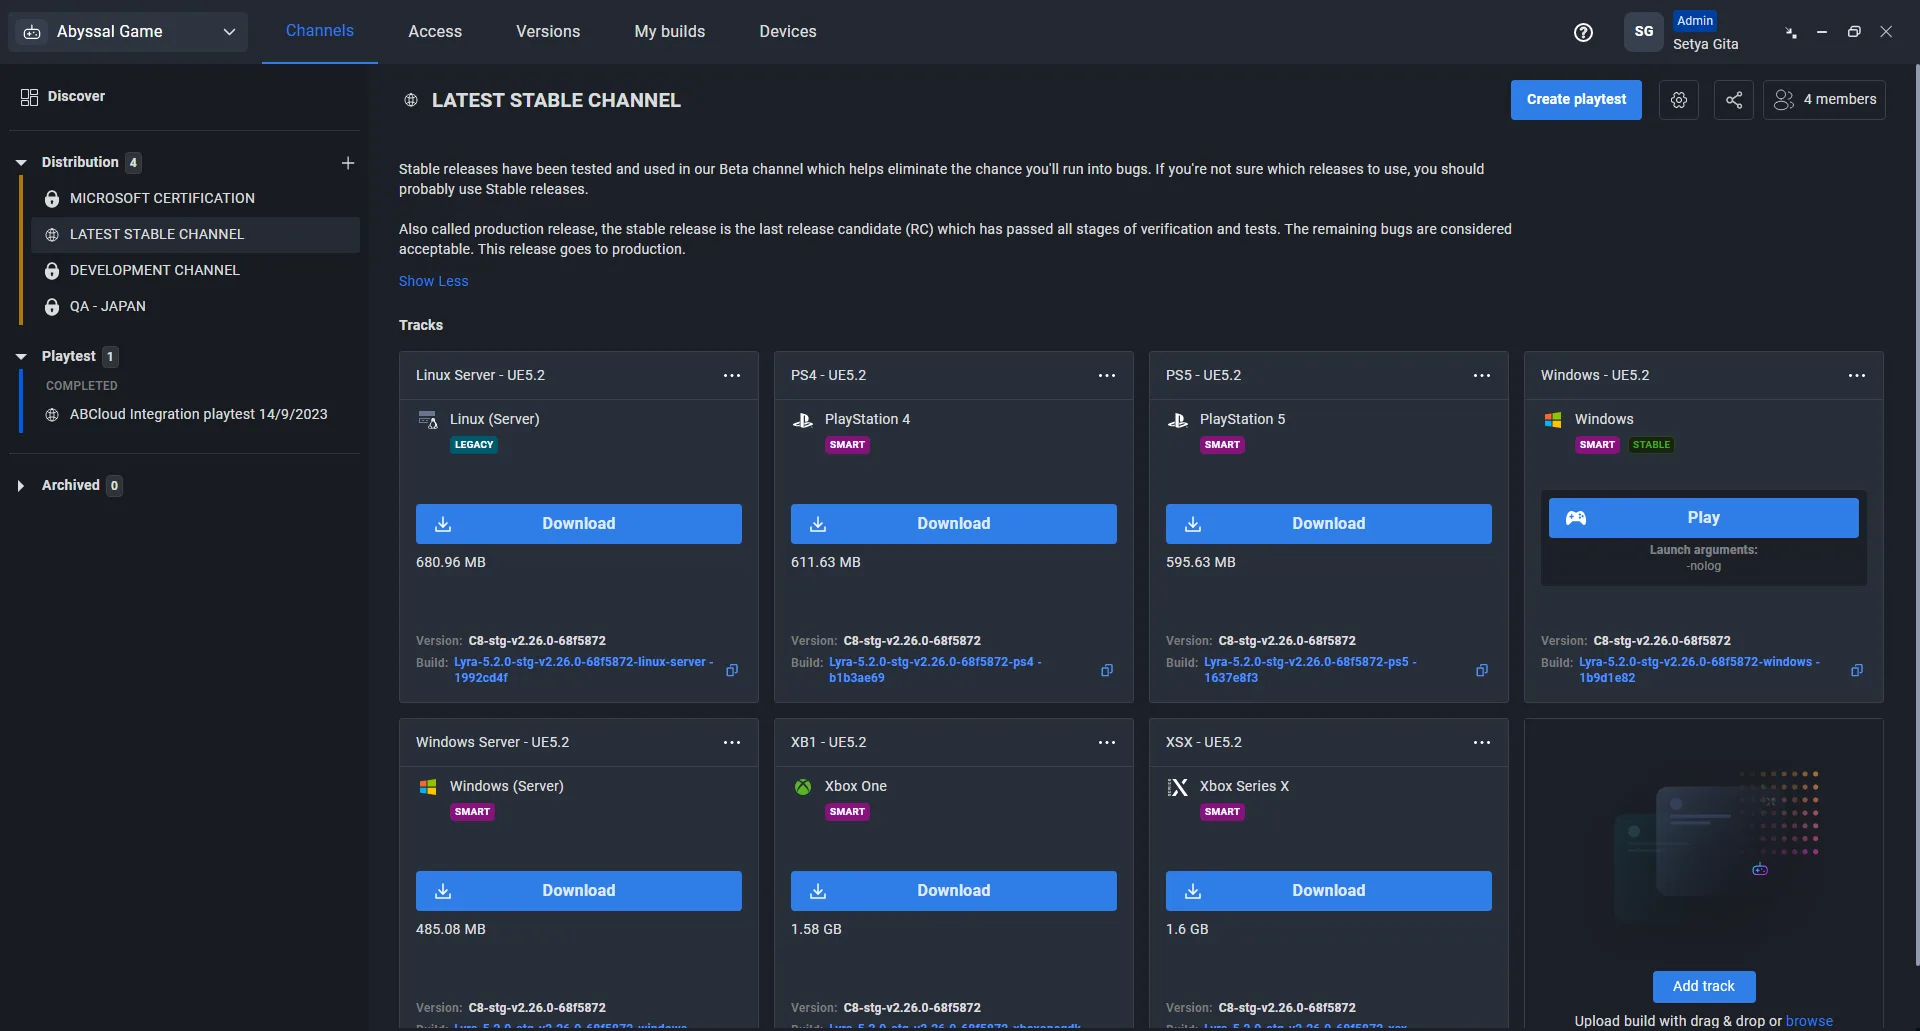
Use tracks to organize channels
A track is a subfolder of a channel. You can add several tracks into one channel with different build platforms. For example, if your game is for Windows, Xbox Series S/X, and PlayStation 5, you can collect them together into one channel page to make it easier to manage.
You will have several settings for your track:
- Rename track: rename the track card.
- Change head of track: choose another build to be set as head of track.
- Set launch arguments: manage launch arguments of the track. You can create a new one or use the predefined launch arguments.
- Configure auto update: set up auto update and auto play.
- Track history: list builds that were previously used as the head of track, and set one build from the list as the new head of the track.
- Move Track: move the track between channels.
- Copy build to track: copy the head build of a track and then set it as the new head build of another track in another channel.
- Delete track: delete the track from the channel.
Create a predefined launch argument
You can have a collection of predefined launch arguments that can be saved locally and globally. Here's how to create them:
- Click on the Game Name in the top-left side of the window.
- Go to Game Settings > Launch Arguments.
- Click the Add new button and define whether to save it as Local or Global.
- Enter the name of the predefined launch arguments.
- Fill in the launch argument box with the launch arguments commands (e.g.,
-noname). - Choose the Platform that will use the launch arguments.
- Click the Add button and your new launch arguments will be in the list.
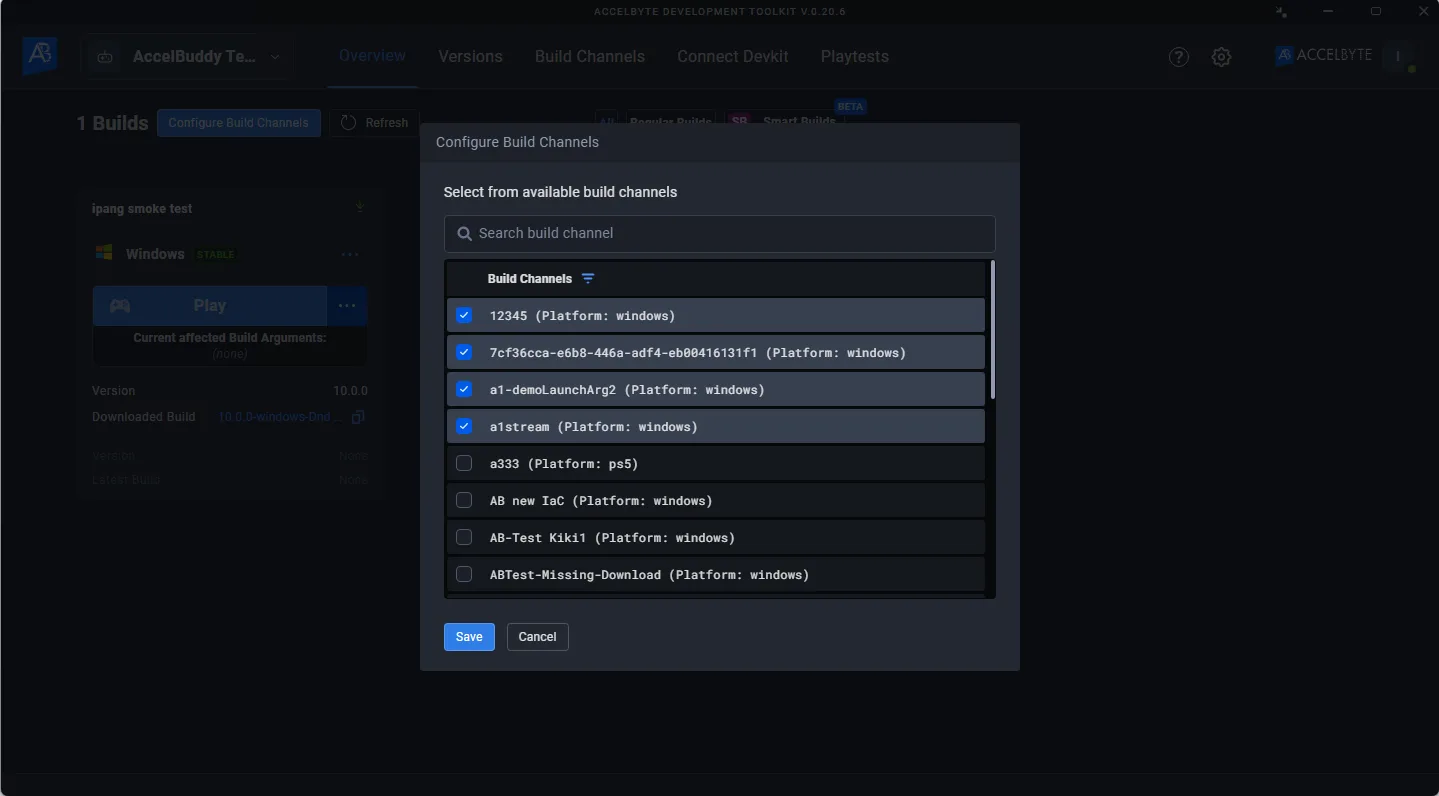
Set predefined launch arguments as your track's default
In the old ADT Hub, you couldn't attach launch arguments to the build channel without updating them through the ADT CLI. With the new Hub, you can tie launch arguments to the track to override the build's launch arguments and the rest of your team will immediately see the changes. Here's how:
- Click the ellipsis (
...) on your track. - Go to Track > Set launch arguments.
- Either edit the launch arguments from the Use track launch arguments field or click on Use predefined launch arguments to select predefined launch arguments from the list.
- Click on the Save button and the track's launch argument will be changed on your and your team's machines.
Standard users are not allowed to set launch arguments on their own. Contact your Admin to set a launch argument on a certain track.
Control who can see the channel and invite them
In the new ADT Hub, you can give channel access to your team members individually or by predefined user groups. We recommend you create user groups before giving access to the respective channels. Here's how to create one:
-
Click the Game Name in the top-left side of the window.
-
Go to Game settings > User Groups.
-
Click the Add button on the pop-up that appears.
-
Fill in the User group name (mandatory) and Description (optional) fields and click the Add button.
-
Find the recently created user group in the list.
-
Click the Add button next to the respective group.
noteThe Add button is replaced with an Edit button once users are added.
-
Select the users you want to add to the group in the next pop-up.
-
Click the Add button.
Assign user groups to a channel
After successfully creating user groups and selecting the members, you can assign them to the private channels. You can do this by following these steps:
- Go to the Access menu and find the private channels you want to grant users access to.
- Click on the Edit Access button.
- Type the user group's name and click on it in the search results.
- Click on the Add button and close the pop-up.
The private channels will appear on the users' Discover menu once you give them access. Then, they can join the channel at any time they want.
Invite users to private channels via email
If you want to notify your team via email, you can always invite members. Here's how to invite team members to the private channel:
- Go to the Channels page.
- Click on the desired private channel's name the sidebar.
- On the channel's page, click on the Members button.
- Click on the Invite member button. Then, click on the search bar and search for the users you want to invite.
- Click on the Send invitation button. The invited user(s) should receive the invitation in their email immediately.
Create a quick playtest from the latest stable channel
The Playtest menu is now on the sidebar in the new ADT Hub. This allows you to move between distribution and playtest channels quickly. You can create a playtest channel from the latest stable distribution channel. The builds and the access of the distribution channel will also be moved to the playtest channel.
- Old Hub - Playtests
- New Hub - Playtests
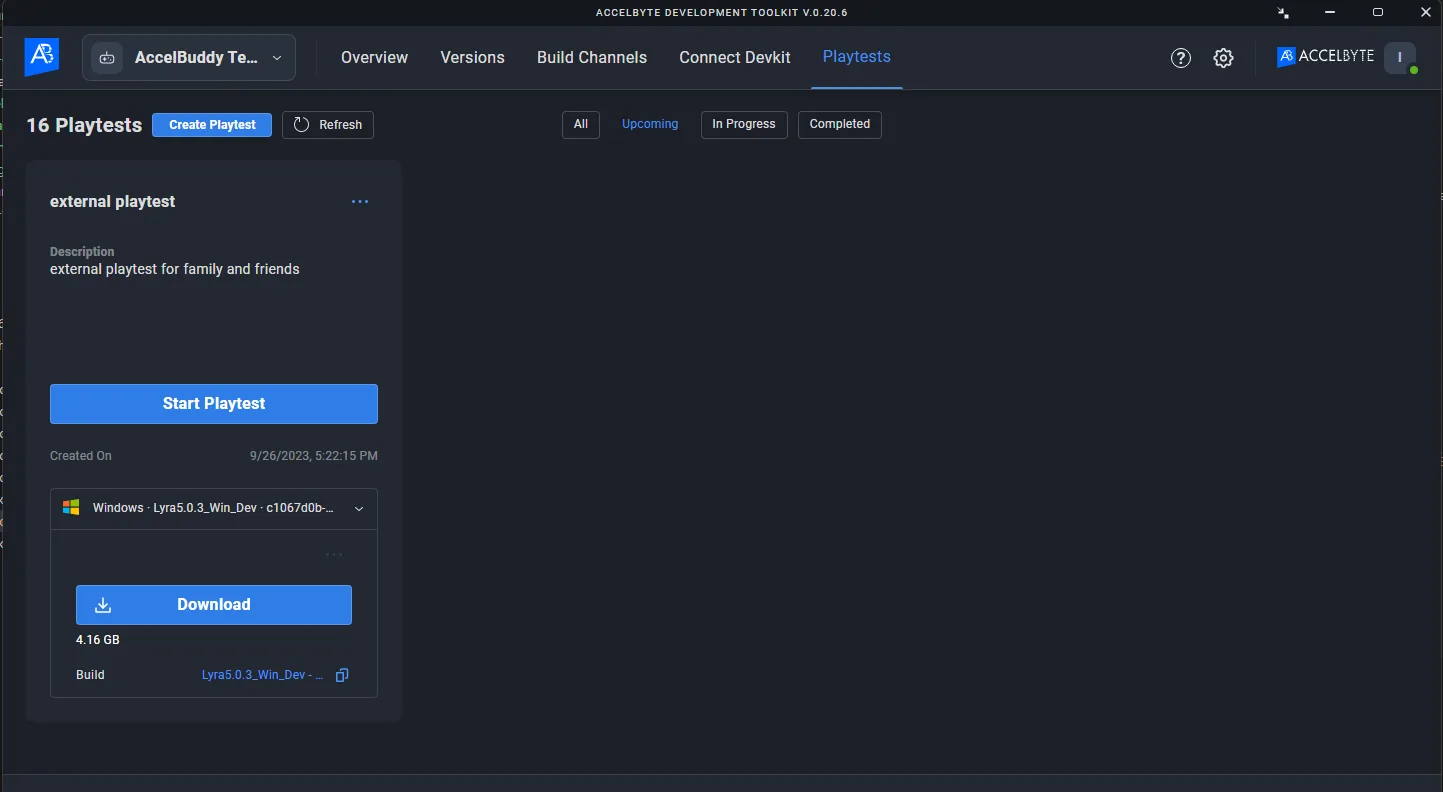

Here's how to create the playtest channel:
- Choose the Distribution channel that has the most stable build.
- Click the Create playtest button at the top of the page.
- Fill the playtest channel name and description fields.
- Click on the Create button and to create a playtest channel.
- The settings, access, and tracks from the distribution channel are copied to the new playtest channel.
Use the new Track CLI command
Track was previously called the Build channel. Now, a channel can consist of multiple tracks.
Before you start using track commands on CLI, make sure you add resources: NAMESPACE:{namespace}:GAME:{gameId}:TRACK and NAMESPACE:{namespace}:GAME:{gameId}:TRACK:BUILDS to your API lists. Here's how:
- Go to ADT Web and login as Admin or Developer.
- Go to Game Settings menu then select API Key Management.
- Click on the edit button of your game's API Key.
- Click the + Add New Resource.
- Copy and paste the
NAMESPACE:{namespace}:GAME:{gameId}:TRACKandNAMESPACE:{namespace}:GAME:{gameId}:TRACK:BUILDSvalue into the field box and tick the CRUD permissions depending on your needs. - Click on Save changes button and you're all set up to use the new CLI.
Create a track
Currently, there is no CLI command that can be used to create a track under a specific channel. You have to create a new track directly from the ADT Hub first.
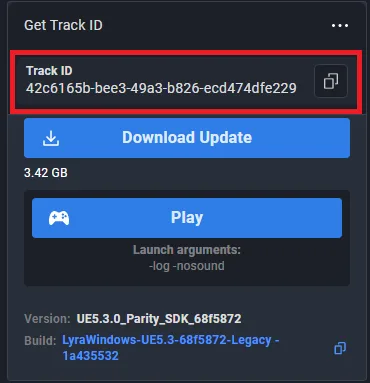
Update head of tracks
To update the head of tracks, you can use the following command:
.\BlackBoxCLI.exe track update-head
--namespace <your_namespace>
--apikey <your_apikey>
--track-id <target_track_id>
--build-id <build_id_as_head>
--version-id <version_id_of_the_build>
Response
Track build update succeed
Update a track's name
.\BlackBoxCLI.exe track update --name <new_track_name>
--namespace <your_namespace>
--apikey <your_apikey>
--track-id <target_track_id>
Response
Track update succeed
Track ID is only available in the ADT Hub at this time.
Update a track's launch arguments
.\BlackBoxCLI.exe track update --launch-arguments "<launch_argument>"
--namespace <namespace>
--apikey <APIKEY>
--track-id <target_track_id>
Response
Track update succeed
(Optional) Updating both a track's name and launch arguments at the same time:
.\BlackBoxCLI.exe track update --name "New track name" --launch-arguments "-launcharg1 -launcharg2 -launcharg3"
--namespace <your namespace>
--apikey <APIKEY>
--track-id <target track id>
Response
Track update succeed
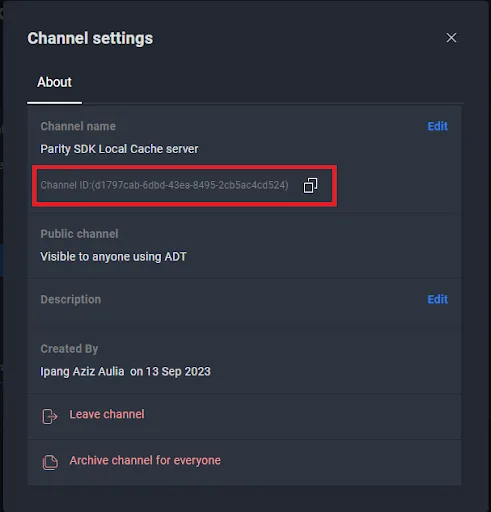
Get the list of tracks on a channel
.\BlackBoxCLI.exe track list
--channel-id <your_channel_id>
--page <page_number>
--page-limit <number_of_items>
Channel ID is only available in the ADT Hub at this time.
Response
ID                                              | Name
-----------------------------------------------------------
 83366b17-f748-4f5a-badb-bcd44ae6a494           | 2
 cfc06c61-c864-4af0-9625-0628b854de8b           | test
 4dd4f17d-ad16-46db-ab9f-ff6f8980c2d0           | empty
-----------------------------------------------------------