Epic をアイデンティティプロバイダーとして設定する
注釈:本資料はAI技術を用いて翻訳されています。
概要
このガイドは、検証済みの Epic Games デベロッパーが Epic Games アカウントを AccelByte Gaming Services (AGS) に接続する際の手助けとなることを目的としています。お使いのゲームによっては、ここに記載されていない Epic Games サービス内の追加機能を設定する必要がある場合があります。Epic Games サービスの設定に関する完全な情報については、Epic Games の担当者に直接問い合わせて、Epic Games ドキュメントを確認することをお勧めします。
このガイドは公開利用を目的としており、機密性の理由から限られた情報のみを含んでいます。まずは完全な機密ガイドを参照することをお勧めします。機密ガイドのコピーをリクエストするには、AccelByte のテクニカルプロデューサーに問い合わせてください。
目標
- AccelByte Game SDK を使用して、ゲームで Epic 認証方式を有効にする。
- AccelByte Player Portal を使用して、パブリッシャーの Web サイトで Epic 認証方式を有効にする。
前提条件
Web ログイン統合
- Epic デベロッパーアカウント。
- 認証を設定し権限を管理するための AccelByte Admin Portal アカウント。
- Player Portal と Launcher 用のパブリッシャー Namespace。
- Player Portal。
- AGS CLI の手順に従う場合は、AGS CLI をインストールし、これらの機能へのアクセス権を持つアカウントでサインインしてください。詳細については、インストールとサインインを参照してください。例では Bash シェルを使用しています。
Web ログイン統合は現在 AGS Public Cloud では利用できず、AGS Private Cloud でのみサポートされています。
インゲームログイン統合
- Epic デベロッパーアカウント。
- Unreal Engine を使用する場合は、UE バージョン 4.27 または 5.0 のインストールが必要です。
- Unity を使用する場合は、PlayEveryWare/eos_plugin_for_unity が必要です。
- 認証を設定し権限を管理するための AccelByte Admin Portal アカウント。
- ゲーム Namespace。
- AccelByte Game SDK の最新版がインポートされた Unity または Unreal ゲームプロジェクト。
- AGS Identity and Access Management (IAM) クライアントに関する知識。
- AGS CLI の手順に従う場合は、AGS CLI をインストールし、これらの機能へのアクセス権を持つアカウントでサインインしてください。詳細については、インストールとサインインを参照してください。例では Bash シェルを使用しています。
Epic プロダクトの設定
組織の作成
デベロッパーアカウント配下の組織 (Organization) が必要であり、その組織に検証済みのドメインを追加する必要があります。
Epic によるドメインの検証には多少時間がかかります。
プロダクトブランドの設定
プロダクトのブランド設定、権限、およびリンクされたクライアントを設定します。EOS Epic Account Services のセットアップ方法ガイドに従ってください。
ブランド設定には検証済みのドメインが必要です。ドメインをお持ちでない場合はそのまま進めることもできますが、プレイヤーはログイン時に警告メッセージを受け取ります。詳細については、ドメイン検証のページを参照してください。
クライアントの作成
プロダクト配下にクライアントを作成します。新しいクライアントの追加ガイドに従ってください。
Epic Account Services アプリケーションの作成
アプリケーションを作成します。EOS Epic Account Services アプリケーションのセットアップガイドに従ってください。
- 権限 (Permissions) では、Basic Profile、Online Presence、および Friends List を有効にする必要があります。
- リンクされたクライアント (Linked Clients) では、以前に作成したクライアントを選択します。
Epic デベロッパーポータルでの設定に問題がある場合は、カスタマーサポートに問い合わせて AccelByte からガイドを入手してください。
AGS で Epic Games ログインプロバイダーを設定する
Web ログイン
パブリッシャーの Web サイト向けに Epic Games ログインを設定すると、プレイヤーは自分の Epic Games アカウントでその Web サイトにサインインできるようになります。設定するには、次の手順に従います。
設定手順
- Admin Portal
- AGS CLI
-
AGS Admin Portal で、パブリッシャーネームスペースに移動します。
-
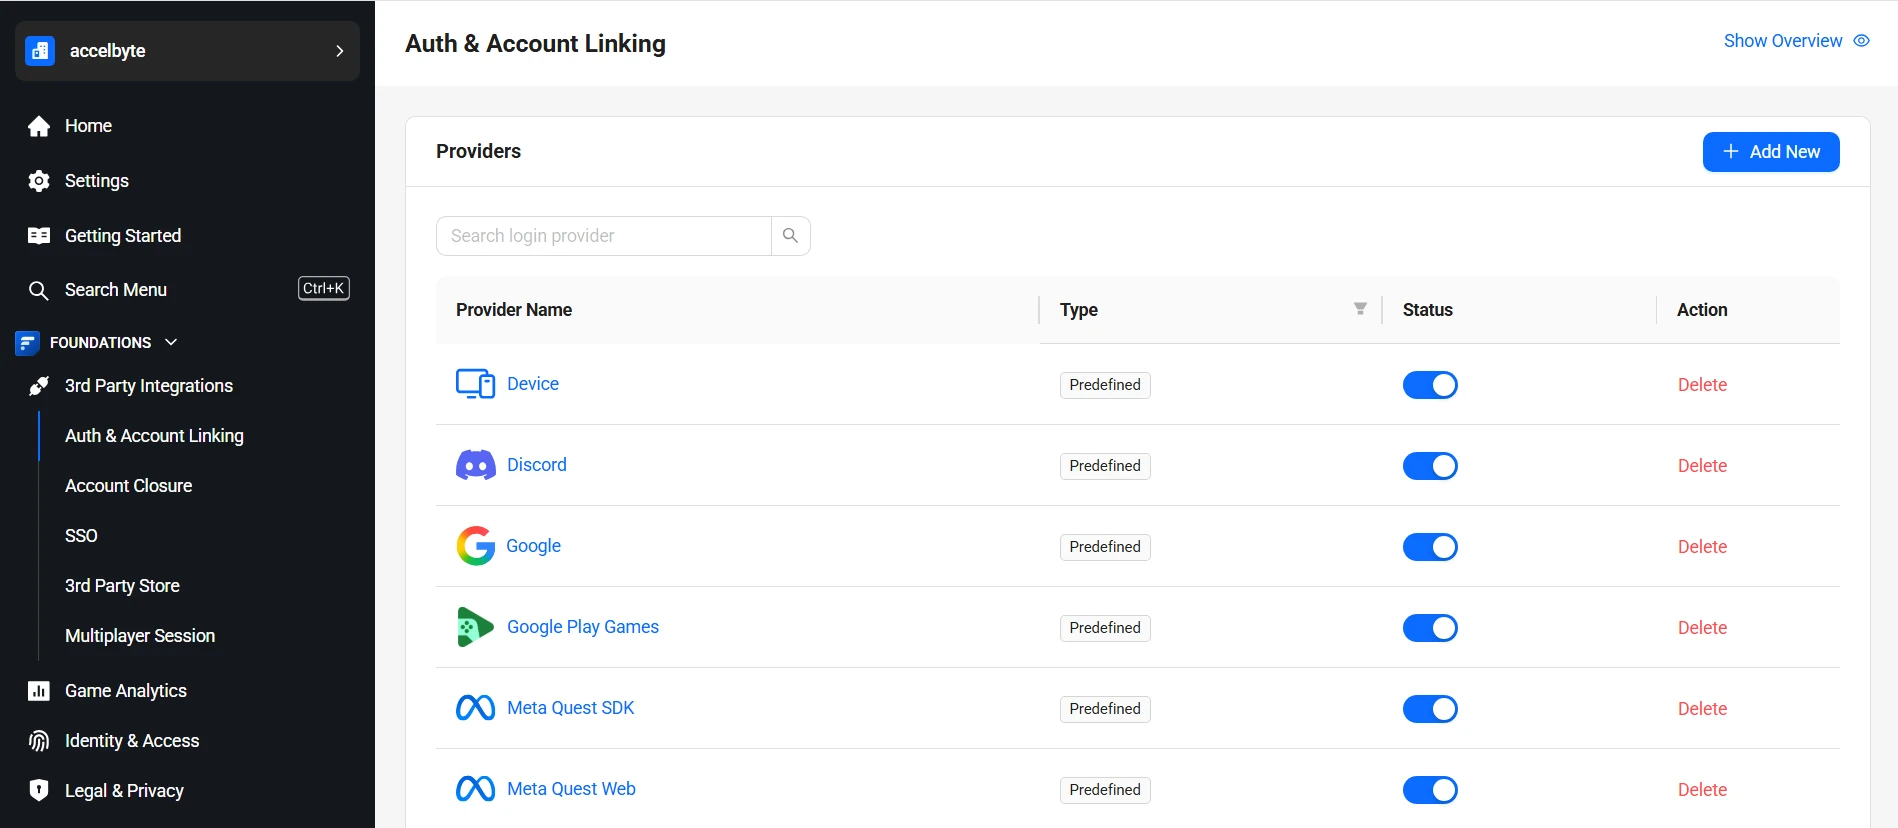
サイドバーメニューで、Foundations > 3rd Party Integrations > Auth & Account Linking に移動します。
-
Auth & Account Linking ページで、+ Add New をクリックします。
-
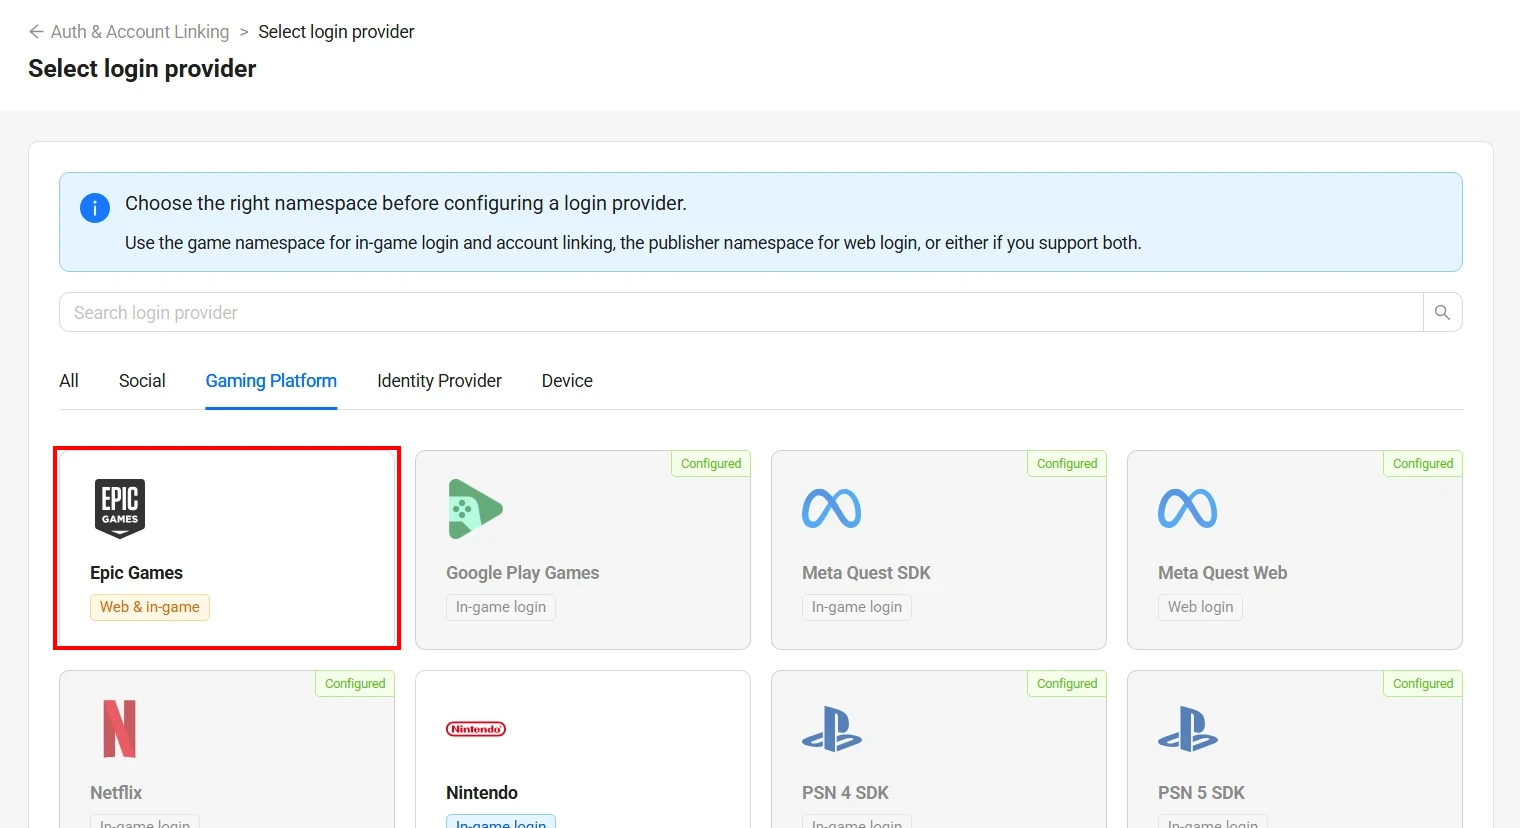
Select login provider ページで、Gaming Platform タブの Epic Games を見つけてクリックします。
-
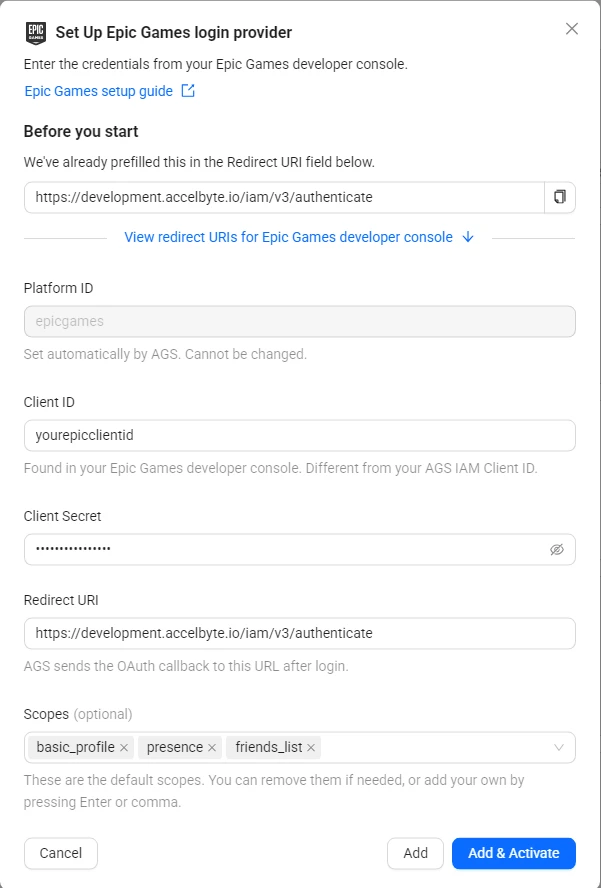
Set up Epic Games login provider フォームが表示されます。
-
次のフィールドを入力します。
- Platform ID:
epicgames。自動的に設定されるため、変更はできません。 - Client ID: Epic Games アプリケーションの Client ID。
- Client secret: Epic Games アプリケーションの Client Secret。
- Redirect URI:
<BaseURL>/iam/v3/authenticate(BaseURL はドメインアドレスです。例:https://prod.gamingservices.accelbyte.io)。important以下の URI を Epic Games デベロッパーコンソール に許可済みリダイレクト URI として登録してください(
<BaseURL>はドメインアドレス、<Namespace>はパブリッシャーネームスペースです)。<BaseURL><BaseURL>/iam/v3/authenticate<BaseURL>/iam/v3/platforms/epicgames/authenticate<BaseURL>/iam/v3/public/namespaces/<Namespace>/users/me/platforms/epicgames/web/link/establish(アカウント連携に使用)<BaseURL>/iam/v3/public/namespaces/<Namespace>/users/me/platforms/epicgames/web/reauth/establish(GDPR の再認証プロセスに使用)
- Scopes(任意): デフォルトのスコープは
basic_profile、presence、friends_listです。これらを削除できるほか、Enter キーを押すかカンマを入力して独自のスコープを追加することもできます。
- Platform ID:
-
Add & Activate をクリックすると、プロバイダーの作成と有効化を 1 回の操作で実行できます。有効化せずに作成したい場合は、代わりに Add をクリックします。
Epic Games 認証における platform_token は Access Token または Auth Code です。
-
プロバイダーの設定を記述した JSON ファイルを作成します。ファイル名は任意です。この例では
epicgames.jsonを使用します。{
"ClientId": "<YourEpicClientId>",
"Secret": "<YourEpicClientSecret>",
"RedirectUri": "<BaseURL>/iam/v3/authenticate",
"IsActive": true
}ClientIdとSecret: Epic Games アプリケーションの Client ID と Client Secret です。RedirectUri:<BaseURL>をドメインアドレス(例:https://prod.gamingservices.accelbyte.io)に置き換えます。Admin Portal タブに記載されているリダイレクト URI を Epic Games デベロッパーコンソールに登録してください。scopes(任意): 独自の Epic Games スコープを設定するには、"scopes": ["basic_profile", "presence"]のように配列として追加します。省略した場合、AGS はデフォルトのスコープbasic_profile、presence、friends_listを使用します。IsActive:trueの場合、Add & Activate と同様にプロバイダーを追加して有効化します。falseの場合、Add と同様に有効化せずに追加します。
-
プロバイダーを追加します。
<YourPublisherNamespace>をパブリッシャーネームスペースに置き換えます。@の後に JSON ファイルのパスを指定します。ags iam platform-credentials create --namespace <YourPublisherNamespace> --platform-id epicgames --json @epicgames.jsonこのファイルにはクライアントシークレットが含まれているため、コマンドの実行後に削除してください。
ログインプロバイダーを編集する
- Admin Portal
- AGS CLI
-
Auth & Account Linking ページで、Epic Games のプロバイダーをクリックします。
-
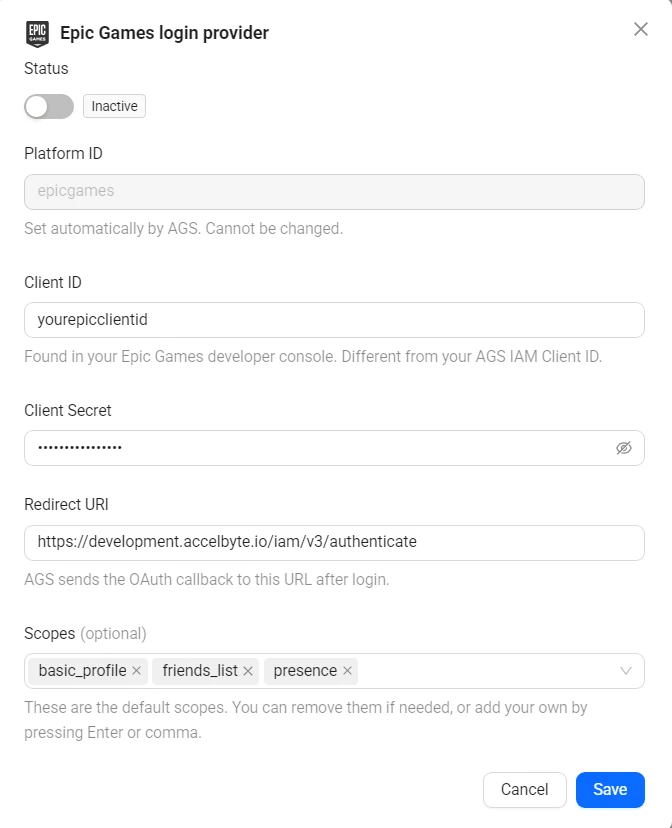
画面右側にプロバイダーの設定パネルが表示されます。必要に応じて各フィールドを更新します。
-
パネル上部の Status トグルで、プロバイダーを有効化または無効化します。
-
Save をクリックします。
-
プロバイダーの現在の設定を確認します。
ags iam platform-credentials get --namespace <YourPublisherNamespace> --platform-id epicgames -
変更したいフィールドのみを送信します。省略したフィールドは現在の値が維持されます。たとえば、プロバイダーを無効化するには次のようにします。
ags iam platform-credentials update --namespace <YourPublisherNamespace> --platform-id epicgames --json '{"IsActive": false}'再度有効化するには、
{"IsActive": true}を送信します。クライアントシークレットを変更するには、代わりに{"Secret": "<NewEpicClientSecret>"}を JSON ファイルに記述し、--json @<FileName>で指定して、コマンドの実行後にそのファイルを削除してください。
試してみる
-
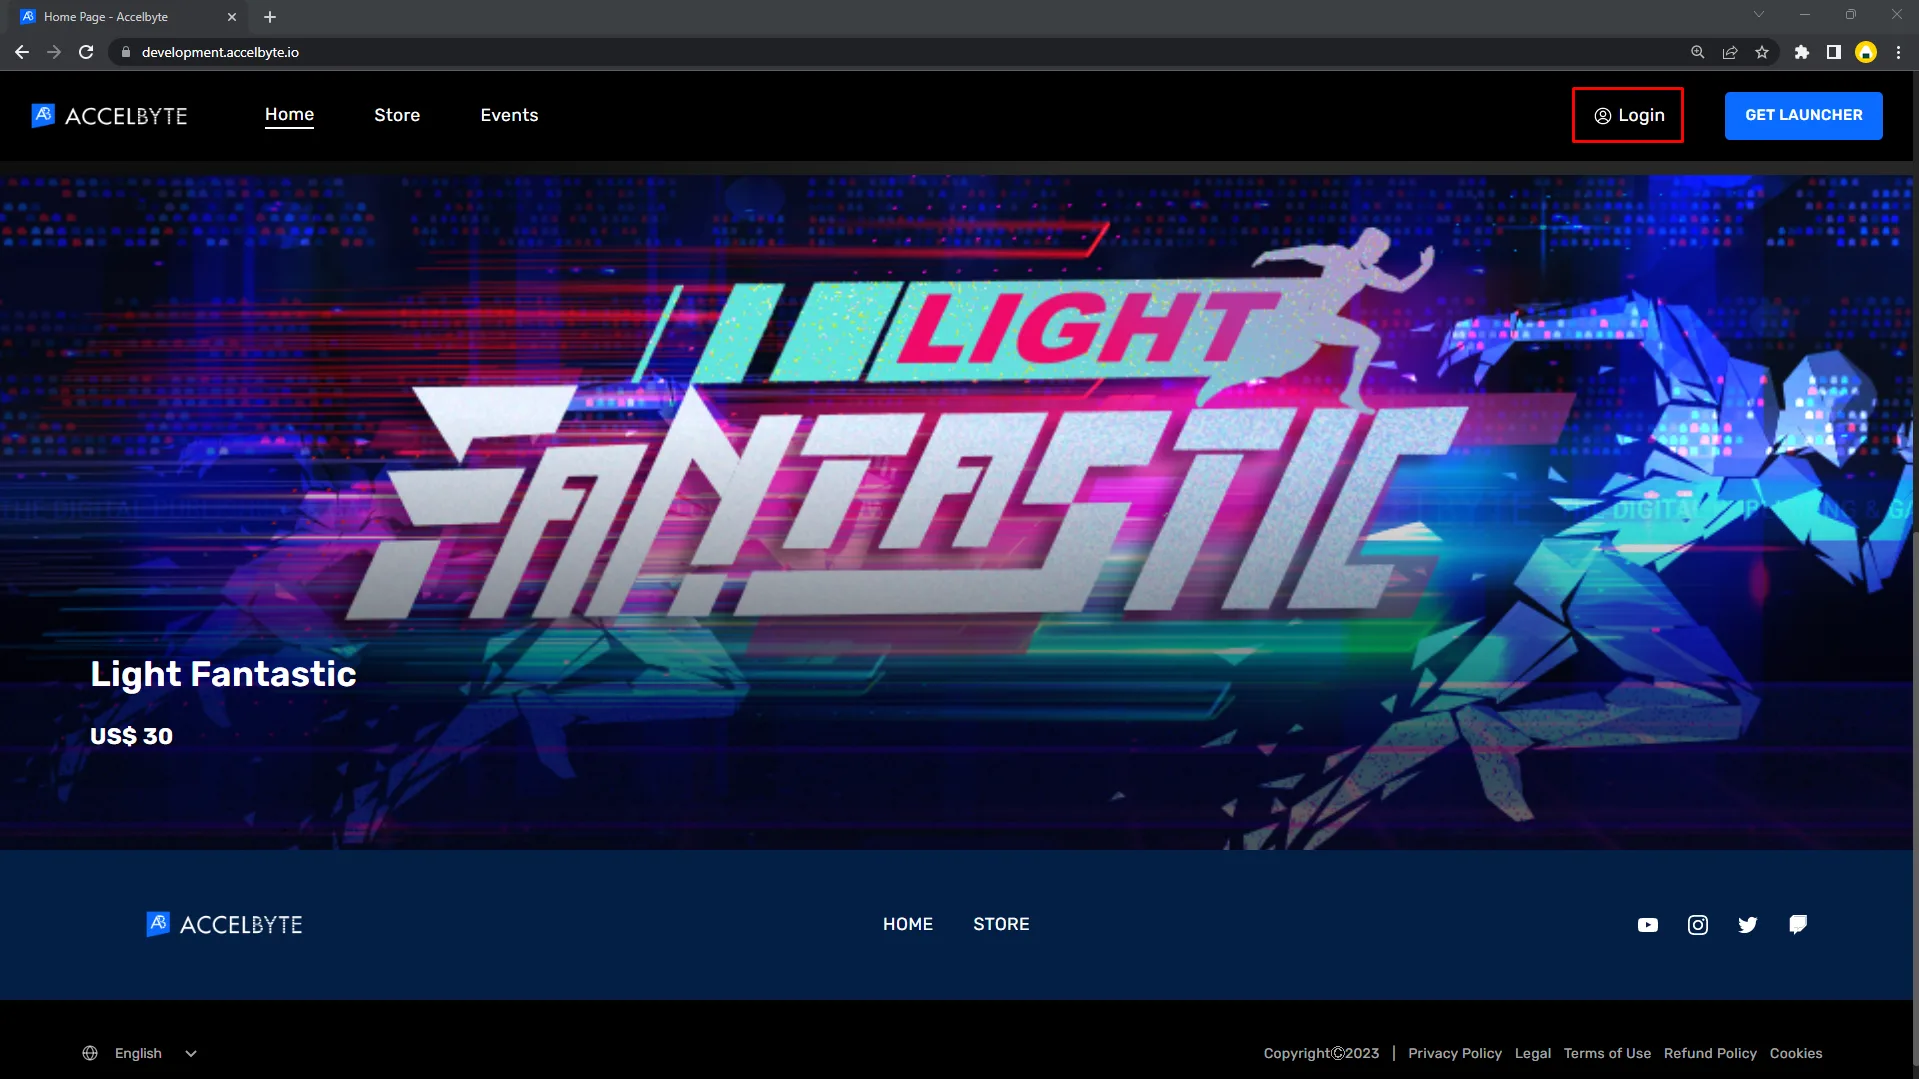
Player Portal を開き、Login ボタンをクリックします。
-
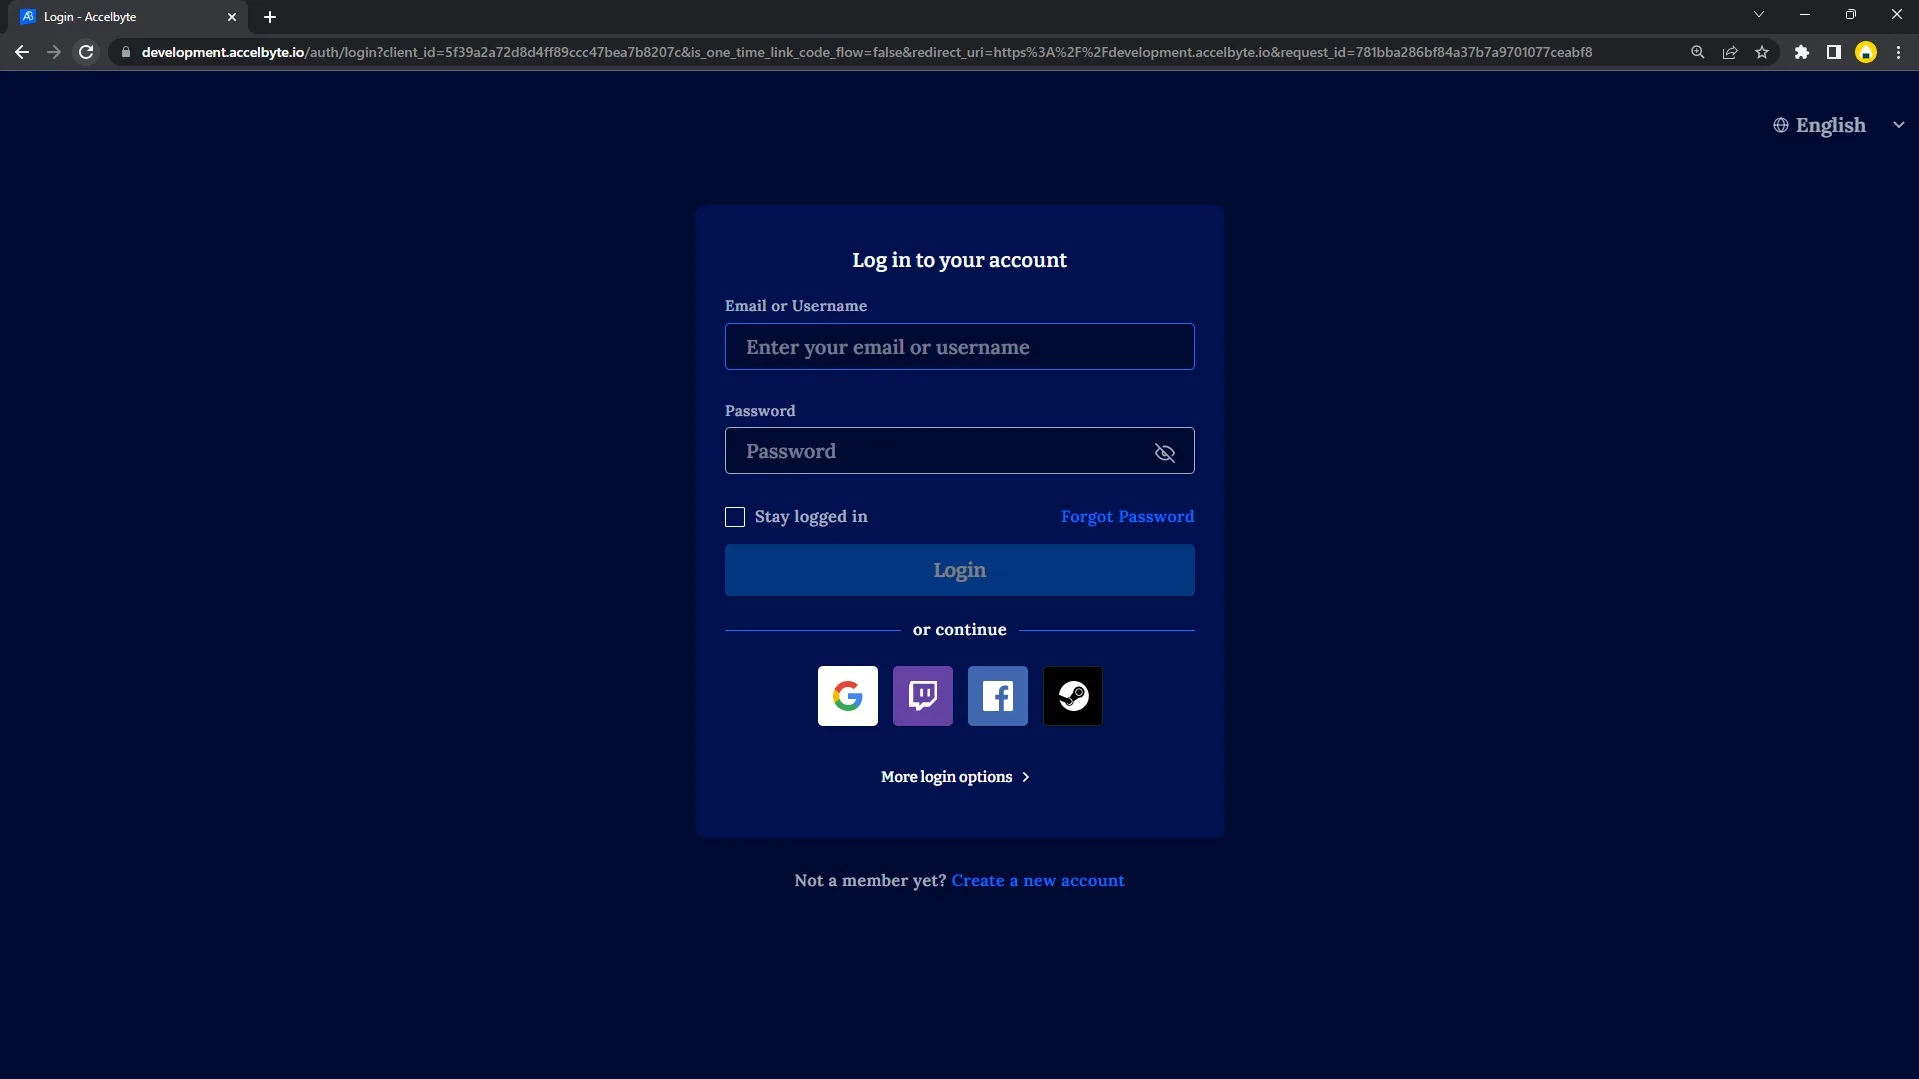
Epic Games のアイコンをクリックします。見つからない場合は、More login options をクリックしてください。
-
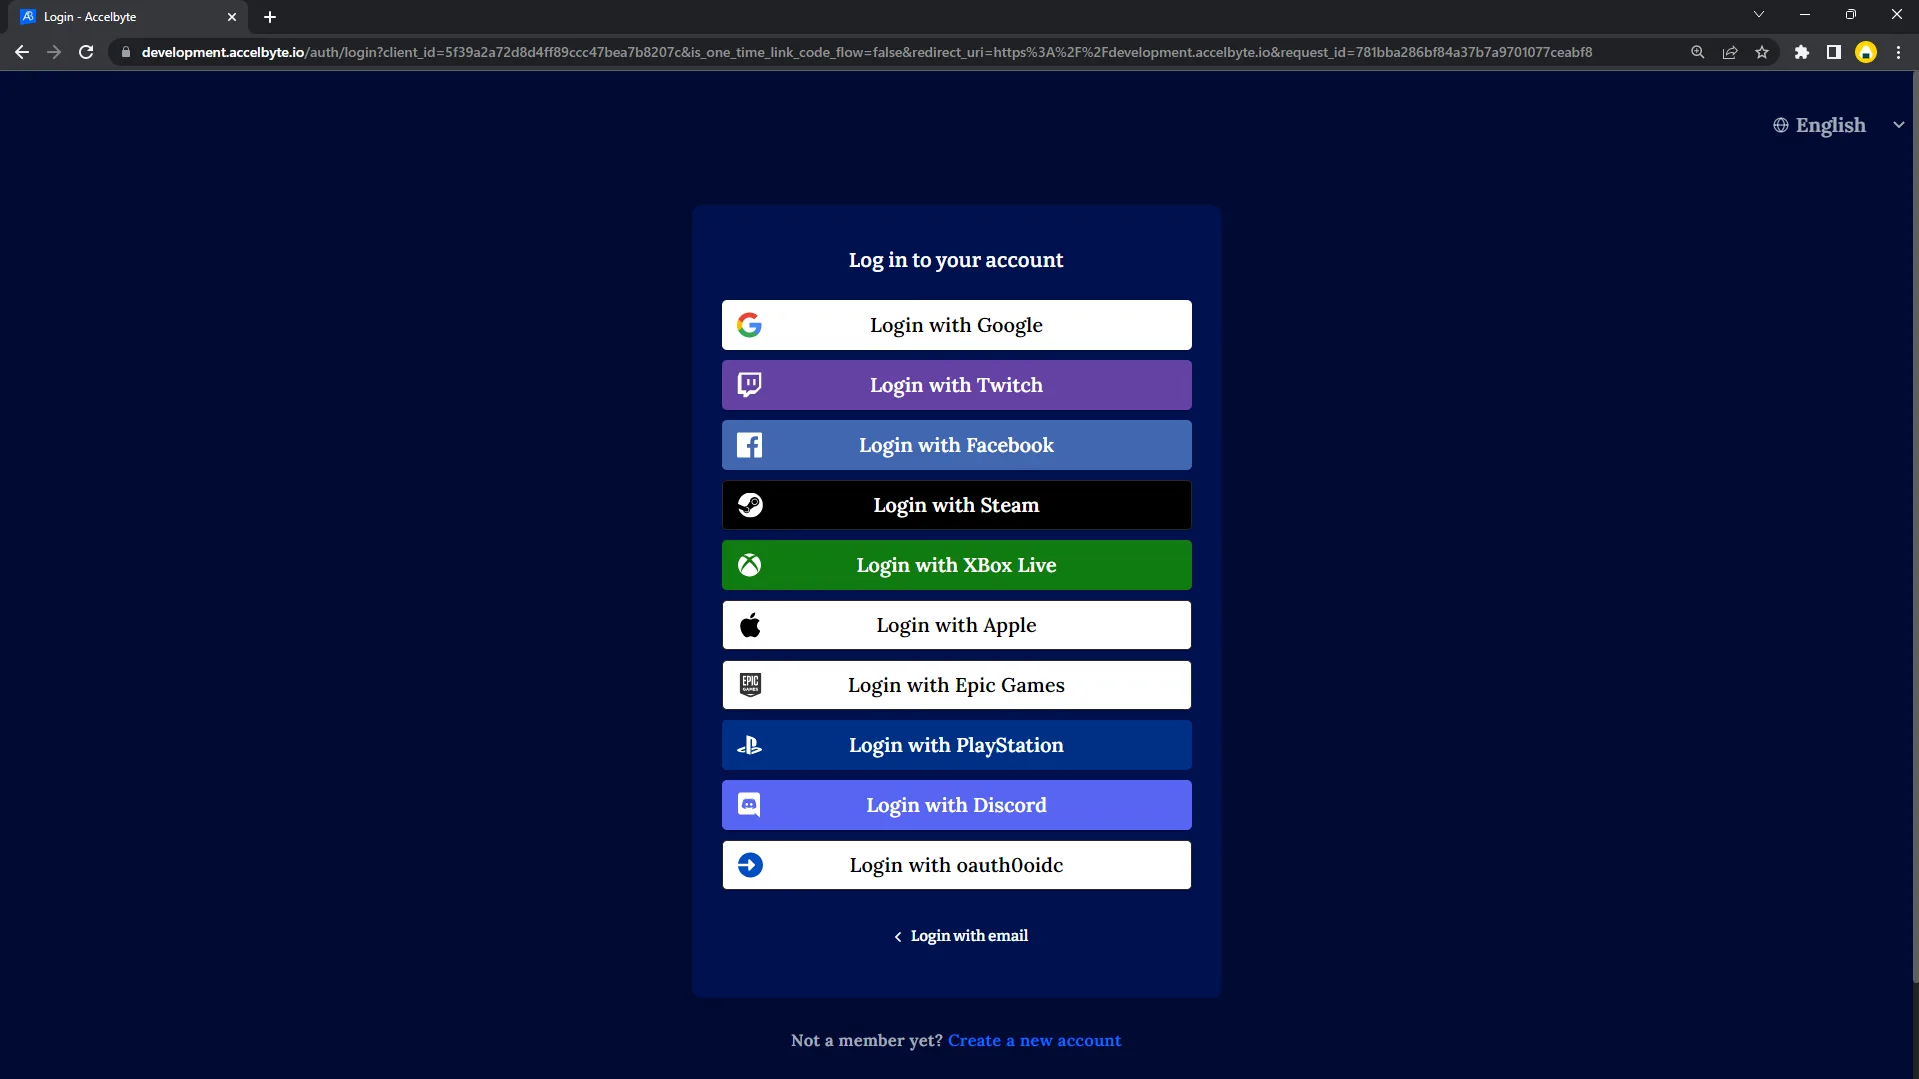
Login with Epic Games をクリックします。
-
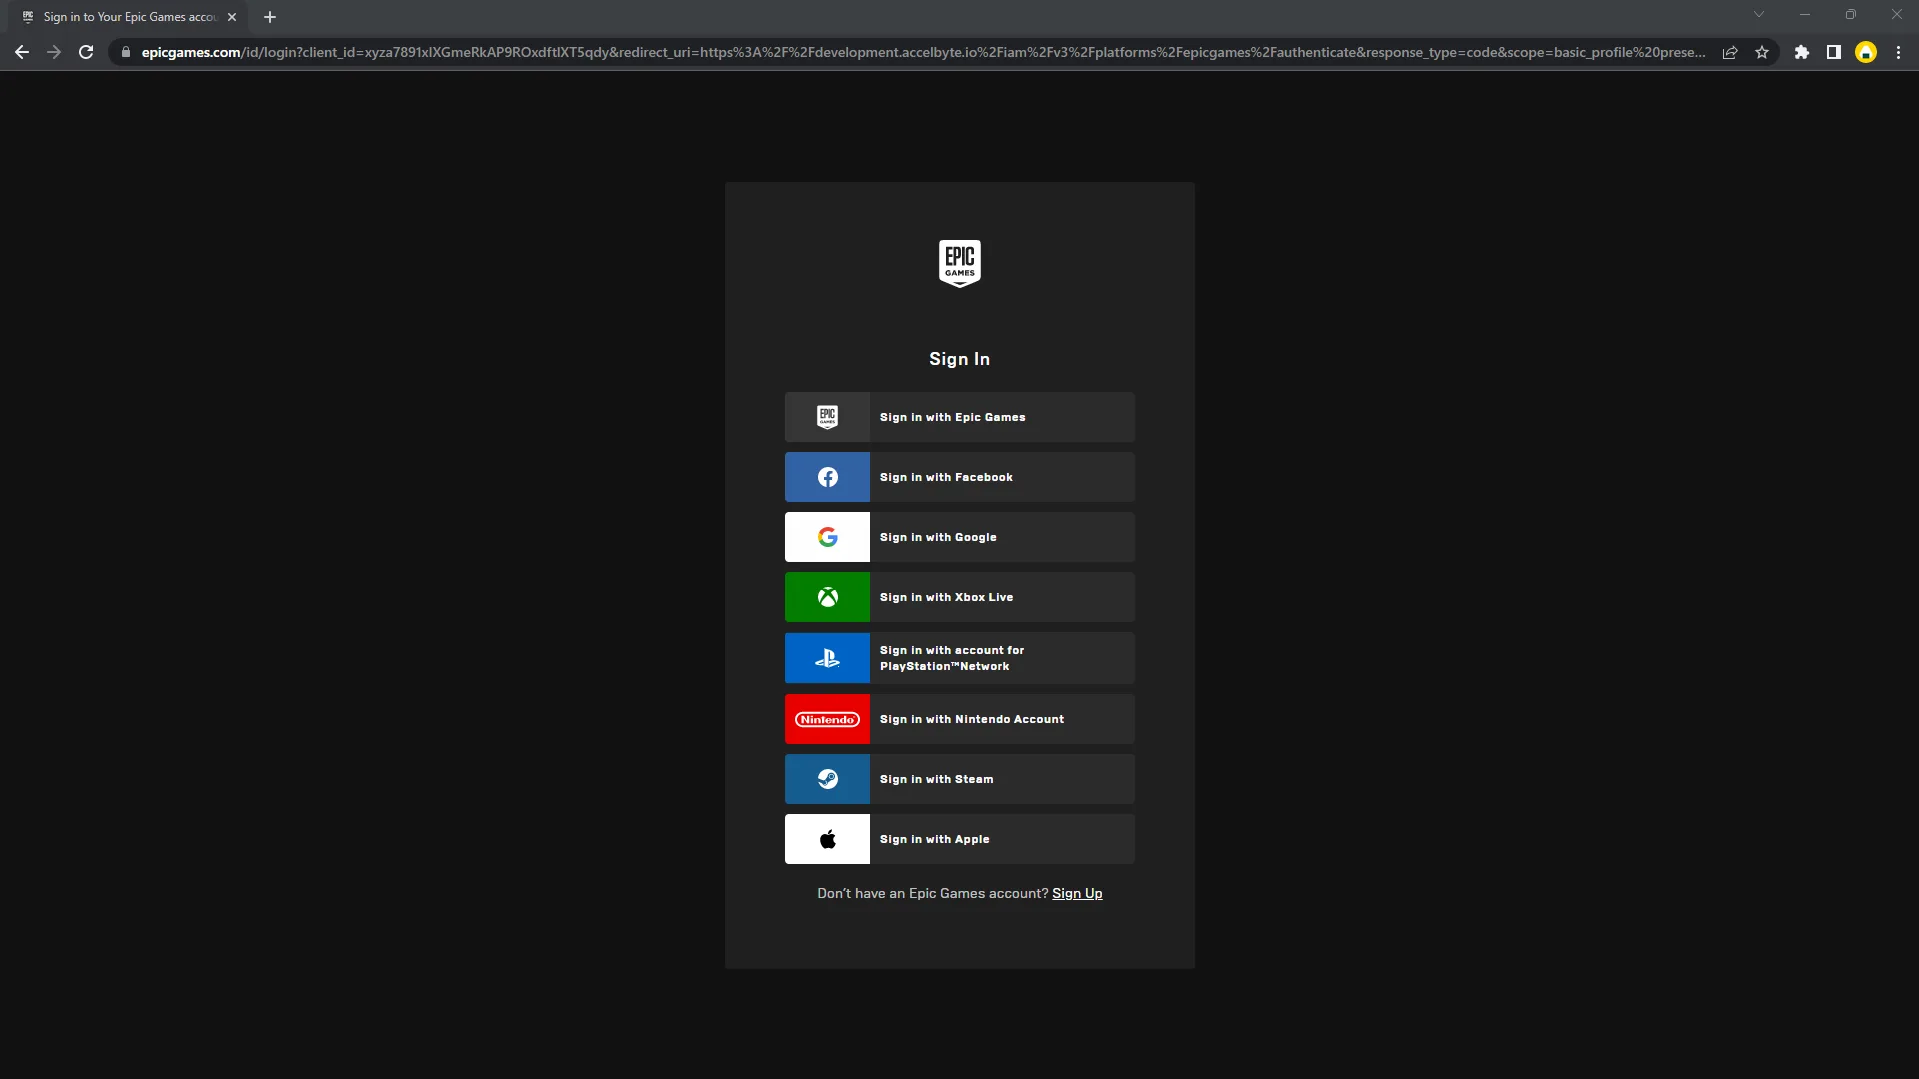
Epic Games の Web ログインページにリダイレクトされます。ここで Epic の認証情報を入力して先に進みます。以上で必要な手順は完了です。
インゲームログイン
ゲーム内で Epic Games ログインを設定すると、プレイヤーは自分の Epic Games アカウントを使用してゲームにサインインできるようになります。設定するには、次の手順に従います。
設定手順
- Admin Portal
- AGS CLI
-
AGS Admin Portal で、ゲームネームスペースに移動します。
-
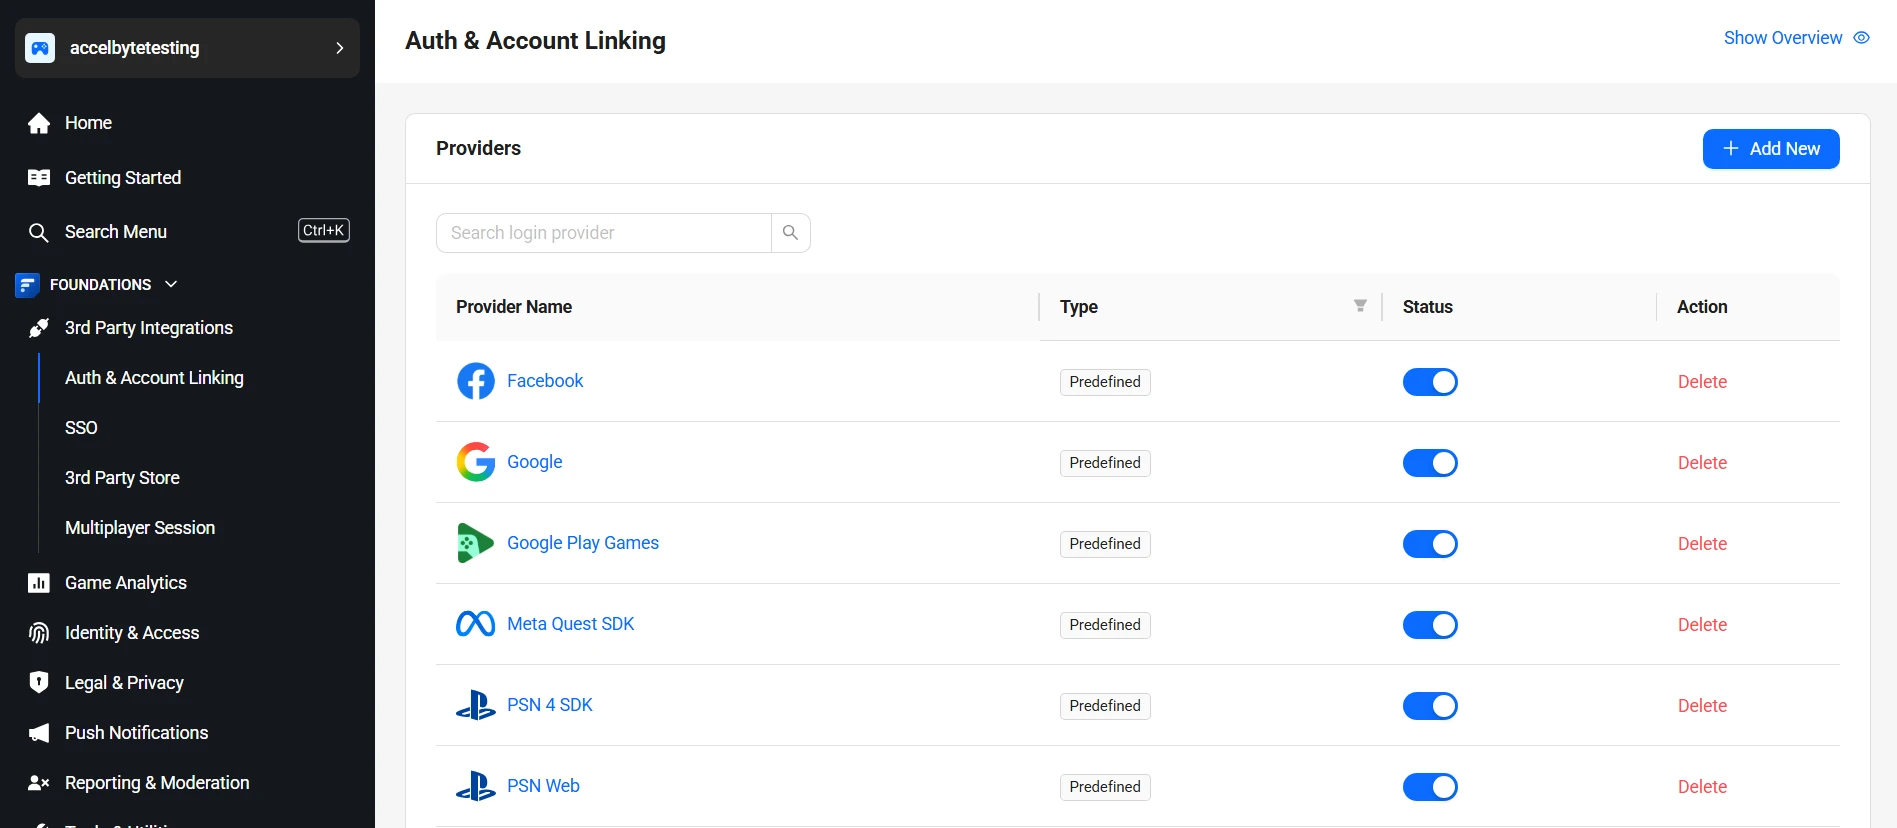
サイドバーメニューで、Foundations > 3rd Party Integrations > Auth & Account Linking に移動します。
-
Auth & Account Linking ページで、+ Add New をクリックします。
-
Select login provider ページで、Gaming Platform タブの Epic Games を見つけてクリックします。
-
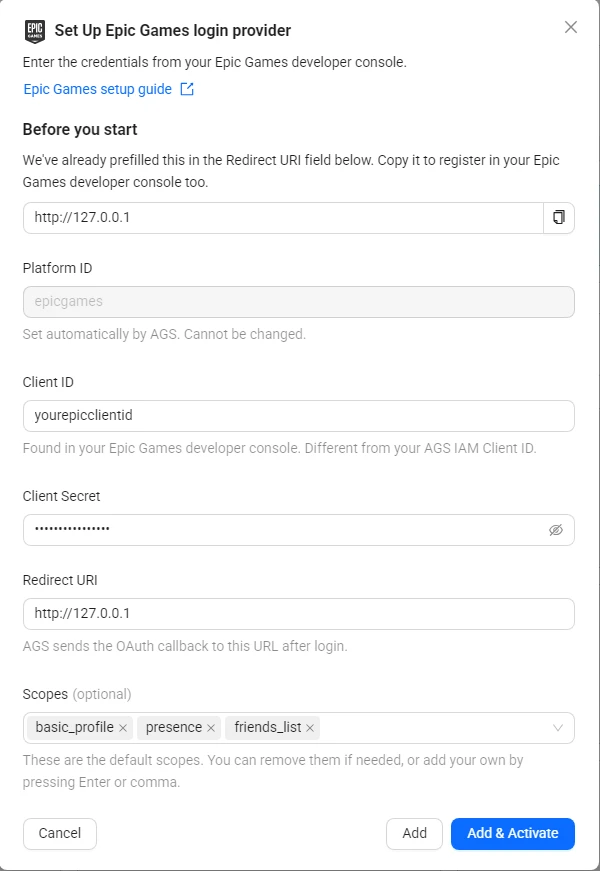
Set up Epic Games login provider フォームが表示されます。
-
次のフィールドを入力します。
- Platform ID:
epicgames。自動的に設定されるため、変更はできません。 - Client ID: Epic Games アプリケーションの Client ID。
- Client secret: Epic Games アプリケーションの Client Secret。
- Redirect URI: デフォルトは
http://127.0.0.1です。importantこの URL(
http://127.0.0.1)をそのまま、Epic Games デベロッパーコンソール に許可済みリダイレクト URI として登録してください。 - Scopes(任意): デフォルトのスコープは
basic_profile、presence、friends_listです。これらを削除できるほか、Enter キーを押すかカンマを入力して独自のスコープを追加することもできます。
- Platform ID:
-
Add & Activate をクリックすると、プロバイダーの作成と有効化を 1 回の操作で実行できます。有効化せずに作成したい場合は、代わりに Add をクリックします。
-
プロバイダーの設定を記述した JSON ファイルを作成します。ファイル名は任意です。この例では
epicgames.jsonを使用します。{
"ClientId": "<YourEpicClientId>",
"Secret": "<YourEpicClientSecret>",
"RedirectUri": "http://127.0.0.1",
"IsActive": true
}ClientIdとSecret: Epic Games アプリケーションの Client ID と Client Secret です。RedirectUri: この URL をそのまま、許可済みリダイレクト URI として Epic Games デベロッパーコンソールに登録してください。scopes(任意): 独自の Epic Games スコープを設定するには、"scopes": ["basic_profile", "presence"]のように配列として追加します。省略した場合、AGS はデフォルトのスコープbasic_profile、presence、friends_listを使用します。IsActive:trueの場合、Add & Activate と同様にプロバイダーを追加して有効化します。falseの場合、Add と同様に有効化せずに追加します。
-
プロバイダーを追加します。
<YourGameNamespace>をゲームネームスペースに置き換えます。@の後に JSON ファイルのパスを指定します。ags iam platform-credentials create --namespace <YourGameNamespace> --platform-id epicgames --json @epicgames.jsonこのファイルにはクライアントシークレットが含まれているため、コマンドの実行後に削除してください。
ログインプロバイダーを編集する
- Admin Portal
- AGS CLI
-
Auth & Account Linking ページで、Epic Games のプロバイダーをクリックします。
-
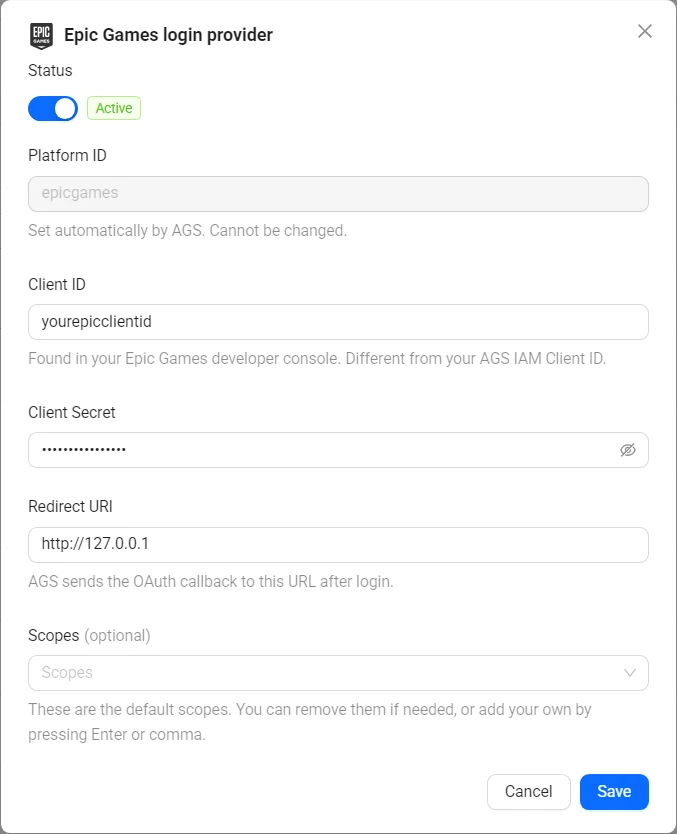
画面右側にプロバイダーの設定パネルが表示されます。必要に応じて各フィールドを更新します。
-
パネル上部の Status トグルで、プロバイダーを有効化または無効化します。
-
Save をクリックします。
-
プロバイダーの現在の設定を確認します。
ags iam platform-credentials get --namespace <YourGameNamespace> --platform-id epicgames -
変更したいフィールドのみを送信します。省略したフィールドは現在の値が維持されます。たとえば、プロバイダーを無効化するには次のようにします。
ags iam platform-credentials update --namespace <YourGameNamespace> --platform-id epicgames --json '{"IsActive": false}'再度有効化するには、
{"IsActive": true}を送信します。クライアントシークレットを変更するには、代わりに{"Secret": "<NewEpicClientSecret>"}を JSON ファイルに記述し、--json @<FileName>で指定して、コマンドの実行後にそのファイルを削除してください。
Epic Games 用の IAM クライアントを作成する
IAM クライアントとは、対象のプラットフォームでリリースしたいゲームクライアントを表すものです。IAM クライアントの詳細については、アプリケーションのアクセス制御を管理するを参照してください。
- Unreal Engine Instructions
- Unity Instructions
Unreal インゲームログイン統合
AccelByte SDK を使用してゲームのサインインを統合することで、プレイヤーが自分の Epic 認証情報を使ってゲームにログインできるようにします。
Unreal の準備と設定
依存関係の追加
まず、パブリック依存モジュールである OnlineSubsystem と OnlineSubsystemEOS を <YourProject>.Build.cs ファイルに追加する必要があります。これらは、Unreal Engine 内からオンラインサブシステム EOS を使用するようにプロジェクトを統合するために必要なすべての依存関係です。
public ABThirdPartyLogin(ReadOnlyTargetRules Target) : base(Target)
{
  PCHUsage = PCHUsageMode.UseExplicitOrSharedPCHs;

  PublicDependencyModuleNames.AddRange(new string[] { "Core", "CoreUObject", "Engine", "InputCore" , "AccelByteUe4Sdk", "Slate", "SlateCore" });

  PrivateDependencyModuleNames.AddRange(new string[] { "Json", "OnlineSubsystem", "OnlineSubsystemEOS", "HTTP" });

}
<YourProject>.Target.cs の内部に OnlineSubsystemEOS を追加します。
public ABThirdPartyLoginTarget( TargetInfo Target) : base(Target)
{
  Type = TargetType.Game;
  DefaultBuildSettings = BuildSettingsVersion.V2;
  ExtraModuleNames.AddRange( new string[] { "ABThirdPartyLogin", "OnlineSubsystem", "AccelByteUe4Sdk", "OnlineSubsystemEOS" } );
}
<YourProject>.Target.cs および <YourProjectEditor>.Target.cs ファイルの内部に OnlineSubsystemSteam を追加します。
public ABThirdPartyLoginEditorTarget( TargetInfo Target) : base(Target)
{
  Type = TargetType.Editor;
  DefaultBuildSettings = BuildSettingsVersion.V2;
  ExtraModuleNames.AddRange( new string[] { "ABThirdPartyLogin", "OnlineSubsystem", "AccelByteUe4Sdk", "OnlineSubsystemEOS" } );
}
Epic Games ログイン用の Unreal Engine プロジェクト設定
DefaultEngine.ini ファイル内に、Epic の設定用にいくつかの変数を追加する必要があります。この設定は、プロジェクトを開いたときに Epic Online Service が自動的に開始されるようにするために必要です。
Unreal Engine に Online Subsystem EOS を使用するよう指示するには、次の設定を追加します。
[OnlineSubsystem]
DefaultPlatformService=EOS
アプリケーションで EOS Online Subsystem を使用することを Unreal Engine に伝えたので、次に以下の設定を追加して OnlineSubsystemEOS モジュールを設定する必要があります。
[OnlineSubsystemEOS]
bEnabled=true
Epic Developer Portal から取得した値に基づいて、以下の値を入力できます。
[/Script/OnlineSubsystemEOS.NetDriverEOS]
bIsUsingP2PSockets=true

[/Script/OnlineSubsystemEOS.EOSSettings]
CacheDir=CacheDir
DefaultArtifactName=YOUR Product Name
TickBudgetInMilliseconds=0
bEnableOverlay=True
bEnableSocialOverlay=True
bShouldEnforceBeingLaunchedByEGS=False
TitleStorageReadChunkLength=0
+Artifacts=(ArtifactName="[Your Product Name]",
ClientId="[Your Client ID]",//This ID should start with "xyz" as the first 3 characters
ClientSecret="[Your Client Secret]",//This is the password that is used to verify your Client ID
ProductId="[Your Product ID]",//The EOS SDK uses this ID to identify your product
SandboxId="[Your Sandbox ID]",//The artifact belongs to the sandbox with this ID value.
DeploymentId="[Your Deployment ID]",//Deployment IDs differ for each artifact
EncryptionKey="[Your Encyption Key]")//When you upload data to an EOS service, this 64-byte hexadecimal string is used to encrypt it
bUseEAS=True
bUseEOSConnect=True
bMirrorStatsToEOS=True
bMirrorAchievementsToEOS=True
bUseEOSSessions=True
bMirrorPresenceToEAS=True

zUnreal Engine Project Setting for AccelByte Gaming Services
Add your AccelByte credentials here in DefaultEngine.ini
[/Script/AccelByteUe4Sdk.AccelByteSettings]
ClientId=<Your IAM_Client_Id>
ClientSecret=<Your IAM_Client_Secret>
Namespace=<Your Namespace>
PublisherNamespace=<Your Publisher Namespace>
RedirectURI=
BaseUrl="https://prod.gamingservices.accelbyte.io"
AppId=133xxx
IamServerUrl="https://prod.gamingservices.accelbyte.io/iam"
PlatformServerUrl="https://prod.gamingservices.accelbyte.io/platform"
Unreal Engine サンプルコードの実装
次に、以下のサンプルコードを使用して、ゲームに Epic 認証方式を実装する方法を説明します。
IOnlineSubsystem は DefaultEngine.ini で定義された DefaultPlatformService の値を読み取ります。IdentityInterface は、ユーザーアカウントに関連するこれらのサービスとのやり取りを管理し、ユーザー認証とアクセストークンの取得を可能にします。操作が成功すると、AccelByte SDK の LoginWithOtherPlatform 関数が、Identity Interface から取得した認証トークンを使用してサードパーティプラットフォームのログインを処理します。
スニペットで使用されている AccelByteOnlineSubsystemPtr を取得するには、このガイドに従ってください。
FOnlineAccountCredentials Credentials;
Credentials.Id = FString();
Credentials.Token = FString();
Credentials.Type = FString("accountportal");

UE_LOG(LogTemp, Warning, TEXT("%s"), TEXT("Begin Login"));
const IOnlineSubsystem* OnlineSubsystem = IOnlineSubsystem::Get();
if (OnlineSubsystem == nullptr)//will get active OSS Platform Service
{
  FString Message = TEXT("Cannot login with no online subsystem set!");
  UE_LOG(LogTemp, Warning, TEXT("%s"), *Message);
  return;
}

const IOnlineIdentityPtr OnlineIdentity = OnlineSubsystem->GetIdentityInterface();
if (!OnlineIdentity.IsValid())
{
  FString Message = TEXT("Could not retrieve identity interface from native subsystem.");
  UE_LOG(LogTemp, Warning, TEXT("%s"), *Message);
  return;
}
APlayerController* MyPlayerController = UGameplayStatics::GetPlayerController(GetWorld(), 0);;

const ULocalPlayer* LocalPlayer = Cast<ULocalPlayer>(MyPlayerController->Player);
if (LocalPlayer == nullptr)
{
  FString Message = TEXT("Can only login with native platform for local players");
  UE_LOG(LogTemp, Warning, TEXT("%s"), *Message);
  return;
}

auto ApiClient = AccelByteOnlineSubsystemPtr->GetApiClient(TEXT("YOUR_KEY"));
auto UserApi = ApiClient->GetUserApi().Pin();

const FVoidHandler OnLoginSuccessDelegate = FVoidHandler::CreateLambda([&]() {
    FAccountUserData AccountUserData = ApiClient->CredentialsRef->GetAccountUserData();
    //if Success will return some user credential
    FString AccountUserDataString;
    FJsonObjectConverter::UStructToJsonObjectString(AccountUserData, AccountUserDataString);

    FString Message = FString::Printf(TEXT("Login to AB Service Success : %s"), *AccountUserDataString);
});
const FErrorHandler OnLoginErrorDelegate = FErrorHandler::CreateLambda([=](int32 ErrorCode, const FString& ErrorMessage) {
     FString Message = FString::Printf(TEXT("Error Login to AB Service : %s"), *ErrorMessage);//Failed Login to AB Service
});

const FOnLoginCompleteDelegate NativeLoginComplete = FOnLoginCompleteDelegate::CreateLambda([=]
(int32 LocalUserNum, bool bWasSuccessful, const FUniqueNetId& UserId, const FString& Error) {
  UE_LOG(LogTemp, Warning, TEXT("OnLoginComplete %s : %s"), bWasSuccessful ? TEXT("Success") : TEXT("Fail"), *Error);
  FString Message = FString::Printf(TEXT("OnLoginComplete %s : %s"), bWasSuccessful ? TEXT("Success") : TEXT("Fail"), *Error);
  OnActionInfoUpdated.Broadcast(Message);

  if (bWasSuccessful)
  {
     const FString PlatformToken = OnlineIdentity->GetAuthToken(LocalPlayer->GetControllerId());
     UE_LOG(LogTemp, Warning, TEXT("PlatformToken : %s"), *PlatformToken);
     OnActionInfoUpdated.Broadcast(FString::Printf(TEXT("PlatformToken : %s"), *PlatformToken));//Will Obtained Auth Ticket from OnlineIdentity

     UserApi->LoginWithOtherPlatform(EAccelBytePlatformType::EpicGames, PlatformToken, OnLoginSuccessDelegate, OnLoginErrorDelegate);
     UE_LOG(LogTemp, Warning, TEXT("Request LoginWithOtherPlatform"));
     OnActionInfoUpdated.Broadcast(TEXT("Request LoginWithOtherPlatform"));
  }//this method will hitting the AccelByte endpoint and will return value after success
});
OnlineIdentity->AddOnLoginCompleteDelegate_Handle(LocalPlayer->GetControllerId(), NativeLoginComplete);
const bool bWaitForDelegate = OnlineIdentity->Login(LocalPlayer->GetControllerId(), Credentials);
if (!bWaitForDelegate)
{
  FString Message = TEXT("The online subsystem couldn't login");
  UE_LOG(LogTemp, Warning, TEXT("%s"), *Message);
}

FString Message = TEXT("Sending login request to native subsystem!");
UE_LOG(LogTemp, Warning, TEXT("%s"), *Message);
このコードをプロジェクトに追加した後、プロジェクトをコンパイル、ビルド、実行します。これで完了です。
サンプルコードのテスト
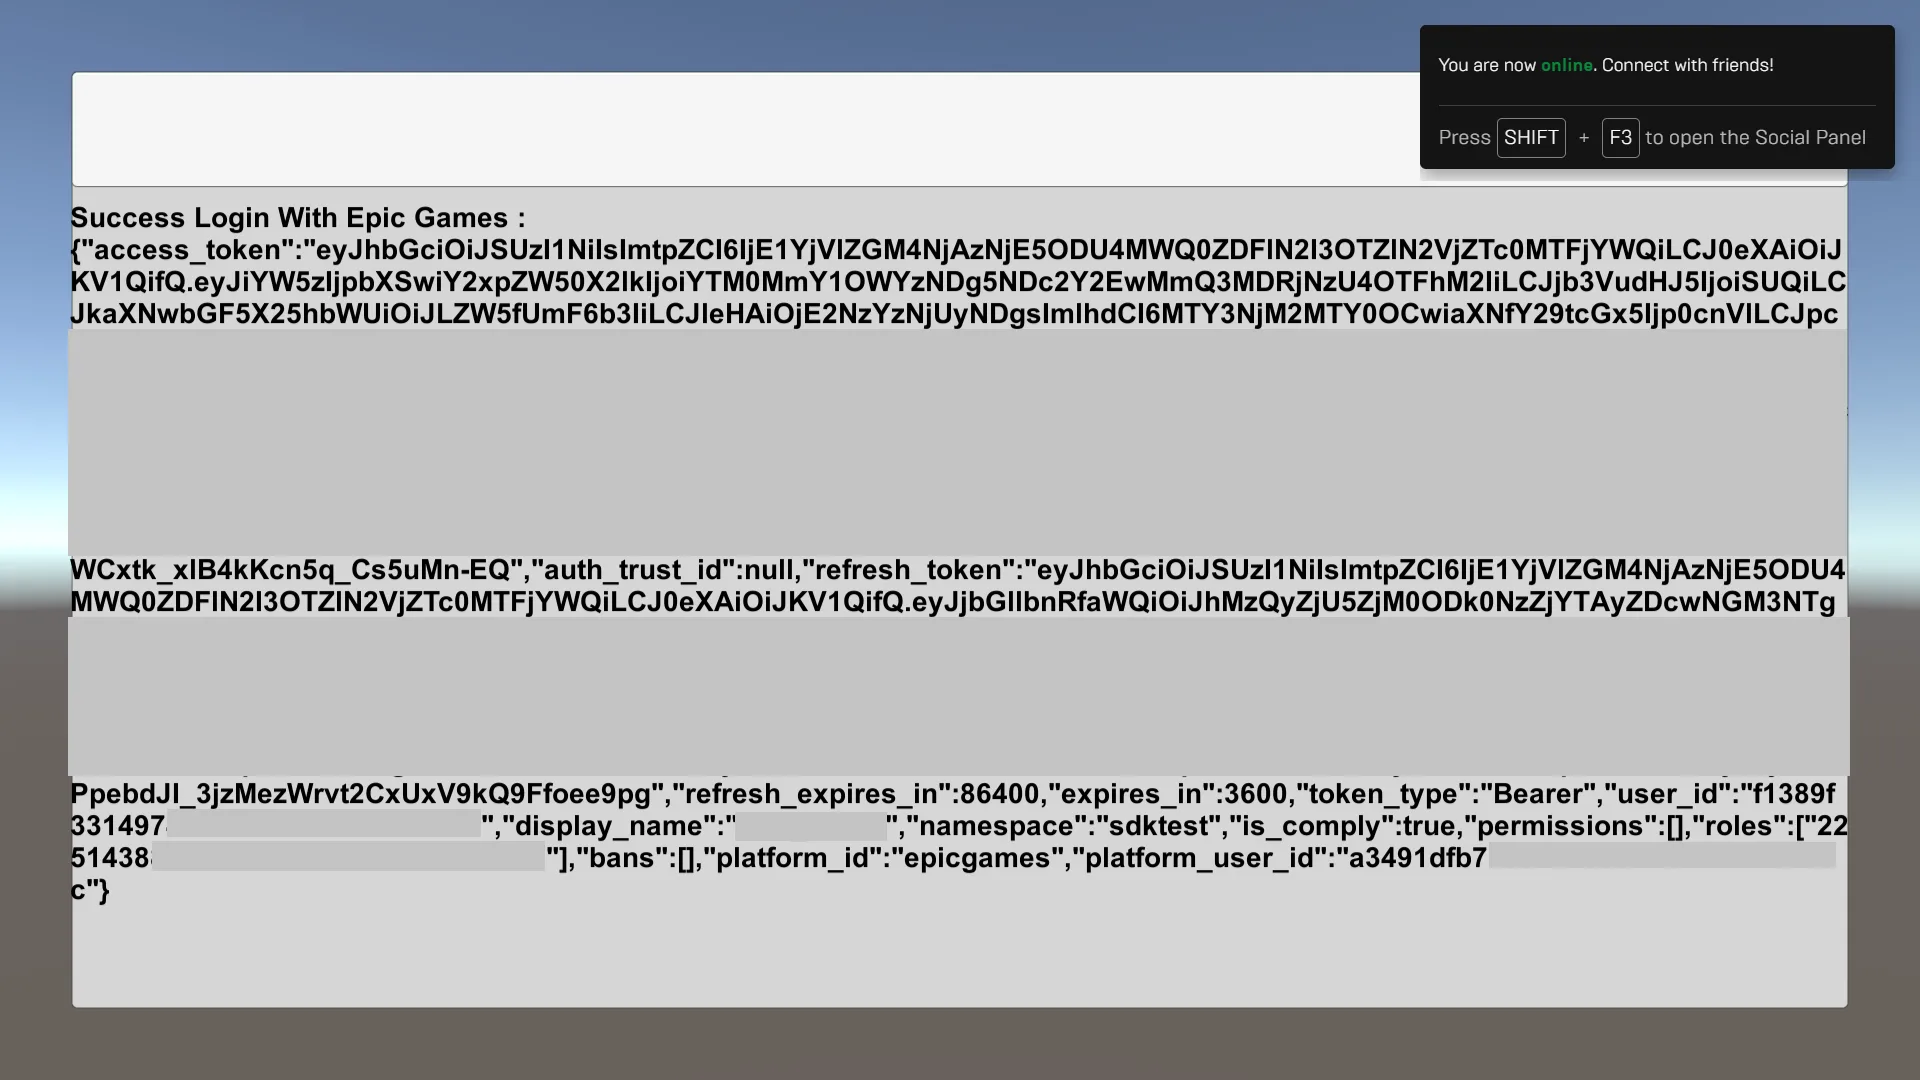
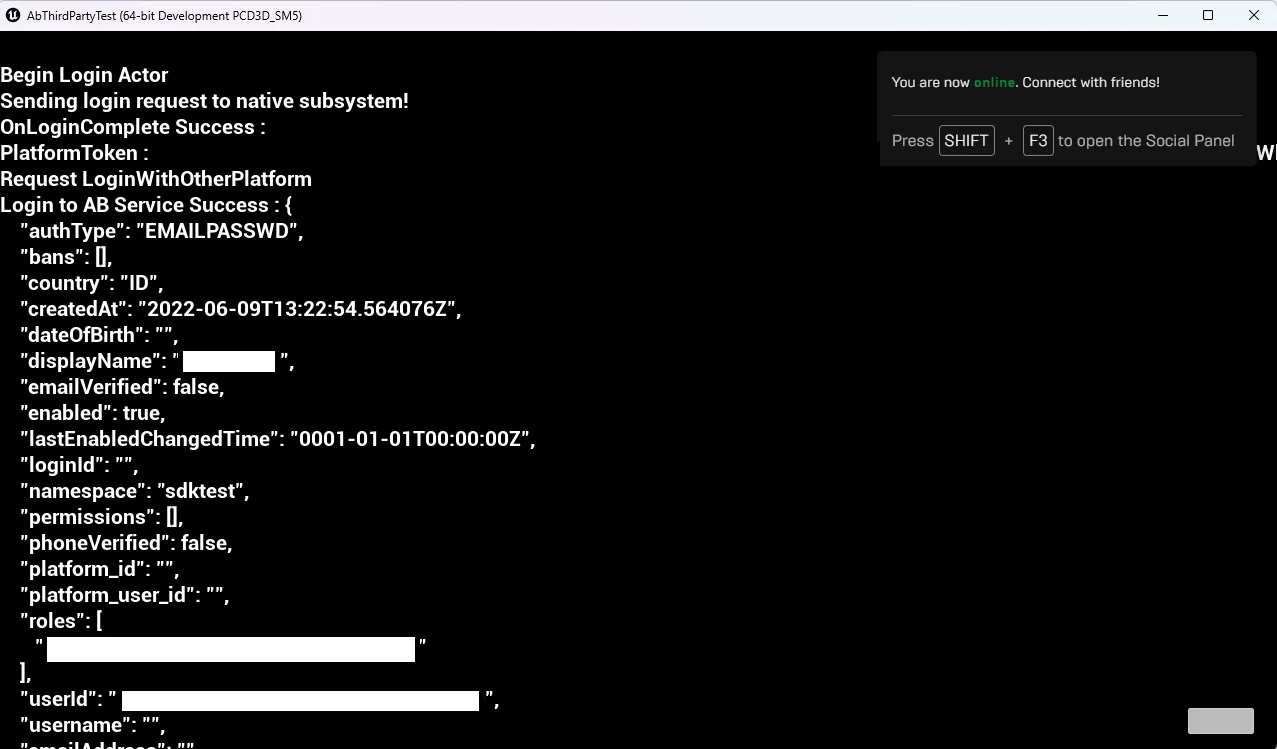
以下の画像は、Epic アカウントを使用してテストアプリに正常にログインできた例を示しています。
Unity インゲームログイン統合
AccelByte SDK を使用して Epic Game のサインインを統合することで、プレイヤーが自分の Epic 認証情報を使ってログインできるようにします。
Unity の準備と設定
Epic Games ログイン用の Unity プロジェクト設定
SDK Config を開く方法の詳細については、SDK のインストールと設定を参照してください。その後、AGS Admin Portal の値に基づいて各属性を入力し、設定を保存します。
Unity サンプルコードの実装
このサンプルコードの実装では、Epic Game SDK のラッパーとして、オープンソースの PlayEveryWare の Epic Online Service Plugin を使用します。
このプラグインを機能させるには、プラグインとタイムティッカーのアタッチ処理を Awake メソッドと Update メソッドの中に配置するようにしてください。
    float platformTickTimer = 0f;
    const float platformTickInterval = 0.1f;

    // In the editor, make sure to dynamically load and unload the SDK between play sessions.
    // This initializes the SDK each time the game is run in editor.
#if UNITY_EDITOR
    [DllImport("Kernel32.dll")]
    private static extern IntPtr LoadLibrary(string lpLibFileName);

    [DllImport("Kernel32.dll")]
    private static extern int FreeLibrary(IntPtr hLibModule);

    [DllImport("Kernel32.dll")]
    private static extern IntPtr GetProcAddress(IntPtr hModule, string lpProcName);

    private IntPtr libraryPointer;
#endif

    private void Awake()
    {
#if UNITY_EDITOR
        var libraryPath = "Assets/" + Epic.OnlineServices.Config.LibraryName;

        libraryPointer = LoadLibrary(libraryPath);
        if (libraryPointer == IntPtr.Zero)
        {
            throw new Exception("Failed to load library" + libraryPath);
        }

        Bindings.Hook(libraryPointer, GetProcAddress);
#endif
    }

    private void OnApplicationQuit()
    {
        if (platformInterface != null)
        {
            platformInterface.Release();
            platformInterface = null;
            PlatformInterface.Shutdown();
        }

#if UNITY_EDITOR
        if (libraryPointer != IntPtr.Zero)
        {
            Bindings.Unhook();

            // Free until the module ref count is 0
            while (FreeLibrary(libraryPointer) != 0) { }
            libraryPointer = IntPtr.Zero;
        }
#endif
    }

    // Calling tick on a regular interval is required for callbacks to work.
    private void Update()
    {
        if (platformInterface != null)
        {
            platformTickTimer += UnityEngine.Time.deltaTime;

            if (platformTickTimer >= platformTickInterval)
            {
                platformTickTimer = 0;
                platformInterface.Tick();
            }
        }
    }
その EOS Plugin の Login メソッドを使用して Epic トークンを生成できます。プラグインが正しく初期化されていることも確認してください。
    private void GetEpicToken(string productName
        , string productVersion
        , string productId
        , string sandboxId
        , string deploymentId
        , string epicClientId
        , string epicClientSecret
        , LoginCredentialType credentialType
        , string credentialId
        , string credentialToken
        , Action<string> onGetEpicTokenFinished)
    {
        var initializeOptions = new InitializeOptions()
        {
            ProductName = productName,
            ProductVersion = productVersion
        };

        var initializeResult = PlatformInterface.Initialize(ref initializeOptions);
        if (initializeResult != Epic.OnlineServices.Result.Success)
        {
            Debug.LogError("Failed to initialize platform: " + initializeResult);
            return;
        }

        var options = new Options()
        {
            ProductId = productId,
            SandboxId = sandboxId,
            DeploymentId = deploymentId,
            ClientCredentials = new ClientCredentials()
            {
                ClientId = epicClientId,
                ClientSecret = epicClientSecret
            }
        };

        PlatformInterface platformInterface = PlatformInterface.Create(ref options);
        if (platformInterface == null)
        {
            Debug.LogError("Failed to create platform");
            return;
        }

        var loginOptions = new LoginOptions()
        {
            Credentials = new Credentials()
            {
                Type = credentialType,
                Id = credentialId,
                Token = credentialToken
            },

            // Change these scopes to match the ones set up on your product on the Developer Portal.
            ScopeFlags = Epic.OnlineServices.Auth.AuthScopeFlags.BasicProfile |
                         Epic.OnlineServices.Auth.AuthScopeFlags.FriendsList |
                         Epic.OnlineServices.Auth.AuthScopeFlags.Presence
        };

        string authCode = string.Empty;
        platformInterface.GetAuthInterface().Login(ref loginOptions, null,
            (ref LoginCallbackInfo loginCallbackInfo) =>
            {
                if (loginCallbackInfo.ResultCode == Epic.OnlineServices.Result.Success)
                {
                    Debug.Log("Epic Login succeeded");
                    CopyUserAuthTokenOptions tokenOptions = new CopyUserAuthTokenOptions();

                    Token? token = null;
                    platformInterface.GetAuthInterface().CopyUserAuthToken(ref tokenOptions, loginCallbackInfo.LocalUserId, out token);
                    if (token == null)
                    {
                        Debug.Log("Could not get token");
                        return;
                    }

                    authCode = token.Value.AccessToken;
                }
                else if (Common.IsOperationComplete(loginCallbackInfo.ResultCode))
                {
                    Debug.Log("Epic Login failed: " + loginCallbackInfo.ResultCode);
                    authCode = loginCallbackInfo.ResultCode.ToString();
                }

                onGetEpicTokenFinished?.Invoke(authCode);
            });
    }
AccelByte IAM Service にログインします。
    private void LoginAccelByteEpicPlatform(string productName
        , string productVersion
        , string productId
        , string sandboxId
        , string deploymentId
        , string epicClientId
        , string epicClientSecret
        , LoginCredentialType credentialType
        , string credentialId
        , string credentialToken)
    {
        GetEpicToken(productName, productVersion, productId, sandboxId, deploymentId, epicClientId, epicClientSecret, credentialType, credentialId, credentialToken, epicToken =>
        {
            if (string.IsNullOrEmpty(epicToken))
            {
                Debug.LogError("Epic Token is empty");
                return;
            }

            AccelByte.Api.User user = AccelByteSDK.GetClientRegistry().GetApi().GetUser();
            user.LoginWithOtherPlatform(AccelByte.Models.PlatformType.EpicGames, epicToken, OnLoginWithEpicDone);
        });
    }

    private void OnLoginWithEpicDone(Result<TokenData, OAuthError> loginResult)
    {
        if (loginResult.IsError)
        {
            Debug.Log($"Login failed, Error: {loginResult.Error.error}, Description {loginResult.Error.error_description}");
        }
        else
        {
            Debug.Log("Login success");
        }
    }
Login Handler Script をプロジェクトに追加した後、プロジェクトをコンパイルできます。
サンプルコードのテスト
これで、プロジェクトをビルドして実行できます。以下の画像は、Epic アカウントを使用してテストアプリに正常にログインできた例を示しています。
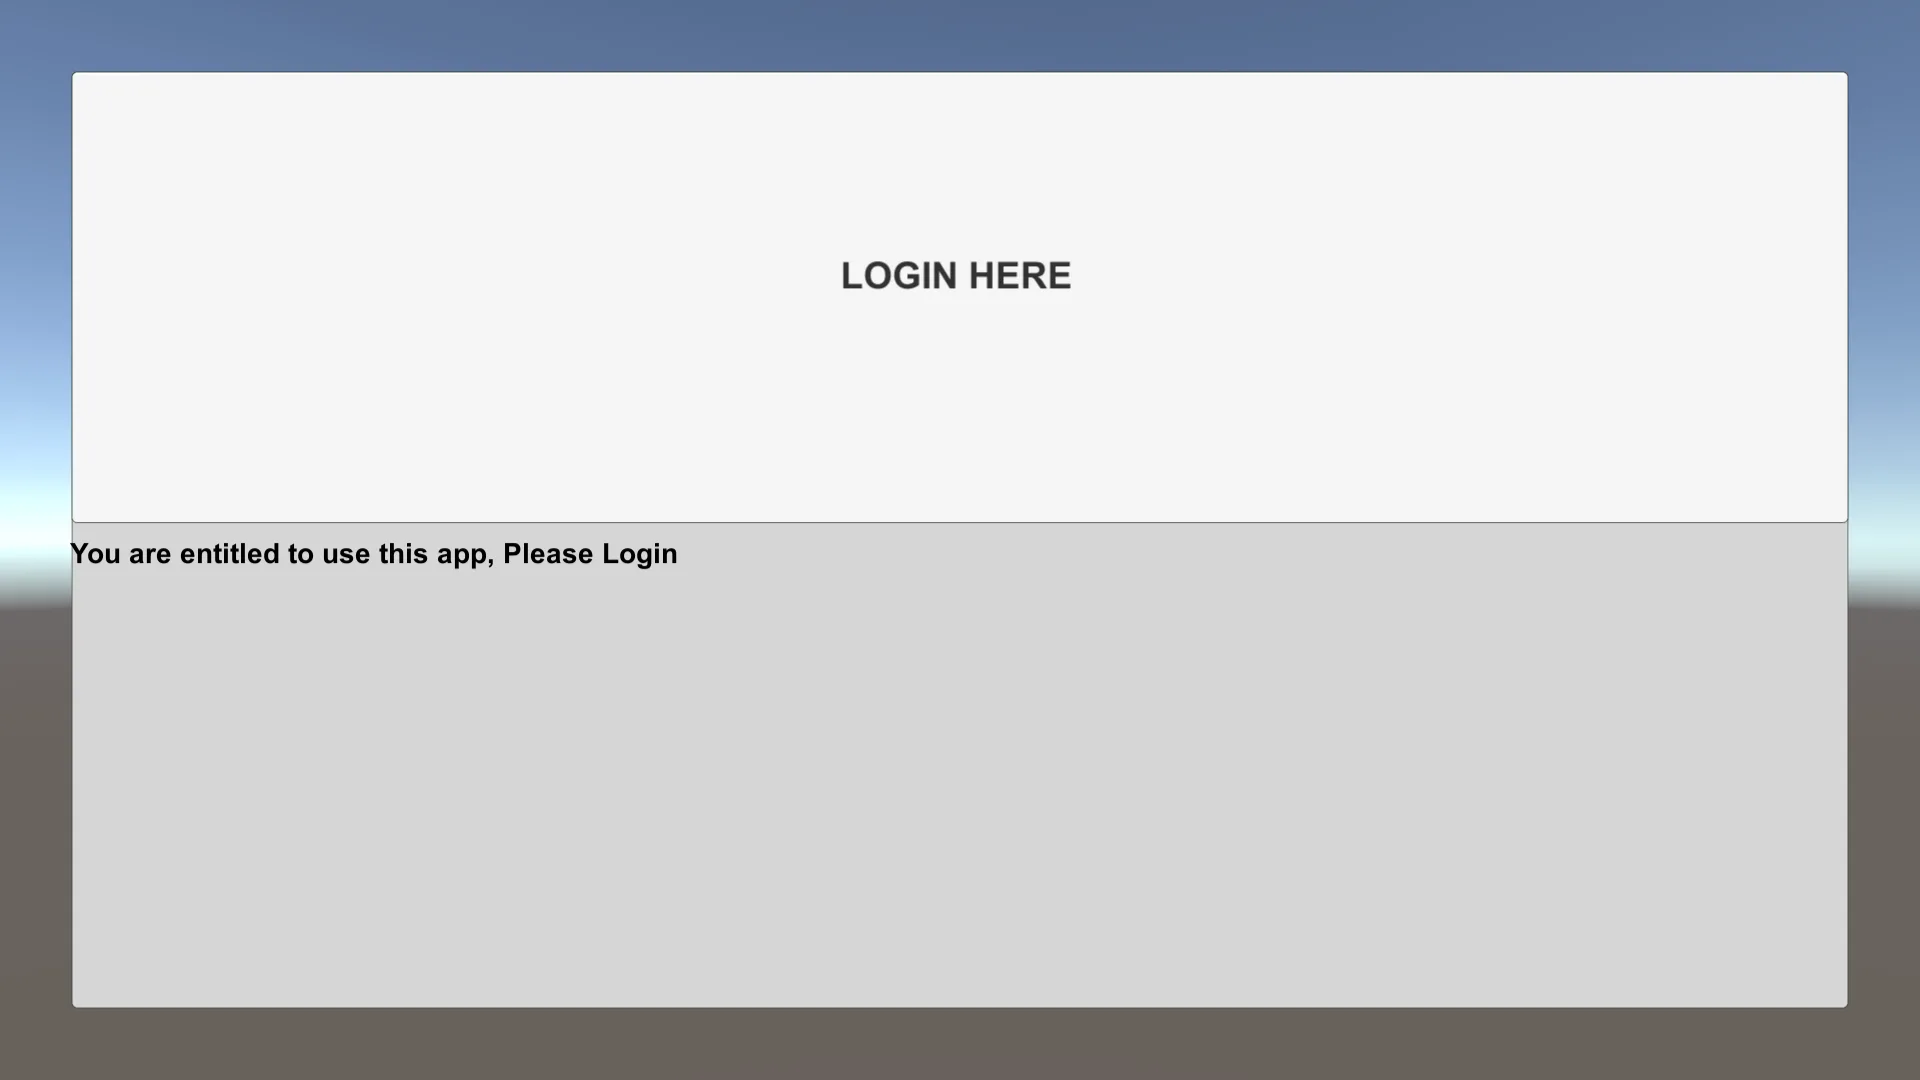
ログインを完了するには、Epic Games のログイン認証情報を入力します。