Snapchat をアイデンティティプロバイダーとして設定する
注釈:本資料はAI技術を用いて翻訳されています。
概要
このガイドは、認証済みの Snapchat 開発者が Snapchat アカウントを AccelByte Gaming Services (AGS) に接続できるよう支援することを目的としています。ここに記載されていない Snapchat サービスの追加機能を設定する必要がある場合もあります。Snapchat サービスの設定に関する詳細については、Snapchat の担当者に直接問い合わせ、Snapchat の公式ドキュメントを確認することをお勧めします。
このガイドは公開利用を目的としており、機密性のため限定的な情報のみを含んでいます。まずは完全な機密ガイドを参照することをお勧めします。機密ガイドのコピーをリクエストするには、AccelByte のテクニカルプロデューサーにお問い合わせください。
目標
- AccelByte Player Portal を使用して、パブリッシャーウェブサイト向けに Snapchat 認証方式を有効にする。
- AccelByte Game SDK を使用して、ゲーム向けに Snapchat 認証方式を有効にする。
前提条件
- Snapchat Developer アカウント。
- Developer アカウント配下の Organization。
- Unreal Engine を使用する場合は、UE バージョン 4.27 または 5.0 をインストールしていること。
- 認証を設定し、権限を管理するための AccelByte Admin Portal アカウント。
- Player Portal と Launcher 用のパブリッシャー名前空間、およびゲーム用のゲーム名前空間。
- Player Portal。
- 最新バージョンの AccelByte Game SDK を導入した Unity または Unreal のゲームプロジェクト。
- AGS の Identity and Access Management (IAM) クライアントに関する知識。
- AGS CLI の手順に従う場合は、AGS CLI をインストールし、これらの機能へのアクセス権を持つアカウントでサインインしてください。詳細については、インストールとサインインを参照してください。例では Bash シェルを使用しています。
Snapchat Kit App を設定する
Snap Kit App を作成する
Snapchat Developer アカウントの配下に Snap Kit App を作成します。手順については、Snapchat の最初のアプリ設定ガイドに従ってください。
Snap Login Kit を有効化する
Snap Kit App の配下で Snap Login Kit を有効化し、OAuth の Redirect URI にドメインの URL(例: https://prod.gamingservices.accelbyte.io)を入力します。詳細については、Snapchat の Login Kit に関するドキュメントを参照してください。
Snapchat のウェブログインを設定する
ウェブログイン連携は現在 AGS Public Cloud では利用できず、AGS Private Cloud でのみサポートされています。
Player Portal で Snapchat ログインを設定するには、以下の手順に従ってください。これにより、プレイヤーは Snapchat アカウントを使用して Player Portal にサインインできるようになります。
- Admin Portal
- AGS CLI
-
AGS Admin Portal で、パブリッシャー名前空間に移動します。
-
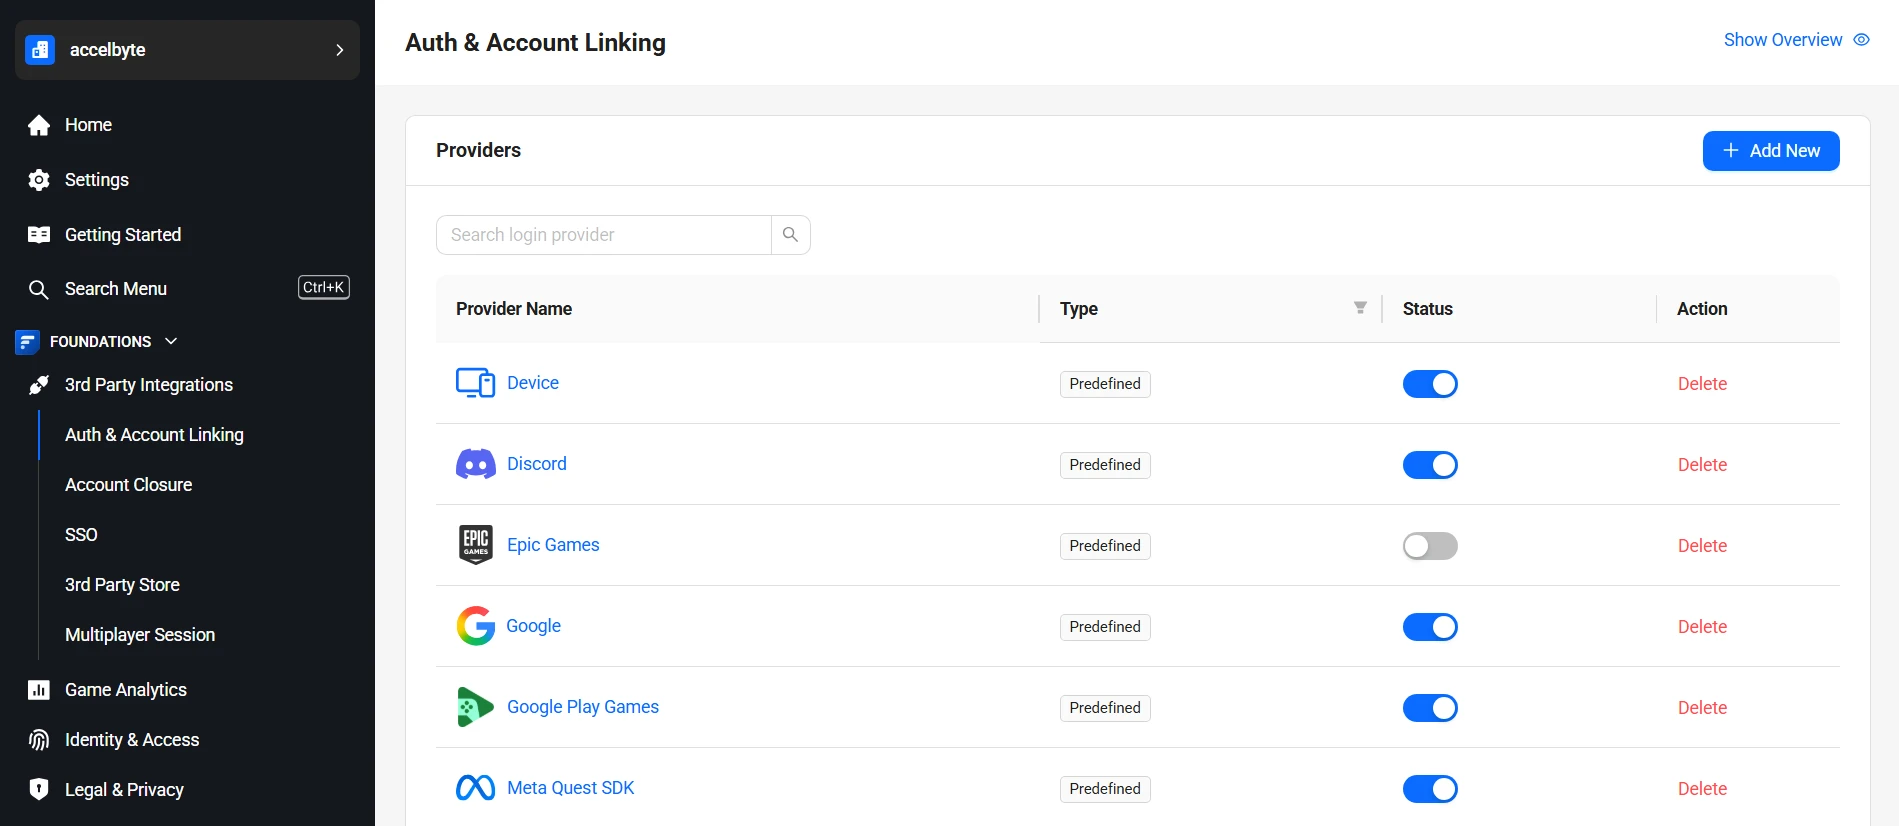
サイドバーメニューで、Foundations > 3rd Party Integrations > Auth & Account Linking に移動します。
-
Auth & Account Linking ページで、+ Add New をクリックします。
-
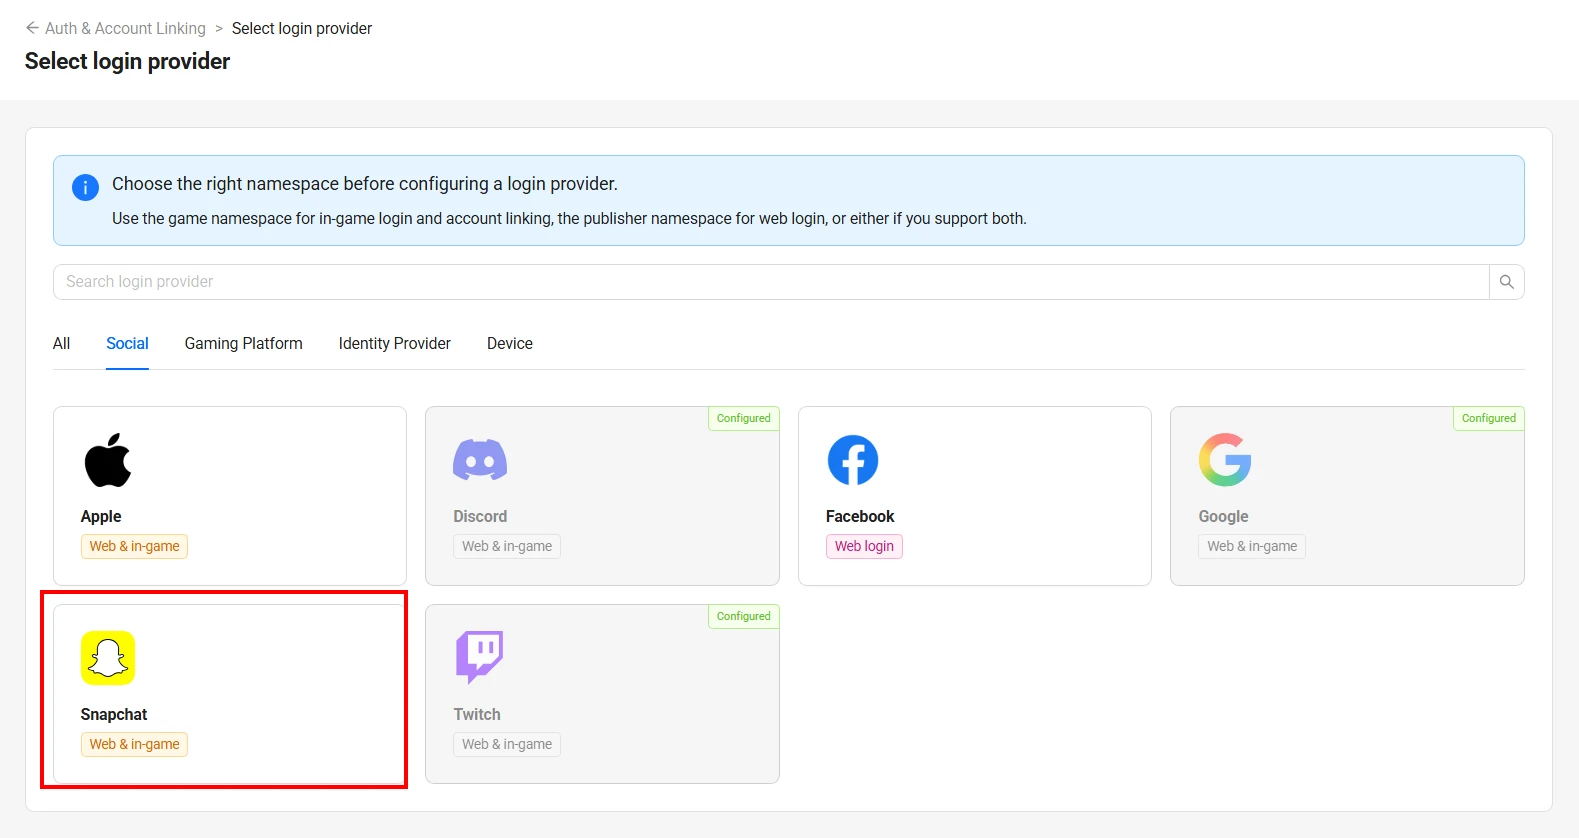
ログイン方式の一覧から、Snapchat を選択します。
-
Set up Snapchat login provider フォームが表示されます。
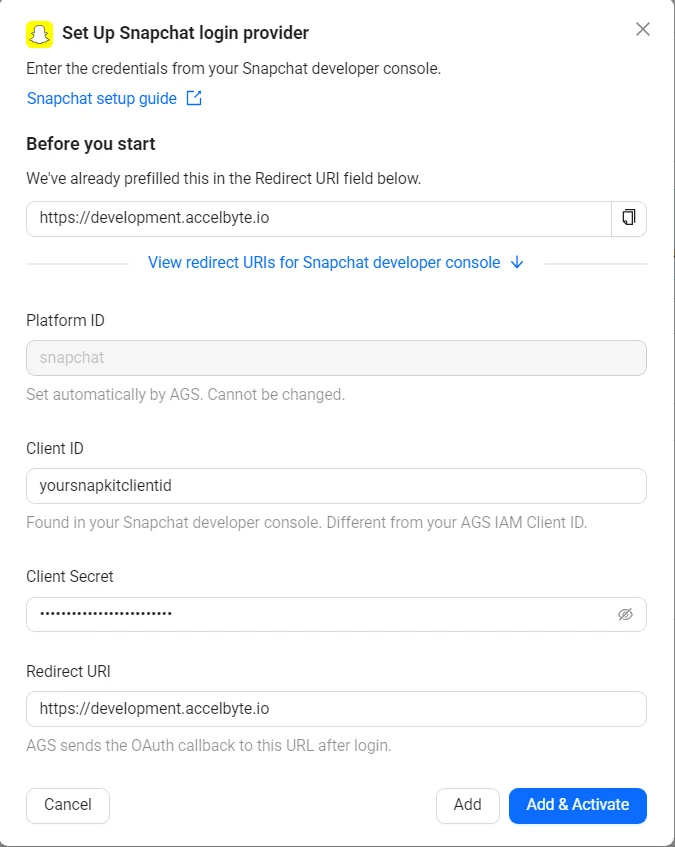
以下のフィールドに入力します。
- Platform ID:
snapchat。自動的に設定されるため、変更はできません。 - Client ID: Snap Kit の Client ID。
- Client Secret: Snap Kit の Client Secret。
- Redirect URI: ドメインの URL(例:
https://prod.gamingservices.accelbyte.io)。important以下の URI を Snap Developer Portal で許可済みのリダイレクト URI として登録してください(
{baseUrl}はドメインアドレス、{namespace}はパブリッシャー名前空間です)。{baseUrl}{baseUrl}/iam/v3/platforms/snapchat/authenticate{baseUrl}/iam/v3/public/namespaces/{namespace}/users/me/platforms/snapchat/web/link/establish(アカウントリンクに使用){baseUrl}/iam/v3/public/namespaces/{namespace}/users/me/platforms/snapchat/web/reauth/establish(GDPR の再認証プロセスに使用)
- Platform ID:
-
Add & Activate をクリックすると、プロバイダーの作成と有効化を一度に実行できます。有効化せずに作成のみを行う場合は、Add をクリックします。
-
プロバイダーの設定を記述した JSON ファイルを作成します。ファイル名は任意です。この例では
snapchat.jsonを使用します。{
"ClientId": "<YourSnapchatClientId>",
"Secret": "<YourSnapchatClientSecret>",
"RedirectUri": "<BaseURL>",
"IsActive": true
}ClientIdとSecret: Snap Kit の Client ID と Client Secret。RedirectUri:<BaseURL>をドメインの URL(例:https://prod.gamingservices.accelbyte.io)に置き換えます。Admin Portal タブに記載されているリダイレクト URI を、Snap Developer Portal で許可済みのリダイレクト URI として登録してください。IsActive:trueを指定すると、Add & Activate と同様にプロバイダーを追加して有効化します。falseを指定すると、Add と同様に有効化せずに追加します。
-
プロバイダーを追加します。
<YourPublisherNamespace>をパブリッシャーネームスペースに置き換えます。@の後には JSON ファイルのパスを指定します。ags iam platform-credentials create --namespace <YourPublisherNamespace> --platform-id snapchat --json @snapchat.jsonこのファイルにはクライアントシークレットが含まれているため、コマンドの実行後に削除してください。
ログインプロバイダーを編集する
- Admin Portal
- AGS CLI
-
Auth & Account Linking ページで、Snapchat プロバイダーをクリックします。
-
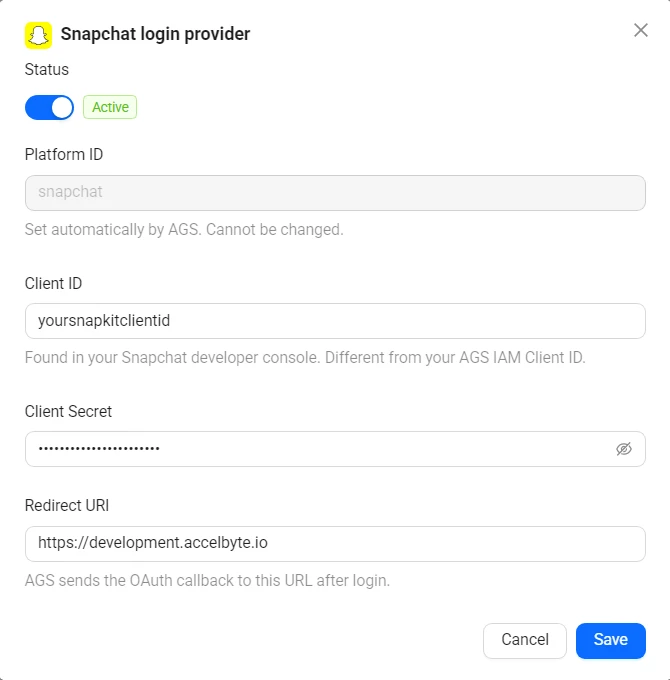
Snapchat login provider ダイアログが表示されます。必要に応じて各フィールドを更新します。
-
画面上部の Status トグルで、プロバイダーの有効化または無効化を切り替えます。
-
Save をクリックします。
-
プロバイダーの現在の設定を確認します。
ags iam platform-credentials get --namespace <YourPublisherNamespace> --platform-id snapchat -
変更したいフィールドのみを送信します。省略したフィールドは現在の値が維持されます。たとえば、プロバイダーを無効化するには次のようにします。
ags iam platform-credentials update --namespace <YourPublisherNamespace> --platform-id snapchat --json '{"IsActive": false}'有効化するには、
{"IsActive": true}を送信します。クライアントシークレットを変更するには、代わりに{"Secret": "<NewSnapchatClientSecret>"}を JSON ファイルに記述して--json @<FileName>で渡し、コマンドの実行後にそのファイルを削除してください。
Snapchat のゲーム内ログインを設定する
ゲーム内で Snapchat ログインを設定するには、以下の手順に従ってください。これにより、プレイヤーは Snapchat アカウントを使用してゲームにサインインできるようになります。
- Admin Portal
- AGS CLI
-
AGS Admin Portal で、ゲーム名前空間に移動します。
-
サイドバーメニューで、Foundations > 3rd Party Integrations > Auth & Account Linking に移動します。
-
Auth & Account Linking ページで、+ Add New をクリックします。
-
ログイン方式の一覧から、Snapchat を選択します。
-
以下のフィールドに入力します。
- Platform ID:
snapchat。自動的に設定されるため、変更はできません。 - Client ID: Snap Kit の Client ID。
- Client Secret: Snap Kit の Client Secret。
- Redirect URI:
http://127.0.0.1。
- Platform ID:
-
Add & Activate をクリックすると、プロバイダーの作成と有効化を一度に実行できます。有効化せずに作成のみを行う場合は、Add をクリックします。
-
プロバイダーの設定を記述した JSON ファイルを作成します。ファイル名は任意です。この例では
snapchat.jsonを使用します。{
"ClientId": "<YourSnapchatClientId>",
"Secret": "<YourSnapchatClientSecret>",
"RedirectUri": "http://127.0.0.1",
"IsActive": true
}ClientIdとSecret: Snap Kit の Client ID と Client Secret。RedirectUri: Admin Portal で自動入力されるデフォルト値と同じhttp://127.0.0.1のままにします。IsActive:trueを指定すると、Add & Activate と同様にプロバイダーを追加して有効化します。falseを指定すると、Add と同様に有効化せずに追加します。
-
プロバイダーを追加します。
<YourGameNamespace>をゲームネームスペースに置き換えます。@の後には JSON ファイルのパスを指定します。ags iam platform-credentials create --namespace <YourGameNamespace> --platform-id snapchat --json @snapchat.jsonこのファイルにはクライアントシークレットが含まれているため、コマンドの実行後に削除してください。
ログインプロバイダーを編集する
- Admin Portal
- AGS CLI
-
Auth & Account Linking ページで、Snapchat プロバイダーをクリックします。
-
Snapchat login provider ダイアログが表示されます。必要に応じて各フィールドを更新します。
-
画面上部の Status トグルで、プロバイダーの有効化または無効化を切り替えます。
-
Save をクリックします。
-
プロバイダーの現在の設定を確認します。
ags iam platform-credentials get --namespace <YourGameNamespace> --platform-id snapchat -
変更したいフィールドのみを送信します。省略したフィールドは現在の値が維持されます。たとえば、プロバイダーを無効化するには次のようにします。
ags iam platform-credentials update --namespace <YourGameNamespace> --platform-id snapchat --json '{"IsActive": false}'有効化するには、
{"IsActive": true}を送信します。クライアントシークレットを変更するには、代わりに{"Secret": "<NewSnapchatClientSecret>"}を JSON ファイルに記述して--json @<FileName>で渡し、コマンドの実行後にそのファイルを削除してください。
IAM クライアントを作成する
IAM クライアントは、対象プラットフォームでリリースするゲームクライアントを表すものです。
特定の SDK プラットフォーム(例: Xbox、Steam、PlayStation)向けの IAM クライアントをすでに保有している場合は、新しい IAM クライアントを作成する必要はありません。Snapchat はゲームを開発するためのプラットフォームではないため、既存の IAM クライアントをそのまま使用できます。IAM クライアントの詳細については、アプリケーションのアクセス制御を管理するを参照してください。
ゲーム内ログインの手順
設定方法はゲームエンジンごとに異なります。以下のタブからお使いのゲームエンジンを選択してください。
- Unreal Engine Instructions
- Unity Instructions
Unreal ゲーム内ログイン連携
Snapchat のゲームを AccelByte SDK と連携させてサインインできるようにすることで、プレイヤーは Snapchat の認証情報を使用してゲームにログインできるようになります。
Unreal の準備と設定
Snapchat は UE4 向けの連携をサポートしていません。そのため、この実装ではウェブログインを使用し、Snapchat Auth から取得したログインコードをトークンとして AccelByte にログインします。Snapchat アカウントは AccelByte アカウントにリンクされ、デフォルトではヘッドレスアカウントになります。
参照: Snapchat の Login Kit ウェブチュートリアル
依存関係を追加する
まず、AccelbyteUe4Sdk をパブリック依存モジュールとして追加します。この依存関係は、Unreal Engine で AccelByte SDK プラグインを使用してプロジェクトを連携させるために必要です。
public ABThirdPartyLogin(ReadOnlyTargetRules Target) : base(Target)
{
  PCHUsage = PCHUsageMode.UseExplicitOrSharedPCHs;

  PublicDependencyModuleNames.AddRange(new string[] { "Core", "CoreUObject", "Engine", "InputCore" , "AccelByteUe4Sdk", "Slate", "SlateCore" });

  PrivateDependencyModuleNames.AddRange(new string[] { "Json", "HTTP" });

}
<YourProject>.Target.cs と <YourProjectEditor>.Target.cs の中に AccelbyteUe4Sdk を追加します。
public ABThirdPartyLoginTarget( TargetInfo Target) : base(Target)
{
  Type = TargetType.Game;
  DefaultBuildSettings = BuildSettingsVersion.V2;
  ExtraModuleNames.AddRange( new string[] { "ABThirdPartyLogin", "AccelByteUe4Sdk" } );
}
public ABThirdPartyLoginEditorTarget( TargetInfo Target) : base(Target)
{
  Type = TargetType.Editor;
  DefaultBuildSettings = BuildSettingsVersion.V2;
  ExtraModuleNames.AddRange( new string[] { "ABThirdPartyLogin", "AccelByteUe4Sdk" } );
}
Snapchat 用に Unreal Engine プロジェクトを設定する
DefaultEngine.ini ファイルに、以下のように AccelByte の認証情報を追加します。
[/Script/AccelByteUe4Sdk.AccelByteSettings]
ClientId=<Your Client_Id>
ClientSecret=<Your Client_Secret>
Namespace=<Your Namespace>
PublisherNamespace=<Your Publisher Namespace>
RedirectURI="http://127.0.0.1"
BaseUrl="https://prod.gamingservices.accelbyte.io"
IamServerUrl="https://prod.gamingservices.accelbyte.io/iam"
PlatformServerUrl="https://prod.gamingservices.accelbyte.io/platform"

[SnapChatConfig]
SnapChatClientId=<SnapChatClientId>
Unreal のサンプルコード実装
以下の手順では、サンプルコードを使用して、ゲームに Snapchat 認証方式を実装する方法を説明します。
-
ログインコンテナとして、Blueprint で WebBrowser アイテムを作成します。
-
Snapchat のログイン URL
https://accounts.snapchat.com/accounts/oauth2/authを読み込みます。あわせて、以下の認証パラメータを追加します。
- redirect_uri: ログイン完了時のリダイレクト先 URL。リダイレクト先はゲームに戻るため、値には BaseUrl(ApiClient->Settings->BaseUrl)を指定します。また、許可リストに登録するため、Snapchat Developer Portal の Redirect Uri 設定にも同じ BaseUrl の値を入力してください。
- response_type: 値には "code" を指定します。
- scope: 権限スコープの値を指定します。
| https://auth.snapchat.com/oauth2/api/user.display_name | ユーザーの Snapchat 表示名へのアクセスを許可します |
| https://auth.snapchat.com/oauth2/api/user.bitmoji.avatar | ユーザーの Bitmoji アバターへのアクセスを許可します(ユーザーによる切り替えが可能) |
| https://auth.snapchat.com/oauth2/api/user.external_id | アプリケーションへのユーザーのオンボーディングに使用できる、ユーザーの外部 ID へのアクセスを許可します |
スニペット内で使用されている AccelByteOnlineSubsystemPtr を取得するには、このガイドに従ってください。
auto ApiClient = AccelByteOnlineSubsystemPtr->GetApiClient(TEXT("YOUR_KEY"));
auto UserApi = ApiClient->GetUserApi().Pin();

void UAccelByteAuth::SnapChatLogin()
{
	FString SnapChatClientId;
	GConfig->GetString(TEXT("SnapChatConfig"), TEXT("SnapChatClientId"), SnapChatClientId, GEngineIni);
	FString RedirectUri = ApiClient->Settings->BaseUrl;
	FString Scope = TEXT("https://auth.snapchat.com/oauth2/api/user.display_name https://auth.snapchat.com/oauth2/api/user.bitmoji.avatar https://auth.snapchat.com/oauth2/api/user.external_id");

	FString Url = FString::Printf(TEXT("https://accounts.snapchat.com/accounts/oauth2/auth?client_id=%s&redirect_uri=%s&response_type=%s&scope=%s"),
		*FGenericPlatformHttp::UrlEncode(SnapChatClientId),
		*FGenericPlatformHttp::UrlEncode(RedirectUri),
		TEXT("code"),
		*FGenericPlatformHttp::UrlEncode(Scope));

	WBrowser_SnapChatAuth->LoadURL(Url);
	WBrowser_SnapChatAuth->OnUrlChanged.AddUniqueDynamic(this, &UAccelByteAuth::AccelByteLoginWithSnapChat);
}

void UAccelByteAuth::AccelByteLoginWithSnapChat(const FText& NewUrl)
{
	FString Url = NewUrl.ToString();
	FString RedirectUri = ApiClient->Settings->BaseUrl;
	FString LoginCode = TEXT("");

	if (Url.Contains(RedirectUri))
	{
		LoginCode = FGenericPlatformHttp::GetUrlParameter(Url, TEXT("code")).GetValue();
	}

	if (!LoginCode.IsEmpty())
	{
	UserApi->LoginWithOtherPlatform(EAccelBytePlatformType::SnapChat, LoginCode, FVoidHandler::CreateWeakLambda(this, [this]()
		{
		// Handle Success Login
		}),
FErrorHandler::CreateWeakLambda(this, [](int32 ErrorCode, const FString& ErrorMessage)
		{
			// Handle Error Login
		}));

    // Close Login Page (Hide WebBrowser)
	}
}
Snapchat 認証における platform_token は Auth Code です。
このサンプルコードをプロジェクトに追加したら、プロジェクトをコンパイル、ビルド、実行します。以上で設定は完了です。
サンプルコードをテストする
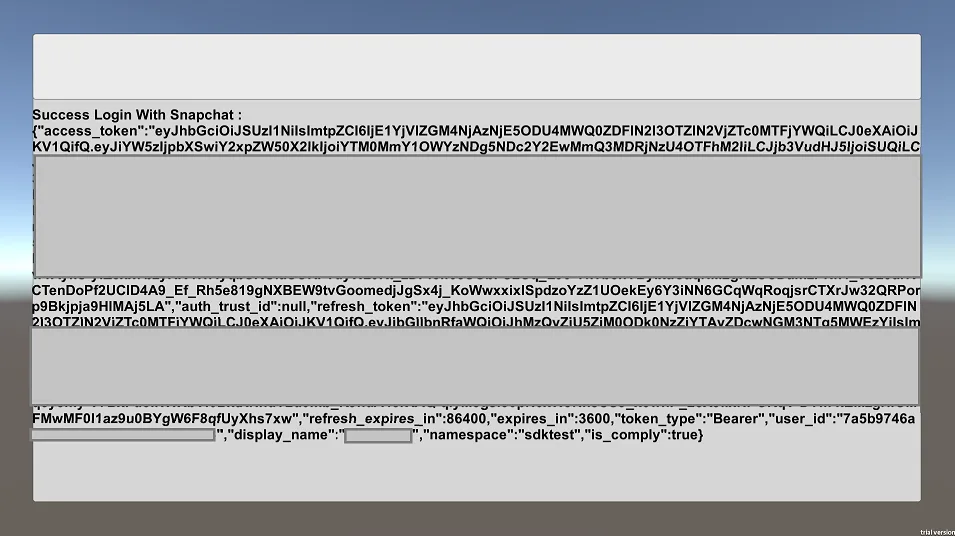
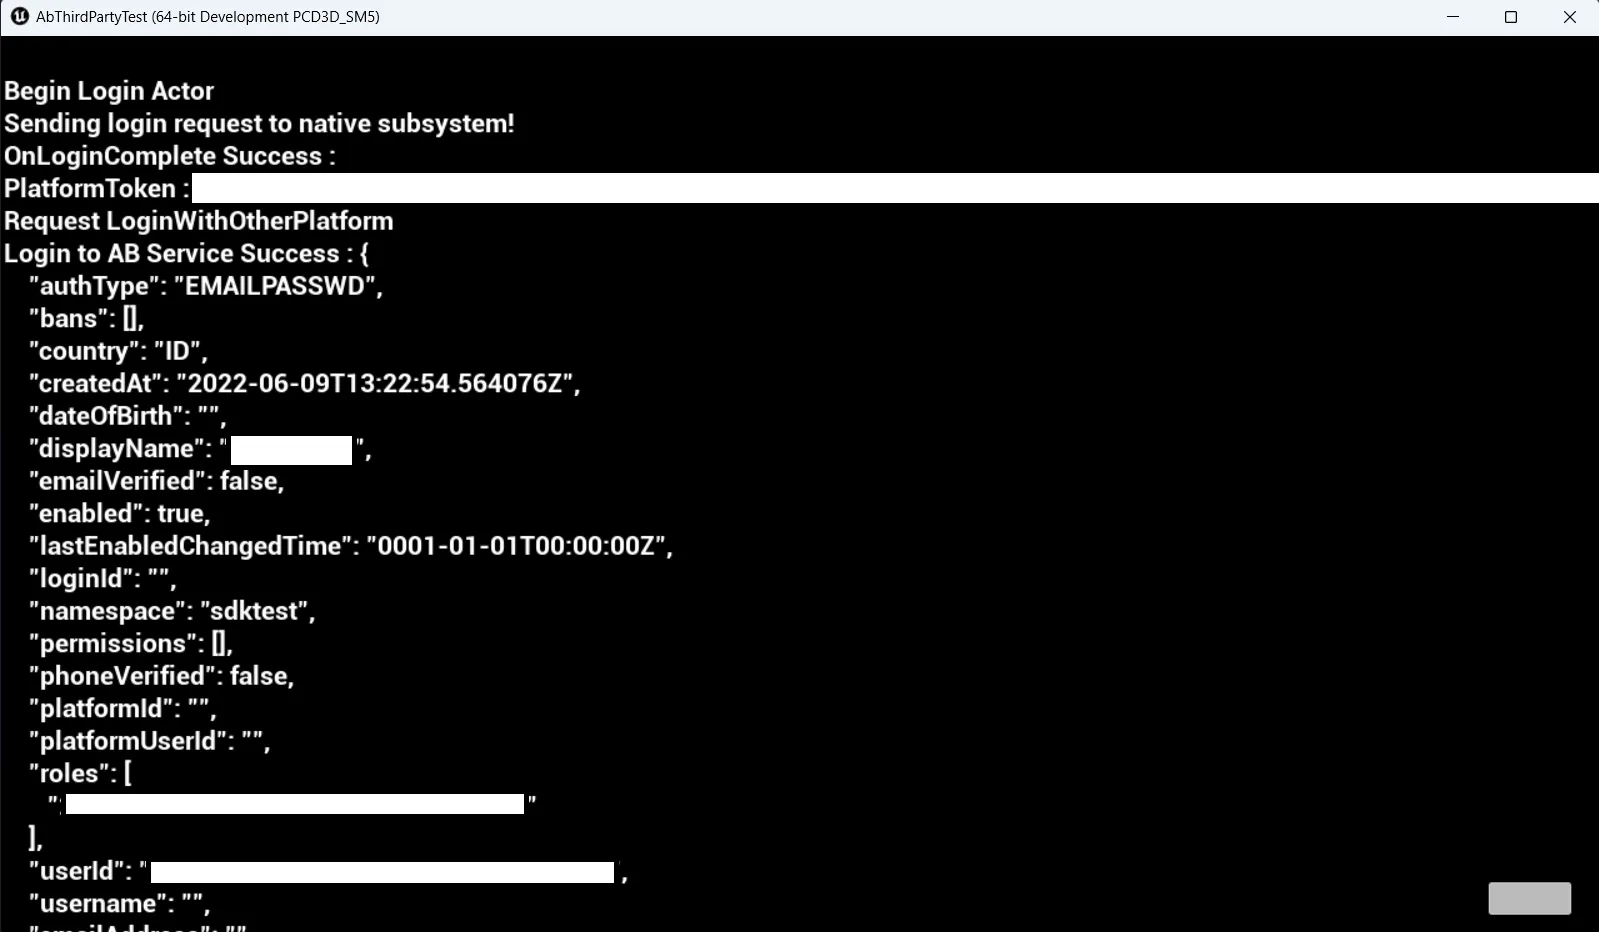
以下の画像は、テストアプリで Snapchat アカウントを使用してログインに成功した状態を示しています。
Unity ゲーム内ログイン連携
Snapchat のゲームを AccelByte SDK と連携させてサインインできるようにすることで、プレイヤーは Snapchat の認証情報を使用してゲームにログインできるようになります。
Unity の準備と設定
AccelByte Gaming Services 用に Unity プロジェクトを設定する
AccelByte SDK をプロジェクトで正しく動作させるには、AccelByte Admin Portal であらかじめ作成した値を入力し、以下の手順に従う必要があります。
- AccelByteSDKConfig.json という名前のゲームクライアント設定用ファイルを作成します。
- AccelByteSDKConfig.json ファイルをコピーし、Unity プロジェクトディレクトリの Assets/Resource ディレクトリに追加します。
- ゲームの情報に基づいて AccelByteSDKConfig.json ファイルに値を入力します。以下は JSON ファイルの例です。
{
 "Default": {
    "Namespace": "<Your Game Namespace>",
    "UsePlayerPrefs": true,//It will use Player Preferences
    "EnableDebugLog": true,//Enable Debug Logging
    "DebugLogFilter": "Log",//Type of Debug Log
    "BaseUrl": "https://prod.gamingservices.accelbyte.io",
    "RedirectUri": "http://127.0.0.1",
    "AppId": "<Your AppId>",
    "PublisherNamespace": "<Your Publisher Namespace>"
  }
}
- AccelByteServerSDKConfig.json という名前のファイルを作成し、Unity プロジェクトディレクトリの Assets/Resource ディレクトリに追加します。
- Game Server 設定として使用する以下のコードで AccelByteServerSDKConfig.json を更新します。以下は JSON ファイルの例です。
{
  "Default": {
    "Namespace": "<Your Game Namespace>",
    "BaseUrl": "https://prod.gamingservices.accelbyte.io",
    "RedirectUri": "http://127.0.0.1"
  }
}
- AccelByteSDKOAuthConfig.json と AccelByteServerSDKOAuthConfig.json という 2 つのファイルを作成します。これら両方のファイルを Unity プロジェクトディレクトリの Assets/Resources ディレクトリに追加します。両方の JSON ファイルの内容は以下のようになります。
{
  "Default": {
    "ClientId": "<Your IAM Client ID>",
    "ClientSecret": "<Your IAM Client Secret>"
  }
}
Unity のサンプルコード実装
以下の手順では、サンプルコードを使用して、ゲームに Snapchat 認証方式を実装する方法を説明します。
Snapchat API を呼び出すためのカスタム SDK を作成する必要があります。以下はその例です。
[SerializeField] private string clientId = "Your Snapchat ClientId";
private string redirectUri = "http://127.0.0.1/";
[SerializeField] private string[] scopes =
{
   "https://auth.snapchat.com/oauth2/api/user.display_name",
   "https://auth.snapchat.com/oauth2/api/user.bitmoji.avatar",
   "https://auth.snapchat.com/oauth2/api/user.external_id"
};
private const string authUrl = "https://accounts.snapchat.com/accounts/oauth2/auth";

private async void OnLoginClick()
{
   SnapchatLoginButton.interactable = false;
   LoginStatus.text = "Logging in...";
   string scopeStr = string.Join("%20", scopes);
   string url = $"{authUrl}?client_id={clientId}&redirect_uri=http://127.0.0.1&response_type=code&scope={scopeStr}";

   // Open the URL in the default browser
   Application.OpenURL(url);

   // Wait for the authorization code
   string authCode = await GetAuthorizationCode();
   Debug.Log($"Snapchat auth code: {snapchatAuthCode}");
      });
}

private async Task<string> GetAuthorizationCode()
{
   string authCode = "";
   bool receivedAuthCode = false;
   // Wait for the user to complete the authentication process and receive the authorization code
   float elapsedTime = 0;
   float timeout = 10f; // Maximum time to wait for the user to complete the authentication process (in seconds)
   while (!receivedAuthCode && elapsedTime < timeout)
   {
       authCode = await ListenForAuthorizationCode(redirectUri);
       elapsedTime += 1f;

       // Check if the authorization code has been received
       if (!string.IsNullOrEmpty(snapchatAuthCode))
       {
           receivedAuthCode = true;
       }
   }
   return authCode;
}

private async Task<string> ListenForAuthorizationCode(string redirectUri)
{
   string authCode = "";

   // Create a HttpListener instance to listen on the redirect URI
   var listener = new HttpListener();
   listener.Prefixes.Add(redirectUri);
   listener.Start();

   // Wait for a request to be received on the HttpListener
   var context = await listener.GetContextAsync();

   // Extract the authorization code from the request URI
   var requestUri = context.Request.Url;
   authCode = HttpUtility.ParseQueryString(requestUri.Query).Get("code");

   // Send a response to the request with an HTML page that displays the authorization code
   var response = context.Response;
   var responseString = $"<html><body><h1>Authorization Code: {authCode}</h1></body></html>";
   var buffer = Encoding.UTF8.GetBytes(responseString);
   response.ContentLength64 = buffer.Length;
   var output = response.OutputStream;
   await output.WriteAsync(buffer, 0, buffer.Length);

   // Close the HttpListener and return the authorization code
   listener.Close();
   return authCode;
}
以下のコードは、AccelByte SDK に含まれる LoginWithOtherPlatform の処理を示しています。このメソッドは、GetAuthSessionTicket メソッドから取得した認証トークンを使用して、サードパーティプラットフォームのログインを処理します。
var apiClient = AccelByteSDK.GetClientRegistry().GetApi();
var user = apiClient.GetUser();

Result < TokenData, OAuthError > loginResult = null;
user.LoginWithOtherPlatform(PlatformType.Snapchat, snapAuthToken, (Result < TokenData, OAuthError > loginResult) => {
  if (loginResult.IsError) {
    //If we error, grab the Error Error and Description to print in the Log
    Debug.Log($ "Login failed : {loginResult.Error.error} Description : {loginResult.Error.error_description}");
    //Set the Status Text to display the Error if there is any
    LoginStatus.text = $ "Login failed : {loginResult.Error.error} Description : {loginResult.Error.error_description}";
  } else {
    Debug.Log($ "Login successful : {loginResult.Value}");
    LoginStatus.text = $ "Success Login Snapchat :{loginResult.Value.ToJsonString()}";
  }
});
Snapchat 認証における platform_token は Auth Code です。
ログインハンドラースクリプトをプロジェクトに追加したら、プロジェクトをコンパイルできます。
サンプルコードをテストする
これで、プロジェクトをビルドして実行できます。以下の画像は、テストアプリで Snapchat アカウントを使用してログインに成功した状態を示しています。